
Subscribe to Our Youtube Channel
Related Manuals for Westinghouse QK050


Summary of Contents for Westinghouse QK050
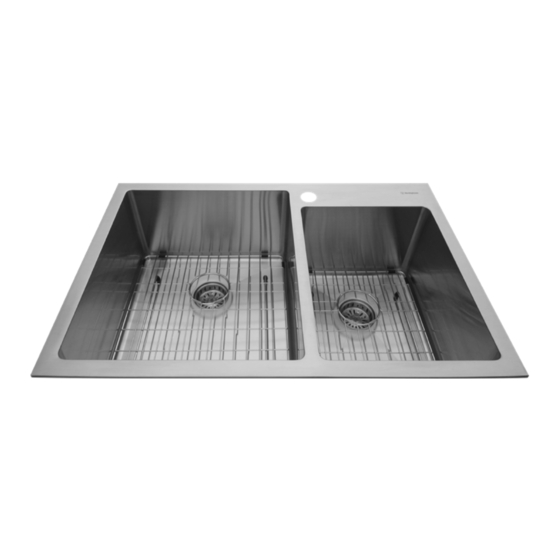
- Page 1 OFFSET DOUBLE BOWL STAINLESS STEEL SINK WITH ROUNDED CORNERS ÉVIER À CUVES DÉCALÉES AUX COINS ARRONDIS EN ACIER INOXYDABLE OWNER’S MANUAL MANUEL DE L’UTILISATEUR # QK050...
-
Page 2: Table Of Contents
If you have any questions, contact the manufacturer . 3 . Installation work and plumbing must be done by qualified person(s) in accordance with all applicable codes and standards . 4 . Protect the entire surface during installation . QK050... -
Page 3: Warranty
Warranty ONE-YEAR LIMITED WARRANTY A thorough inspection must be made before installation and any damage must be promptly reported . We will not be liable for failures or damage that could have been discovered or avoided by proper inspection and testing prior to installation . Conglom Kitchen &... -
Page 4: Pre-Installation
Silicone sealant Pencil Thread seal Flathead Hacksaw Safety goggles screwdriver Safety gloves PARTS REQUIRED (NOT INLCUDED) NOTE: Plastic Connecting Tail pipe (2) Supply lines (2) flange (2) nut (2) Parts not shown to actual size. QK050... -
Page 5: Package Contents
Pre-Installation (continued) PACKAGE CONTENTS Carefully check the utility sink for damage and/or missing parts prior to installation . If there is any damage or if you are missing parts, do not proceed with the installation . Report damage and/or missing parts immediately to our customer service team at cs@conglomkb .com or 1-877-333-0098 (Service available in English and French, Monday - Friday from 8:30am - 5pm EST) . -
Page 6: Installation
- Make sure the template (1A) is parallel to the front of the counter . Setback Tape 3 1/2 - 4 in. (89 mm - 102 mm) Undermount installation QK050... - Page 7 Installation (continued) TESTING THE FIT OF THE SINK DRILLING THE HOLES FOR THE UNDERMOUNT CLIPS - Place the sink (A) underneath the cut-out in the counter to test its fit. Ensure that the reveal is equal on all four sides CAUTION: Always wear safety goggles and gloves when when viewed from above .
- Page 8 SUPPLY LINES (NOT INCLUDED) The supply lines, which connect the faucet to the household water system, are not supplied with this unit . They need to be purchased separately . Follow the supply line manufacturer’s instructions for proper installation . QK050...
-
Page 9: Topmount
Installation (continued) TOPMOUNT INSTALLATION PREPARING THE AREA CUTTING THE COUNTER NOTE: CAUTION: Always wear safety goggles and gloves when Topmount sinks are dropped into the counter from above. If you are using power tools to prevent personal injury . installing an undermount sink, please see “undermount installation”. Sink template (1A) shows cut-lines for both undermount and topmount installations. - Page 10 SUPPLY LINES (NOT INCLUDED) The supply lines, which connect the faucet to the household water system, are not supplied with this unit . They need to be purchased separately . Follow the supply line manufacturer’s instructions for proper installation . QK050...
-
Page 11: Installing The Vanishing Edge
Installation (continued) INSTALLING THE VANISHING EDGE STRAINERS NOTE: If you are installing a garbage disposer (not supplied), do not install the strainer. Please contact us to obtain a garbage disposer adaptor that will replace the flange from your garbage disposer. Install the garbage disposer according to the manufacturer’s installation instructions replacing the flange for the adaptor. -
Page 12: Installing The Bottom Grids
) . Always rub the surfaces in the direction of the grain of the steel . When finished, rinse the sink with water and dry it with a towel to allow the sink to form a protective outer layer. This procedure can also be used to renew all of the surfaces of the sink . QK050... -
Page 13: Service Parts
Service Parts If you are missing parts or if you require replacement parts, please call our customer service team at cs@conglomkb.com or 1-877-333-0098, service available in English and French, Monday - Friday from 8:30 am - 5 pm EST . Identify the required part(s) and have the part number(s) ready . Part Description Code Quantity... -
Page 14: Manuel De L'utilisateur
3 . Votre installation doit être conforme à tous les codes de bâtiment locaux pour la plomberie . Faites en sorte qu’un ouvrier qualifié effectue ou approuve votre installation de plomberie . 4 . Protéger la surface lors de l’installation . QK050... -
Page 15: Garantie
Garantie GARANTIE LIMITÉE D’UN AN Inspecter minutieusement le produit avant l’installation et signaler tout dommage sans délai . Nous ne serons pas responsables des défaillances ou des dommages qui auraient dû être découverts ou évités par une inspection adéquate et des essais avant l’installation . Conglom Kitchen and Bath garantit ce produit contre tout défaut dans les matériaux ou la fabrication, pour une période d’un (1) an à... -
Page 16: Préinstallation
Scie à métaux Lunettes de sécurité Gants de sécurité PIÈCES REQUISES (NON INLCUSES) REMARQUE : Bride en Tuyau de Écrou de Tuyaux Les pièces ne sont pas plastique (2) vidange (2) raccordement (2) d’alimentation (2) illustrées à leur taille réelle. QK050... -
Page 17: Contenu De L'emballage
Préinstallation (suite) CONTENU DE L’EMBALLAGE Vérifier soigneusement que l’unité ne comporte aucun dommage ou pièces manquantes avant l’installation. Dans le cas de dommages ou de pièces manquantes, communiquer avec le service à la clientèle au cs@conglomkb.com ou 1 877 333-0098 (service en anglais et français, du lundi au vendredi, 8 h 30 et 17 h, HNE) . -
Page 18: Installation
. - S’assurer que le gabarit (1A) est aligné parallèlement à l’avant du comptoir . Marge de recul Ruban 3 1/2 - 4 po. (89 mm - 102 mm) Installation sous le comptoir QK050... - Page 19 Installation (suite) ESSAI DE L’AJUSTEMENT DE L’ÉVIER PERÇAGE DES TROUS POUR LES ATTACHES DE FIXATION PAR EN DESSOUS DU COMPTOIR - Placer l’évier (A) en dessous de la découpe dans le comptoir pour faire l’essai de son ajustement . Faire en sorte que la AVERTISSEMENT : Toujours porter des lunettes et des partie visible est égale sur les quatre côtés lorsque vue du gants de sécurité...
- Page 20 Les tuyaux d’alimentation qui raccordent le robinet au système d’eau résidentiel ne sont pas fournis avec cette unité . Ils doivent être achetés séparément . Suivre les directives fournies par le manufacturier des tuyaux d’alimentation pour une installation adéquate . QK050...
-
Page 21: Installation Sur Le Comptoir
Installation (suite) INSTALLATION SUR LE COMPTOIR PRÉPARER LA SURFACE DÉCOUPE DU COMPTOIR REMARQUE : AVERTISSEMENT : Toujours porter des lunettes et des Les éviers installés par le dessus sont déposés sur le comptoir à gants de sécurité afin d’éviter les blessures. partir du dessus. - Page 22 Les tuyaux d’alimentation qui raccordent le robinet au système d’eau résidentiel ne sont pas fournis avec cette unité . Ils doivent être achetés séparément . Suivre les directives fournies par le manufacturier des tuyaux d’alimentation pour une installation adéquate . QK050...
-
Page 23: Installation Des Crépines À Rebord Infini
Installation (suite) INSTALLATION DES CRÉPINES À REBORD INFINI REMARQUE : Si vous installez un broyeur à déchets (non inclus), n’installez pas la crépine. Communiquer avec nous pour obtenir un adaptateur spécial pour remplacer la bride de votre broyeur à déchets. Vous pouvez vous procurer l’adaptateur auprès du fabricant. Installez le broyeur à... -
Page 24: Installation Des Grilles Métalliques
Barkeeper’s Friend rincez l’évier avec de l’eau et essuyez-le à l’aide d’une serviette pour permettre qu’une couche externe protectrice se forme. Vous pouvez également utiliser cette procédure pour redonner à toutes les surfaces de l’évier leur éclat . QK050... -
Page 25: Pièces De Rechange
Pièces de rechange Si des pièces sont manquantes ou vous avez besoin de pièces de rechange, veuillez nous contacter au cs@conglomkb.com ou 1-877-333-0098 (service en anglais et français, du lundi au vendredi, 8 h 30 et 17 h, HNE). Veuillez identifier les pièces nécessaires et ayez les codes à portée de la main. Pièce Description Code... - Page 26 Imported by / Importé par : St-Laurent, Québec, H4S 2C3 1-877-333-0098 | cs@conglomkb.com (service available in English and French, Monday - Friday from 8:30 am - 5 pm EST) (service en anglais et en français, du lundi au vendredi, 8 h 30 à 17 h, HNE) www.conglomkb.com Made in China / Fabriqué...
Need help?
Do you have a question about the QK050 and is the answer not in the manual?
Questions and answers