
Subscribe to Our Youtube Channel
Related Manuals for Westinghouse QL292


Summary of Contents for Westinghouse QL292
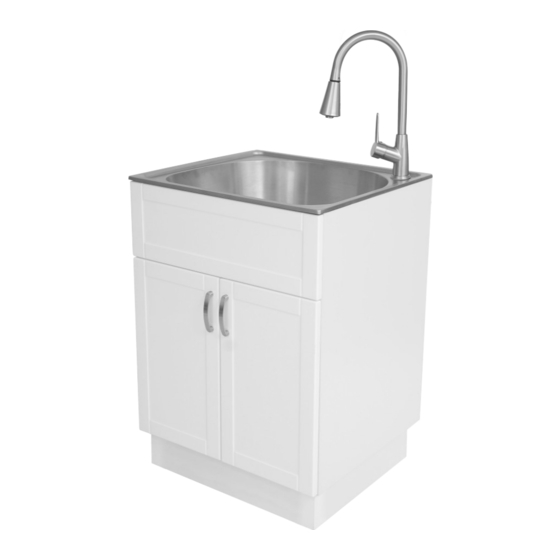
- Page 1 ALL-IN-ONE UTILITY SINK, STORAGE CABINET AND FAUCET TODO EN UNO LAVABO, ARMARIO Y GRIFO OWNER’S MANUAL QL292 MANUAL DEL USUARIO # 850165...
-
Page 2: Table Of Contents
. 4 . Protect the entire surface during installation . 5 . All holes drilled into the unit must be done from the finished surface side with extreme care and sealed very carefully to form a watertight barrier . QL292... -
Page 3: Warranty
Warranty ONE YEAR LIMITED WARRANTY A thorough inspection must be made before installation and any damage must be promptly reported . We will not be liable for failures or damage that could have been discovered or avoided by proper inspection and testing prior to installation . Conglom Kitchen &... -
Page 4: Pre-Installation
Pre-Installation TOOLS/MATERIALS REQUIRED (NOT SUPPLIED) Adjustable Needle nose Phillips wrench pliers screwdriver 100% Silicone Utility knife Pipe wrench Sealant Carpenter’s level Hacksaw Safety gloves Safety goggles Masking Tape PARTS REQUIRED (NOT SUPPLIED) Tail Pipe P-Trap Supply lines QL292... -
Page 5: Package Contents
Pre-Installation (continued) PACKAGE CONTENTS Carefully check all components for damages and/or missing parts prior to installation . If there are any damages or if you are missing parts, do not proceed with the installation . Report damages and/or missing parts immediately to the manufacturer . Do not dispose of packaging before you are satisfied with your new utility sink. -
Page 6: Installation
. There should be no Faucet slack in the hose . outlet 8 . Connect the water supply lines (not supplied) to the faucet . Hose Counterweight Faucet outlet Water Supply Lines Hose QL292... -
Page 7: Strainer Installation
Installation (continued) STRAINER INSTALLATION Sealant 1 . Apply a ring of sealant to the underside of the strainer flange. 2 . Insert the strainer body into the sink . 3 . Assemble the rubber gasket, friction washer and locknut onto the strainer body from under the sink . -
Page 8: Base Installation
5 . Gently place the cabinet upright . DOOR HANDLE INSTALLATION 1 . Insert the door handle screws (H) into the pre-drilled holes in each door . 2 . Attach the door handles (F) and hand tighten the door handle screws (H) using a screwdriver . QL292... -
Page 9: Door Position Adjustment
Installation (continued) DOOR POSITION ADJUSTMENT If the doors need to be repositioned, the hinges can be adjusted to ensure a precise fit with the cabinet. 1 . The lateral adjustment screw adjusts the door left or right . 2 . Horizontal adjustment of the screws adjust the door forward and backward . -
Page 10: Placement
Faucet body 10 . Install the handle and secure it with the screw . 11 . Insert the plastic indicator back into the handle with the colors oriented as previously noted . Red is normally on the left . QL292... -
Page 11: Care And Cleaning
Care and Cleaning UTILITY SINK Your sink is manufactured with the highest grade stainless steel and will provide you many years of enjoyment with the proper care . Do not After use, always rinse your sink with tap Do not allow any food, detergent, soap or water to dilute and remove deposits . -
Page 12: Service Parts
0098, 8:30 am – 5 pm, EST, Monday–Friday . Identify the required part(s) and have the part number(s) ready . Part Description Code Quantity Door Handles QHL122 Door Handle Screws QHL104 Base Screws QHL108 Cabinet Feet QHL107 Cabinet Hinges QHL102 Ceramic Cartridge QHL166 Sprayer Head QHL168 Strainer Basket QHS101 Strainer Assembly QHS150 Hose QHL165 Counterweight QHL167 QL292... -
Page 13: Tabla De Materias
Tabla de materias Tabla de materias . . . . . . . . . . . . . . . . . . . . . . . . . . . 13 Cómo instalar las manijas de las puertas . -
Page 14: Garantía
Antes de llamar para presentar una reclamación, asegúrese de tener a la mano: - El número o la descripción del modelo. - El comprobante de compra . - Los detalles del defecto y/o el número de pieza. - Nombre(s) y domicilio(s) del propietario o el instalador . QL292... -
Page 15: Preinstalación
Preinstalación HERRAMIENTAS/MATERIALES REQUERIDOS (NO INCLUIDOS) Llaves Alicates Desarmador en Cuchillo de uso cruz general Llave de tubos Sellador de silicona Nivel de Sierra de mano carpintero Guantes de Gafas de seguridad seguridad PIEZAS REQUERIDAS (NO INCLUIDOS) Líneas de Tubo final P Trampa alimentación CONGLOMKB .COM... -
Page 16: Contenido Del Paquete
No deseche el embalaje antes de que esté satisfecho con su nuevo fregadero . Pieza Descripción Cantidad Armario Fregadero Grifo Colador Conjunto de colador Manijas de las puertas Base del armario Tornillos de las manijas Tornillos de la base del armario Patas del armario Contrapeso Llave Allen QL292... -
Page 17: Instalación
Instalación CÓMO INSTALAR EL GRIFO 1 . Sujete el extremo de la manguera que contiene el accesorio grande con una mano, y apriete con la otra mano el cabezal de aspersión del grifo hacia la derecha, sobre el accesorio grande . Empuje Tubería la manguera hacia adentro de modo que el cabezal se alinee del grifo... -
Page 18: Cómo Instalar El Colador
Cuerpo del colador Junta de goma Arandela de fricción 4 . Apriete la contratuerca con la mano . No apriete demasiado la contratuerca o la tuerca de conexión, ya que podría romper o Tuerca deformar el cuerpo del escurridor . QL292... -
Page 19: Cómo Instalar La Base Del Armario
Instalación (continuación) CÓMO INSTALAR LA BASE DEL ARMARIO PRECAUCIÓN: No ponga todo el peso sobre las patas laterales cuando lo coloque su lugar . Una minuciosa inspección debe realizarse antes de la instalación y cualquier daño o pieza faltante debe comunicarse de inmediato. No continúe con la instalación. -
Page 20: Ajuste De La Posición De Las Puertas
1 . Agregue un poco de sellador en la parte superior del armario (A) con cuidado . 2 . Descanse el fregadero (B) en al armario (A), y asegúrese de colocarlo de forma pareja y centrado . Elimine el exceso de sellador . Sellador QL292... -
Page 21: Colocación
Instalación (continuación) COLOCACIÓN Mueva la unidad ya armada a su ubicación final. La conexión de los tubos de abastecimiento y el sistema de drenaje pueden ahora ser completados . LÍNEAS DE ABASTECIMIENTO (NO INCLUIDAS) Las líneas de abastecimiento, que conectan el grifo al suministro de agua de la casa, no vienen incluidos con en esta unidad . -
Page 22: Cuidado Y Limpieza
. Lavar immediatamente con de pino, etc . agua después de la eliminación de las manchas . Evite el uso de novajas de afeitar y otros instrumentos que puedan caer y rayar la superficie. QL292... -
Page 23: Piezas De Repuesto
Piezas de repuesto Si le faltan piezas o necesita repuestos, comuníquese con nuestro equipo de servicio al cliente vía cs@conglomkb.com o llamando al teléfono 1-877-333-0098 (de lunes a viernes, de 8:30 a. m. a 5:00 p.m., hora del Este; servicio disponible en inglés y francés). Identifique la(s) pieza(s) requerida(s) y tenga listo el número correspondiente. - Page 24 Imported by / Importado por: St-Laurent, Québec, H4S 2C3 1-877-333-0098 | cs@conglomkb.com (service available in English and French, Monday - Friday from 8:30 am - 5:00 pm EST) (De lunes a viernes, de 8:30 a. m. a 5:00 p. m., hora del Este; servicio disponible en inglés y francés). www.conglomkb.com Made in China / Hecho en China...
Need help?
Do you have a question about the QL292 and is the answer not in the manual?
Questions and answers