Table of Contents
Advertisement
Quick Links
Advertisement
Table of Contents

Related Manuals for Wisenet SRB-160S


Summary of Contents for Wisenet SRB-160S
-
Page 1: Network Storage
NETWORK STORAGE User Manual SRB-160S... -
Page 2: User Manual
NETWORK STORAGE User Manual Copyright ©2017 Co., Ltd. All rights reserved. Hanwha Techwin Trademark Each of trademarks herein is registered. The name of this product and other trademarks mentioned in this manual are the registered trademark of their respective company. Restriction Copyright of this document is reserved. -
Page 3: Overview
overview IMPORTANT SAFETY INSTRUCTIONS Read these operating instructions carefully before using the unit. Follow all the safety instructions listed below. Keep these operating instructions handy for future reference. Read these instructions. Keep these instructions. Heed all warnings. Follow all instructions. Do not use this apparatus near water. -
Page 4: Before Start
overview BEFORE START This manual provides operational information necessary for using the product and contains a description about each component part and its function as well as menu or network settings. You have to keep in mind the following notices : • Hanwha Techwin retains the copyright on this manual. -
Page 5: Table Of Contents
CONTENTS OVERVIEW Important Safety Instructions Before Start Contents Features Part Names and Functions (Front) Part Names and Functions (Rear) INSTALLATION Installing HDD Turn on the System Connecting the iSCSI Starting the system Setting the administrator’s Initial password WEB VIEWER PROGRAM Recommended System Specifications Major Features Execute... - Page 6 overview ONE-TOUCH BUTTON SETUP What is the ONE-TOUCH BUTTON SETUP? Starting the ONE-TOUCH BUTTON SETUP USING THE DEVICE AS AN ISCSI Using an iSCSI storage on Windows OS STORAGE Using an iSCSI storage on LINUX TROUBLE SHOOTING RAID Level and Status Message on LCD ONE-TOUCH button setup error Internet Explorer authentication failure Windows iSCSI initiator connection failure...
-
Page 7: Features
FEATURES • Large capacity network storage • Compatible NVR : SSM-RS, PRN-4011, XRN-1610/1610S, XRN-2010/2011 • Throughput Classification Performance Group 1 400Mbps Enterprise HDD 800Mbps Group 2 400Mbps Group 1 300Mbps Surveillance HDD 600Mbps Group 2 300Mbps ※ Use only enterprise HDDs for SSM-RS. • 16 Hot-swappable HDD (Max. -
Page 8: Package Contents
overview Package Contents Please unwrap the product, and place the product on a flat place or in the place to be installed. Please check the following contents are included in addition to the main unit. The appearance of the components may differ from the image shown. Accessory category and quantity may differ depending on sales region. -
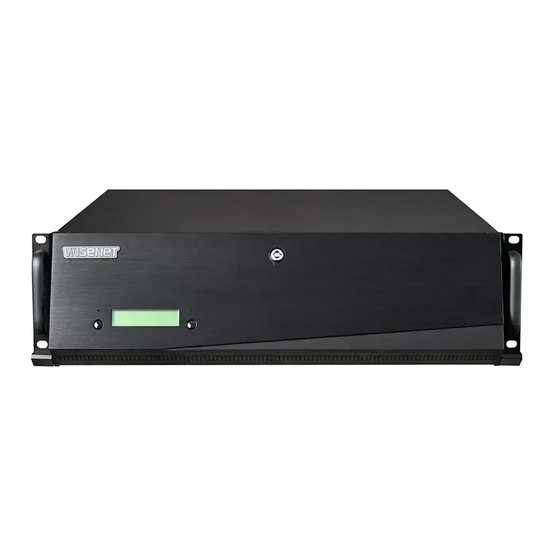
Page 9: Part Names And Functions (Front)
PART NAMES AND FUNCTIONS (FRONT) Front I Part Names Functions ERROR LED Lights on when an error occurs. (Red) Network LED Lights on when RAID rebuilding is in progress or the data is transferring. (White) Door-Lock Key Locks or unlocks the door of the front panel with using the enclosed door-lock key. Front LCD Displays the status of the device. - Page 10 overview Front II Part Names Functions Mute LED (Red) Lights on when the mute function is operated. This switch can be used to mute the beep that is sounded when a problem occurs from Mute Switch the device. Press and hold it for 1 or 2 seconds, and then a red LED will turn on to notify you that the device is muted.
-
Page 11: Part Names And Functions (Rear)
PART NAMES AND FUNCTIONS (REAR) Part Names Functions Power Supply Outputs Max. 300W (Redundant) USB port Connects the USB devices. Console port Used for the system setting in the factory. Port 1: Connects the device with a network switch for data transferring. Network port Port 2,3,4: Connects the device with a network switch together the Port 1 for Network Bonding. -
Page 12: Installation
installation Please take note of the followings before using this product. • Do not use the product outdoor. • Do not spill water or liquid in the connection part of the product. • Do not impose the system to excessive shock or force. • Do not pull out the power plug forcefully. - Page 13 Install the SATA HDD (maximum 16) following the instruction. 1. Open the door of the front. 2. Open the door of the front panel by using the enclosed door-lock key. 3. Remove the 16 hot-swap drive bays by pulling the handles toward you. 4.
-
Page 14: Turn On The System
installation The HDDs to be installed should be the same model and capacity. When you insert a hot-swap drive bay, push the end of the drive handle. Turn on The SySTem 1. Connect the power cable of the device to the wall outlet. 2. -
Page 15: Connecting The Iscsi
PPPoE 모뎀 스위치 NETWORK 1 NETWORK 3 NETWO Tx Rx G O O RK 1 NETW WORK 3 2 3 4 AUDIO OUT OPTICAL OPTICAL NETWORK 1 NETWORK 2 Phone (PPPoE) HDMI CONSOLE NETWORK 2 NETWORK 2 iSCSI iSCSI COM COM COM Line ALARM ALARM OUT... -
Page 16: Starting The System
When booting the system, the below messages is displayed in order. IP Storage IP Storage SRB-160S Powering Up Loading System STARTING iSCSI.. When the device is fully booted, the following information will be displayed on the front LCD through button operation. - Page 17 If it’s down linked, it will be displayed as Network Status XXX:XXX:XXX:XXX ` If NETWORK 1 is not connected NET1:UNPLUGGED XXX.XXX.XXX.XXX SRB-160S Device Information Displays Model name and Serial Number SN:S2MK0130218 FW VERSION: 1.0.0 Firmware Information Displays firmware version and date BUILD: 2017.02.11...
-
Page 18: Setting The Administrator's Initial Password
installation SETTING THE ADMINISTRATOR’S INITIAL PASSWORD When you access the web viewer first time, you must set the administrator’s initial password. Set the password according the password rules. Web Viewer address : http://<Device IP address> (Ex. http://192.168.1.100 ) 18_ installation... -
Page 19: Web Viewer Program
Web Viewer Program Web Viewer is a program that lets you remotely check the equipment status and change settings on the network without installing a separate application. RECOMMENDED SYSTEM SPECIFICATIONS Name Specifications • MS IE 10 or higher • Google Chrome 57 or higher Web Browser • Mac Safari 9 or higher (required) • Firefox 43 or higher... -
Page 20: Execute
Web Viewer Program EXECUTE Check the IP address on the LCD on the front side of the equipment, or search the equipment from the RemoteManager to check the IP address. Run the web browser and enter the address below in the address bar. WEB VIEWER ADDRESS: HTTP://<EQUIPMENT IP ADDRESS>... -
Page 21: Storage
STORAGE Sets RAID, Volume, iSCSI target to provide storage service through the iSCSI protocol. RAID Management (retrieve information) There are 2 RAID groups. RAID GROUP 1 comprises 1 through 8, and RAID GROUP 2 comprises 9 through 16. Click a RAID GROUP to retrieve. You can check the RAID information and disk information. - Page 22 Web Viewer Program RAID Management (create) Select a RAID level and press the [CREATE RAID] button to create a RAID. RAID Management (delete) If a RAID has already been configured, press the [DELETE RAID] button and select OK to delete a RAID. If a volume exists in the RAID, then you can't delete the RAID.
- Page 23 Volume Management (delete) You can delete volumes that are not being used. 1. Click the [DELETE] button on the right side of the volume to delete it. A window to confirm deletion of the volume will appear. 2. Enter the equipment password and click the [APPLY] button.
- Page 24 Web Viewer Program iSCSI Target (create) You can create a new iSCSI Target. 1. Press the [CREATE TARGET] button, and a Create Target window will appear. 2. Select a volume to connect. 3. Click the [APPLY] button, and an iSCSI Target is created.
-
Page 25: Network
NETWORK Sets the network to access, monitor, and manage this product. Interface (retrieve information) You can retrieve the network interface information for the connected network port. Interface (edit) You can modify the network interface settings. 1. Click the [EDIT] button on the right side of the network port to modify it. - Page 26 Web Viewer Program Interface (create bonding) If you connect multiple recorders to this product, then bond 2 or more network ports in the Link Aggregation mode. If you connect multiple recorders in a port, then recording may not work properly due to limitations in the network bandwidth.
- Page 27 Set SMTP (email) To send a notification email to a designated email account when an event occurs, such as device malfunction, you can set an SMTP. 1. Select the check box to enable SMTP. 2. Enter the information for your mail server. 3.
-
Page 28: System
Web Viewer Program SYSTEM You can access functions for the use and maintenance of this product. General • Device information – You can retrieve the model name, serial number, system operating time, and average system load information. – If you click the [FACTORY RESET] button, then the system settings information will be initialized. - Page 29 Date & Time • Time zone settings You can change the time zone for the product. 1. Select the desired time zone. 2. Click the [APPLY] button. • Time settings You can change the system time. 1. Select the Time & Date Settings mode. –...
- Page 30 Web Viewer Program Update You can check the version of the installed firmware, as well as update the firmware. 1. Click the [Update] button and select a file to upload. 2. Click the [APPLY] button in the update confirmation window, and then the firmware updating process will begin.
-
Page 31: Remote Manager Utility
remote manager uti l i ty The REMOTE MANAGER utility was developed for user to discover the device in network and set it up easily using the PC located in the remote place. SYSTEM REQUIREMENTS Item Recommended • Windows 7 32bit/64bit • Windows 8 32bit/64bit • Windows 8.1 32bit/64bit • Windows 10 32bit/64bit... -
Page 32: Remote Manager Installation
remote manager uti l i ty REMOTE MANAGER INSTALLATION Prepare the installer file corresponding to the OS of the PC. Unlike the Windows operating system, MAC does not support an installation type file (portable type). 1. Execute the REMOTE MANAGER installer file "RemoteManager _<version>... - Page 33 4. Click the [Next] button. 5. The REMOTE MANAGER installation is in progress 6. If the installation is completed, click the [Finish] button. English - 33...
-
Page 34: Composition And Menu Of The Remote
remote manager uti l i ty COMPOSITION AND MENU OF THE REMOTE MANAGER Indicates whether the web page can be connected ornot using the configured IP address. Blue: can be connected Gray: can’t be connected Click the information icon at the top right of the screen, and then you can view the version information and change language settings. -
Page 35: Network Settings
NETWORK SETTINGS You can set the network information of the device. 1. Select the device that you want to configure the network information on the STORAGE LIST 2. Click the [Network Settings] button. 3. Change the network information of the device following the network environment. -
Page 36: Storage Settings
remote manager uti l i ty STORAGE SETTINGS The menu is displayed differently depending on the RAID status set on the device. Storage Reset You can reset all data of HDDs secured in the device. 1. Select the device that you want to do the STORAGE RESET on the STORAGE LIST. -
Page 37: Disks Information
DISKS INFORMATION You can get the detail information of HDDs secured in the device Select the device and click the [Disks Information] button In the Disk information, you can see the model name, the serial number, the capacity, and the state of the HDD secured in the device. -
Page 38: Update Firmware
remote manager uti l i ty UPDATE FIRMWARE You can upgrade the firmware of the device. 1. Select the device that you want to upgrade the firmware on the STORAGE LIST. 2. Click the [Update Firmware] button. And, you can see the right pop-up menu. - Page 39 one-touch button setup WHAT IS THE ONE-TOUCH BUTTON SETUP? This function is very useful to setup a device very easily. - Refer to "Part Names and Functions (Front)" for button operation. (Page 9) The device that was set up with ONE-TOUCH BUTTON SETUP has following features. • The RAID level of the device is RAID5.
- Page 40 one-touch button setup STARTING THE ONE-TOUCH BUTTON SETUP 1. Check the state of all HDDs secured in the device. All the states of RAID GROUP1 HDDs must be U(Unused) in the GROUP1 and GROUP2. Minimum 3 HDDs are needed. HDD1-8 :UUUUUUUU RAID GROUP2 HDD9-16:UUUUUUUU 2.
- Page 41 usi n g the devi c e as an i S CSI storage USING AN iSCSI STORAGE ON WINDOWS OS If you are using Windows 7 or above, Microsoft iSCSI Software Initiator is included and you can find this program like the below window. 1.
- Page 42 usi n g the devi c e as an i S CSI storage 3. The available iSCSI targets and their status will then be shown under the [Targets] tab. Select the target to connect then click the [Connect] button. 4. You may click the [Advanced…] button to specify the logon information if you have configured the authentication otherwise simply click the [OK] button to continue.
- Page 43 6. After the target has been connected, Windows will detect its presence and treat it as if a new HDD has been added which needs to be initialized and formatted before you can use it. Right click My computer > Manage to open the Computer Management window then go to Disk Management and a window should pop up automatically...
- Page 44 usi n g the devi c e as an i S CSI storage • Check the available iSCSI node(s) to connect. # iscsiadm–m node • You can delete the node(s) you don’t want to connect to when the service is on with the following command. # iscsiadm–m node --op delete –targetname TARGET_IQN • You can login all the available nodes.
- Page 45 trouble shooti n g RAID LEVEL AND STATUS MESSAGE ON LCD • The required minimum HDD number corresponding RAID level RAID Level Minimum HDD number RAID 0 RAID 10 RAID 5 RAID 5 + Hot Standby RAID 6 • Abnormal RAID operating LCD messages Message RAID Status &...
- Page 46 trouble shooti n g ONE-TOUCH BUTTON SETUP ERROR • ONE-TOUCH BUTTON SETUP ERROR Message Cause & Solution ` Cause The device is operating as an iSCSI storage. The HDDs secured in the device have prior RAID information. ` Solution ① Connect to the web page of the device. ②...
- Page 47 • ONE-TOUCH BUTTON SETUP ERROR Message Cause & Solution ` Cause Secured HDDs in a RAID group is less than 3 To make a RAID5 volume, there must be 3 or more. ` Solution ① Secure 3 HDDs or more in each RAID Group. SYS INIT FAILED ②...
- Page 48 FIRMWARE UPDATE FAILURE IN SAFARI BROWSER ON MAC Message Cause & Solution ` Cause The use of cookies for SRB-160S Web Viewer is restricted. ` Solution ① Click “Safari>References”, and click “Privacy” ② Select a “Cookies and website data” option , “Allow from websites I visit”...
- Page 49 SPECIFICATION Model SRB-160S Performance Operating System Embedded Linux Recording Bandwidth Max. 800Mbps Built-In Internal HDD 16 (Max 128TB, RAID-0 Mode), Hot-Swappable Storage RAID RAID 0 / 10 / 5 / 6, RAID5+Hotstandby iSCSI Volume Max. 8 (8 NVRs can be connected)
- Page 50 Model SRB-160S Indicator/Interface LED(Status indicator) : Error(1), Action(1) Indicator LCD Panel : Status of System/Disk/RAID Inner LED : Mute(1), Power(1)" Front Front Button(2) : One-Touch Setup, LCD Setup Switch Inner Button(2) : Mute (1), Power(1)" Key Lock...
- Page 51 Hanwha Techwin cares for the environment at all product manufacturing stages, and is taking measures to provide customers with more environmentally friendly products. The Eco mark represents Hanwha Techwin’s devotion to creating environmentally friendly products, and indicates that the product satisfies the EU RoHS Directive.
- Page 52 Head Office 6, Pangyo-ro 319 beon-gil, Bundang-gu, Seongnam-si, Gyeonggi-do, 463-400 Rep. of KOREA Tel : +82.70.7147.8753 Fax : +82.31.8018.3740 www.hanwha-security.com Hanwha Techwin America 500 Frank W. Burr Blvd. Suite 43 Teaneck, NJ 07666 Toll Free +1.877.213.1222 Direct +1.201.325.6920 Fax +1.201.373.0124 www.hanwha-security.com Hanwha Techwin Europe Heriot House, Heriot Road, Chertsey, Surrey, KT16 9DT, United Kingdom...
Need help?
Do you have a question about the SRB-160S and is the answer not in the manual?
Questions and answers