
Related Manuals for Code CR2


Summary of Contents for Code CR2
- Page 1 User’s Manual This version of the manual only supports firmware version 04AH and greater CR2 User’s Manual Draft_022803_AS -...
-
Page 2: Statement Of Agency Compliance
Statement of Agency Compliance The Code Reader 2.0 has been tested for compliance with FCC regulations and was found to be compliant with all applicable FCC Rules and Regulations. IMPORTANT NOTE: To comply with FCC RF exposure compliance requirements, this device must not be co-located or operate in conjunction with any other antenna or transmitter. - Page 3 Any use of the technical documentation is at the risk of the user. The Code Corporation reserves the right to make changes without prior notice. The Code Corporation does not assume any product liability arising out of or in connection with the application or use of any product or application described herein.
-
Page 4: Table Of Contents
USB Interface......................12 RS-232 Interface ......................13 Batch Interface (Store and Forward)..............14-15 Cordless Interface (Bluetooth Radio)..............16-19 Switching Cables......................20 Attaching Handle......................21 CR2 Battery and Battery Blank ..................22 CR2 Feedback Definition Guide................23-24 Chapter 3 - Symbology Programming Introduction ........................26 Aztec Symbology Enable/Disable Decoding..................27 Enable/Disable Inverse Decoding................27 Codabar Symbology Enable/Disable Decoding..................28... - Page 5 Enable/Disable Decoding..................38 3.14 Micro PDF417 Symbology Enable/Disable Decoding..................39 3.15 Postal Symbologies Enable/Disable Decoding..................40 3.16 QR Code Symbology Enable/Disable Decoding..................41 Check Checksum ....................41 Don’t Check Checksum ..................41 3.17 RSS Symbology Enable/Disable Decoding..................42 3.18 UPC/EAN/JAN Symbologies Enable/Disable Decoding..................43 CR2 User’s Manual Draft_022803_AS -...
- Page 6 Table of Contents Chapter 4 - CR2 Advanced Programming Communication Settings USB Settings......................45 RF Settings ......................46 RS-232 Settings ..................... 47 • Data Bit...................... 48 • Stop Bit Data ..................... 49 • Baud Rate....................50 • Parity ......................51 Prefix / Suffix ........................
- Page 7 CR2 Troubleshooting Guide..................... 76 Chapter 7 - CR2 Factory Default Settings CR2 Default Settings....................78-79 Appendix A - Connecting the CR2 Bluetooth Radio to Specific Hosts 3Com® Wireless Bluetooth USB Device # 3CREB96 ..........81-88 Appendix B - Setting Up a Network of Bluetooth Devices Setting up a Network of Bluetooth Devices ..............
-
Page 8: Chapter 1 - Cr2 Overview
Chapter 1 - CR2 Overview CR2 User’s Manual Draft_022803_AS -... -
Page 9: Introduction
1.1 - Introduction CR2 is a revolutionary new, bar code reader. Developed to be the first universal reader, no other single device performs as many functions. With a cost of ownership far less than comparable systems, the CR2 incorporates a unique dual path optical system, a 1.3 million pixel CMOS sensor, and a 400 MHz processor. -
Page 10: Unpacking
Remove the imager from its packing and inspect it for damage. If the scanner was damaged during shipping, please call Code Corpration at (801) 495-2200. The standard CR2 unit is shipped with a USB cable interface. The unit also features a battery blank that must be installed in the unit at all times. -
Page 11: General Safety Information
Use only the particular power supply provided for use with a specific unit when operating Code equipment. Accessories Only those accessories approved by Code (page 9) should be utilized with Code equipment. Non-compliance with any of the above may result in: •... -
Page 12: Warranty And Service Information
America. Shipments from the US or other locations will be made F.O.B. Code’s manufacturing plant. Code will use new or refurbished parts at its discretion and will own all parts removed from repaired products. Customer will pay for the replacement product in case it does not return the replaced product to Code within 3 days of receipt of the replacement product. - Page 13 In no event shall Code be liable for any consequential, special, indirect, incidental or punitive damages, or for any loss of profits, revenue or data, even if Code has been advised of the possibility thereof. CR2 User’s Manual Draft_022803_AS -...
-
Page 14: Targeting And Reading Techniques
Note: The CR2 can read a symbol that is not centered however, the CR2 performs best when a code is centered. If two (2) bar codes are with the imagers decode zone, the CR2 will decode the symbol closest to the center of the aiming dot. - Page 15 (optimal focal point is 4 inches) and one imager focused on a far-field for larger codes (optimal focal point 9 inches). To read smaller symbols move the CR2 closer to the symbol. To read larger symbols move the unit farther away from the symbol (see figure 1.4).
-
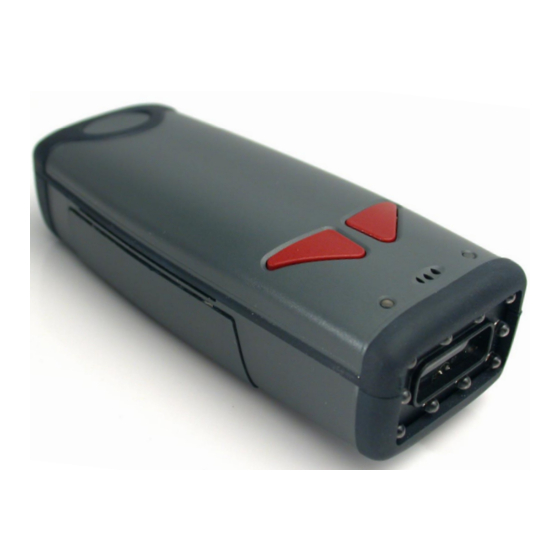
Page 16: Cr2 Accessories
1.6 - CR2 Accessories The standard CR2 unit is a palm-held device with a USB cable interface (figure 1.5). Figure 1.5 CR2 with USB Cable Interface Optional Accessories The following accessories are also available by contacting a Code representative: •... -
Page 17: Chapter 2 - Getting Started
Chapter 2 - Getting Started CR2 User’s Manual Draft_022803_AS -... -
Page 18: Minimum Requirements
2.1 - Minimum Requirements Operating Systems: Windows © - 98 (version 2), ME, 2000, XP Interfaces: USB or RS-232 / Serial Bluetooth: CR2 only supports Bluettoth serial profile CR2 User’s Manual Draft_022803_AS -... -
Page 19: Installation Guides - Usb Interface
Make sure the USB cable is sufficiently attached to your CR2 unit (figure 2.1). You DO NOT need to power off your host computer (figure 2.2). The CR2 with USB interface can be plugged into any host while the computer is powered up. -
Page 20: Interface
(figure 2.7) and then plug the power adapter into a wall socket (figure 2.8). If you are using the 1300 mA or 1800 mA battery for batch mode, the CR2 will recharge the battery whenever the unit is a attached to a RS-232 cable that is plugged into a wall socket. -
Page 21: Batch Interface (Store And Forward)
The CR2 unit will automatically detect when the USB cable is detached or the Bluetooth® radio is out of range and will switch into batch mode. CR2 units featuring RS-232 interfaces have to be programmed to enter batch mode by scanning a code (see section 4.6). - Page 22 Bluetooth Radio is back in range and the user scans another code or the specific transfer data code (Users may also program a button in section 4.6 to transfer data) the reader will transfer scanned data. However, once the readers memory has been transferred, the user must scan a specific code to erase the units memory (see section 4.6).
-
Page 23: Cordless Interface (Bluetooth Radio)
Bluetooth device you must get the Bluetooth Radio PIN # of your CR2. The Bluetooth PIN # is the same as your units serial #. The serial number is located underneath the battery on the CR2 specification sticker or you can scan the Reader ID code on page 52 of the CR2 User’s Manual. - Page 24 Enable Pairing Inquire and Connect When the desired slave device prompts for a pin, type in your CR2 Bluetooth PIN #. The CR2 should now be added to the slave devices bonded list. Once you have established a connection, you must make sure the device is set to a serial port profile.
- Page 25 • CR2 is not in bonded list • CR2 has incorrect Bluetooth address or link key, or both associated with the desired device list number Transferring Data The application software on the desired device must be running. As codes are read, they will automatically transmit to the application.
- Page 26 2.2 - Installation Guide - Cordless Interface (con’t) Reconnecting to a Device You may easily reconnect with up to 256 slave devices the CR2 has created a bonded relationship with. these devices by utilizing our label template at: www.codecorp.com/products/downloads/bluetoothlabels. Note: The template will not be available until 3/1/03. To test this feature follow the instructions below: While connected to a the desired slave device, scan the “Save to 001”...
-
Page 27: Switching Cables
2.3 - Attaching and Switching Cables Attaching and Switching Cables The CR2 is available with USB (standard) and RS-232 cables. All of the cables are connected to the CR2 with a 8-pin DIN connector. Different cables may be required for different hosts. -
Page 28: Attaching Handle
Attaching the Handle To attach the handle, please follow the following steps. Place the CR2 in the cradle of the handle and slide the unit back (figure 2.16). Be careful not to place fingerprints on the front glass when attaching handle. -
Page 29: Cr2 Battery And Battery Blank
Attaching and Detaching the Lithium Ion Battery The CR2 is available with a 1300 mA or 1800 mA Lithium Ion battery. If you wish to purchase, contact a Code representative. To install battery or battery blank in cradle or to detach battery from unit, push the locking mechanism up toward the front of the scanner and insert or detach battery (figures 2.18 &... -
Page 30: Cr2 Feedback Definition Guide
2.6 - CR2 Feedback Definition Guide The CR2 features two (2) LED’s on the front of the unit. These LED’s give a user feedback on the various functionality of the unit. Each LED has a small icon underneath that represent the... - Page 31 2.6 - CR2 Feedback Definition Guide (con’t) Memory Battery Sound Successful Flash battery Decode and status either 1 Beep Flash Green Data Transfer Green, Amber or via cable Flash either Successful Flash Amber 1 Beep Green, Amber Decode in or Red...
-
Page 32: Chapter 3 - Symbology Programming
Chapter 3 - Symbology Programming CR2 User’s Manual Draft_022803_AS -... -
Page 33: Introduction
To reset the unit to factory defaults or to save the current settings please scan one of the codes below: Save Settings Note: If you do not save your settings and the CR2 loses power you will lose your settings. Reset to Factory Defaults... -
Page 34: Aztec Symbology
3.2 - Aztec Symbology Scan the following codes to enable/disable Aztec symbology settings: Aztec On Aztec Off Aztec Inverse On Aztec Inverse Off Aztec Both CR2 User’s Manual Draft_022803_AS -... -
Page 35: Codabar Symbology
3.3 - Codabar Symbology Scan the following codes to enable/disable Codabar symbology settings: Codabar On Codabar Off Check Checksum Don’t Check Checksum CR2 User’s Manual Draft_022803_AS -... -
Page 36: Code 128 Symbology
3.4 - Code 128 Symbology Scan the following codes to enable/disable Code 128 symbology settings: Code 128 On Code 128 Off CR2 User’s Manual Draft_022803_AS -... -
Page 37: Code 93 Symbology
3.5 - Code 93 Symbology Scan the following codes to enable/disable Code 93 symbology settings: Code 93 On Code 93 Off CR2 User’s Manual Draft_022803_AS -... -
Page 38: Check Checksum
3.6 - Code 39 Symbology Scan the following codes to enable/disable Code 39 symbology settings: Code 39 On Code 39 Off Check Checksum Don’t Check Checksum Check Checksum and Stip From Result Code 39 Full ASCI On Code 39 Full ASCI Off... -
Page 39: Composite Symbologies
3.7 - Composite Symbologies Scan the following codes to enable/disable Composite symbology settings: Composite On Composite Off CR2 User’s Manual Draft_022803_AS -... -
Page 40: Data Matrix Symbology
Scan the following codes to enable/disable Data Matrix symbology settings: Data Matrix On Data Matrix Off Data Matrix Inverse On Data Matrix Inverse Off Data Matrix Both Data Matrix Rectangle On Data Matrix Rectangle Off CR2 User’s Manual Draft_022803_AS -... -
Page 41: Gocode Symbology
3.9 - GoCode Symbology Scan the following codes to enable/disable GoCode symbology settings: GoCode On GoCode Off CR2 User’s Manual Draft_022803_AS -... -
Page 42: Interleaved 2 Of 5 Symbology
3.10 - Interleaved 2 of 5 Symbology Scan the following codes to enable/disable Interleaved 2 of 5 symbology settings: Interleaved 2 of 5 On Interleaved 2 of 5 Off CR2 User’s Manual Draft_022803_AS -... -
Page 43: Maxicode Symbology
3.11 - Maxicode Symbology Scan the following codes to enable/disable Maxicode symbology settings: Maxicode On Maxicode Off CR2 User’s Manual Draft_022803_AS -... -
Page 44: Msi Plessy Symbology
3.12 - MSI Plessy Symbology Scan the following codes to enable/disable MSI Plessy symbology settings: MSI Plessy On MSI Plessy Off CR2 User’s Manual Draft_022803_AS -... -
Page 45: Pdf 417 Symbology
3.13 - PDF 417 Symbology Scan the following codes to enable/disable PDF 417 symbology settings: PDF417 On PDF417 Off CR2 User’s Manual Draft_022803_AS -... - Page 46 3.14 - Micro PDF 417 Symbology Scan the following codes to enable/disable micro PDF 417 symbology settings: MicroPDF417 On MicroPDF417 Off CR2 User’s Manual Draft_022803_AS -...
-
Page 47: Postal Symbologies
3.15 - Postal Symbologies Scan the following codes to enable the appropriate Postal symbology: Note: If you wish to change which Postal code is activated, you MUST scan the disable all postal codes symbol and then scan your desired symbology. -
Page 48: Check Checksum
3.16 - QR Code Symbology Scan the following codes to enable/disable QR Code symbology settings: QR Code On QR Code Off QR Code Inverse On QR Code Inverse Off QR Code Both Check Checksum Don’t Check Checksum CR2 User’s Manual Draft_022803_AS -... -
Page 49: Rss Symbology
3.17 - RSS Symbology Scan the following codes to enable/disable RSS symbology settings: RSS On RSS Off CR2 User’s Manual Draft_022803_AS -... - Page 50 3.18 - UPC/EAN/JAN Scan the following codes to enable/disable UPC/EAN/JAN symbology settings: UPC On UPC Off UPC Extension On UPC Extension Off UPC Supplemental On UPC Supplemental Off CR2 User’s Manual Draft_022803_AS -...
-
Page 51: Chapter 4 - Cr2 Advanced Programming
Chapter 4 - CR2 Advanced Programming CR2 User’s Manual Draft_022803_AS -... -
Page 52: Communication Settings
4.1 - Reader Communication Settings - USB Interface Scan the following codes to set your reader to the appropriate USB communication setting: USB Keyboard (Default) USB Native USB IBM CR2 User’s Manual Draft_022803_AS -... -
Page 53: Rf Settings
4.1 - Reader Communication Settings - RF Interface Scan the following codes to set your reader to RF communication setting: RF Communication CR2 User’s Manual Draft_022803_AS -... -
Page 54: Settings
4.1 - Reader Communication Settings - RS-232 Interface Scan the following code to set your reader to RS-232/serial communication setting: RS-232 / Serial CR2 User’s Manual Draft_022803_AS -... -
Page 55: Data Bit
4.2 - RS-232 Interface Settings - Set Data Bits Scan the following codes to set the appropriate data bit: 7 Data Bits 8 Data Bits (Default) CR2 User’s Manual Draft_022803_AS -... -
Page 56: Stop Bit Data
4.2 - RS-232 Interface Settings - Set Stop Bit Data Scan the following codes to set the appropriate stop bit data: 1 Stop Bit 2 Stop Bits CR2 User’s Manual Draft_022803_AS -... -
Page 57: Baud Rate
4.2 - RS-232 Interface Settings - Set Baud Rate Scan the following codes to set the appropriate baud rate: 1200 19200 2400 38400 4800 57600 (Default) 9600 CR2 User’s Manual Draft_022803_AS -... -
Page 58: Parity
4.2 - RS-232 Interface Settings - Set Parity Scan the following codes to set parity: Even None (Default) CR2 User’s Manual Draft_022803_AS -... -
Page 59: Prefix / Suffix
4.3 - Set Prefix / Suffix Scan the following codes to set parity: These codes will only work if CR2 unit is set to RS-232 / serial communication mode (page 44). Suffix - Carriage Return Line Feed ON * Suffix - Carriage Return Line Feed OFF * * These codes are subject to change for later versions of firmware. -
Page 60: Reader Id And Firmware Version
Note: For units with a Bluetooth Radio, the Reader ID is also your Bluetooth Radio PIN #. Reader ID and Firmware You will get a text string with your firmware version and Code Reader ID number (see below): 03AB10100101__01681540001000 Firmware Version Code Reader ID # CR2 User’s Manual Draft_022803_AS -... -
Page 61: Time Stamp Settings
4.5 - Time Stamp Settings CR2 has a time stamp feature for logging data (The time stamp is defaulted off in shipped units). If you enable the time stamp feature, everytime the CR2 is powered off or rebooted, the timer will stop. -
Page 62: Batch Mode Settings
Scan the following codes to set the appropriate batch functionality: Transfer Scanned Data from Memory Delete Scanned Data Memory Enable Send and Store Enable RS-232 Batch Mode Disable Send and Store Enable RS-232 Cabled Mode Enable Manual Erase Disable Manual Erase CR2 User’s Manual Draft_022803_AS -... -
Page 63: Bluetooth Radio Settings
4.7 - Bluetooth Radio Settings Scan the following codes to set the left button functionality: Enable RF Inquire and Connect Pairing Enabled Enable Encryption and Authentication Disconnect CR2 User’s Manual Draft_022803_AS -... -
Page 64: Button Programming
Erase Image Read Strip Code Keep Awake Take Picture No Function Set Laser Targeting Read Codes in Both Zones (Default) Upload Stored Data Read Code with Far-Field Imager ONLY Read Code with Near-Field Imager ONLY CR2 User’s Manual Draft_022803_AS -... - Page 65 Erase Image Read Strip Code Keep Awake Take Picture No Function Set Laser Targeting Read Codes in Both Zones (Default) Upload Stored Data Read Code with Far-Field Imager ONLY Read Code with Near-Field Imager ONLY CR2 User’s Manual Draft_022803_AS -...
- Page 66 Scan the following codes to set the handle button functionality: Read Strip Code Erase Image Keep Awake Take Picture Target No Function Upload Stored Data Read Codes in Both Zones (Default) Read Code with Far-Field Imager ONLY Read Code with Near-Field Imager ONLY CR2 User’s Manual Draft_022803_AS -...
-
Page 67: Feedback Settings - Volume Settings
Scan the following codes to set vibration mode: Vibrate On / Beep On Vibrate On / Beep Off Vibrate Off / Beep On (Default) Scan the following codes to set your reader’s volume: Beep Off Beep Low Beep High (Default) CR2 User’s Manual Draft_022803_AS -... -
Page 68: Continous Scan Settings
4.10 - Continous Scan Settings Scan the following codes to turn continous scanning on/off: Note: This fuction is only reccommended for short term use because of battery consumption. CR2 User’s Manual Draft_022803_AS -... -
Page 69: Decode Difficulty
For poor quality codes or codes on non-standard surfaces (shiny, low-contrast), the unit may require more time to process the code before the system abandons the image and restarts on a new decode attempt. To allow for additional... -
Page 70: Enable/ Disable Strip Decode
4.11 - Decode Settings Scan the following codes to enable/disable strip decoding: CR2 User’s Manual Draft_022803_AS -... -
Page 71: Set Decode Tolerances
Scan one of the following codes to set the decode accuracy of the CR2 unit. The 0 setting is the most accurate while the 1600 code is the most tolerant (If you set the unit to a 0 setting, you will have to aim the targeting dot directly on the desired code for it to be read). -
Page 72: Image Quality Settings
4.12 - Image Quality Settings Scan the following codes to set image quality *: Medium High * This software is based in part on the work of the Independent JPEG Group. CR2 User’s Manual Draft_022803_AS -... -
Page 73: Laser Settings
4.13 - Laser Settings Scan the following codes to turn laser targeting on/off: CR2 User’s Manual Draft_022803_AS -... -
Page 74: Reset To Factory Defaults
4.14 - Reset Reader to Factory Defaults Scan the following code to reset reader to factory defaults: Reset to Factory Default Settings CR2 User’s Manual Draft_022803_AS -... -
Page 75: Save Settings
4.15 - Save Settings on Reader Scan the following code to save settings on reader: Save Settings CR2 User’s Manual Draft_022803_AS -... -
Page 76: Reboot
4.16 - Reboot Reader Scan the following code to reboot your reader: Reboot CR2 User’s Manual Draft_022803_AS -... -
Page 77: Chapter 5 - Cr2 Specifications
Chapter 5 - CR2 Specifications CR2 User’s Manual Draft_022803_AS -... -
Page 78: Cr2 Reader Specifications
MaxiCode, PDF417, Data Matrix, QR Code, MicroPDF417, GoCode, UCC Composite, Aztec Code, Code 39, Code 128, UPC/EAN/JAN, Int 2 of 5, Codabar, Code 93, UCC RSS, POSTNET, PLANET, Japanese Post, Australia Post, Royal Mail RM4SCC, KIX code Image Output Options:... - Page 79 5.1 - CR2 Reader Specifications (con’t) PERFORMANCE CHARACTERISTICS Field of View: Near: 21.5º horizontal by 16.2º vertical Far: 22.9º horizontal by 11.6º vertical Focal Point: Near: 21.5º horizontal by 16.2º vertical Far: 22.9º horizontal by 11.6º vertical Sensor: Progressive Scan CMOS 1.33MP (1024x1280)
-
Page 80: Chapter 6 - Maintenance And Troubleshooting
Chapter 6 - Maintenance and Troubleshooting CR2 User’s Manual Draft_022803_AS -... -
Page 81: Frequently Asked Questions
6.1 - Frequently Asked Questions CR2 User’s Manual Draft_022803_AS -... -
Page 82: Cr2 Maintenance
6.2 - CR2 Maintenance CR2 User’s Manual Draft_022803_AS -... -
Page 83: Troubleshooting Guide
6.3 - Troubleshooting Guide See section 2.1 Minimum Requirements If utilizing Windows 98, you will need to upgrade to version 2.0 The CR2 will only support Bluetooth USB devices with serial port profile. CR2 User’s Manual Draft_022803_AS -... -
Page 84: Chapter 7 - Cr2 Factory Default Settings
Chapter 7 - Factory Default Settings CR2 User’s Manual Draft_022803_AS -... -
Page 85: Cr2 Default Settings
7.1 - CR2 - Default Settings The following are the default settings for your the Code Reader 2: Symbology Defaults: All 1D Codes Aztec Codabar Code 128 Code 93 Code 39 Composite Data Matrix DM Inverse DM Rect. GoCode Interleaved 2 0f 5... -
Page 86: Cr2 Default Settings
7.1 - CR2 - Default Settings (con’t) RS-232 Interface Setting Defaults You must scan the RS-232 commuincation settings code on page 44 to switch the reader in RS-232 communication mode. When enabled your unit will default to the following settings:... - Page 87 Appendix A Connecting the CR2 Bluetooth Radio to Other Bluetooth Enabled Devices CR2 User’s Manual Draft_022803_AS -...
-
Page 88: Com® Wireless Bluetooth Usb Device # 3Creb96
Quickstart Guide for Connecting the CR2 Bluetooth® Radio to the 3Com® Wireless Bluetooth USB Device # 3CREB96 Follow the instructions that came with the 3Com device and install on the host computer you wish to utilize. Once you have properly installed the device, open the Bluetooth Connection Manager. - Page 89 The serial number is located on a sticker behind the battery. You may also access the PIN # by scanning a code on page 53 in the CR2 Users Manual. Once you have the Radio PIN # enter it in the password box.
- Page 90 Scan the code below to inquire and connect to the desired device. It may take 20 - 30 seconds for the devices to connect. Observe the connection status check-mark on the device ICON in the Bluetooth Connection Manager upper screen and in the serial port connection at the bottom of the screen.
- Page 91 Disconnect from the CR2 unit by scanning the code below. Wait 20-30 seconds for the devices to disconnect. Disconnect Scan the following code below to enable device pairing: Enable Pairing Mode Scan to inquire and connect to the desired device.
- Page 92 On your host, right click the My Computer icon on your desktop. Open Properties. Under the Hardware tab select Device Manager button. Double click on the 3Com Serial Bluetooth Host. Make sure to match the settings of the port to the below settings: CR2 User’s Manual Draft_022803_AS -...
- Page 93 Open an application and begin scanning codes to verify data output (make sure the application is set to the host COM port observed in the previous steps). Disconnect from the CR2 unit by scanning the code below. Wait 20-30 seconds for the devices to disconnect. Disconnect Scan the code to inquire and connect to the desired device.
- Page 94 Open the sheet of labels that came with your CR2 unit. The CR2 can save up to 256 bonded hosts. You can instantly connect to a host by associating it with a label on the sheet. Follow the steps below to associate a host with a label: Scan the Save 001 code from the label sheet.
- Page 95 Custom button.Under Custom Security Mode screen make sure Connectable box is checked but deselect the Discoverable box. Set the Security Level to Link. When Done click on OK. Scan the code below to save the settings on your Reader. Save Settings on Reader CR2 User’s Manual Draft_022803_AS -...
-
Page 96: Appendix B - Setting Up A Network Of Bluetooth Devices
Appendix B - Setting up a Network of Bluetooth Enabled Devices CR2 User’s Manual Draft_022803_AS -... - Page 97 CR2 User’s Manual Draft_022803_AS -...
- Page 98 Appendix C - Upgrading CR2 Firmware CR2 User’s Manual Draft_022803_AS -...
- Page 99 Instructions for Downloading CR2 Firmware Insert the CR2 Firmware CD in a host computer and copy the CR2 Firmware folder on the CD to your Desktop. If you were emailed a version, please save the files included in the email to the Desktop in a folder called CR2 Firmware.
- Page 100 Click on the Download Now button. Firmware will automatically be uploaded to your CR2 unit (figure 4). Note: DO NOT unplug the unit while upgrading firmware! figure 3 When done uploading, you will see a Pass Icon in the lower left corner and a note saying FIRMWARE HAS BEEN SUCCESSFULLY UPGRADED (figure 4).
Need help?
Do you have a question about the CR2 and is the answer not in the manual?
Questions and answers