Table of Contents
Advertisement
Available languages
Available languages
Quick Links
Advertisement
Chapters
Table of Contents

Subscribe to Our Youtube Channel
Related Manuals for Ecom SHL 200-Ex

Summary of Contents for Ecom SHL 200-Ex
- Page 1 SHL 200-Ex BEDIENUNGSANLEITUNG OPERATING INSTRUCTIONS...
-
Page 2: Table Of Contents
Normalbetrieb ....................13 Notlichtbetrieb ....................14 Ladebetrieb .......................15 Test der Batteriekapazität .................16 Anzeigen ......................17 Fehlerbeseitigung .....................18 Instandhaltung, Wartung, Reparatur ..............19 10.1 Instandhaltung und Wartung ................19 10.2 Reparatur ......................21 10.3 Rücksendung ....................21 Entsorgung ......................21 Zubehör und Ersatzteile ...................22 EG-Konformitätserklärung ................23 Handscheinwerfer SHL 200-Ex... -
Page 3: Allgemeine Angaben
Allgemeine Angaben Allgemeine Angaben Konformität zu Normen und Bestimmungen Siehe Zertifikate und EG-Konformitätserklärung: www.ecom-ex.com. Erläuterung der Symbole Symbole in der Betriebsanleitung Symbol Bedeutung Tipps und Empfehlungen zum Gebrauch des Geräts Gefahr allgemein Gefahr durch explosionsfähige Atmosphäre Gefahr durch spannungsführende Teile... -
Page 4: Warnhinweise
Nichtbeachtung der Anweisung kann zu einem Sachschaden am Gerät und/oder seiner Umgebung führen. Symbole am Gerät oder in Schaltplänen Symbol Bedeutung CE-Kennzeichnung gemäß aktuell gültiger Richtlinie. 05594E00 Gerät gemäß Kennzeichnung für explosionsgefährdete Bereiche zugelassen. 02198E00 Gefahr von Augenschäden durch optische Strahlung Handscheinwerfer SHL 200-Ex... -
Page 5: De 3 Sicherheitshinweise
• Arbeiten am Gerät (Installation, Instandhaltung, Wartung, Störungsbeseitigung) nur von dazu befugtem und entsprechend geschultem Personal durchführen lassen! Bestimmungsgemäße Verwendung Der Handscheinwerfer SHL 200-Ex ist ein Betriebsmittel • für ortsveränderliche Anwendungen • im Kraftfahrzeug verwendbar • für Verwendung in den Zonen 1, 21, 2, 22 und im sicheren Bereich. -
Page 6: De 4 Funktion Und Geräteaufbau
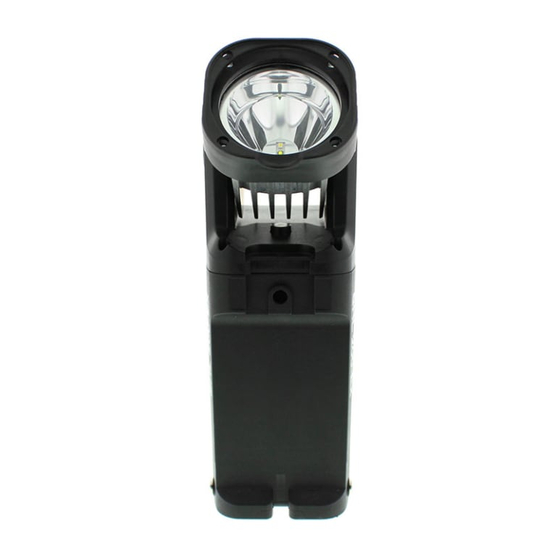
• Notlichtfunktion in Verbindung mit dem Ladesessel • Die Notlichtfunktion ist de- und aktivierbar • Laden der Batterie mit Hilfe des Ladesessels • Test der Batteriekapazität Geräteaufbau Lampenkopf mit Hauptlicht und Nebenlic LED-Anzeige Taster Streuscheiben Gehäuse Ladesessel 14769E00 Handscheinwerfer SHL 200-Ex... -
Page 7: Technische Daten
Dauerbetrieb: kontinuierlich an, typisch 32 h Tiefentladung Bei Restkapazität der Batterie < 10 % erfolgt automatisches Umschalten von Haupt- auf Nebenlicht. Testfunktionen Lampen- Bei defektem Hauptlicht erfolgt automatisches Umschalten auf Nebenlicht überwachung Batteriekapazität Ermittlung der aktuellen Batteriekapazität Handscheinwerfer SHL 200-Ex... - Page 8 Ladekabel 110 ... 240 V AC: ca. 1,8 m lang, mit Euro-Stecker, 2-polig Ladekabel 12 ... 30 V DC: ca. 1,8 m lang, mit freien Enden, 2-polig Hinweis Ex-Betrieb Achtung! Die Ladesessel sind nicht geeignet für den Einsatz in explosionsgefährdeten Bereichen! Ladesessel sind grundsätzlich im NICHT-Ex-Bereich zu montieren! Handscheinwerfer SHL 200-Ex...
-
Page 9: De 6 Transport Und Lagerung
• Das Gerät nur durch geschultes Fachpersonal installieren lassen. Dazu sind Kenntnisse der einschlägigen Normen (z.B. IEC/EN 60079-14) unbedingt erforderlich. Maßangaben / Befestigungsmaße Maßzeichnungen (alle Maße in mm) - Änderungen vorbehalten !! ! ! 14754E00 14753E00 Handscheinwerfer Ladesessel Handscheinwerfer SHL 200-Ex... -
Page 10: Montage / Demontage, Gebrauchslage
Der Montageort muss eben und tragfähig sein. Die Schrauben für die Montage des Wandhalters sind nicht im Lieferumfang enthalten. Wandmontage Schrauben Ladesessel (Torx 20) (im Lieferumfang Wandhalter enthalten) Ladesessel Wandhalter Schrauben zur Befestigung des Wandhalters (nicht im Lieferumfang enthalten) 14770E00 Handscheinwerfer SHL 200-Ex... -
Page 11: De De
7.2.2 Montage Adapter in Fremdgeräteladesessel LG443 Adapter Fremdgeräteladesessel LG443 Halterung Schrauben Halterung (Torx 10) (im Lieferumfang enthalten) 14943E00 • Den Adapter in Ladesessel einsetzen. • Die Halterungen auf Ladesessel schieben. • Den Adapter mit den Schrauben befestigen - Anzugsdrehmoment 0,5 Nm. Handscheinwerfer SHL 200-Ex... - Page 12 • Den Adapter mit den Schrauben befestigen - Anzugsdrehmoment 0,5 Nm. 7.2.3 Montage Gürtelhaken Schraube Gürtelhaken (Torx 10) (im Lieferumfang enthalten) Gürtelhaken 14773E00 • Den Gürtelhaken von oben in die Führung schieben. • Mit der Schraube befestigen - Anzugsdrehmoment 0,5 Nm. Handscheinwerfer SHL 200-Ex...
-
Page 13: De 8 Inbetriebnahme
Das Haupt- oder Nebenlicht des Handscheinwerfers ist nur außerhalb des Ladesessels einschaltbar. Das ungedimmte Hauptlicht und das Nebenlicht leuchten stroboskopfrei. Das Hauptlicht wird automatisch auf Nebenlicht umgeschaltet wenn: • das Hauptlicht defekt ist. • die Kapazität der Batterie kleiner 10 % beträgt. Handscheinwerfer SHL 200-Ex... -
Page 14: Notlichtbetrieb
Notlichtleuchte verwendet werden. Bei Netzausfall wird das Hauptlicht ungedimmt eingeschaltet. Ladesessel • An die Versorgungsspannung anschließen. • Die LED „Power“ leuchtet. • Den Handscheinwerfer einsetzen. Handscheinwerfer • Eventuell eingeschaltete LED wird abgeschaltet. • Ein Funktionstest wird durchgeführt. Handscheinwerfer SHL 200-Ex... -
Page 15: Ladebetrieb
• Die LED-Anzeige informiert über den Ladezustand oder mögliche Fehler. Bei Entnahme aus dem Ladesessel und eingeschalteter Notlichtfunktion • Die LED Hauptlicht wird eingeschaltet. Bei Entnahme aus dem Ladesessel und ausgeschalteter Notlichtfunktion • Die Funktion vor dem Einsetzen wird aktiviert. Handscheinwerfer SHL 200-Ex... -
Page 16: De De
• Die LED der LED-Anzeige schalten sich nacheinander ein und wieder aus. Testablauf • Die Batterie wird 12 Stunden geladen. • Danach wird die LED Hauptlicht eingeschaltet. • Die Batterie wird bis auf 10 % der Kapazität entladen. • Die Entladezeit wird gemessen und bewertet. Handscheinwerfer SHL 200-Ex... -
Page 17: Anzeigen
Batteriekapazität ( 65 % Batteriekapazität ( 88 % Batteriekapazität > 88 % Dimm-Modus grün grün grün grün Beschreibung Dimmstufe < 20 % Dimmstufe < 40 % Dimmstufe < 60 % Dimmstufe ( 80 % Dimmstufe > 80 % Handscheinwerfer SHL 200-Ex... -
Page 18: Fehlerbeseitigung
Spannung Ausgang Ladesessel zu hoch Fehlerbeseitigung Wenn sich der Fehler mit den genannten Vorgehensweisen nicht beheben lässt: • wenden Sie sich an ecom instruments GmbH • Industriestraße 2 • 97959 Assamstadt. Zur schnellen Bearbeitung folgende Angaben bereithalten: • Typ und Seriennummer •... -
Page 19: De 10 Instandhaltung, Wartung, Reparatur
• Arbeiten am Gerät ausschließlich von dazu befugtem und entsprechend geschultem Personal ausführen lassen. 10.1 Instandhaltung und Wartung Die geltenden nationalen Bestimmungen im Einsatzland beachten. • Art und Umfang der Prüfungen den entsprechenden nationalen Vorschriften entnehmen. • Prüfungsintervalle an Betriebsbedingungen anpassen. Handscheinwerfer SHL 200-Ex... - Page 20 • Den Batteriehaltebügel (4) entnehmen. • Die Batterie (5) aus dem Gehäuse entfernen. • Die neue Batterie gemäß Kennzeichnung im Gehäuse einsetzen. • Den Batteriehaltebügel (4) einsetzen. • Mit den Schrauben (3) den Batteriehaltebügel festschrauben - Anzugsdrehmoment 0,5 Nm. Handscheinwerfer SHL 200-Ex...
-
Page 21: 10.2 Reparatur
10.3 Rücksendung Für die Rücksendung im Reparatur-/Servicefall das Formular "Serviceschein" verwen- den. Auf der Internetseite "www.ecom-ex.com" im Menü "Service > Reparatur": • Serviceschein herunterladen und ausfüllen. • Gerät zusammen mit dem Serviceschein wieder in der Originalverpackung an die ecom instruments GmbH senden. -
Page 22: Zubehör Und Ersatzteile
• an öffentliche Sammelstellen oder an den Lieferanten zurückgeben Zubehör und Ersatzteile HINWEIS Nur Original-Zubehör und Original-Ersatzteile des Herstellers verwenden. Zubehör und Ersatzteile Benennung Abbildung Beschreibung Art.Nr. Gewicht Batteriepack Blei-Vlies-Akku, 6 V, 4,5 Ah A0002144 0,720 14808E00 weitere, siehe Datenblatt auf Homepage www.ecom-ex.com. Handscheinwerfer SHL 200-Ex... -
Page 23: Eg-Konformitätserklärung
Handscheinwerfer SHL 200-Ex... - Page 24 Charging Operation .....................37 Battery capacity test ....................38 Indications ......................39 Troubleshooting ....................40 Maintenance and repair ..................41 10.1 Maintenance .......................41 10.2 Repair .........................43 10.3 Returning the device ...................43 Disposal ......................43 Accessories and Spare parts ................44 EC Declaration of Conformity ................45 Portable Lamp SHL 200-Ex...
-
Page 25: En En En
General Information General Information Conformity with standards and regulations See certificates and EC Declaration of Conformity: www.ecom-ex.com. Explanation of the symbols Symbols in these operating instructions Symbol Meaning Tips and recommendations on the use of the device General danger Danger due to explosive atmosphere... -
Page 26: Warning Notes
Symbols on the device or in the circuit diagrams Symbol Meaning CE marking according to the currently applicable directive. 05594E00 According to marking, device approved for hazardous areas. 02198E00 Risk of damage to the eyes caused by optical radiation Portable Lamp SHL 200-Ex... -
Page 27: En 3 Safety Notes
• Work on the device (installation, maintenance, overhaul, repair) may only be carried out by appropriately authorized and trained personnel. Intended Use The portable lamp SHL 200-Ex is equipment • for mobile applications • usable in a motor vehicle • for use in Zones 1, 21, 2, 22 and in the safe area •... -
Page 28: En 4.1 Function
Gas and dust IBExU 12ATEX 1066 † II 2 G Ex ib IIC T4 Gb II 2 D Ex tb IIIC T75°C Db † Certifications and certificates Certificates ATEX Certificate for E1 10 R - 036569 motor vehicles Portable Lamp SHL 200-Ex... -
Page 29: Technical Data
110 ... 240 V AC, 50 / 60 Hz Optionally, a charging cable for motor vehicle operation for 12 ... 30 V DC is available. Portable Lamp SHL 200-Ex... -
Page 30: En 6 Transport And Storage
• Do not drop the device. Batteries • Do not transport together with other materials! • Handle with care! • Store protected from fire, sources of dust, harmful gases and liquids! • Store in a dry and cool location! Portable Lamp SHL 200-Ex... -
Page 31: Mounting And Installation
(e.g. IEC/EN 60079-14). Dimensions / fastening dimensions Dimensional Drawings (All Dimensions in mm) - Subject to Alterations !! ! ! 14754E00 14753E00 Portable lamp Charging unit ø 4,50 14807E00 Drilling hole pattern for wall mounting bracket Portable Lamp SHL 200-Ex... -
Page 32: En 7.2 Mounting / Dismounting, Operating Position
• Slide the charging unit onto the wall bracket from above. • Fasten charging unit with the delivered screws - tightening torque 1.5 Nm. 14771E00 Table mounting Screws for fastening the charging unit (not included in the delivery) Charging unit Level surface 14772E00 Portable Lamp SHL 200-Ex... - Page 33 Screws for adapter (Torx 10) (included in the delivery) Adapter for third-party charging units KFZ90 14944E00 • Insert the adapter into the charging unit. • Fasten the adapter by tightening the screws - tightening torque 0.5 Nm. Portable Lamp SHL 200-Ex...
-
Page 34: En 8 Commissioning
Check the device before commissioning! Explosion protection is impaired! • Observe the inspection requirements in the current national regulations before commissioning in order to maintain the explosion protection. • Check the device for proper installation and function before commissioning. Portable Lamp SHL 200-Ex... -
Page 35: Normal Operation
• Under certain conditions, the rotation of parts cannot be detected. The portable lamp must be off. • Press the pushbutton until reaching the desired dimming level. • The LED display shows the selected dimming level. Portable Lamp SHL 200-Ex... -
Page 36: Emergency Light Operation
• Any switched-on LED will be switched off. • A functional test will be carried out. • The LED display shows information on the charging state or possible faults. • In case of power failure, the portable lamp is switched on. Portable Lamp SHL 200-Ex... -
Page 37: En 9.3 Charging Operation
Upon removal from the charging unit and with the emergency lighting function switched • The LED main light will be switched on. Upon removal from the charging unit and with the emergency lighting function switched • The function before insertion will be activated. Portable Lamp SHL 200-Ex... -
Page 38: En En
• The LED display shows information on the charging state or possible faults. • Keep pressing the button until the LED display shows the battery test. • The LEDs of the LED display are switched on and off one after the other. Portable Lamp SHL 200-Ex... -
Page 39: Indications
Battery capacity > 88 % Dimming mode green green green green Description Dimming level < 20 % Dimming level < 40 % Dimming level < 60 % Dimming level ( 80 % Dimming level > 80 % Portable Lamp SHL 200-Ex... -
Page 40: Troubleshooting
LED input voltage too high LED input voltage too low Charging unit output voltage too high Troubleshooting If the error cannot be eliminated using the mentioned procedures: • Contact the local representative of ecom instruments GmbH. Portable Lamp SHL 200-Ex... -
Page 41: En Maintenance And Repair
10.1 Maintenance Observe the relevant national regulations in the country of use. • Consult the relevant national regulations to determine the type and extent of inspections. • Adapt inspection intervals to the operating conditions. Portable Lamp SHL 200-Ex... - Page 42 • Remove battery (5) from the enclosure. • Insert new battery into enclosure according to marking. • Insert battery retaining bracket (4). • Screw down the battery retaining bracket with the screws (3) - tightening torque 0.5 Nm. Portable Lamp SHL 200-Ex...
-
Page 43: 10.2 Repair
10.3 Returning the device Use the "Service form" to return the device when repair/service is required. On the internet site "www.ecom-ex.com" under "Downloads > Customer service": • Download the service form and fill it out. • Send the device along with the service form in the original packaging to ecom instruments GmbH. -
Page 44: Accessories And Spare Parts
Use only original accessories and spare parts by the manufacturer. Accessories and Spare Parts Designation Figure Description Art. no. Weight Battery lead-fleece battery, maintenance-free, A0002144 0.720 6 V, 4.5 Ah 14808E00 For others, see data sheet on homepage www.ecom-ex.com. Portable Lamp SHL 200-Ex... -
Page 45: Ec Declaration Of Conformity
Nom et adresse de l‘organisme certifié a) Système d‘assurance qualité selon ISO 9001 ecom instruments GmbH | Industriestraße 2 | 97959 Assamstadt | Germany Tel.: +49 62 94 / 42 24-0 | Fax: +49 62 94 / 42 24-100 | E-Mail: sales@ecom-ex.com | www.ecom-ex.com... - Page 46 Assamstadt, 17.03.2017 Unterzeichnet / signed Patrick Sander Vice President Products ecom instruments GmbH | Industriestraße 2 | 97959 Assamstadt | Germany Tel.: +49 62 94 / 42 24-0 | Fax: +49 62 94 / 42 24-100 | E-Mail: sales@ecom-ex.com | www.ecom-ex.com...
- Page 48 GmbH reserves the right to make changes to this document or to withdraw it any time without prior notice.
Need help?
Do you have a question about the SHL 200-Ex and is the answer not in the manual?
Questions and answers