Table of Contents
Advertisement
Quick Links
Advertisement
Table of Contents

Related Manuals for Philco PCN 3172 X


Summary of Contents for Philco PCN 3172 X
- Page 1 COMBI FRIDGE FREEZER NO-FROST USER'S MANUAL PCN 3172 X...
- Page 2 Dear customer, Thank you for buying a PHILCO brand product. So that your appliance serves you well, please read all the instructions in this user's manual.
- Page 3 CONTENT PART 1: SAFETY INFORMATION ........................2 PART 2: OVERVIEW ............................6 PART 3: INSTALLATION ............................ 7 Space requirement ..................................7 Positioning ......................................7 Location ......................................7 Electrical connection ..................................7 Door reversibility.....................................8 PART 4: DAILY USE ............................13 ...
-
Page 4: Part 1: Safety Information
PART 1: SAFETY INFORMATION In the interest of your safety and to ensure the correct use, before installing and fi rst using the appliance, read this user manual carefully, including its hints and warnings. To avoid unnecessary mistakes and accidents, it is important to ensure that all people using the appliance are thoroughly familiar with its operation and safety features. -
Page 5: Copyright © 2016, Fast Čr, A. S
• Do not store explosive substances such as aerosol cans with a fl ammable propellant in this appliance. • The refrigerant isobutane (R600a) is contained within the refrigerant circuit of the appliance, a natural gas with a high level of environmental compatibility, which is nevertheless fl ammable. •... -
Page 6: Copyright © 2016, Fast Čr, A. S
Daily use • Do not put hot on the plastic parts in the appliance. • Do not place food products directly against the rear wall. • Frozen food must not be re-frozen once it has been thawed out. • Store pre-packed frozen food in accordance with the frozen food manufacture’s instructions. •... -
Page 7: Energy Saving
Installation IMPORTANT! For electrical connection carefully follow the instructions given in specifi c paragraphs. • Unpack the appliance and check if there are damages on it. Do not connect the appliance if it is damaged. Report possible damages immediately to the place you bought it. In that case retain packing. •... -
Page 8: Part 2: Overview
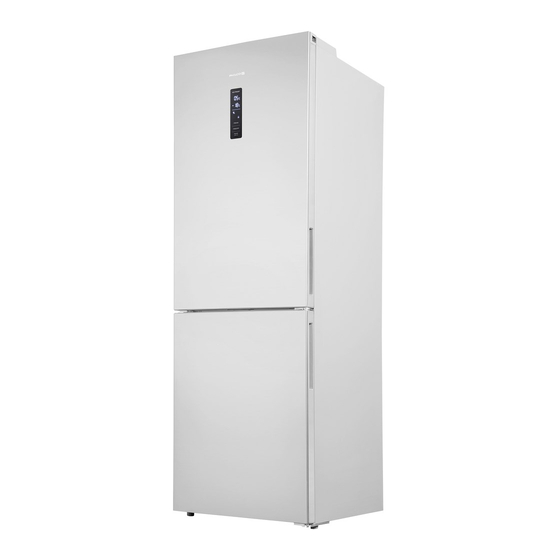
PART 2: OVERVIEW Fridge Shelves Chiller box Crisper Fridge Balconies Freezer Drawers Leveling Feet NOTE: Above picture is for reference only. Real appliance probably is diff erent. EN - 6 Copyright © 2016, Fast ČR, a. s. 03/2016... -
Page 9: Part 3: Installation
PART 3: INSTALLATION Space requirement • Select a location without direct exposure to sunlight; • Select a location with enough space for the refrigerator doors to open easily; • Select a location with level (or nearly level) fl ooring; • Allow suffi cient space to install the refrigerator on a fl at surface;... -
Page 10: Door Reversibility
Door reversibility Before reversing the door, please be prepared below tools and material: straight screwdriver, cross screwdriver, spanner and the components included in the poly bag: Decorative Cover of Right Door ×1 Left Door Hinge Cover × 1 Please upwarp and take off plastic cover by straight screwdriver after opening the door. Please be careful of the wire inside. - Page 11 Take off the upper door, take out the screw from the middle hinge by cross screwdriver, then take off the lower door. Laying down the refrigerator, take out the adjusting feet as below, then take off the lower hinge by cross screwdriver.
- Page 12 Install the lower hinge under to the refrigerator like below, screwing in the adjusting feet, make sure the position in horizon. Install the lower door, adjust and fi x the middle hinge onto the cabinet. Using the Decorative Cover of Right Door from poly bag to cover the insert and take out the other side one accordingly.
- Page 13 Install the upper door, then fi x the upper door hinge onto the cabinet. 10. Install the plastic cover and Left Door Hinge Cover from poly bag onto the product, settle the wire (see diagram) 11. fi x the plastic cover and connect the terminal. EN - 11 Copyright ©...
- Page 14 12. change the Decorative Cover from one to another side. Follow the instruction to take out of the decorative cover, be careful not to ruin the cover. 13. Lastly, using the screw to fi x the top cover. EN - 12 Copyright ©...
-
Page 15: Part 4: Daily Use
PART 4: DAILY USE Using the control panel 1.1 KEY OPERATION Temperature Control of Fridge Compartment Temperature Control of Freezer Compartment Mode/ Locking / Unlocking 1.2 LED DISPLAY Temperature of Fridge Comparment Temperature of Freezer Comparment ECO Mode Holiday Mode Super Mode Locking / Unlocking EN - 13... - Page 16 2.0 OPERATING CONDITION The control panel is 100% lit up for 3 seconds, which operates exactly as per the setting (mode and temperature) before the poweroff . The system will be automatically locked 25 seconds after the last key operation. After locking, the light of the panel would be out 30 seconds after the last key operation. Both preset temperatures of fridge compartemnt and freezer compartment would be shown on the display.
-
Page 17: Holiday Mode
Lock Function N operation in 25 sec will lock the display automatically. 4.0 ECO mode Press mode to choose ECO mode, ECO icon keeps bright after 5 sec fl ashing. 5°in fridge compartment and -18°in freezer compartment under eco mode, “Freezer”&“Fridge“ button in vain while eco icon will fl ash three times in alarm. -
Page 18: Part 5: First Use
PART 5: FIRST USE Cleaning the interior Before using the appliance for the fi rst time, wash the interior and all internal accessories with lukewarm water and some neutral soap so as to remove the typical smell of a brand new product, then dry thoroughly. IMPORTANT! Do not use detergents or abrasive powders, as these will damage the fi nish. -
Page 19: Part 6: Helpful Hints And Tips
PART 6: HELPFUL HINTS AND TIPS Hints for freezing To help you make the most of the freezing process, here are some important hints: • the maximum quantity of food which can be frozen in 24 hrs. is shown on the rating plate; •... - Page 20 Cleaning For hygienic reasons the appliance interior, including interior accessories, should be cleaned regularly. CAUTION! The appliance may not be connected to the mains during cleaning. Danger of electrical shock! Before cleaning switch the appliance off and remove the plug from the mains, or switch off or turn out the circuit breaker or fuse.
-
Page 21: Part 7: Troubleshooting
PART 7: TROUBLESHOOTING CAUTION! Before troubleshooting, disconnect the power supply. Only a qualifi ed electrician of competent person must do the troubleshooting that is not in this manual. IMPORTANT! There are some sounds during normal use (compressor, refrigerant circulation). Problem Possible cause Solution Appliance dose not work Mains plug is not plugged in or is loose Insert mains plug. -
Page 22: Part 8: Information Sheet
INFORMATION SHEET: Philco Philco brand: Brand Philco Model identifi cation PCN 3172 X Type of appliance 3) Energy effi ciency class (A... low electricity consumption to G high electricity consumption) Electricity consumption per 365 days 1) kWh Total available volume: l... - Page 23 INSTRUCTIONS AND INFORMATION REGARDING THE DISPOSAL OF USED PACKAGING MATERIALS Dispose of packaging material at a public waste disposal site. DISPOSAL OF USED ELECTRICAL AND ELECTRONIC APPLIANCES The meaning of the symbol on the product, its accessory or packaging indicates that this product shall not be treated as household waste.
Need help?
Do you have a question about the PCN 3172 X and is the answer not in the manual?
Questions and answers