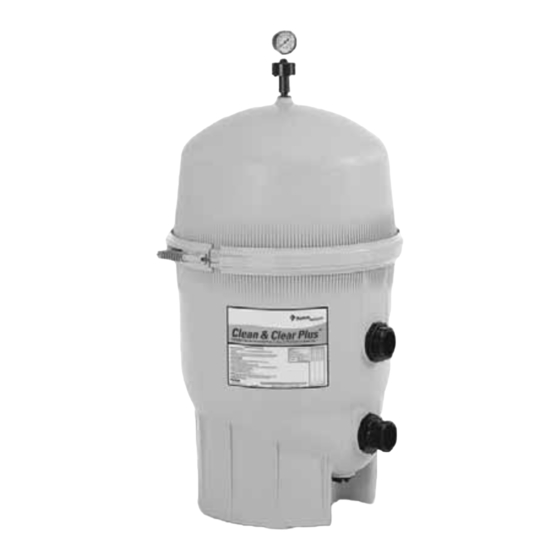
Pentair Clean & Clear Plus Installation Manual
Cartridge filter
Hide thumbs
Also See for Clean & Clear Plus:
- Installation and user manual (20 pages) ,
- Cleaning manual (8 pages)
Advertisement
Available languages
Available languages
Quick Links
Clean & Clear™
Clean & Clear™ Plus
CARTRIDGE FILTER
KARTUSCHENFILTER
PATROONFILTER
FILTRE A CARTOUCHES
FILTRO DE CARTUCHO
FILTRO A CARTUCCIA
Installation guide / Installatiehandleiding
Guide de l'installation / Bedienungsanleitiung
Guia de instalacion / Guide all'installazione
Pentair Water Belgium BVBA
Industriepark Wolfstee
Toekomstlaan 30
B-2200 Herentals – Belgium
+32 (0)14 25 99 11
www.pentairpooleurope.com
G-INSB-CC (Rev. '12-09)
Advertisement

Related Manuals for Pentair Clean & Clear Plus


Summary of Contents for Pentair Clean & Clear Plus
- Page 1 FILTRE A CARTOUCHES FILTRO DE CARTUCHO FILTRO A CARTUCCIA Installation guide / Installatiehandleiding Guide de l’installation / Bedienungsanleitiung Guia de instalacion / Guide all’installazione Pentair Water Belgium BVBA Industriepark Wolfstee Toekomstlaan 30 B-2200 Herentals – Belgium +32 (0)14 25 99 11 www.pentairpooleurope.com...
- Page 2 Water Pool and Spa, Inc. and/or its affiliated companies. Unless noted, names and brands of others that may be used in this document are not used to indicate an affilitation or endorsement between the proprietors of these names and brands and Pentair Water Pool and Spa, Inc. Those names and brands may be the trademarks of those parties or others.
- Page 3 SECTION I. FILTER INSTALLATION 1. The filter should be mounted on a level concrete slab. Position the filter so that the instructions, warnings and pressure gauge are visible to the operator. Also, position the filter so that the piping connections, control valve and drain port are convenient and accessible for servicing and winterizing. 2.
- Page 4 A. GENERAL INFORMATION 1. This filter operates under pressure. When the lock ring is installed properly and operated without air in the water system, this filter will operate in a safe manner. 2. The pressure gauge is the primary indicator of how the filter is operating. Maintain your pressure gauge in good working order. :$51,1* Your filter is a piece of machinery, do not tamper with it, attempt to disassemble it or otherwise adjust it unless you fully understand it’s operation.
- Page 5 D. CLEANING THE FILTER Turn the pump off, shut off any automatic controls to ensure that the system is not inadvertently started during servicing. Open the filter High Flow™ manual air relief valve, (and the waste drain valve, or cap, if your system has one). Remove hair and lint strainer pot lid and clean basket.
- Page 6 KAPITEL I FILTEREINBAU 1. Der Filter muss auf einer ebenen Betonplatte montiert werden. Den Filter so positionieren, dass die Anweisungen und Warnhinweise und das Manometer für den Bediener sichtbar sind. Außerdem den Filter so montieren, dass die Leitungsanschlüsse, das Reglerventil und der Ablaufanschluss für die Wintervorbereitung und Servicearbeiten bequem zugänglich sind.
- Page 7 A. ALLGEMEINE INFORMATIONEN 1. Dieser Filter arbeitet unter Druck. Wenn der Sicherungsring richtig eingebaut ist und die Wasseranlage ohne Lufteinschluss betrieben wird, arbeitet dieser Filter sicher. 2. Die wichtigste Anzeige zur Filterfunktion ist das Manometer. Das Manometer in einwandfreiem Zustand halten. $&+781* Gefahr eines elektrischen Schlages oder von Elektrounfällen Filter und High Flow- Druckentlastungsventil so...
- Page 8 D. REINIGEN DES FILTERS Die Pumpe und automatische Steuerungen abschalten, damit das System nicht versehentlich bei Reparaturarbeiten gestartet werden kann. Das High Flow™-Handdruckentlastungsventil des Filters öffnen (ebenso das Ablassventil bzw. die Ablassschraube, wenn vorhanden) Den Vorfilter herausnehmen, in dem sich Fusseln und Haare sammeln, und den Korb reinigen. Den Korb und den Vorfilter wieder einsetzen. Den Ablassschlauch für das Druckentlastungsventil abbauen, sofern vorhanden.
- Page 9 DEEL I. FILTER INSTALLEREN 1. De filter moet gemonteerd worden op een horizontale betonplaat. Plaats de filter zo dat de instructies, waarschuwingen en drukmeter zichtbaar voor de bediener zijn. Plaats de filter bovendien zo, dat de leidingaansluitingen, afsluitklep en afvoeropening gemakkelijk toegankelijk zijn voor onderhoud en winterklaar maken. 2.
- Page 10 A. ALGEMENE INFORMATIE 1. Deze filter werkt onder druk. Als de folter afsluitring goed is geïnstalleerd en zonder lucht in het watersysteem functioneert, zal deze filter op een veilige manier werken. 2. De drukmeter is de belangrijkste indicator van hoe het filter werkt. Zorg ervoor dat uw drukmeter altijd goed functioneert. :$$56&+8:,1* Uw filter is een stuk machinerie;...
- Page 11 D. REINIGEN VAN DE FILTER Zet de pomp en aut. regelaars uit, om te waarborgen dat het systeem niet per ongeluk wordt gestart tijdens het onderhoud. Open de handmatige High Flow™ ontluchtingsklep van het filter (en de waterafvoerklep of dop als uw systeem dit heeft). Verwijder haar en pluizen uit het inlaatrooster van het afsluitdeksel en reinig de korf.
- Page 12 SECTION I. INSTALLATION DU FILTRE 1. Le filtre doit être monté sur une dalle en béton surélevée. Placez le filtre de façon à ce que les instructions, les avertissements et le manomètre soient visibles par l’opérateur. Placez également le filtre de façon à ce que les raccords de conduits, la soupape de commande et l’orifice de purge soient adéquats et accessibles pour la maintenance et l’hivernage. 2.
- Page 13 A. INFORMATION GÉNÉRALE 1. Ce filtre fonctionne sous pression. Lorsque la bague d’arrêt est installée correctement et mise en service sans air dans le système d’eau, ce filtre fonctionne en toute sécurité. 2. Le manomètre est l’indicateur principal de la façon dont fonctionne le filtre. Assurez un entretien correct du manomètre. $77(17,21 Le filtre est une pièce de machinerie ;...
- Page 14 D. NETTOYAGE DU FILTRE Éteignez la pompe et mettez les commandes automatiques hors tension pour vous assurer que le système ne sera pas démarré par inadvertance pendant la maintenance. Ouvrez la soupape de surpression manuelle High Flow™ (et la soupape de purge ou l’embout, si votre système en est doté). Retirez le couvercle de l’écumoire à...
- Page 15 SECCIÓN I. INSTALACIÓN DEL FILTRO 1. El filtro debe montarse sobre una placa de hormigón nivelada. Posicione el filtro de tal forma que las instrucciones, las advertencias y el manómetro estén visibles para el usuario. Coloque también el filtro de manera que las conexiones de las tuberías, de la válvula de control y la conexión de drenaje sean accesibles para realizar el mantenimiento y la protección para el invierno.
- Page 16 A. INFORMACIÓN GENERAL 1. Este filtro funciona bajo presión. Cuando el anillo de cierre se encuentra instalado adecuadamente y no hay aire en el sistema de agua, el funcionamiento de este filtro será seguro. 2. El manómetro es el indicador principal de cómo está funcionando el filtro. Mantenga su manómetro en buenas condiciones. $'9(57(1&,$ Su filtro es un componente que no se debe manipular, ni desmontar, ni ajustar a menos que comprenda perfectamente su funcionamiento.Pueden producirse serios daños personales e,...
- Page 17 LIMPIEZA DEL FILTRO Apague la bomba y desconecte cualquier control autoático para garantizar que el sistema no se pone en marcha inadvertidamente durante el mantenimiento. Abra el filtro de la válvula manual de alivio de aire High Flow™, (y la válvula de drenaje en caso de que su sistema posea una). Retire la tapa del filtro de pelos y pelusas y limpie el cestillo.Vuelva a colocar el cestillo y asegure la tapa.
- Page 18 SEZIONE I. INSTALLAZIONE DEL FILTRO 1. Il filtro va montato su una lastra di cemento piana. Collocare il filtro in modo che l’operatore possa vedere le istruzioni, le avvertenze e il manometro. Collocarlo inoltre in modo che i raccordi delle tubature, la valvola di controllo e il foro di scolo risultino situati in una posizione comoda e accessibile per gli interventi di manutenzione e per la preparazione per l’inverno.
- Page 19 A. INFORMAZIONI GENERALI 1. Il filtro funziona sotto pressione. Se l’anello di chiusura è montato correttamente e viene fatto funzionare senza aria nel sistema idrico, il filtro funzionerà in sicurezza. 2. Il manometro costituisce l’indicazione principale riguardo al funzionamento del filtro. Mantenere il manometro in buone condizioni di funzionamento.
- Page 20 D. PULIZIA DEL FILTRO Spegnere la pompa e disattivare i controlli automatici per assicurare che il sistema non si avvii inavvertitamente durante la manutenzione. Aprire la valvola di sicurezza manuale High Flow™ (e la valvola o il tappo di scarico dei rifiuti, se il sistema ne è provvisto). Rimuovere capelli e altri peli dal coperchio del filtro e pulire il cestello.
-
Page 21: Replacement Parts
CLEAN & CLEAR™ Replacement Parts Part Number Description H-98209800 High Flow ™ manual air relief valve H-19-0058 Pressure Gauge H-17-8553 Lid, 50, 100 sq. ft. filter 178561 Lid, 75,150, 200 sq. ft. filter 59052900 Locking Ring assy. 3, 4 H-87300400 Body O-ring H-59016200 Air Bleed Sock Kit H-59053500 Center Core, 50 sq. - Page 22 CLEAN & CLEAR PLUS™ Replacement Parts Item No. Part No. Description H-19-0058 Gauge, pressure, ¼ in. 2 H-98209800 High Flow™ manual air relief valve G-17-8616 Spring, compression 1 1 170026 Manifold, top assy., 240 sq. ft. H-17-0027 Manifold, top assy., 320 & 520 sq. ft. 6 H-RAF173572 Cartridge Element, 240 sq.
- Page 23 NOTES...
- Page 24 SAVE THESE INSTRUCTIONS ! PENTAIR WATER BELGIUM BVBA – INDUSTRIEPARK WOLFSTEE TOEKOMSTLAAN 30 – 2200 HERENTALS – BELGIUM TEL: +32 (0)14 259911 – FAX: +32 (0)14 259925 poolemea@pentair.com – www.pentairpooleurope.com ¡ ¡ ¡ ¡ £ £ £ £ ¥ ¥...
Need help?
Do you have a question about the Clean & Clear Plus and is the answer not in the manual?
Questions and answers