Roland XS-62S Owner's Manual
Hd
Hide thumbs
Also See for XS-62S:
- Reference manual (35 pages) ,
- Quick start manual (3 pages) ,
- Reference manual (32 pages)
Table of Contents
Advertisement
Quick Links
Download this manual
See also:
Reference Manual
Owner's Manual
Owner's Manual (this document)
Read this first. It explains the basic things you need to know in
order to use the XS-62S.
PDF Manual (download from the Web)
5 Reference Manual
This manual covers all menu items of the XS-62S.
It also describes control via LAN CONTROL, RS-422, RS-232, and
TALLY/GPIO.
Before using the XS-62S, ensure that its system program is at the most
recent version. For information on available upgrades for the system
program, see the Roland website (https://proav.roland.com/).
You can check the system program version by pressing the [MENU]
button 0 "SYSTEM" 0 "VERSION. "
To obtain the PDF manual
1.
Enter the following URL in your computer.
https://proav.roland.com/
2.
Go to the XS-62S product page
and click the "Support."
I
© 2017 Roland Corporation
Advertisement
Table of Contents

Related Manuals for Roland XS-62S


Summary of Contents for Roland XS-62S
- Page 1 Before using the XS-62S, ensure that its system program is at the most recent version. For information on available upgrades for the system program, see the Roland website (https://proav.roland.com/). You can check the system program version by pressing the [MENU] button 0 “SYSTEM”...
-
Page 2: Federal Communications Commission
ENA 23 Zone 1 nr. 1620 Klaus-Michael Kuehnelaan 13, 2440 Geel, BELGIUM For the USA DECLARATION OF CONFORMITY Compliance Information Statement Model Name : XS-62S Type of Equipment : VIDEO SWITCHER Responsible Party : Roland Corporation U.S. Address : 5100 S. Eastern Avenue Los Angeles, CA 90040-2938 Telephone : (323) 890-3700... - Page 3 Checking the Included Items The XS-62S includes the following items. Please take a moment to confirm that all of these items have been included with the XS-62S. If you find that any item is missing, contact the nearest authorized Roland distributor in your country.
-
Page 4: Using The Unit Safely
Refer all servicing to your retailer, Otherwise, fire or electric shock switch on the unit, then pull out the plug the nearest Roland Service Center, may result. from the outlet. For this reason, the outlet or an authorized Roland distributor, into which you choose to connect the power as listed on the “Information. - Page 5 Service Center, or an authorized An accumulation of dust or foreign won’t come loose. Roland distributor, as listed on the objects between the power plug “Information” when: and the power outlet can lead to •...
-
Page 6: Important Notes
• Do not place containers or anything else be recorded or duplicated freely. • Roland assumes no liability concerning the containing liquid on top of this unit. Also, • This product contains eParts integrated... -
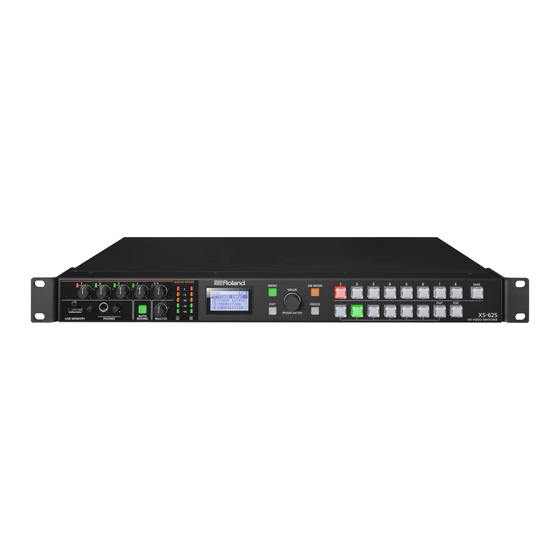
Page 7: Panel Descriptions
Panel Descriptions Front Panel 11 12 Name Explanation Page AUDIO MIXER [1]–[5/6] knobs These adjust the volume level for AUDIO IN 1–5/6. p. 25 SIG/PEAK indicators This lights up when input via AUDIO IN 1–5/6 is detected, and when the volume level is too high. p. -
Page 8: Connecting Your Equipment (Rear Panel / Front Panel)
* For channel 6, setting an assigned input connector is * The XS-62S has three internal output buses (PGM/1, PVW/2, and necessary (p. 13). AUX/3), and you can select the bus to output for each individual connector (p. - Page 9 * When using a USB flash drive for the AUX/3 bus as the first time, you must format it using output. the XS-62S (p. 34). * Never turn off the power or remove the USB flash drive while the USB flash drive is being accessed.
-
Page 10: Multi-View Monitor Display
Panel Descriptions Multi-view Monitor Display The output of the HDMI OUT 3 connector can display a list of input/output videos, an audio level meter, and a menu screen. * Multi-view monitor display is available when the HDMI OUT 3 connector’s “OUTPUT ASSIGN” (p. 16) is set to “MULTI-VIEW. ” * When you press the [MENU] button, the menu appears in the screen (OSD menu). -
Page 11: Basic Operations
About the Auto Off function * By turning the [VALUE] knob while pressing it, you can change the value The power to the XS-62S turns off automatically when all of more greatly. the following states persist for 240 minutes (Auto Off function). -
Page 12: Setting The System Format
Setting the System Format When set at “59.94 Hz” When set at “50 Hz” 480/59.94p 576/50p On the XS-62S, the input/output format is determined according to the system format. You set the input/output format to match 720/59.94p 720/50p the connected equipment. -
Page 13: Setting The Input Formats For Channels 5 And 6
Video Input/Output Settings Setting the Input Formats for Channels 5 and 6 Assigning a Video Source to Channel 6 By factory default, the EDID assignment for channels 5 and 6 is You can assign a video source at the HDMI IN 6 connector or the “INTERNAL”... -
Page 14: Adjusting Output Video
MANUAL SIZE H (*2) This adjusts the horizontal size. MANUAL SIZE V (*2) This adjusts the vertical size. You can adjust the output video to match the equipment receiving the output from the XS-62S. This adjusts the display position in the POSITION H (*2) horizontal direction. -
Page 15: Adjusting The Input Video
Video Input/Output Settings HDMI/ANLG IN6: Adjusting the Input Video HDMI IN 6 connector (*2), RGB/CMPNT/CMPST IN 6 connector (*2) Menu item Explanation This adjusts the image quality of the video input via the respective connectors. For HDMI IN and RGB/CMPNT/CMPST IN6 connectors, INPUT ASSIGN This selects the video signal that is input. -
Page 16: Selecting The Video Of The Bus To Output
MEMO “HDCP” setting. HDMI OUT 3 is also able to output MULTI-VIEW. * The XS-62S must be connected to an HDCP compatible display for HDCP protected video to be connected. Select the [MENU] button 0 “VIDEO OUTPUT” 0 What’s HDCP? “SDI OUT 1,”... -
Page 17: Setting The Operation Mode
Switching Using the PGM-PST Mode You can select the preset video (the video to be output next) for This selects video that is being input to the XS-62S, and outputs it the PVW/2 bus, and after checking that video, output it to the to the PGM/1 bus. -
Page 18: Switching Using The Matrix Mode
Video Operations Switching Using the MATRIX Mode Selecting the Channel for Output to the AUX/3 You can individually select the video that is output to each bus (PGM/1, PVW/2, AUX/3 buses). Here’s how to select the channel that is output to the AUX/3 bus. To select the video that is output to the PGM/1 Press the [SW MODE] button several times to make bus and PVW/2 bus, press the [SW MODE] button... -
Page 19: Switching Automatically (Auto Scan)
Video Operations Switching Automatically (Auto Scan) Using Imported Still Images You can make the video on channels 1 through 6 switch You can take a still image captured from input video or imported automatically. from a USB flash drive, assign it to channel 7 or 8, and output it in the same way as video. -
Page 20: Importing A Still Image From A Usb Flash Drive
Press the [VALUE] knob to apply the setting. 5 When you’re using a USB flash drive for the first time, be sure to format it on the XS-62S (p. 35). Press the [MENU] button to quit the menu. 5 Depending on the USB flash drive, recognition of the flash MEMO drive might take some time. -
Page 21: Deleting A Still Image
Video Operations Deleting a Still Image This deletes a still image saved in the unit. Select the [MENU] button 0 “SYSTEM” 0 “DELETE STILL.” Use the [VALUE] knob to select “STILL IMAGE1” or “STILL IMAGE2” as the memory you want to delete. A “... -
Page 22: Video Composition Operations
Video Composition Operations This composites video. The XS-62S has three built-in types of MEMO composition. 5 It’s not possible to check the Picture-In-Picture effect beforehand in the PVW/2 section of the multi view monitor Compositing Using Picture-in-Picture in DISSOLVE mode (p. 17). -
Page 23: Compositing Using Split
Video Composition Operations Compositing Using Split This composites two video streams in a split screen. The video of the PGM/1 bus is composited above or on the left, and the video of the PVW/2 bus is composited below or on the right. The two videos are composited (split) and output to the PGM/1 This section describes operations when in the PGM/PST mode bus. -
Page 24: Compositing Using Dsk
Video Composition Operations Setting the key type and extraction color Compositing Using DSK This takes video that was composited upstream using PinP etc., To change the key type and extraction color to match the video and performs further downstream compositing with text or you want to composite. -
Page 25: Audio Operations
Adjusting the digital gain This adjusts the head amp gain, sound position, and volume On the XS-62S, separately from head amp gain, you can also balance of audio input to the XS-62S. adjust “digital gain. ” Whereas head amp gain adjusts analog audio, digital gain adjusts digital audio. -
Page 26: Adjusting The Volume Balance
Audio Operations Adjusting the Volume Balance Selecting the Audio of the Bus to Output This adjusts the volume balance of input and the volume level for You can select the audio bus that is output from the AUDIO OUT PGM/1 bus. jacks (XLR, RCA) and PHONES jack. -
Page 27: Applying Effects To Audio
Audio Operations Applying Effects to Audio Menu item Explanation This sets the level used as the threshold for THRESHOLD removing audio. Audio below the level set here You can apply effects and adjust the tone quality. is removed. This adjusts the length of time until the audio Applying Effects to Input Audio RELEASE is fully attenuated after audio falls below the... -
Page 28: Applying Effects To Output Audio
Audio Operations Equalizer (EQ) * PGM/1, PVW/2 bus only Applying Effects to Output Audio This adjusts the tone quality for each frequency band. This applies effects and adjusts the tone quality for master out and AUX-bus audio. Menu item Explanation * Only the limiter can be used on AUX-bus audio (p. -
Page 29: Controlling Fader Operation Automatically (Auto Mixing)
This automatically controls fader operations that normally are performed by an operator (Auto Mixing feature). It lets you rely on Select the [MENU] button 0 “AUDIO AUTO the XS-62S to perform complex fader operations, enabling use in MIXING.” circumstances where no dedicated operator is assigned. -
Page 30: Silencing Specific Audio (Mute)
Audio Operations Silencing Specific Audio (Mute) Interlinking Audio Output to Video Switching (Audio Follow) You can temporarily silence specific audio input or the audio output to a bus (Mute function). You can associate audio with a video switch so that when the video is switched, the specified audio alone is output Muting input audio automatically, and other audio is automatically muted. -
Page 31: Them To Sdi Video
Select the [MENU] button 0 “AUDIO FOLLOW.” From among “AUDIO IN 1” through “AUDIO IN 5/6,” The SDI OUT connectors on the XS-62S accommodate eight channels of embedded audio. The assigned bus (stereo audio) and select the input audio you want to use with Audio the analog input audio (AUDIO IN 1–5/6) can be added to the SDI... - Page 32 Audio Operations Select the [MENU] button 0 “AUDIO EMB.” From among “AUDIO IN 1” through “AUDIO IN 5/6,” select the input audio you want to send to the SDI embedded-audio channel. Use the [VALUE] knob to set the audio type to “DRY”...
-
Page 33: Other Features
The XS-62S all stored settings. -
Page 34: Saving The Unit's Settings On A Usb Flash Drive
* When you’re using a USB flash drive for the first time, be sure to The USB SAVE screen is displayed. format it on the XS-62S (p. 35). Select the file to overwrite, then press the [VALUE] * Depending on the USB flash drive, recognition of the flash drive might take some time. -
Page 35: Formatting Usb Flash Drives
State (Factory Reset) When using a USB flash drive for the first time, be sure to format it on the XS-62S. You can return the values of settings on the XS-62S to their factory NOTE defaults. 5 The XS-62S does not recognize unformatted USB flash If operation that differs from what is described in the owner’s... -
Page 36: Preventing Unintended Operation (Panel Lock)
Select the [MENU] button 0 “SYSTEM” 0 “PANEL Using the dedicated XS-62S RCS program LOCK.” You can connect the XS-62S to a computer via a CONTROL (LAN) connector, and use dedicated program XS-62S RCS to operate the unit by remote control. -
Page 37: Outputting A Tally Signal
* The tally signal output affects the video of the PGM/1 and PVW/2 buses. Roland website For the specifications of the TALLY/GPIO connector, refer to the Reference Manual (PDF), available for download at the Roland website. https://proav.roland.com/... -
Page 38: Appendices
Appendices Troubleshooting If you suspect a malfunction, please check the following points. If this does not resolve the problem, contact a nearby Roland Service Center. Problem Items to check Action Page Video-related problems If you press the [SW MODE] button several times to make it turn yellow or green, the format of the currently selected input channel is shown on this unit’s display. -
Page 39: Rgb/Cmpnt/Cmpst In 6 Connector Specifications
(for 3 seconds or longer) to turn off panel lock. A USB flash drive Has the USB flash drive been The XS-62S does not recognize unformatted USB flash drives. Format the p. 35 cannot be read formatted on the XS-62S? USB flash drive before using it for the first time. -
Page 40: Block Diagram
Appendices Block Diagram Video Section (PGM-PST Mode, DISSOLVE Mode) -
Page 41: Video Section (Matrix Mode)
Appendices Video Section (MATRIX Mode) -
Page 42: Audio Section
Appendices Audio Section INPUT BUS SIG/PEAK HEAD AMP DIGITAL AUDIO Analog Input 1 - 4 GAIN GAIN LEVEL MUTE FOLLOW AUTO 3Band GATE COMP DELAY 75Hz MIXING * Linked when PGM-PST/DISSOLVE mode AUTO MIXING AUDIO MUTE FOLLOW LEVEL TO “AUDIO Embedded Analog 1-4” SIG/PEAK DIGITAL AUDIO... - Page 43 Appendices INPUT BUS OUTPUT BUS PGM/1 PVW/2 AUX/3 * Same as video output bus CH1 Embedded SDI Output1 CH2 Embedded Embededd CH3 Embedded FROM “AUDIO Embedded Analog 1” CH4 Embedded FROM “AUDIO Embedded Analog 2” CH5 Embedded FROM “AUDIO Embedded Analog 3” CH6 Embedded FROM “AUDIO Embedded Analog 4”...
-
Page 44: Transition Effects List
Appendices Transition Effects List Effect Explanation The two pictures are blended together as the video is switched. Video transitions are made with the luminance levels of the two video streams maintained unchanged. This is an abbreviation of “full additive mix. ” The two video streams are compared, and transitions are made with display during transition starting with levels of high luminance. -
Page 45: Main Specifications
Appendices Main Specifications Roland XS-62S: HD Video Switcher 9 Video Video Processing 4:2:2 (Y/Pb/Pr), 8-bit SDI IN 1–4 connectors *3 BNC type x 4 HDMI IN 5–6 *4 *5 HDMI type A x 2 Input Connectors HD DB-15 type x 1 RGB/CMPNT/CMPST IN 6 connector HDMI or RGB/CMPNT/CMPST selected. - Page 46 Owner’s Manual, AC adaptor, Power cord, Rubber feet (4 pcs.) * 0 dBu = 0.775 Vrms * This document explains the specifications of the product at the time that the document was issued. For the latest information, refer to the Roland website.
-
Page 47: Dimensions
Appendices Dimensions... - Page 48 For EU Countries...
Need help?
Do you have a question about the XS-62S and is the answer not in the manual?
Questions and answers