Download Print this page

Advertisement

Quick Links

ELECTRONICS
© Samsung Electronics Co., Ltd. NOV. 2000
Printed in Korea
AC68-01289A
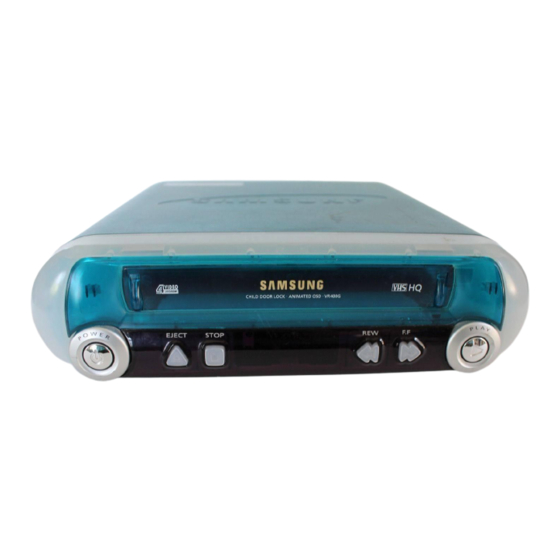
VIDEO CASSETTE RECORDER
VR400G/400P
VR400PC/400RC
SV-400GP/400PP/400RP
SV-400GUP/400PUP/400RUP
SV-400GUM/400PUM/400RUM
SERVICE
For mechanical disassembly and adjustment, refer to the "Mechanical Manual" (DX-9R
VIDEO CASSETTE RECORDER
EJECT
STOP
REW
F.F
Manual
AC68-00001A).
CONTENTS
1. Precautions
2. Alignment and Adjustment
3. Exploded View and Parts List
4. Electrical Parts List
5. Schematic Diagrams

Advertisement

loading

Summary of Contents for Samsung VR400PVR400PC

  • Page 1 For mechanical disassembly and adjustment, refer to the “Mechanical Manual” (DX-9R AC68-00001A). VIDEO CASSETTE RECORDER CONTENTS 1. Precautions ELECTRONICS 2. Alignment and Adjustment 3. Exploded View and Parts List 4. Electrical Parts List 5. Schematic Diagrams EJECT STOP © Samsung Electronics Co., Ltd. NOV. 2000 Printed in Korea AC68-01289A...
  • Page 2: Important Service Guide

    IMPORTANT SERVICE GUIDE ◆ MODE SWITCH (PROGRAM SWITCH) ASSEMBLY POINT 1) When installing the ass’y full deck on the Main PCB, be sure to align the assembly point of mode switch. Fig. 1 ◆ HOW TO EJECT THE CASSETTE TAPE (If the unit does not operate on condition that tape is inserted into housing ass’y) 1) Remove the Holder Worm Œ...
  • Page 3 Alternatively, wear a discharging Wrist-strap device. (Be sure to remove it prior to applying power--this is an electric shock precaution.) Samsung Electronics...
  • Page 4 Always inspect for pinched, out- of-place, or frayed wiring. Do not change the spacing between components and the printed circuit board. Check the AC power cord for damage. Make sure that leads and components do not touch thermally hot parts. Samsung Electronics...
  • Page 5 3) When replacing the cylinder ass’y, be sure to adjust the “X-Point” and “Head switching adjustment”. 4) Among Samsung VCR remote control used for adjustment as a accessory, only the remote control that has figures buttons (0 ~ 9) is available for all adjustment regardless of chassis.
  • Page 6 Alignment and Adjustment 2-1-2 Test point location for adjustment mode setting Short-Circuit Fig. 2-2 Main PCB (Bottom View) Samsung Electronics...
  • Page 7: Mechanical Adjustment

    2) Intermittently short-circuit the two test points on 6) Turn the Power off. Main PCB to set the adjustment mode. (See Fig. 2-2) 3) Press the “5” button of remote control then adjust- ment is operated automatically. (See Fig. 2-1) Samsung Electronics...
  • Page 8: Head Switching Point Adjustment

    6, 7, 20, 30, 34, 35, 39 VR400PC/RC 6, 7, 20, 30, 34, 35, 39 SV-400GP/PP/RP 6, 7, 17, 20, 28, 30, 35, 39 SV-400GUP/PUP/RUP 6, 7, 17, 20, 28, 30, 35, 39 SV-400GUM/PUM/RUM 6, 7, 17, 20, 28, 30, 35, 39 Samsung Electronics...
  • Page 9: Exploded View And Parts List

    3-2 Mechanical Parts (Top Side) - - - - - - - - - - - - - - - - - - - - - - - - - - - - - - - - - - 3-4 3-3 Mechanical Parts (Bottom Side) - - - - - - - - - - - - - - - - - - - - - - - - - - - - - - - 3-6 Samsung Electronics...
  • Page 10: Cabinet Assembly

    Exploded View and Parts List 3-1 Cabinet Assembly Samsung Electronics...
  • Page 11 AC64-00407J AC64-00404J AC39-10220N SV-400RUM AC97-01249A AC64-00407P AC64-00404K AC39-10200N SV-400GUP AC97-01101A AC64-00407K AC64-00404H AC39-10014A SV-400PUP AC97-01132A AC64-00407L AC64-00404J AC39-10014A SV-400RUP AC97-01250A AC64-00407Q AC64-00404K AC39-10014A SV-400GP AC97-01133A AC64-00407M AC64-00404H AC39-10019A SV-400PP AC97-01134A AC64-00407N AC64-00404J AC39-10019A SV-400RP AC97-01251A AC64-00407R AC64-00404K AC39-10019A Samsung Electronics...
  • Page 12 Exploded View and Parts List 3-2 Mechanical Parts (Top Side) Samsung Electronics...
  • Page 13 AC66-30538A LEVER-TENSION ASSY;-,X-9(TS),-,-,-,X-9 K248 AC61-60554A SPRING-TENSION LEVER;-,ES,SUS304-WPB,OD3 K250 AC63-12029A BAND-BRAKE ASSY;-,X-9(TS),-,-,-,X-9 K330 AC66-30550A LEVER-S.BRAKE ASSY;-,POM+SUS,-,-,-,X-9 K340 AC66-30549A LEVER-T.BRAKE ASSY;-,POM+SUS,-,-,-,X-9 K350 AC61-60564A SPRING-BRAKE;-,TENSION,SWP-A,0.25,3,-,X- K490 AC61-21010B HOLDER-CASS ASSY;-,SECC+POM+SUS,-,-,SEIN K502 AC61-60561A SPRING-FL.LEVER-LR;-,ES,SUS304 WPB,PI2.7 K530 AC66-30546A LEVER-FL.ARM ASS’Y;-,SECC+POM+SUS,-,-,-, K546 AC61-50658A GUIDE-CASS. DOOR;X-9,POM,-,NTR,-,- Samsung Electronics...
  • Page 14 Exploded View and Parts List 3-3 Mechanical Parts (Bottom Side) Samsung Electronics...
  • Page 15 B488 AC66-30543A LEVER-S LOAD ASSY;-,-,-,-,-,X-9 B500 AC66-30542A LEVER-T LOAD ASSY;-,-,-,-,-,X-9 B560 AC31-00006A MOTOR-CAPSTAN;-,DMVCMC07JR,-,- B570 AC60-10514A SCREW-CAPSTAN;-,PH,+,M2.6,L6,- G542 AC66-60051A BELT-PULLEY;-,5CM-70,2 * 2,-,71.3,-,X-9 K200 AC61-21012A HOLDER-CLUTCH ASSY;-,-,-,-,-,X-9 K221 AC66-20581A GEAR-CENTER ASSY;-,POM,M=O.5,-,HIGHT T., K222 AC60-30306A WASHER-SLIT;-,-,ID2.1,OD5.0,T0.5,-,POLYS K225 AC66-30547A LEVER-UP DOWN ASSY;-,POM+SUS,-,-,-,X-9 Samsung Electronics...
  • Page 16 Exploded View and Parts List MEMO Samsung Electronics...
  • Page 17: Electrical Parts List

    2003-000994 R-METAL OXIDE(S);33Kohm,5%,2W,AF,TP,3.9x R1SS02 2003-000994 R-METAL OXIDE(S);33Kohm,5%,2W,AF,TP,3.9x R1SS03 2003-000148 R-METAL OXIDE;100OHM,5%,2W,AE,TP,6X16MM R1SS04 2001-000429 R-CARBON;1KOHM,5%,1/8W,AA,TP,1.8X3.2MM R1SS04 2001-000429 R-CARBON;1KOHM,5%,1/8W,AA,TP,1.8X3.2MM R1SS05 2004-000869 R-METAL;3Kohm,1%,1/8W,AA,TP,1.8x3.2mm R1SS05 2004-000869 R-METAL;3Kohm,1%,1/8W,AA,TP,1.8x3.2mm R1SS06 2004-000459 R-METAL;2.2Kohm,1%,1/8W,AA,TP,1.8x3.2m R1SS06 2004-000459 R-METAL;2.2Kohm,1%,1/8W,AA,TP,1.8x3.2m VA1SS1 1405-001026 VARISTOR;470V,600A,9x7mm,TP VA1SS1 1405-001026 VARISTOR;470V,600A,9x7mm,TP ZD1SR1 0403-000571 DIODE-ZENER;UZP43B,43V,40-46V,1W,DO-41,T Samsung Electronics...
  • Page 18 2001-000429 R-CARBON;1KOHM,5%,1/8W,AA,TP,1.8X3.2MM C624 2401-002165 C-AL;100uF,20%,16V,GP,TP,6.3x7,5 R630 2007-001039 R-CHIP;56KOHM,5%,1/10W,DA,TP,2012 C625 2202-002037 C-CERAMIC,MLC-AXIAL;100nF,80-20%,50V,Y5V R631 2001-000864 R-CARBON;56KOHM,5%,1/8W,AA,TP,1.8X3.2MM C626 2203-000192 C-CERAMIC,CHIP;100nF,+80-20%,50V,Y5V,TP, R632 2001-000786 R-CARBON;47KOHM,5%,1/8W,AA,TP,1.8X3.2MM C627 2203-001245 C-CERAMIC,CHIP;0.082nF,5%,50V,NP0,TP,201 R633 2007-000565 R-CHIP;220KOHM,5%,1/10W,DA,TP,2012 C628 2401-002068 C-AL;33uF,20%,16V,GP,TP,5x11,5 R634 2007-000068 R-CHIP;470KOHM,5%,1/10W,DA,TP,2012 C629 2203-001579 C-CERAMIC,CHIP;15nF,10%,50V,NP0,TP,2012 R635 2001-000429 R-CARBON;1KOHM,5%,1/8W,AA,TP,1.8X3.2MM Samsung Electronics...
  • Page 19 2007-000241 R-CHIP;1.5KOHM,5%,1/10W,DA,TP,2012 C329 2203-000476 C-CERAMIC,CHIP;1000nF,+80-20%,16V,Y5V,TP R316 2007-000267 R-CHIP;1.8KOHM,5%,1/10W,DA,TP,2012 C330 2203-000260 C-CERAMIC,CHIP;10nF,10%,50V,X7R,TP,2012 R317 2007-000241 R-CHIP;1.5KOHM,5%,1/10W,DA,TP,2012 C331 2203-000476 C-CERAMIC,CHIP;1000nF,+80-20%,16V,Y5V,TP R318 2007-001177 R-CHIP;8.2KOHM,5%,1/10W,DA,TP,2012 C332 2401-000414 C-AL;10uF,20%,16V,GP,TP,4x7,5 R320 2007-000300 R-CHIP;10KOHM,5%,1/10W,DA,TP,2012 C333 2203-000192 C-CERAMIC,CHIP;100nF,+80-20%,50V,Y5V,TP, R326 2001-000454 R-CARBON;2.2MOHM,5%,1/8W,AA,TP,1.8X3.2M C334 2203-000989 C-CERAMIC,CHIP;47nF,10%,50V,X7R,TP,2012 R327 2007-000981 R-CHIP;5.6KOHM,5%,1/10W,DA,TP,2012 Samsung Electronics...
  • Page 20 R-CARBON;2.2KOHM,5%,1/8W,AA,TP,1.8X3.2M Q801 0501-000303 TR-SMALL SIGNAL;KSA733,PNP,250mW,TO-92,T R723 2001-000449 R-CARBON;2.2KOHM,5%,1/8W,AA,TP,1.8X3.2M R801 2001-000969 R-CARBON;75OHM,5%,1/8W,AA,TP,1.8X3.2MM R725 2001-000449 R-CARBON;2.2KOHM,5%,1/8W,AA,TP,1.8X3.2M R802 2001-000025 R-CARBON;75OHM,5%,1/4W,AA,TP,2.4X6.4MM R727 2001-000290 R-CARBON;10KOHM,5%,1/8W,AA,TP,1.8X3.2MM R803 2007-001239 R-CHIP;910OHM,5%,1/10W,DA,TP,2012 R752 2001-000969 R-CARBON;75OHM,5%,1/8W,AA,TP,1.8X3.2MM R804 2007-001166 R-CHIP;75OHM,5%,1/10W,DA,TP,2012 RM701 AC32-00002A MODULE-REMOCON;-,GP1U291Q,38KHZ,-,7.3X13 R8M1 2001-000786 R-CARBON;47KOHM,5%,1/8W,AA,TP,1.8X3.2MM R8M2 2001-000878 R-CARBON;6.2KOHM,5%,1/8W,AA,TP,1.8X3.2M Samsung Electronics...
  • Page 21 5-7 Display - - - - - - - - - - - - - - - - - - - - - - - - - - - - - - - - - - - - - - - - - - - - - - 5-9 Samsung Electronics...
  • Page 22: Block Identification Of Main Pcb

    Important safety notices : Components identified with the mark have the special characteristics for safety. When replacing any of these components. Use only the same type. ◆ Block Identification of Main PCB Samsung Electronics...
  • Page 23 Schematic Diagrams 5-1 S.M.P.S.(120 Voltage) Samsung Electronics...
  • Page 24 Schematic Diagrams 5-2 S.M.P.S.(Free Voltage) Samsung Electronics...
  • Page 25 Schematic Diagrams 5-3 Power Samsung Electronics...
  • Page 26 Schematic Diagrams 5-4 Logic Samsung Electronics...
  • Page 27 Schematic Diagrams 5-5 Audio/Video Samsung Electronics...
  • Page 28 Schematic Diagrams 5-6 TM-Block/Input-Ouput Samsung Electronics...
  • Page 29 Schematic Diagrams 5-7 Display Samsung Electronics...
  • Page 30 Schematic Diagrams MEMO 5-10 Samsung Electronics...
  • Page 31 DX-9R Manual MECHANICAL 3 File with the SERVICE MANUAL. VHS DECK CONTENTS 1. Disassembly and Reassembly ELECTRONICS 2. Alignment and Adjustment © Samsung Electronics Co., Ltd. NOV. 1998 Printed in Korea AC68-00001A...
  • Page 32: Disassembly And Reassembly

    ¨ Ø ∏ Fig. 1-1 Top parts Location-1 Œ BRACKET FL TOP ´ GEAR FL CAM ˇ MOTOR LOADING ASS’Y ¨ LEVER FL ARM ASS’Y ˆ HOLDER FL CASSETTE ASS’Y Ø LEVER FL DOOR ∏ SLIDER FL DRIVE Samsung Electronics...
  • Page 33 Ò GEAR IDLE ¨ PLATE CYLINDER B Ú LEVER IDLE ˆ PLATE CYLINDER A Æ LEVER T BRAKE ASS’Y Ø ACE HEAD ASS’Y ı DISK T REEL ∏ UNIT PINCH ASS’Y ” LEVER #9 GUIDE ASS’Y ’ LEVER TENSION ASS’Y Samsung Electronics...
  • Page 34 ´ GEAR JOINT 2 ˇ BRAKET GEAR ¨ MOTOR CAPSTAN ASS’Y ˆ LEVER T LOAD ASS’Y Ø GEAR LOADING DRIVE ∏ LEVER S LOAD ASS’Y ” HOLDER CLUTCH ASS’Y ’ BELT PULLEY ˝ SLIDER CAM Ô SLEEVE TENSION Samsung Electronics...
  • Page 35 Note : Take care not to change assembly direction. in the direction of arrow ÒBÓ. Œ 2 SCREWS Œ LEVER FL DOOR ´ BRACKET FL TOP "A" "B" ´ HOOK Fig. 1-5 Lever FL Door Removal Fig. 1-4 Bracket FL Top Removal Samsung Electronics...
  • Page 36 ´ BOSS ˇ SLIDER FL DRIVE "B" BOSS [B] Fig. 1-7 Lever FL Arm Ass’y Removal RAIL [C] Œ HOLDER FL RAIL [D] CASSETTE ASS'Y ´ LEVER FL CASSETTE-R "A" BOSS [A] Fig. 1-6 Holder FL Cassette Ass’y Removal Samsung Electronics...
  • Page 37 GEAR FL CAM Œ SCREW ´ BRACKET GEAR ˆ GEAR JOINT 1 ¨ GEAR JOINT 2 Œ SLIDER FL DRIVE Fig. 1-9 Bracket Gear, Gear FL Cam, Gear Joint 1, 2 Fig. 1-8 Slider FL Drive Removal Removal Samsung Electronics...
  • Page 38 TIMING POINT 2 ˇ GEAR WORM WHEEL ¨ GEAR FL CAM Fig. 1-11 Holder Worm, Gear Worm, Gear Worm Wheel Removal POST GEAR WORM WHEEL TIMING POINT 3 Fig. 1-10 Assembly of Gear FL Cam, Gear Joint 1,2 Samsung Electronics...
  • Page 39 Œ GEAR LOADING DRIVE HOOK [A] ´ SLIDER CAM ˇ LEVER T LOAD ASS'Y ¨ LEVER S LOAD ASS'Y Œ SCREW Fig. 1-12 Motor Loading Ass’y Removal Fig. 1-13 Gear Loading Drive, Slider Cam, Lever T, S Load Ass’y Removal Samsung Electronics...
  • Page 40 PIN A PIN C PIN D PIN B ˇ SLIDER CAM Fig. 1-14 Assembly of Gear Loading Drive, ´ SLEEVE TENSION Slider Cam, Lever T, S Load Ass’y Fig. 1-15 Lever Tension Ass’y, Band Brake Ass’y, Sleeve Tension Removal Samsung Electronics...
  • Page 41 ˇ SPRING BRAKE ´ GEAR IDLE "B" HOOK [C] ´ GEAR IDLE ´ LEVER T BRAKE ASS'Y Œ LEVER S BRAKE ASS'Y HOOK [B] Fig. 1-17 Lever Idle Ass’y Removal Fig. 1-16 Lever S, T Brake Ass’y Removal 1-10 Samsung Electronics...
  • Page 42 1) Remove the Washer Slit Œ. 2) Lift the Holder Clutch AssÕy ´. Œ DISK S REEL Œ WASHER SLIT ´ DISK T REEL ´ HOLDER CLUTCH ASS'Y Fig. 1-18 Disk S, T Reel Removal Fig. 1-19 Holder Clutch Ass’y Removal Samsung Electronics 1-11...
  • Page 43 Œ LEVER UP DOWN ASS'Y ¨ RING ˇ GEAR ∏ HOOK 35˚ Ø POST MAIN BASE Fig. 1-21 Assembly of Lever Up Down Ass’y, Gear Center Ass’y Fig. 1-20 Lever Up Down Ass’y, Gear Center Ass’y Removal 1-12 Samsung Electronics...
  • Page 44 2) When reinstalling, be sure to apply grease on the post pinch roller. HOOK [A] ´ PLATE JOINT Œ UNIT PINCH ASS'Y ˇ SPRING PINCH DRIVE Fig. 1-22 Guide Cassette Door Removal Fig. 1-23 Unit Pinch Ass’y, Plate Joint, Spring Pinch Drive Removal Samsung Electronics 1-13...
  • Page 45 2) After reinstalling, check the bottom side of the Post #9 Guide to stick to the top side of Main Base. ´ LEVER #9 GUIDE ASS'Y Œ SPRING #9 GUIDE Fig. 1-25 FE Head Removal Fig. 1-24 Lever #9 Guide Ass’y Removal 1-14 Samsung Electronics...
  • Page 46 2) Remove the screw Œ. 3) Lift the ACE Head AssÕy ´. Œ SLIDER S ASS'Y Œ SCREW ´ SLIDER T ASS'Y ´ ACE HEAD ASS'Y Fig. 1-27 Slider S, T Ass’y Removal Fig. 1-26 ACE Head Removal Samsung Electronics 1-15...
  • Page 47 1-2-27 Lever Head Cleaner Ass’y Removal (Optional) 1) Release the Hook Œ. 2) Lift the Lever Head Cleaner AssÕy ´. ´ LEVER HEAD CLEANER ASS'Y Œ HOOK Fig. 1-28 Cylinder Ass’y Removal Fig. 1-30 Lever Head Cleaner Ass’y Removal 1-16 Samsung Electronics...
  • Page 48 4) Rotate Gear Worm Wheel ˇ counterclockwise using screw driver again up to the state of eject mode and then pick out the tape. (Refer to Fig. 1-32) ´ MOTOR CAPSTAN ASS'Y Fig. 1-31 Motor Capstan Ass’y Removal FRAME Fig. 1-33 Samsung Electronics 1-17...
  • Page 49 CAPSTAN MOTOR PULLEY BELT PULLEY ∆ HOLDER CLUTCH ASS’Y GEAR CENTER ASS’Y GEAR IDLE (2Point) LOADING MOTOR BAND BRAKE ASS’Y BRAKE T ASS’Y Æ : Cleaning O : Check and replacement in necessary 3 : Add Oil 1-18 Samsung Electronics...
  • Page 50 Fig. 2-1 Location of Tape Transport Adjustment FE HEAD CYLINDER ASS'Y PINCH ROLLER GUIDE ROLLER "S" GUIDE ROLLER "T" POST TENSION #8 GUIDE POST #9 GUIDE POST MAIN BASE ACE HEAD CAPSTAN SHAFT #3 GUIDE POST Fig. 2-2 Tape Travel Diagram Samsung Electronics...
  • Page 51 1) See page 5-1 of the Service Manual for ACE Head position (X-Point) adjustment. Fig. 2-3 Location of ACE Head Adjustment Screw AUDIO HEAD VIDEO HEAD 0 ~ 0 .25 mm CONTROL HEAD Fig. 2-4 ACE Head Height Adjustment Samsung Electronics...
  • Page 52 ) driver to obtain a flat video RF envelope as shown in Fig. 2-8. IDEAL ENVELOPE S HEIGHT S HEIGHT T HEIGHT T HEIGHT TOO HIGH TOO LOW TOO HIGH TOO LOW GUIDE ROLLER T GUIDE ROLLER S Fig. 2-8 Guide Roller S, T Height Adjustment Samsung Electronics...
  • Page 53 145 ± 30 Cassette Torquemeter 4) Transportation of accurate driving force is done by gears. (Gear Center AssÕy) Note : If the spec. does not meet the followings speci- fications, replace the holder clutch assÕy and then recheck. Samsung Electronics...
  • Page 54 Fig. 2-13 Tension Pole and Back Tension Adjustment Note : 1) Mark on Main Base is located in about 1.3mm from inside of bending line. 2) Be careful not to deform the region of adjusting on Main Base up and down at adjusting. Samsung Electronics...
  • Page 55 Alignment and Adjustment MEMO Samsung Electronics...