Hayward Pool Vac Ultra Installation Manual
Hide thumbs
Also See for Pool Vac Ultra:
- Troubleshooting manual (50 pages) ,
- Installation instructions manual (38 pages) ,
- User manual (25 pages)

Related Manuals for Hayward Pool Vac Ultra


Summary of Contents for Hayward Pool Vac Ultra
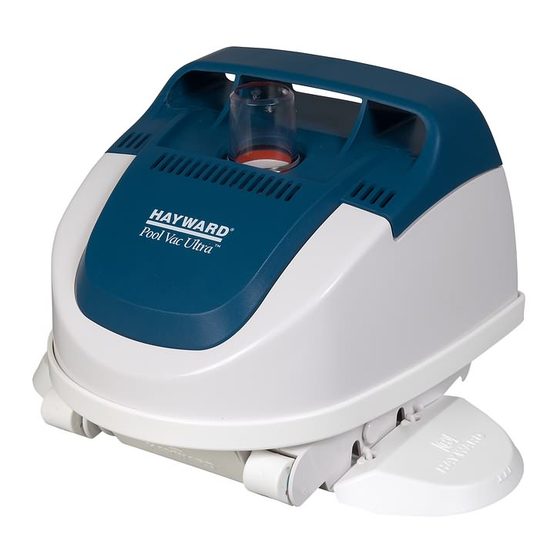
- Page 1 Pool Vac Ultra ® Installation Manual Plunge into a sparkling clean pool... automatically.™ P/N K498FG...
- Page 2 Serial Number ________________________________________________________ Note The Pool Vac Ultra should not be used to clean the pool for spring start-up unless the conditions noted in Step 1 are met. On those occasions, where your pool is subjected to an abnormal debris load,...
- Page 3 Pool Vac Ultra OPTIONAL ACCESSORIES Hayward Skimmer Vac Plate is a great accessory for achieving a pool cleaning balance that automatically alternates between skimming the pool’s surface and vacuuming with each cycle of the filtration system’s time clock. Benefits include: •...
- Page 4 Step 2 Clean or backwash the filter, and clean the hair and lint pot prior to installing the Pool Vac Ultra. Following the installation of Pool Vac Ultra, clean the system at regular intervals according to individual pool conditions.
- Page 5 (The length of each hose section is four feet.) This extra length is absolutely necessary for proper operation of the Pool Vac Ultra. If the hose is not long enough, it will be necessary to purchase additional hose sections from your Hayward Pool Vac Ultra dealer. The hose length supplied (40 feet) has been determined to be sufficient for the majority of pools nationally.
- Page 6 “MAX” side and you have connected your hose to the skimmer, it will be necessary to reduce the vacuum/water flow by using a valve or valves in the filter system, or the Hayward V094 Regulator Valve or an optional Hayward Automatic Skimmer Vacuum Plate designed to adjust vacuum/water flow.
- Page 7 Step 8 Check the rear flap adjuster dial at the left rear of the Pool Vac Ultra. It should be set at position number II which is the middle position (see Figure 5). Submerge the Pool Vac Ultra into the water and remove all of the entrapped air.
- Page 8 When the Pool Vac Ultra does start up a wall, it will not always go all the way up the wall. If the Pool Vac Ultra does not seem to be “sticking” to the wall, turn the rear flap adjuster to position III (see Figure 5).
- Page 9 IMPORTANT TIPS In one piece fiberglass pools there is very little dirt on the walls, but the Pool Vac Ultra will still climb the walls. Due to the shape (severe angles) of most in-ground vinyl liner pools, the Pool Vac Ultra 's cleaning is mostly confined to the bottom (both shallow and deep) and the hopper sides.
- Page 10 Turn the valve to full skim and then adjust the Flow Gauge vacuum gauge by turning the valve toward main drain suction. Usually this valve is the same size as the Pool Vac Ultra hose end, and it will therefore be necessary to purchase a V098 Hose Adapter (see Figure 7).
- Page 11 (3) vertical lines above it. When you can no longer see the horizontal line, the wings must be changed (see Figure 9). The Hayward Pool Vac Ultra Tune-Up Kit is available from your dealer. Shoes, wings and flaps may also be purchased separately.
- Page 12 Remove the old wings by bending the wings up toward the sides of the cleaner, and lift them off their hooks (see Figure 10). If any of the wing hooks are broken, take the Pool Vac Ultra to your dealer for pod replacement as the unit will not function properly if the wings are not properly attached.
- Page 13 (see Figure 12). Push the flap in place. You will actually feel and hear a snap when the flap is in place. Fold the flap in towards the bottom of the Pool Vac Ultra. You will feel some resistance at this point (that is normal).
- Page 14 5. POOL VAC ULTRA BUMPER REPLACEMENT: Replacement of the Pool Vac Ultra Bumper is not recommended as a “Do It Yourself” repair, because there is a slight possibility that the replacement might cause a problem in the propulsion system. We strongly suggest that you consult your Hayward Pool Vac Ultra dealer for this repair.
- Page 15 Lift “Easy Opening Bottom” (see Figures 14 & 15). g) Remove four (4) “A” screws (see Figure 13). h) Lift the Lower Body Assembly off the Pool Vac Ultra (see Figure 13). i) Remove four (4) “B” screws (see Figure 13).
- Page 16 Should the Pool Vac Ultra stop moving or become sluggish due to debris trapped in the throat or inside the unit, the turbine/vacuum chamber is accessible following the instructions on pages 12 and 13 of this manual.
-
Page 17: Troubleshooting Guide
Problem: Slow/no forward movement CAUSES SOLUTIONS Lack of/improper water flow through cleaner Check water flow with Flow Gauge and adjust as per Step 6, Figure 2. Partial blockage of Pool Vac Ultra throat Clear blockage Worn shoes Replace shoes Worn wings Replace wings Improper cleaner model for application Call 1-800-227-1477 (U.S.A. - Page 18 Pool Vac Ultra TROUBLESHOOTING GUIDE Problem: Cleaner climbs to water surface and sucks air CAUSES SOLUTIONS Too much/improper water flow through cleaner Check water flow with Flow Gauge and adjust per instructions in Step 6. Improper tension on rear flap...
- Page 19 Pool Vac Ultra TROUBLESHOOTING GUIDE Problem: Cleaner sticks at steps, corners, etc. CAUSES SOLUTIONS Improper water flow Check water flow with Flow Gauge and adjust as per Step 6, Figure 2. Worn shoes Replace shoes Worn wings Replace wings Hose too short...
- Page 20 C) The integrity of “good” pool plaster is such that a pool vacuum cleaner - automatic or manual cannot remove that plaster. D) The integrity of “good” pool plaster is such that the plaster will cause wear on the Pool Vac Ultra - not vice versa.
- Page 21 Pool Vac Ultra CONCRETE, DESERT & VINYL MODEL REPLACEMENT PARTS...
- Page 22 Pool Vac Ultra CONCRETE, DESERT & VINYL MODEL REPLACEMENT PARTS Ref.No. Part No. Description No. Req’d AXV230DBK Lower body, black AXV230DWH Lower body, white AXV434BKP Flap kit, black (2 flaps, front & rear springs) AXV434WHP Flap kit, white (2 flaps, front & rear springs) AXV015P Pod screw kit, (2 hex head screws &...
- Page 23 Pool Vac Ultra CONCRETE, DESERT & VINYL MODEL REPLACEMENT PARTS Turbine Kit A-Frame Kit a) AXV601P b) AXV601D...
- Page 24 HAYWARD POOL PRODUCTS, INC. 2875 Pomona Boulevard, Pomona, CA 91768 Toll Free: 800-227-1477 www.haywardnet.com Copyright © Hayward Pool Products. All rights reserved. manufactured, sold and distributed by Hayward Pool Products, Inc. AquaPilot® is a registered trademark of Hayward Products.
Need help?
Do you have a question about the Pool Vac Ultra and is the answer not in the manual?
Questions and answers