Table of Contents
Advertisement
Quick Links
Advertisement
Table of Contents

Related Manuals for Reely 1526043


Summary of Contents for Reely 1526043
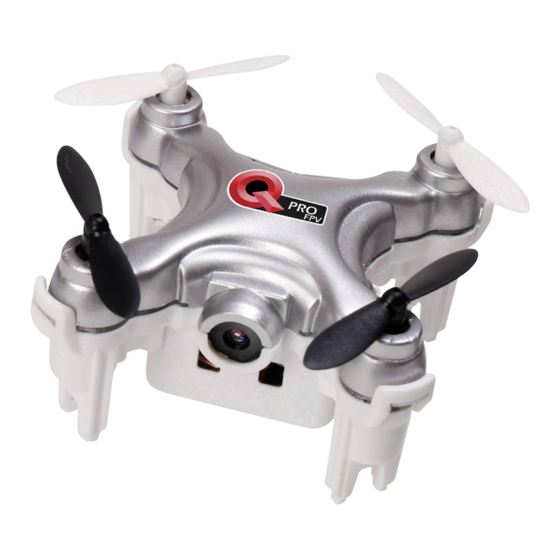
- Page 1 Operating Instructions Electro-Quadrocopter “Q Pro FPV” RtF Item No. 1526043...
- Page 2 Table of Contents Page Introduction ................................4 Explanation of Symbols ............................4 Intended Use ...............................5 Product Description .............................5 Scope of Delivery ..............................6 Safety Notes ................................7 a) General ................................7 b) Before Commissioning ..........................7 c) During Operation ............................8 Battery and Rechargeable Battery Notes ......................9 a) Transmitter..............................9 b) Flight Battery ..............................9 Start Preparations ..............................10...
- Page 3 Page 13. FPV Operation ..............................20 a) General Information .............................20 b) Loading the App ............................20 c) Make the Model Ready to Start ........................21 d) Operation with the App ..........................23 e) Viewing Pictures or Videos ..........................23 f) Operating the Quadrocopter with your Smartphone ..................23 g) Control Using the Position Sensors of your Smartphone ................27 14.
-
Page 4: Introduction
1. Introduction Dear Customer, thank you for purchasing this product. This product complies with the statutory national and European requirements. To maintain this status and to ensure safe operation, you as the user must observe these operating instructions! These operating instructions are part of this product. They contain important notes on commissioning and handling. -
Page 5: Intended Use
3. Intended Use The electrical quadrocopter "Q Pro FPV" is a helicopter-like model solely designed for private use in the model making area and the operating times associated with this. This system is not suitable for other types of use. Any use other than that described above can damage the product and involves additional risks such as short circuit, fire, electric shock, etc. -
Page 6: Scope Of Delivery
5. Scope of Delivery • Pre-installed quadrocopter "Q Pro FPV" • Transmitter • Smartphone holder for transmitter • USB charger • Two spare rotors (front) • Two spare rotors (rear) • Operating instructions Current operating instructions Download the current operating instructions via the link www.conrad.com/downloads or scan the QR code displayed. -
Page 7: Safety Notes
6. Safety Notes In case of damage caused by non-compliance with these operating instructions, the warranty/ guarantee will expire. We do not assume any liability for consequential damage! We do not assume any liability for property damage or personal injury caused by improper use or non-compliance with the safety instructions! In such cases the warranty/guarantee is voided. -
Page 8: C) During Operation
• Ensure sufficient residual capacity (battery tester) of the batteries inserted in the transmitter. If the bat- teries are empty, always replace the complete set, never individual cells only. • When the rotors are running, make sure that neither objects nor body parts are in the rotating and suction area of the rotors. -
Page 9: Battery And Rechargeable Battery Notes
7. Battery and Rechargeable Battery Notes Although use of batteries and rechargeable batteries in everyday life is a matter of course today, there are many dangers and problems. In particular in LiPo/LiIon batteries with high energy content (as compared to conventional NiCd or NiMH batteries), various provisions must be complied with to avoid danger of explosion and fire. -
Page 10: Start Preparations
• Place the model on a fire-resistant surface for charging (e.g. a plate). Keep a distance to flammable objects (use USB extension cable if required). • As the charger and the rechargeable LiPo flight battery both heat up during the charging procedure, it is necessary to ensure sufficient ventilation. -
Page 11: B) Charge Flight Battery
b) Charge Flight Battery A suitable USB mains unit or USB cigarette lighter adapter (neither enclosed) may be used for power supply to the enclosed USB charger; they each must have an output current of at least 500 mA. Alternatively, the USB port of a computer or USB hub with a dedicated mains unit can be used as well that can supply a current of 500 mA per port. -
Page 12: Operating Elements Of The Transmitter
9. Operating Elements of the Transmitter Figure 3 1 On/off switch 2 LED for function control 3 Left control lever (motor speed and yaw in mode 2) 4 Right control lever (roll and nod in mode 2) 5 Switch mode 1 / mode 2 6 Automatic start / landing 7 Smartphone holder Figure 3 shows the Smartphone holder already installed. -
Page 13: Safety Devices
10. Safety Devices The quadrocopter "Q Pro FPV" has a range of safety devices in the transmitter and flight model which protect the model from damage and/or should reduce possible damage to a minimum. The protection mechanisms are identified by LED indicators (flight model) or an acoustic warning signal (transmitter). a) Transmitter The battery condition is continually inspected while the transmitter is in operation. -
Page 14: Information For First Take-Off
11. Information for First Take-Off a) Mode 1 / Mode 2 The remote control mode specifies which control function is executed with which control element at the transmitter. The remote control transmitter is configured to mode 2 after activation. However, you can also switch to mode 1. The explanations on the control functions in mode 2 are presented in these operating instructions. -
Page 15: C) Yaw Function
c) Yaw Function "Yaw" denotes the rotation of the quadrocopter around the yaw axis (vertical axis). This movement either occurs unin- tentionally due to the speed torque of the rotors or intentionally as a flight direction change. This movement is caused by speed changes of the individual rotors towards each other in the quadrocopter. -
Page 16: E) Roll Function
e) Roll Function "Roll" denotes the movement around the centre line which can be compared to the sideways rolling of a ball (or the sideways crawl of a crab). In this way, through lifting one side the quadrocopter moves independent of its forward direction to the side. -
Page 17: The First Start
12. The First Start a) Start The operation and handling of remote controlled flight models must be learned! If you have never steered such a model, start especially carefully and get used to the reactions of the model to the remote control commands first. -
Page 18: B) Automatic Starting And Landing By Pushing A Button
• When you have familiarised yourself a little with the model's flight properties, you may perform additional exercises. Start with simple flight manoeuvres like a flying a meter forwards/back (nod function). Then practice hovering to the left/right (roll function). When you have the practice you need, start flying circles and figure eights. •... -
Page 19: C) Flight Movements
c) Flight Movements After the model has been started, it is in hover flight. Push the left control lever at the transmitter forward carefully. This initiates rising of the model. Put the left control lever into the middle position again to stop rising. Pull the left control lever back carefully to start sinking. -
Page 20: Fpv Operation
13. FPV Operation a) General Information The quadrocopter is serially equipped with a camera that transmits a video to a suitable Smartphone (not enclosed) live by radio. Recording of pictures and control of the camera are possible by an app installed on the Smartphone. Pictures or videos can be saved on the Smartphone and processed further from there. -
Page 21: C) Make The Model Ready To Start
c) Make the Model Ready to Start Make your quadrocopter ready for operation by binding the quadrocopter with the activated transmitter. The model will now emit a transmission signal. Activate the "WiFi function" in your Smartphone under "Settings". Then connect the "Q Pro-FPV" App to the quadro- copter in order to connect the model to your Smartphone. - Page 22 • Symbol "play" (3) Select "play" (3) to open the following operating interface: Figure 14 The symbols shown in the upper row (1 - 11) have the following functions: 1 Leaving the screen 2 Taking pictures with the quadrocopter camera 3 Recording video with the quadrocopter camera 4 Viewing stored pictures or videos 5 Flight mode (beginner / advanced user / pro)
-
Page 23: D) Operation With The App
d) Operation with the App When the quadrocopter is ready to start (see preceding chapter c) and the App is activated in your Smartphone with "Play" (see figure 13, item 3), you will receive a live image from the quadrocopter camera. You can start at once and –... - Page 24 Control with the Operating Elements of the App After starting the App, various operating elements will be displayed on your Smartphone in addition to the camera image. In addition to the operating elements for the camera that you already know (see chapter 13, items 1 - 4), the control elements of a remote control transmitter as well as a symbol for automatic start and automatic landing are "symbolically"...
- Page 25 The two control elements (figure 15, items 12 + 13) in your display represent the control levers of a remote control transmitter and can be controlled in the same manner. Hold the Smartphone with both hands. Touch either "point" with one finger each (best with your thumbs) and control the model as explained for control- ling it with a remote control transmitter in chapters 11 and 12.
- Page 26 In the basic configuration, the App is set to "30%" (figure 15, item 5). This corresponds to beginner's mode (also see chapter 11). The control functions are limited in their effects. If you touch this symbol again, "60%" will appear. This corresponds to advanced mode. The model reacts more agile to the control commands.
-
Page 27: G) Control Using The Position Sensors Of Your Smartphone
g) Control Using the Position Sensors of your Smartphone Smartphones have position sensors, e.g. to turn the display to make the contents legible or recognisable no matter how you hold your device. The quadrocopter can be controlled using these sensors in the control functions "nod" (forward and backward) and "roll"... -
Page 28: Maintenance And Repair
14. Maintenance and Repair a) Regular Cleaning The quadrocopter "Q Pro FPV" is a very simply built flight model. There are no mechanical parts that need to be lubricated or require special maintenance. However, after each flight operation, you should clean the quadrocopter of possible contamination (wool threads, hair, dust etc.). -
Page 29: C) Calibration With The Transmitter
c) Calibration with the Transmitter The quadrocopter "Q Pro FPV" is delivered calibrated perfectly ex works. After harder landings or crashes, it is pos- sible that the quadrocopter will no longer fly as usual. In this case, you should recalibrate the quadrocopter. Calibration can be performed in operation with the Smartphone (see chapter 13) or the remote control transmitter (see this chapter). -
Page 30: Disposal
15. Disposal a) Product Electronic devices are recyclable and should not be disposed of in household waste. Dispose of the prod- uct according to the applicable statutory provisions at the end of its service life. Remove any inserted batteries/rechargeable batteries and dispose of them separately from the product. b) Batteries/Rechargeable Batteries You as the end user are required by law (Battery Ordinance) to return all used batteries/rechargeable batteries. -
Page 31: Technical Data
17. Technical Data a) Transmitter Transmission frequency........2.4 GHz Transmission output .........5 mW Transmitter range ..........max. 20 - 25 m (free field) Operating voltage ..........3 V/DC (2 type micro/AAA batteries) Dimensions (W x L x H) ........155 x 104 x 54 mm Weight (without batteries) .........approx. - Page 32 This is a publication by Conrad Electronic SE, Klaus-Conrad-Str. 1, D-92240 Hirschau (www.conrad.com). All rights including translation reserved. Reproduction by any method, e.g. photocopy, microfilming, or the capture in electronic data processing systems require the prior written approval by the editor. Reprinting, also in part, is prohibited. This publication represent the technical status at the time of printing.
Need help?
Do you have a question about the 1526043 and is the answer not in the manual?
Questions and answers