KSB PumpDrive 2 Installation & Operating Manual
Self-cooling motor-independent
Hide thumbs
Also See for PumpDrive 2:
- Supplementary operating manual (16 pages) ,
- Supplementary operating manual (20 pages)

Subscribe to Our Youtube Channel
Related Manuals for KSB PumpDrive 2


Summary of Contents for KSB PumpDrive 2
- Page 1 Self-cooling Motor-independent Frequency Inverter PumpDrive 2 Installation/Operating Manual...
- Page 2 Legal information/Copyright Installation/Operating Manual PumpDrive 2 Original operating manual All rights reserved. The contents provided herein must neither be distributed, copied, reproduced, edited or processed for any other purpose, nor otherwise transmitted, published or made available to a third party without the manufacturer's express written consent.
-
Page 3: Table Of Contents
Checks to be carried out prior to installation.................... 32 Mounting PumpDrive............................. 32 7.3.1 Motor mounting .......................... 32 7.3.2 Wall/control cabinet mounting...................... 32 Electrical connection ............................ 33 7.4.1 Safety regulations .......................... 33 7.4.2 Information for planning the system .................... 34 7.4.3 Electrical connection.......................... 38 Commissioning/Shutdown ........................ 64 Commissioning wizard ........................... 64 PumpDrive 2 3 of 212... -
Page 4: Table Of Contents
Automatic motor adaptation (AMA) of frequency inverter................ 67 8.5.1 Automatic motor adaptation (AMA) of frequency inverter for asynchronous motors.... 68 8.5.2 Automatic motor adaptation (AMA) of frequency inverter for KSB SuPremE motors .... 69 Entering the setpoint ............................. 70 Pump operation.............................. 72 8.7.1 Single-pump operation........................ 72 8.7.2... -
Page 5: Glossary
Proprietary CAN bus that is used in dual and multiple pump configurations for facilitating communication among the frequency inverters. The KSB device bus cannot be used for external communication or for communication with the KSB local bus (PumpDrive 1). Pump... -
Page 6: Safety
▪ The product must not be used in potentially explosive atmospheres. PumpDrive 2 6 of 212... -
Page 7: Personnel Qualification And Training
▪ Carry out work on the product during standstill only. ▪ As soon as the work has been completed, re-install and re-activate any safety- relevant devices and protective devices. Before returning the product to service, observe all instructions on commissioning. PumpDrive 2 7 of 212... -
Page 8: Unauthorised Modes Of Operation
The software has been specially created for this product and thoroughly tested. It is impermissible to make any changes or additions to the software or parts of the software. Software updates supplied by KSB are excluded from this rule. 1.11 Electromagnetic compatibility (EMC) -
Page 9: Line Harmonics Requirements
▪ EN 61000-4-5: Electromagnetic compatibility (EMC) – Part 4-5: Testing and measurement techniques – Surge immunity test ▪ EN 61000-4-6: Electromagnetic compatibility (EMC) – Part 4-6: Testing and measurement techniques – Immunity to conducted disturbances, induced by radio-frequency fields PumpDrive 2 9 of 212... -
Page 10: Transport/Temporary Storage/Disposal
1. On transfer of goods, check each packaging unit for damage. 2. In the event of in-transit damage, assess the exact damage, document it and notify KSB or the supplying dealer (as applicable) and the insurer about the damage in writing immediately. -
Page 11: Storage
Fig. 4: Transporting the motor with frequency inverter Fig. 5: Transporting the frequency inverter with lifting gear 2.3 Storage If the ambient conditions for storage are met, the function of the control unit is safeguarded even after a prolonged period of storage. PumpDrive 2 11 of 212... -
Page 12: Disposal/Recycling
- Line chokes with copper windings - Copper lines for internal wiring 3. Dispose of materials in accordance with local regulations or in another controlled manner. PCBs, power electronics, capacitors and electronic components are all special waste. PumpDrive 2 12 of 212... -
Page 13: General
The serial number uniquely describes the product and is used as identification in all further business processes. In the event of damage, immediately contact your nearest KSB service centre to maintain the right to claim under warranty. 3.2 Target group This operating manual is aimed at the target group of trained and qualified specialist technical personnel. -
Page 14: Operation
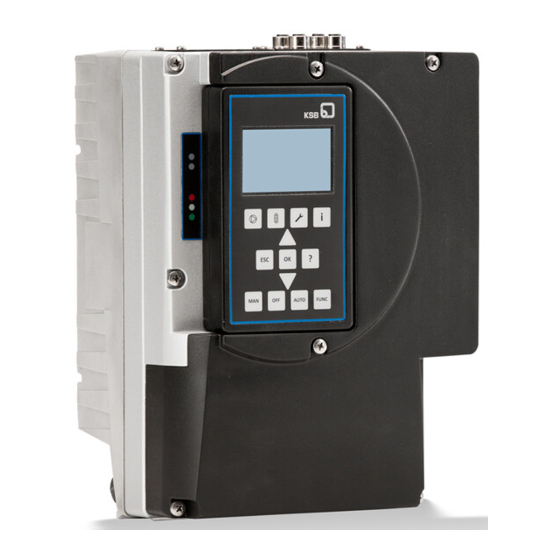
Display of the master and login level Display of up to four (4) operating values: One operating value is displayed in large format. Three (3) operating values are displayed in small format. The operating values scroll through cyclically. PumpDrive 2 14 of 212... - Page 15 ▪ Switches to automatic operating mode. FUNC operating key: FUNC ▪ Parameterisable function key Manual mode via control panel NOTE After a power failure, the frequency inverter reverts to the OFF operating mode. Manual mode must be restarted. PumpDrive 2 15 of 212...
-
Page 16: Menu Keys
Fig. 8: Menu display Name of current menu/parameter Parameter number of parameter selected in selection list Display of the current operating mode Display of the master and login level Parameter/submenu selection list Display of operating status PumpDrive 2 16 of 212... - Page 17 0000 1-1-1 Log in as customer Service Login 0000...9999 1-1-2 Log in for access to special parameters for KSB Service 1-1-4 Logout Log out of all access levels NOTE If no keys are pressed for ten minutes, the system will automatically return to the standard access level.
- Page 18 Acknowledgement You can acknowledge the message once the cause has been rectified. Messages can be acknowledged separately in the Diagnosis menu. A message can also be acknowledged via a digital input. Digital input 2 is defaulted for this purpose. PumpDrive 2 18 of 212...
- Page 19 General settings can be made or the settings for the process optimised in the Settings section. 4.1.2.3.1 Setting the display language The display ships from the factory with support for 4 languages (language package). A language package can be changed using the KSB Service Tool: Table 17: Parameters for display language Parameter Description Possible settings...
- Page 20 2. Using the arrow keys, select the operating value to be displayed from the list. 3. Press OK key. 4. Select additional, required operating values from the list and confirm by pressing the OK key. PumpDrive 2 20 of 212...
-
Page 21: Service Interface And Led Traffic Light Function
▪ Configuring and parameterising the frequency inverter with the service software ▪ Software update ▪ Saving and documenting set parameters LED traffic light function The LED traffic light function provides information about the current PumpDrive operating status. PumpDrive 2 21 of 212... - Page 22 4 Operation Table 19: LED description Description One or more than one alert is active Amber One or more than one warning is active Steady light: Trouble-free operation Green PumpDrive 2 22 of 212...
-
Page 23: Commissioning Report
Number of master control devices ..[Quantity] Bus connection Field bus type ...... Number of modules ..[Quantity] Comments ..............................................................................................................................................................................................KSB Customer Service/name Client/name ....................................Place, date, signature Place, date, signature PumpDrive 2 23 of 212... -
Page 24: Description
Table 20: Designation example Item P D R V 2 Table 21: Key to the designation Item Code Description Generation PDRV2 2. PumpDrive generation ✘ ✘ Variant PumpDrive 2 Eco ✘ PumpDrive 2 ✘ 8-13 Power 000K37 = 0,37 kW ✘ ✘ 000K55 = 0,55 kW ✘ ✘ 000K75 = 0,75 kW ✘... - Page 25 6 Description Item Code Description 17-20 Motor type 1LE1 Siemens 1LE1/ KSB 1PC3 ✘ ✘ 1LA7 Siemens 1LA7/ KSB 1LA7 ✘ ✘ 1LA9 Siemens 1LA9/ KSB 1LA9 ✘ ✘ 1LG6 Siemens 1LG6/ KSB 1LG6 ✘ ✘ SUPB KSB SuPremE B ✘ ✘ KSB(DM) Cantoni ✘...
-
Page 26: Name Plate
PumpDrive type code KSB order number Pump designation Date of manufacture 6.4 Power range and sizes Table 22: Power range for 2-pole (3000 rpm), 4-pole (1500 rpm) and 6-pole (1000) asynchronous motors and KSB SuPremE Size Nominal electrical power Nominal output current Mains-side input current... -
Page 27: Technical Data
TN-S, TN-CS, TN-C, TT and IT mains (to IEC/EN 60364) Output data Frequency inverter output frequency 0 - 70 Hz for asynchronous motors 0 - 140 Hz for KSB SuPremE PWM carrier frequency Range: 2 - 8 kHz (Factory setting: 4 kHz) Phase rate of rise dv/dt 5000 V/µs max. - Page 28 Nominal motor current Table 24: Technical data of I/O extension board Characteristic Value Analog inputs Number of parameterisable analog inputs Input type Differential Maximum voltage (with reference to GND) + 10 V Current input 0/4 – 20 mA PumpDrive 2 28 of 212...
- Page 29 OFF level < 2 V Output current Max. 40 mA Differential current < 100 µA Reverse polarity protection Provided Short-circuit protection and overload protection Provided Relay outputs Number of parameterisable relay outputs 1 changeover contacts 5 NO contact PumpDrive 2 29 of 212...
-
Page 30: Dimensions And Weights
460 350 290 280 309 582 350 290 280 565 M8 × 14 ..18K500.. 18,5 ..22K00..30K00.. E ..37K00.. 700 455 340 375 475 819 455 340 375 800 M8 × 14 ..45K00..55K00.. The dimensions provided refer to PumpDrive including the wall-mounting brackets. Without motor adapter PumpDrive 2 30 of 212... -
Page 31: Mounting Options
▪ Cabinet mounting The installation kit required for the cabinet-mounted model is included in the scope of supply. Installation kits for subsequent conversion to cabinet mounting for existing pump systems are available as accessories. PumpDrive 2 31 of 212... -
Page 32: Installation At Site
7.3.2 Wall/control cabinet mounting The wall-mounted model is supplied with the installation kit required for wall mounting as standard. Installation kits for subsequent conversion to the wall mounting configuration for existing pump systems are available from KSB. PumpDrive 2 32 of 212... -
Page 33: Electrical Connection
WARNING Direct connection between power supply and motor connection (bypass) Damage to the frequency inverter! ▷ Never establish a direct connection between the power supply and motor connection (bypass) of the frequency inverter. PumpDrive 2 33 of 212... -
Page 34: Information For Planning The System
AC1 duty rating; the rated current values of the frequency inverters used are added and the result is increased by 15 %. Motor connection cable Shielded cables must be used as motor connection cables. Control cable Shielded cables must be used as control cables. PumpDrive 2 34 of 212... - Page 35 ..45K00..55K00.. 122,4 Impairment of protection provided by enclosure when cable diameters other than those specified are used. Observe the information on the use of line chokes provided in the Accessories and Optional Equipment section. PumpDrive 2 35 of 212...
- Page 36 ▪ Metal cable ducts made from a single piece with a minimum coverage of 80 % (if shielded connection cables cannot be used) Installation at site/ For more effective shielding, install the frequency inverter in a metal cabinet. environment PumpDrive 2 36 of 212...
- Page 37 (in the power range up to and including 45 kW). Line chokes also reduce mains feedback and improve the power factor. The scope of DIN EN 61000-3-2 must be heeded. Appropriate line chokes are available from KSB. (ð Section 12.2.8, Page 205) PumpDrive 2 37 of 212...
- Page 38 C-shaped housing cover Fig. 17: C-shaped housing cover 1. Remove the cross-recessed head screws on the C-shaped cover. 2. Remove the C-shaped cover. PumpDrive 2 38 of 212...
- Page 39 Before connecting the power and motor connection cables, carefully pry open the protective cover using a wide screwdriver. Sizes D and E:Undo the screws on the protective cover. Fig. 19: Removing the protective cover 2. Remove the protective cover. PumpDrive 2 39 of 212...
- Page 40 7.4.3.3 Connecting mains and motor DANGER Touching or removing the terminals and connectors of the braking resistor Risk of fatal injury due to electric shock! ▷ Never open or touch the terminals and connectors of the braking resistor. PumpDrive 2 40 of 212...
- Page 41 In the event of a short circuit in the winding (short circuit between phase and PTC), a fuse trips and prevents carryover of low voltages to the low-voltage level. In the case of a fault or malfunction, this fuse can only be replaced by KSB service personnel.
- Page 42 L1 L2 L3 PE U MOTOR Fig. 23: Establishing the power supply and motor connections, size C ① Mains connection ② Motor connection ③ PTC connection ④ Braking resistor ⑤ Motor PTC ⑥ Jumper for IT mains PumpDrive 2 42 of 212...
- Page 43 Connect the cores for a PTC connection/PTC thermistor to the PTC terminal strip (3). If monitoring devices (PTC/ no PTC connection is available on the motor side, parameter 3-2-3-1 (PTC Analysis) PTC thermistor) must be deactivated. PumpDrive 2 43 of 212...
- Page 44 "Establishing the power supply and motor connections, size B") must be removed. 7.4.3.3.1 Connecting the power supply when the master switch is installed If the optional master switch is in the OFF position, the frequency inverter and the motor are disconnected from the mains. PumpDrive 2 44 of 212...
- Page 45 2. Sizes A, B and C: Connect the power cable and the motor connection cable to the designated terminals on the inside of the protective cover. Sizes D and E: Connect the power cable and motor connection cable directly to the master switch. PumpDrive 2 45 of 212...
- Page 46 When directly connecting a motor line to the designated motor terminals (U, V, W), the motor connector fitted at the factory must first be removed. Fig. 28: Disconnecting the cores of the motor connector 1. Disconnect the cores of the motor connector at terminals U, V and W. PumpDrive 2 46 of 212...
- Page 47 IP55 enclosure protection as specified in the technical data is only provided if the cover has been fitted properly. 7.4.3.3.3 Retrofitting a frequency inverter for a KSB SuPremE B2 motor (for sizes C, D and E only) The heat sink is closed with a plug. The following steps must be carried out to retrofit for a KSB SuPremE B2 motor.
- Page 48 5. Connect the motor cables as described. (ð Section 7.4.3.3, Page 40) Fig. 34: Inserting motor cables 6. Connect the PTC cables that are supplied as standard with the KSB SuPremE B2 motor. 7. Close the frequency inverter with the protective cover and the housing cover.
- Page 49 7.4.3.5 Installing and connecting the M12 module The M12 module can be used to connect multiple frequency inverters to implement dual or multiple pump configurations. The M12 module also allows PumpMeter to be connected to the frequency inverter via Modbus. PumpDrive 2 49 of 212...
- Page 50 7 Installation at Site Fig. 38: M12 module C - D Connection for dual/multiple pump configurations (KSB device bus) Connection for PumpMeter (Modbus) Connector for the bus cable crosslink (Modbus) ▪ Can be retrofitted ▪ Internal T-connector (bus looped through) [uninterruptible even in the event of a frequency inverter power failure] ▪...
- Page 51 ▷ Cover unused M12 sockets of the M12 module with a cap (included in the scope of supply). Connecting dual and multiple pump configurations Designing dual and multiple pump configurations via a cable pre-configured especially for this connection (see Accessories) PumpDrive 2 51 of 212...
- Page 52 (colour: light purple, connector: angled, connector: angled) Connection for dual/multiple pump configuration, PumpDrive No. 2 NOTE Terminating resistors (refer to KSB accessories) that can be connected to the unassigned M12 connector (C or D) at the M12 module are required for the bus terminator.
- Page 53 PumpMeter) Blue 0 V White Input (4 - 20 mA) Grey Vent opening Table 32: Pin assignment, M12 module, input C/D Conductor colour coding M12 socket C and D assignment Shielding Black CAN GND White CAN H PumpDrive 2 53 of 212...
- Page 54 ▪ Internal T-connector (bus looped through) [uninterruptible even in the event of a frequency inverter power failure] ▪ Pre-configured cables (ð Section 12.2, Page 197) ▪ Connector for self assembly (ð Section 12.2, Page 197) Installing the field bus module The field bus module can be fitted in an available slot of the frequency inverter. PumpDrive 2 54 of 212...
- Page 55 Fig. 48: Securing the M12 module CAUTION Incorrect assembly Impairment of protection provided by the enclosure (protection may be compromised)! ▷ Cover unused M12 sockets of the M12 module with a cap (included in the scope of supply). PumpDrive 2 55 of 212...
- Page 56 ▪ 1 analog output ▪ 3 digital inputs ▪ 2 digital outputs ▪ 1 changeover contact relay ▪ 5 NO contact relays The I/O extension board can be pre-installed at the factory or retrofitted as an accessory. PumpDrive 2 56 of 212...
- Page 57 Flexible cores Flexible cores with wire end sleeves M12: 3,5-7,0 Terminal strip A, B, C 0,2-1,5 0,2-1,0 0,25 - 0,75 M16: 5,0-10,0 Impairment of protection provided by enclosure when cable diameters other than those specified are used. PumpDrive 2 57 of 212...
- Page 58 7 Installation at Site DI-E N C 10 +24V DIC OM1 +24V AO1-GND +24V AIN2 + AIN2 - +24V AIN1 + AIN1 - NC 2 C OM2 +24V NC 1 C OM1 +24V Fig. 53: Control terminals PumpDrive 2 58 of 212...
- Page 59 If the internal 24 V source is used, the internal GND must also be connected to the electrically isolated DICOM1 ground of the digital inputs. A wire jumper can be used between GND and DICOM1 for this purpose. PumpDrive 2 59 of 212...
- Page 60 AIN2 - AIN2 - Fig. 54: Connecting sensors to the differential analog input Current sensor Output signal: 0/4 - 20 mA 2-wire Current sensor Output signal: 0/4 - 20 mA 3-wire Voltage sensor Output signal: 0/2 - 10 V 3-wire PumpDrive 2 60 of 212...
- Page 61 If the internal 24 V source is used, the internal GND must also be connected to the electrically isolated DICOM2 ground of the digital inputs. A wire jumper can be used between GND and DICOM2 for this purpose. PumpDrive 2 61 of 212...
- Page 62 1. Undo the screws on the C-shaped housing cover. Remove the display. 2. Position the graphical control panel and screw on the C-shaped housing cover. Changing the installation position of the control panel Table 37: Possible installation positions for the control panel Standard Rotated 180° PumpDrive 2 62 of 212...
- Page 63 NOTE If the control panel is removed during operation and at the same time, the power supply to the DI EN is severed at the internal 24 V supply line, the frequency inverter is deactivated. PumpDrive 2 63 of 212...
-
Page 64: Commissioning/Shutdown
If a multiple pump system is identified, the user is prompted to specify the corresponding parameters after having entered the motor data. If the commissioning wizard is later started again via parameter 3-1-5, it is only run at the frequency inverter where the start was initiated. PumpDrive 2 64 of 212... -
Page 65: Control Point Concept
Nominal Motor Frequency 0,0…200,0 Hz Dependent on size/ motor Nominal frequency of motor as per name plate 3-2-1-4 Nominal Motor Current 0,00…150,00 A Dependent on size/ motor Nominal current of motor as per name plate PumpDrive 2 65 of 212... -
Page 66: Motor Control Method
8.4 Motor control method The frequency inverter gives you a choice of several motor control methods: ▪ Vector control method for the KSB SuPremE motor ▪ Vector control method for the asynchronous motor ▪ V/f control method for the asynchronous motor The V/f control method can be selected for basic applications. -
Page 67: Automatic Motor Adaptation (Ama) Of Frequency Inverter
Automatic motor adaptation can only be started from the Auto Stop state. For this purpose, the frequency inverter must be in automatic mode and the System Start / Stop parameter (1-3-1) must be set to Stop. PumpDrive 2 67 of 212... -
Page 68: Automatic Motor Adaptation (Ama) Of Frequency Inverter For Asynchronous Motors
AMA Fault alert is output. In this scenario, the extended motor data is not saved and AMA must be restarted. The following extended motor data (3-3-3-2 to 3-3-3-5) is calculated or measured depending on the AMA type selected under Start Automatic Motor Adaptation (3-3-3-1): PumpDrive 2 68 of 212... -
Page 69: Automatic Motor Adaptation (Ama) Of Frequency Inverter For Ksb Supreme Motors
8.5.2 Automatic motor adaptation (AMA) of frequency inverter for KSB SuPremE motors Automatic motor adaptation for the KSB SuPremE motor is started using the Update Motor Parameters (3-3-4-1) parameter. Using the nominal motor data as a basis, the extended motor data is determined which ensures very good control of the KSB SuPremE motor. -
Page 70: Entering The Setpoint
8 Commissioning/Shutdown NOTE If the extended motor data for the KSB SuPremE motor cannot be determined, a No Matching Motor Data Available alert is output. The name plate data of the KSB SuPremE motor should be checked and verified. 8.6 Entering the setpoint NOTE The parameter values and value ranges/units entered are mutually dependent. - Page 71 Setpoint/Control Value Active" (ð Section 8.10.1, Page 114) . If the setpoint or control value is specified or defined via a/the field bus module, the control point must also be set to Local to activate the alternative setpoint or control value. PumpDrive 2 71 of 212...
-
Page 72: Pump Operation
A control value can be defined in automatic mode using an external standard signal. Fig. 57: Terminal wiring diagram, open-loop control mode (dashed line = optional) Start / Stop External setpoint signal (ð Section 8.6, Page 70) Signal relay 1 (ð Section 8.10.3, Page 120) Signal relay 2 (ð Section 8.10.3, Page 120) PumpDrive 2 72 of 212... - Page 73 Control) parameter (1-3-3). The system start is activated by the System Start / Stop (1-3-1) parameter. The frequency inverter then starts as soon as it is set to automatic or manual mode and the enable is given via DI-EN. PumpDrive 2 73 of 212...
- Page 74 To activate the process controller, the type of process to be controlled must be selected via the Type of Control parameter (3-6-1). When OFF (Open-loop Control) is selected, the process controller is deactivated and the frequency inverter runs in open-loop control mode. PumpDrive 2 74 of 212...
- Page 75 (refer to parameter 3-11). If the value range or unit is subsequently changed, all dependent parameters must be checked for correctness again. PumpDrive 2 75 of 212...
- Page 76 Determination of Controller Parameters Finished message. The single-pump system or multiple pump system continues to operate uninterrupted with the new controller parameters. If the process of determining the controller parameters could not be completed correctly, the display shows the Automatic PumpDrive 2 76 of 212...
- Page 77 (refer to parameter 3-11). If the value range or unit is subsequently changed, all dependent parameters must be checked for correctness again. PumpDrive 2 77 of 212...
- Page 78 Configurable setpoint. This parameter is disabled if the setpoint is specified via DIGIN/ANIN. Otherwise, the setpoint source is selected via the Control Point parameter (Local/Field Bus). 3-8-2-1 Analog Input 2 Signal 4…20mA Sensor signal at analog input 2 PumpDrive 2 78 of 212...
- Page 79 Example The frequency inverter is to control the system to achieve a setpoint of 6.7 bar in a differential pressure control process. For this purpose, a differential pressure sensor (4 - 20 mA) with a measuring range of 0 to 10 bar is connected to analog input 2 of PumpDrive 2 79 of 212...
- Page 80 It is activated by setting the Type of Control parameter (3-6-1) to Differential Pressure (Sensorless). Setting the setpoint (ð Section 8.6, Page 70) . PumpDrive 2 80 of 212...
- Page 81 (3-5-2-1 and 3-5-2-2) must have been entered. NOTE For power curves with sections of the curve being constant over the flow rate (flat characteristic curve), signals must be made available for the suction pressure and discharge pressure of the pump. PumpDrive 2 81 of 212...
-
Page 82: Multiple Pump Configuration
All signals required to control the system must be connected to the master control device. The master control role is assigned to a frequency inverter via the Role in Multiple Pump System parameter (3-7-1). PumpDrive 2 82 of 212... - Page 83 Switching limits are defined using the parameters listed in the "Start/stop parameters" table. These switching limits are parameterised for changing over from one to two pumps. Switching limits for starting and stopping additional pumps are calculated automatically and do not need to be defined. PumpDrive 2 83 of 212...
- Page 84 The following diagram shows the switching limits of a running pump in a multiple pump system and the associated parameters in the head / flow rate diagram. PumpDrive 2 84 of 212...
- Page 85 The "Switching limits of two running pumps in a multiple pump system" diagram shows the switching limits of two running pumps in a multiple pump system and the associated parameters in the head/flow rate diagram. PumpDrive 2 85 of 212...
- Page 86 Effective direction of the switching limits Coloured area Operating range of two running pumps KSB PumpDynamicControl (3-7-3-6): This parameter determines the position of the stop limits relative to the start limits; see "Switching limits of two running pumps in a multiple pump system" diagram and greatly impacts the dynamic response and energy efficiency of the system.
-
Page 87: Application Functions
▪ Flow rate estimation ▪ Operating point monitoring ▪ Stand-by (sleep) mode ▪ Sensorless differential pressure control ▪ Multiple pump configuration If the frequency inverter is parameterised at the factory, all pump-specific parameters are already specified. PumpDrive 2 87 of 212... - Page 88 Table 61: Parameters for matching PumpDrive to the pump Parameter Description Possible settings Factory setting 3-4-3-1 Flow Rate Q_0 Minimum to maximum flow rate Pump-specific Flow Rate Q_1 Minimum to maximum flow rate Pump-specific 3-4-3-2 PumpDrive 2 88 of 212...
-
Page 89: Protective Functions
Table 62: Thermal motor protection Parameter Description Possible settings Factory setting 3-2-3-1 PTC Data Analysis ▪ OFF Motor temperature monitoring ▪ ON 3-2-3-2 Thermal Motor Protection Behaviour ▪ Non-self-acknowledging Non-self-acknowledging ▪ Self-acknowledging Behaviour for detection of excessive motor temperature PumpDrive 2 89 of 212... - Page 90 0.00 ... 150.00 A Dependent on size Nominal current of motor as per name plate Max. Motor Current in % of 0 ... 150 % 3-2-1-4 110 % 3-3-7-1 Nominal Motor Current Setting the maximum motor current permissible PumpDrive 2 90 of 212...
- Page 91 (pump changeover). 3-9-1-3 Speed During Failure Minimum to maximum speed of 3-2-2-1 motor Fixed speed that is activated when the actual value fails. PumpDrive 2 91 of 212...
- Page 92 NOTE If dry running protection was activated via an external sensor, sensorless dry running detection is inactive. Protection against dry running and hydraulic blockage is based on a learning function that is run through once. PumpDrive 2 92 of 212...
- Page 93 Before the learning function is run, it must be checked whether it is permissible to operate the pump against the closed valve for a short period. This is not the case for KSB pumps of the Sewatec and Sewabloc type series. NOTE When the minimum speed is changed, the dry-running learning function must be restarted.
- Page 94 For this purpose, the Automatic Functional Check Run (3-9-2-1) parameter must be set to After Idle Period. The Functional Check Run Duration (3-9-2-4) parameter is used to specify the duration of the functional check run. PumpDrive 2 94 of 212...
- Page 95 Starting the functional check run via the control panel The functional check run can be started immediately via the control panel. To do this, activate the Immediate Functional Check Run parameter (1-3-6). This function can also be assigned to the FUNC key. PumpDrive 2 95 of 212...
-
Page 96: Flow Rate Estimation
The actual characteristic curves of a pump can differ from the documented ones as a result of manufacturing tolerances. Inaccuracies then arise for flow rate estimation. Higher accuracies can be reached by using the characteristic curves obtained from a pump acceptance test. PumpDrive 2 96 of 212... - Page 97 Inside Pipe Diameter, Suction Pressure 0...1000 mm 0,0 mm Measuring Point Inside pipe diameter at the suction pressure measuring point 3-5-2-2 Pipe Diameter, Discharge Pressure 0...1000 mm 0,0 mm Measuring Point Inside pipe diameter at the discharge pressure measuring point PumpDrive 2 97 of 212...
-
Page 98: Energy Optimisation
Piping with diagram of pressure losses Consumer with diagram of inlet pressure The discharge pressure of the pump (1) can be used in open piping systems to achieve an almost constant pressure upstream of the consumer (3). PumpDrive 2 98 of 212... - Page 99 To this end, the Dynamic Pressure Compensation Method parameter (3-9-3-1) is set to Flow Rate. The following diagram shows the setpoint compensation curve (solid line) as a function of the flow rate and relevant parameters. PumpDrive 2 99 of 212...
- Page 100 To this end, the Dynamic Pressure Compensation Method parameter (3-9-3-1) is set to Speed. The following diagram shows the setpoint compensation curve (solid line) as a function of the speed and relevant parameters. PumpDrive 2 100 of 212...
- Page 101 3-9-3-2 or 3-9-3-3 Minimum Setpoint Compensation Minimum to maximum limit of Dependent on the unit 3-9-3-5 Minimum setpoint compensation for measuring range opening the swing check valve in the case of low pump flow rates. PumpDrive 2 101 of 212...
- Page 102 Dynamic Pressure Compensation Method (3-9-3-1) parameter has been set to Speed. 3-9-3-2 Fig. 73: Setpoint compensation curve for dynamic pressure compensation based on flow rate Flow rate independent setpoint Setpoint Compensation Compensated setpoint PumpDrive 2 102 of 212...
- Page 103 Sleep mode only takes effect in closed-loop control mode. In multiple pump systems, sleep mode only takes effect if just one pump is running. Sleep mode is activated via parameter (3-9-4-1). PumpDrive 2 103 of 212...
- Page 104 Pressure drops as soon as fluid is withdrawn. If the configurable limit value for the Maximum Control Deviation for Restart (3-9-4-5) is achieved, the pump starts up again (t3). NOTE In a multiple pump system, starting of an additional pump cancels the stop attempt. PumpDrive 2 104 of 212...
- Page 105 The energy savings meter determines the electrical energy saved by operation on a frequency inverter. To this end, the difference between the current input power of the pump set (1-2-1-4) and a reference power is determined and integrated over PumpDrive 2 105 of 212...
- Page 106 The method with constant reference power requires specification of the power in kW. This is the average effective power of the running pump set for operation without a frequency inverter. The specification is made using the Fixed Reference Power parameter (3-9-5-2). PumpDrive 2 106 of 212...
- Page 107 1-4-1-6 Costs SavedEnergy cost Display value in national currency 3-9-5-4 savings, in national currency, in comparison with fixed speed pump 1-4-1-7 Reset Energy Savings Run / ESC Meter PumpDrive 2 107 of 212...
- Page 108 (3-9-9-1) is set, a pipe flushing routine. The duration of operation below the minimum value is defined by parameter (3-9-9-3). The current flow velocity of the fluid in the system can be displayed at the control panel (1-2-3-8). PumpDrive 2 108 of 212...
-
Page 109: Ramps
3-2-2-2. In open-loop control mode, the start ramp is left when the control value is reached. In closed-loop control mode, the start ramp is left when the speed defined by the controller is reached. The stop ramp is activated as soon as a stop signal is issued. PumpDrive 2 109 of 212... - Page 110 If a speed change curve is flatter than the operating ramp, no limitation occurs. Parameters 3-2-2-2 and 3-3-5-3 are used for defining the operating ramp. [min 3-3-5-3 3-3-5-3 Fig. 78: Operating ramp Speed Time PumpDrive 2 110 of 212...
- Page 111 The Type of Control parameter (3-6-1) is set to Temperature (Heating). Accordingly, control range Δx is limited by the Minimum Temperature (3-11-4-1) and Maximum Temperature (3-11-4-2) parameters. 3-6-4-6 3-6-4-6 Fig. 80: Setpoint ramp Controlled variable Time Δx Control range PumpDrive 2 111 of 212...
-
Page 112: Motor Standstill Heater
In a multiple pump configuration, Load Factory Settings (3-1-3-5) must be carried out separately on all frequency inverters. It is sufficient to save the settings on just one frequency inverter in the system. This approach must also be adopted when loading and saving user settings. PumpDrive 2 112 of 212... -
Page 113: Read Out Pumpmeter
PMtr Suction / Discharge Pressure Function of M12 module, input A. Internal operating values cannot be used as an actual value source. 3-13-1 Read Out Name Plate Transfers the name plate information from PumpMeter to the frequency inverter PumpDrive 2 113 of 212... -
Page 114: Date And Time
The amount of time this process takes depends on the mass moment of inertia of the system. The drive remains disabled during coasting. The Motor Disabled status is displayed on the control panel. PumpDrive 2 114 of 212... - Page 115 This function can be used to increase or decrease the respective required value (setpoint, control value, manual-mode control value) in conjunction with the operating mode (closed-loop control mode, open-loop control mode, manual mode). Two digital inputs are used for this purpose. PumpDrive 2 115 of 212...
- Page 116 8.10.1.2 External Message A local message can be created externally via a digital input. The Response to External Message parameter (3-9-14-1) can be used to determine whether the message is an alert or a warning. PumpDrive 2 116 of 212...
- Page 117 8.10.1.4 Dry running protection Dry running can be monitored by an external sensor (e.g. pressure switch) via a digital input. For this purpose, the digital input function must be set to the dry running protection value. PumpDrive 2 117 of 212...
-
Page 118: Analog Inputs
If signal type 4 - 20 mA or 2 - 10 V is parameterised at an analog input without a live- zero signal present at the device, the frequency inverter outputs the Broken Wire warning. (ð Section 8.8.2.6, Page 91) PumpDrive 2 118 of 212... - Page 119 ▪ Alternative Setpoint/Control Value (Auto) ▪ Control Value (Manual) ▪ Suction Pressure ▪ Discharge Pressure ▪ Differential Pressure ▪ Flow Rate ▪ Level ▪ Temperature ▪ Suction Pressure_Internal ▪ Discharge Pressure_Internal ▪ Differential Pressure_Internal PumpDrive 2 119 of 212...
-
Page 120: Relay Outputs
▪ Suction Pressure_Internal ▪ Discharge Pressure_Internal ▪ Differential Pressure_Internal 8.10.3 Relay outputs Operating status information can be queried on the two volt-free contacts (changeover contact relays) of the frequency inverter. PumpDrive 2 120 of 212... - Page 121 Time Delay OFF 0,0 – 10,0 s 0,5 s 3-8-9-3 Period of time for which the event selected must have gone before the relay is reset PumpDrive 2 121 of 212...
-
Page 122: Analog Outputs
4 options). For this purpose, parameterise the function of the digital inputs to Control AOUT Bit 0 or Control AOUT Bit 1. Table 95: Controlling the output values Assignment at analog output 1 Control AOUT Bit 1 Control AOUT Bit 0 PumpDrive 2 122 of 212... -
Page 123: Inputs And Outputs Of The I/O Extension Board
▪ Control Digital Bit 1 ▪ Control Digital Bit 2 ▪ Dry Running Protection ▪ Reset Messages ▪ Control AOUT Bit 0 ▪ Control AOUT Bit 1 ▪ External Message ▪ Start Functional Check Run ▪ Pump Changeover PumpDrive 2 123 of 212... - Page 124 Relay outputs on the I/O extension board The I/O extension board has one volt-free (NO/NC) relay and five volt-free (NO) relays. The function of the relays can be parameterised via the control panel. (ð Section 8.10.3, Page 120) PumpDrive 2 124 of 212...
- Page 125 Assignment at analog output 1 Control AOUT Bit 1 Control AOUT Bit 0 NOTE Only the digital inputs on the I/O extension board can be used to initiate the measurement value output sequence for analog output 2. PumpDrive 2 125 of 212...
- Page 126 Time Delay OFF 0,0…600,0 s 0,5 s 3-8-17-3 Period of time for which the event selected must have gone before the digital output is reset PumpDrive 2 126 of 212...
-
Page 127: Parameterising The M12 Module
PMtr Suction / Discharge Pressure (3-8-4-1). NOTE When changing parameter 3-8-4-1 to the above-mentioned value (in particular in retrofit applications) a 24 V voltage reset is triggered, which is required for initialisation of the bus connection to PumpMeter. PumpDrive 2 127 of 212... - Page 128 External pressure sensor as actual value source PumpMeter as internal measured variable for the master control device PumpMeter as internal measured variable for auxiliary control device 1 PumpMeter as internal measured variable for auxiliary control device 2 Pre-configured cable for multiple pump configuration PumpDrive 2 128 of 212...
- Page 129 PumpMeter devices to be used for Etaline Z pumps equipped with frequency inverters are provided with a special firmware version at the factory to serve as Modbus master. The two frequency inverters are set to Modbus slave. This is the only PumpDrive 2 129 of 212...
-
Page 130: Parameterising The Field Bus Module
If a frequency inverter is retrofitted, this special firmware must be installed on PumpMeter using the KSB Service Tool to enable redundant dual pump operation. NOTE The operating point display of PumpMeter always refers to operation of one pump only. - Page 131 Only if the actual value also fails at the auxiliary master is the alert output, which then triggers the specified response to actual value failure. PumpDrive 2 131 of 212...
- Page 132 The control direction is used if the actual value is supplied via nviRemoteTemp. 3-12-3-8 LON Dyn Press Comp Method ▪ OFF ▪ Speed Determines whether dynamic pressure compensation is used for pressure control via ▪ Flow Rate nviRemotePress. PumpDrive 2 132 of 212...
-
Page 133: Servicing/Maintenance
After switching off the frequency inverter, wait 10 minutes until dangerous voltages have discharged. NOTE All maintenance, service and installation work can be carried out by KSB Service or authorised workshops. Find your contact in the attached "Addresses" booklet or on the Internet at "www.ksb.com/contact". -
Page 134: Dismantling
9 Servicing/Maintenance 9.3 Dismantling 9.3.1 Preparing frequency inverter for dismantling 1. Disconnect the frequency inverter from the power supply. 2. Disconnect the electrical connection at the frequency inverter. 3. Carry out mechanical dismantling. PumpDrive 2 134 of 212... -
Page 135: Parameter List
1-1-1 Customer Login Log in as customer 0000…9999 1-1-2 Service Login Log in for access to special parameters for 0000…9999 KSB Service 1-1-3 Factory Login Log in for access to special parameters for 0000…9999 KSB Production 1-1-4 Logout Logout from all access levels... - Page 136 Parameter Description Help text Possible settings Unit Factory setting 1-2-1-9 Heat Sink Temperature Current temperature of frequency inverter Dependent on the heat sink unit set 1-2-1-10 PCB Temperature Current temperature on the I/O board Dependent on the unit set 1-2-1-11 Motor Torque Current motor torque based on the motor speed and mechanical power of the motor...
- Page 137 Parameter Description Help text Possible settings Unit Factory setting 1-2-4-4 M12 Module Input A Current signal value present at analog input Value A of the M12 module 1-2-4-5 M12 Module Input B Current signal value present at analog input Value B of the M12 module 1-2-4-6 Digital Inputs...
- Page 138 Parameter Description Help text Possible settings Unit Factory setting 1-3-9-1 Alternative Setpoint Alternative configurable setpoint (can be Minimum to maximum limit of value range Dependent on the 0,00 (Closed-loop Control) activated via time or DIGIN; DIGIN has controlled priority). This parameter is disabled if the variable set setpoint is specified via DIGIN/ANIN.
- Page 139 Parameter Description Help text Possible settings Unit Factory setting 1-4-2-5 Number of Starts Number of frequency inverter starts on the line side 1-4-2-6 Reset Starts Function for resetting the start counter Date and Time 1-5-1 System Time Current time of system 00:00 …...
- Page 140 Parameter Description Help text Possible settings Unit Factory setting 3-1-2-3 Function Key Assigning a freely selectable function to the ▪ No Function Language Assignment FUNC key System Start / Stop ▪ Setpoint (Closed-loop Control) ▪ Control Value (Open-loop Control) ▪ Alternative Setpoint (Closed-loop Control) ▪...
- Page 141 Parameter Description Help text Possible settings Unit Factory setting 3-1-5 Commissioning Wizard Starting the commissioning wizard Motor 3-2-1 Nominal Motor Data 3-2-1-1 Nominal Motor Power Nominal power of motor as per name plate Minimum to maximum limit of value range Dependent on the Dependent on unit set...
- Page 142 Parameter Description Help text Possible settings Unit Factory setting 3-3-2 V/f Control for Asynchronous Motor 3-3-2-1 V/f Voltage 0 Data points for the V/f characteristic 0,00 … 15,00 3-3-2-2 V/f Voltage 1 Data points for the V/f characteristic 0,00 … 100,00 3-3-2-3 V/f Frequency 1 Data points for the V/f characteristic...
- Page 143 Parameters adaptation (AMA) for the KSB SuPremE motor. Using the nominal motor data as a basis, the extended motor data is determined which ensures very good control of the KSB SuPremE motor. 3-3-4-2 Selected Motor KSB SuPremE motor variant currently Motor-specific...
- Page 144 Parameter Description Help text Possible settings Unit Factory setting 3-3-8-2 Integral Setting the integral constant of the 0 … 9999 Dependent on Constant_Current (KiI) MotionControl power controller size 3-3-8-3 Proportional Setting the proportional constant of the 0 … 9999 Dependent on Constant_Flux (Kpflx) MotionControl flux controller size...
- Page 145 Parameter Description Help text Possible settings Unit Factory setting 3-4-3-10 Pump Input Power P_1 Data point 1 for hydraulic performance at Minimum to maximum limit of value range Dependent on the Pump-specific nominal speed unit set 3-4-3-11 Pump Input Power P_2 Data point 2 for hydraulic performance at Minimum to maximum limit of value range Dependent on the...
- Page 146 Parameter Description Help text Possible settings Unit Factory setting System Application- specific 3-5-1 Fluid Density Density of the fluid handled 0 … 10000 Kg/m3 1000 3-5-2 Pressure Measuring Points 3-5-2-1 Pipe Diameter_Suction Inside pipe diameter at the suction pressure 0 … 1000 System-specific Pressure Measuring measuring point...
- Page 147 Parameter Description Help text Possible settings Unit Factory setting 3-6-3 Actual Value Source Selecting the source for the actual value: ▪ Local Local Activating the field bus as the actual value ▪ Field Bus source. Analog inputs or PumpMeter have the highest priority.
- Page 148 Parameter Description Help text Possible settings Unit Factory setting 3-6-5 Manual Mode 3-6-5-1 Fixed Speed 1 Fixed speed selectable via digital inputs 3-2-2-1 … 3-2-2-2 3-6-5-2 Fixed Speed 2 Fixed speed selectable via digital inputs 3-2-2-1 … 3-2-2-2 3-6-5-3 Fixed Speed 3 Fixed speed selectable via digital inputs 3-2-2-1 …...
- Page 149 Parameter Description Help text Possible settings Unit Factory setting 3-7-3-2 Min. Time Stop Minimum period of time between two stops 0.0…600,0 20,0 3-7-3-3 Start Speed A pump is started when the start speed is 0…140 reached. 3-7-3-4 Stop Speed A pump is stopped when the stop speed is 0…90 reached (required only for pumps with flat characteristic curves).
- Page 150 Parameter Description Help text Possible settings Unit Factory setting 3-8-1-2 Analog Input 1 Function Function of analog input 1. Internal ▪ No Function No Function operating values cannot be used as an ▪ Setpoint/Control Value (Auto) actual value source. ▪ Control Value (Manual) ▪...
- Page 151 Parameter Description Help text Possible settings Unit Factory setting 3-8-2-2 Analog Input 2 Function Function of analog input 2. Internal ▪ No Function No Function operating values cannot be used as an ▪ Setpoint/Control Value (Auto) actual value source. ▪ Control Value (Manual) ▪...
- Page 152 Parameter Description Help text Possible settings Unit Factory setting 3-8-3-2 Analog Input 3 Function Function of analog input 3 of the I/O ▪ No Function No Function extension board. Internal operating values ▪ Setpoint/Control Value (Auto) cannot be used as an actual value source. ▪...
- Page 153 Parameter Description Help text Possible settings Unit Factory setting 3-8-5 M12 Module Input B 3-8-5-1 Function M12 Module Function of M12 module, input B. Internal ▪ OFF Input B operating values cannot be used as an ▪ PMtr Suction/Discharge Pressure actual value source.
- Page 154 Parameter Description Help text Possible settings Unit Factory setting 3-8-6-1 Digital Input 1 Function Configurable function of digital input 1 ▪ No Function System Start ▪ System Start ▪ Potentiometer Auto + ▪ Potentiometer Auto - ▪ Control Point ▪ Alternative Setpoint/Control Value Active ▪...
- Page 155 Parameter Description Help text Possible settings Unit Factory setting 3-8-6-2 Digital Input 2 Function Configurable function of digital input 2 ▪ No Function Reset Messages ▪ System Start ▪ Potentiometer Auto + ▪ Potentiometer Auto - ▪ Control Point ▪ Alternative Setpoint/Control Value Active ▪...
- Page 156 Parameter Description Help text Possible settings Unit Factory setting 3-8-6-3 Digital Input 3 Function Configurable function of digital input 3 ▪ No Function No Function ▪ System Start ▪ Potentiometer Auto + ▪ Potentiometer Auto - ▪ Control Point ▪ Alternative Setpoint/Control Value Active ▪...
- Page 157 Parameter Description Help text Possible settings Unit Factory setting 3-8-6-4 Digital Input 4 Function Configurable function of digital input 4 ▪ No Function No Function ▪ System Start ▪ Potentiometer Auto + ▪ Potentiometer Auto - ▪ Control Point ▪ Alternative Setpoint/Control Value Active ▪...
- Page 158 Parameter Description Help text Possible settings Unit Factory setting 3-8-6-5 Digital Input 5 Function Configurable function of digital input 5 ▪ No Function No Function ▪ System Start ▪ Potentiometer Auto + ▪ Potentiometer Auto - ▪ Control Point ▪ Alternative Setpoint/Control Value Active ▪...
- Page 159 Parameter Description Help text Possible settings Unit Factory setting 3-8-6-6 Digital Input 6 Function Configurable function of digital input 6 of I/ ▪ No Function No Function O extension board ▪ System Start ▪ Potentiometer Auto + ▪ Potentiometer Auto - ▪...
- Page 160 Parameter Description Help text Possible settings Unit Factory setting 3-8-6-7 Digital Input 7 Function Configurable function of digital input 7 of I/ ▪ No Function No Function O extension board ▪ System Start ▪ Potentiometer Auto + ▪ Potentiometer Auto - ▪...
- Page 161 Parameter Description Help text Possible settings Unit Factory setting 3-8-6-8 Digital Input 8 Function Configurable function of digital input 8 of I/ ▪ No Function No Function O extension board ▪ System Start ▪ Potentiometer Auto + ▪ Potentiometer Auto - ▪...
- Page 162 Parameter Description Help text Possible settings Unit Factory setting 3-8-7-2 Assignment 2 Analog Selectable assignment 2 of analog output 1 ▪ OFF Motor Current Output 1 ▪ Setpoint ▪ Actual Value ▪ Motor Speed ▪ Motor Power ▪ Motor Current ▪...
- Page 163 Parameter Description Help text Possible settings Unit Factory setting 3-8-8-1 Assignment 1 Analog Selectable assignment 1 of analog output 2 ▪ OFF Motor Speed Output 2 of I/O extension board ▪ Setpoint ▪ Actual Value ▪ Motor Speed ▪ Motor Power ▪...
- Page 164 Parameter Description Help text Possible settings Unit Factory setting 3-8-8-4 Assignment 4 Analog Selectable assignment 4 of analog output 2 ▪ OFF DC Link Voltage Output 2 of I/O extension board ▪ Setpoint ▪ Actual Value ▪ Motor Speed ▪ Motor Power ▪...
- Page 165 Parameter Description Help text Possible settings Unit Factory setting 3-8-9-2 Time Delay ON Period of time during which the event 0,0 … 10,0 selected must be continually available until the relay is set 3-8-9-3 Time Delay OFF Period of time for which the event selected 0,0 …...
- Page 166 Parameter Description Help text Possible settings Unit Factory setting 3-8-11-1 Relay 3 Function Selectable messages via relay 3 ▪ No function No function ▪ AUTO operating mode ▪ RUN operating status ▪ AUTO/SLEEP operating status ▪ Warning ▪ Alert ▪ Alert or Warning ▪...
- Page 167 Parameter Description Help text Possible settings Unit Factory setting 3-8-12-1 Relay 4 Function Selectable messages via relay 4 of I/O ▪ No function No function extension board ▪ AUTO operating mode ▪ RUN operating status ▪ AUTO/SLEEP operating status ▪ Warning ▪...
- Page 168 Parameter Description Help text Possible settings Unit Factory setting 3-8-13-1 Relay 5 Function Selectable messages via relay 5 of I/O ▪ No function No function extension board ▪ AUTO operating mode ▪ RUN operating status ▪ AUTO/SLEEP operating status ▪ Warning ▪...
- Page 169 Parameter Description Help text Possible settings Unit Factory setting 3-8-14-1 Relay 6 Function Selectable messages via relay 6 of I/O ▪ No function No function extension board ▪ AUTO operating mode ▪ RUN operating status ▪ AUTO/SLEEP operating status ▪ Warning ▪...
- Page 170 Parameter Description Help text Possible settings Unit Factory setting 3-8-15-1 Relay 7 Function Selectable messages via relay 7 of I/O ▪ No function No function extension board ▪ AUTO operating mode ▪ RUN operating status ▪ AUTO/SLEEP operating status ▪ Warning ▪...
- Page 171 Parameter Description Help text Possible settings Unit Factory setting 3-8-16-1 Relay 8 Function Selectable messages via relay 8 of I/O ▪ No function No function extension board ▪ AUTO operating mode ▪ RUN operating status ▪ AUTO/SLEEP operating status ▪ Warning ▪...
- Page 172 Parameter Description Help text Possible settings Unit Factory setting 3-8-17-1 Digital Output 1 Selectable messages via digital output 1 of I/ ▪ No function No function Function O extension board ▪ AUTO operating mode ▪ RUN operating status ▪ AUTO/SLEEP operating status ▪...
- Page 173 Parameter Description Help text Possible settings Unit Factory setting 3-8-18-1 Digital Output 2 Selectable messages via digital output 2 of I/ ▪ No function No function Function O extension board ▪ AUTO operating mode ▪ RUN operating status ▪ AUTO/SLEEP operating status ▪...
- Page 174 Parameter Description Help text Possible settings Unit Factory setting 3-9-1-2 Time Delay Time delay before the message (warning or 0,0 … 10,0 alert) is triggered. In a redundant system, only a warning is output as the auxiliary master can assume the function. Only if the actual value also fails at the auxiliary master is the alert output, which then triggers the specified response to actual value failure.
- Page 175 Parameter Description Help text Possible settings Unit Factory setting 3-9-3-3 Dyn Press Comp n Data The setpoint compensation value is reached 0,0 … 600,0 Point at this point. Beyond that, the setpoint is further increased with respect to the specified value. Data is entered in % referred to Maximum Motor Speed (3.2.2.2).
- Page 176 Parameter Description Help text Possible settings Unit Factory setting 3-9-6 Dry Running Detection 3-9-6-1 Hydraulic Blockage Limit Factor for shifting the learning curve. The 0 … 130 limit curve for hydraulic blockage is calculated based on the product of the learning curve with the parameter.
- Page 177 Parameter Description Help text Possible settings Unit Factory setting 3-9-8-2 Time Constant for Time constant for attenuation of estimated 0,0 … 600,0 Attenuation of flow rate values. The time constant makes it Estimated Flow Rate easier to read the display value on the Values control panel and is required for sensorless flow rate control.
- Page 178 Parameter Description Help text Possible settings Unit Factory setting 3-9-12-1 Lower Limit Lower speed limit for suppressing the 3-2-2-1 … 3-2-2-2 3-2-2-1 resonance range. If the lower and upper limit frequency are assigned the same values, there is no suppression. This function is not supported in manual mode.
- Page 179 Parameter Description Help text Possible settings Unit Factory setting 3-10-2-2 Upper Limit Defining the upper limit value for warning. 3-10-2-1 … 3-11-7-2 150,00 When the upper limit value is exceeded, a warning is triggered after the time delay has lapsed. 3-10-2-3 Time Delay Period of time for which the limit value...
- Page 180 Parameter Description Help text Possible settings Unit Factory setting 3-10-5-3 Time Delay Period of time for which the limit value 0,0 … 600,0 must be continually violated before a warning is triggered 3-10-6 Flow rate 3-10-6-1 Lower Limit Defining the lower limit value for warning. 3-11-3-1 …...
- Page 181 Parameter Description Help text Possible settings Unit Factory setting 3-10-9 Differential Pressure 3-10-9-1 Lower Limit Defining the lower limit value for warning. 3-11-2-1 … 3-10-9-2 Dependent on the When the lower limit value is undershot, a unit set warning is triggered after the time delay has lapsed.
- Page 182 Parameter Description Help text Possible settings Unit Factory setting 3-11-1-2 Maximum Speed Maximum limit of measuring range 0 … 4200 Motor-specific 3-11-2 Pressure 3-11-2-1 Minimum Pressure Minimum limit of measuring range -1,00 … 3-11-2-2 -1,00 3-11-2-2 Maximum Pressure Maximum limit of measuring range 3-11-2-1 …...
- Page 183 Parameter Description Help text Possible settings Unit Factory setting 3-11-7-2 Maximum Current Maximum limit of measuring range 3-11-7-1 … 150,00 150,00 3-11-8 Frequency 3-11-8-1 Minimum Frequency Minimum limit of measuring range 0,0 … 3-11-8-2 3-11-8-2 Maximum Frequency Maximum limit of measuring range 3-11-8-1 …...
- Page 184 Parameter Description Help text Possible settings Unit Factory setting 3-12-2-5 Cycle Time, Setpoint/ Time delay before the message (warning or 0,0…10,0 Control Value alert) is triggered. In a redundant system, only a warning is output as the auxiliary master can assume the function. Only if the setpoint/control value also fails at the auxiliary master is the alert output, which then triggers the specified response to...
- Page 185 Parameter Description Help text Possible settings Unit Factory setting 3-12-3-7 Control Direction, Specifies the control direction for OFF / ON Temperature Control temperature control. The control direction is used if the actual value is supplied via nviRemoteTemp. 3-12-3-8 LON Dyn Press Comp Determines whether dynamic pressure OFFSpeedFlow Rate Method...
- Page 186 Serial number of the control panel Number 4-2-2 Control Panel Software Software version of the control panel Version 4-2-3 Control Panel Software Revision of control panel software Revision KSB Order 4-3-1 Order number Order number PumpMeter 4-4-1 PumpMeter Serial Serial number of PumpMeter Number 4-4-2...
- Page 187 Parameter Description Help text Possible settings Unit Factory setting 4-8-1 Modbus Module Serial Serial number of the Modbus module Number 4-8-2 Modbus Module Software version of the Modbus module Software Version 4-8-3 Modbus Module Software revision of the Modbus module Software Revision...
-
Page 188: Selection Lists
Table 113: Favourites menu selection list Parameter Description 1-1-1 Customer Login 1-3-1 System Start / Stop 1-3-2 Setpoint (Closed-loop Control) 1-3-3 Control Value (Open-loop Control) 3-1-1 Language 3-6-1 Type of Control 3-6-2 Control Point 3-6-3 Actual Value Source PumpDrive 2 188 of 212... -
Page 189: Trouble-Shooting
If problems occur that are not described in the following table, consultation with the KSB customer service is required. A Mains fuse rating too small for the nominal mains current. B Motor does not start. -
Page 190: Alerts
Phase failure (motor) Phase failure on motor side Non-self- acknowledging Short circuit Motor short-circuited (defective motor winding) Partially self- acknowledging Hardware error Hardware defective Non-self- acknowledging Heat sink temperature high Power electronics overtemperature Non-self- acknowledging PumpDrive 2 190 of 212... - Page 191 Pump blocked mechanically/runs sluggishly Check pump. Motor terminal board wired incorrectly Wire motor terminal board correctly. (delta/star) Disconnect PumpDrive from the power supply to rectify faults on current-carrying components. Observe the safety information! Restore the PumpDrive default settings. PumpDrive 2 191 of 212...
- Page 192 Wrong direction of rotation of the pump Change the direction of rotation of the motor via the phase sequence. Pump blocked mechanically/runs sluggishly Check pump. Carrier frequency of frequency inverter set Set carrier frequency to permissible range . too high PumpDrive 2 192 of 212...
-
Page 193: Warnings
Note: Approx. 10 % tolerance is permissible. Pump runs in reverse when motor is not Check swing check valve. supplied with current No master control KSB device bus wired incorrectly Re-wire properly. (interruption, short circuit) Sensor connected incorrectly (actual value Connect sensor correctly. - Page 194 24 V DC supply . Short circuit of consumers connected to Disconnect defective 24 V DC consumers. 24 V DC voltage supply Control terminal wiring errors (DigIn, AnIn) Re-wire properly. PumpDrive 2 194 of 212...
-
Page 195: Information Messages
The amount of time this process takes depends on the mass moment of inertia of the system. The drive remains disabled during coasting. I102 Pipe flushing mode active Performing the pipe flushing function Self-acknowledging PumpDrive 2 195 of 212... -
Page 196: Purchase Order Specifications
Refer to the name plate for all data. Also specify the following data: ▪ Part number and description ▪ Quantity of spare parts ▪ Shipping address ▪ Mode of dispatch (freight, mail, express freight, air freight) PumpDrive 2 196 of 212... -
Page 197: Accessories
An adapter is required if PumpDrive is to be mounted on the motor. Select the adapter required based on the motor size and the type of construction used. Table 122: Accessories: Motor adapter kits for KSB/Siemens standardised motor: types 1LE1 and 1PC3, 2-pole and 4- pole... - Page 198 1LA9 BG132 B3/V15 01506326 PumpDrive size C PumpDrive size C 01506328 1LA9 BG160 B3/V15 Table 124: Accessories: Motor adapter kits for KSB SuPremE motor: types A and B1, 2-pole and 4-pole Description Design Mat. No. [kg] For mounting PumpDrive size A...
-
Page 199: Adapter For Wall And Cabinet Mounting
12.2.4 Adapter for wall and cabinet mounting The adapter can be used for wall mounting as well as for cabinet mounting and is included in the KSB scope of supply as standard. Table 126: Adapter for wall and cabinet mounting Description Design Mat. -
Page 200: Installation Options
Table 128: Optional modules for retrofitting Description Design Mat. No. [kg] Master switch retrofit kit Size A 01500522 For PumpDrive 2 comprising: Size B 01500523 Master switch, adapted C cover, Size C 01500524 protective cover for the master Size D 01500525... - Page 201 2 × 2 × Length 10 m 01304512 0.22 mm² Length 20 m 01304513 PumpDrive 2 Eco has just one slot into which the M12 module or the Modbus RTU module can be inserted. PumpDrive 2 201 of 212...
-
Page 202: Sensor System
PumpMeter is parameterised at the factory in line with pump-specific requirements. Configuration selections are made in KSB EasySelect. Refer to the last section of this type series booklet for more information. Differential pressure transducer 0 - 1 bar, RC3/8... - Page 203 UB: 10 < UB ≤ 30 V DC (14 to 30 for output 0 - 10 V), Electrical connection via angular connector to DIN 175301-803 Weld-in socket for S-20 and S-11 pressure G1/2B process 01149296 transducers connection, internal thread PumpDrive 2 203 of 212...
- Page 204 PumpDrive, price per metre Connection cable for 5-core cable, halogen-free, type Ölflex 01131430 redundant sensor 110CH, length approx. 1 m, Pre- connection configured, for forwarding a sensor signal to the second PumpDrive for redundant operation (e.g. DPM) PumpDrive 2 204 of 212...
-
Page 205: Control Cabinet Mounting
3 - 5,5 kW (FOVT-016B) 47121247 50/80 m 7,5 kW (FOVT-025B) 47121248 Line chokes for 11 - 15 kW (FOVT-036B) 47121249 reducing electromagnetic interference emissions Reduction of current peaks in long motor power cables PumpDrive 2 205 of 212... - Page 206 45 kW (Type RWK-305-124-KS) 47121255 50/80 m Line chokes for reducing electromagnetic interference emissions, IP00 enclosure Reduction of current peaks in long motor power cables Maximum motor cable length: 30 m @ 16 kHz PumpDrive 2 206 of 212...
-
Page 207: Eu Declaration Of Conformity
Johann-Klein-Straße 9 67227 Frankenthal (Germany) The manufacturer herewith declares that the product: PumpDrive 2, PumpDrive 2 Eco Serial number range: 0117000000 to 0119000000 ▪ is in conformity with the provisions of the following Directives as amended from time to time: –... -
Page 208: Index
Dimensions 30 Analog outputs 122 Arrow keys 15, 16 Disposal 12 Dry running 92 Automatic determination of controller parameters 77 Dry running protection 117 Automatic motor adaptation 67, 68 KSB SuPremE motor 69 Dual pump configuration 129 Dynamic Overload Protection Speed limitation 90 Broken wire detection 91 Bypass 33 Earthing Connect 49 Earth bus bar 34 Cabinet mounting Earth connection 37... - Page 209 Operating ramp 110, 111 Operating values for input and output signals 17 LED display 21 Other applicable documents 13 Limit speed 92 Output filter 38, 48, 205 Line choke 27, 48, 205 Output frequency 27 Install 48 Overview of parameters 135 Lines Connect 37 Live zero 91 LON module 132 PumpDrive 2 209 of 212...
- Page 210 Size A 41, 42 I/O extension board 124 Size C 42 Size D 43 Relay output 28 Size E 43 I/O extension board 29 Time 114 Relay outputs 120 Traffic light 21 RFI suppression 27, 36, 38 Training 7 Transport 10 V/f characteristic 67 V/f control method 66 Vector control method 66 PumpDrive 2 210 of 212...
- Page 211 Index Wall mounting 32 Adapter for mounting 199 Wall-mounted model Dimensions and weights 30 Warnings 193 Graphical control panel 22 Warranty claims 13 Weights 30 PumpDrive 2 211 of 212...
- Page 212 KSB Aktiengesellschaft Johann-Klein-Straße 9 • 67227 Frankenthal (Germany) Tel. +49 6233 86-0 www.ksb.com...
Need help?
Do you have a question about the PumpDrive 2 and is the answer not in the manual?
Questions and answers