Table of Contents
Advertisement
Quick Links
Advertisement
Table of Contents

Related Manuals for Vivitek DU6675


Summary of Contents for Vivitek DU6675
- Page 1 User's Manual DU6675 DW6655 DX6635...
-
Page 2: Table Of Contents
DU6675/DW6655/DX6635 User Manual Table of Contents Copyright ............................. 3 Important Safety Guidelines ......................... 4 Installation and Use Notice ......................4 Disposal of Old Electric and Electronic Equipment ................ 5 Important Recycling Instructions ....................5 Introduction ............................6 Product Features ........................... 6 Packing Checklist .......................... - Page 3 OSD Operation - INSTALLATION ....................42 OSD Operation- SERVICE ......................45 Maintenace ............................46 Replacing the lamp ........................46 Cleaning the projector ......................... 48 Specification............................50 Product Dimensions ........................... 51 Suppoerted Signal Input Timing ......................52 About the VIVITEK support ........................ 53...
-
Page 4: Copyright
No duplication of the manual or any content included in the manual is allowed without the written consent of the manufacturer. Vivitek is the trademark of Vivitek Corporation. © All rights reserved. 2014 Disclaimer The information in the manual is subject to change without notice. The manufacturer does not provide any statement or warranty of the contents in the manual and clearly give up the implied warranties of merchantability and of fitness for a particular purpose. -
Page 5: Important Safety Guidelines
DU6675/DW6655/DX6635 User Manual Important Safety Guidelines Thank you for purchasing the high quality product! Read the Manual carefully to obtain the best performance. The Manual provides instructions to use the menu and implement operation. Installation and Use Notice 1. Read and keep the description properly. -
Page 6: Disposal Of Old Electric And Electronic Equipment
DU6675/DW6655/DX6635 User Manual Disposal of Old Electric and Electronic Equipment The symbol on your product or the package represents that the product should not be treated as the normal household waste when discarded but should be carried to the recycling location of the waste electric and electronic equipment. -
Page 7: Introduction
VIVITEK has made every effort to ensure that the information in the Manual is correct at the time of printing. The contents may be frequently updated due to the continuously product improvement and customer feedback. -
Page 8: Packing Checklist
DU6675/DW6655/DX6635 User Manual Packing Checklist The following items are included in the packaging box of the DU6675/DW6655/DX6635 projector. If any loss or damage to any item, contact your dealer or the VIVITEK customer service department. -
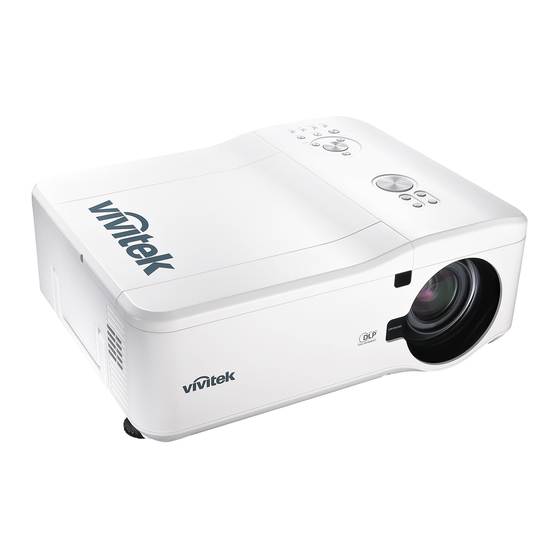
Page 9: Projector Overview
DU6675/DW6655/DX6635 User Manual Projector Overview Front-right View 1. Lamp Cover Remove cover to replace lamp or color wheel 2. Lens Hood Remove lens cap before use 3. Control Panel Press the botton to operate the OSD menu or adjust the lens Settins, see OSD controls. - Page 10 DU6675/DW6655/DX6635 User Manual Bottom View...
-
Page 11: Control Button
DU6675/DW6655/DX6635 User Manual Control Button Using below buttons to control the lens and adjust projected image. Zoom Increase or decrease image size Focus Focus the projected image Up/Down/Left/Rignt Cursor Use the bottom to move the projected image up, down, left ro right. -
Page 12: Terminal Panel Features
DU6675/DW6655/DX6635 User Manual Terminal Panel Features LAN/HDBaseT COMPONENT Connect a LAN cable (Cat5/Cat6, not supplied) from a Connect a component video cable from a video device computer, network device, or HDBaseT transimittor. to the RCA jacks. DVI-D Video In Connect the DVI-D cable (not supplied) from a DVI-D... -
Page 13: Remote Control
DU6675/DW6655/DX6635 User Manual Remote Control Item Label Description Status LED Lights when the remote control is used Turn the projector on at standby mode Turn the projector off (standby mode) ZOOM + Increase the projection image size ZOOM - Reduce the projection image size... -
Page 14: Installation And Setup
DU6675/DW6655/DX6635 User Manual Installation and Setup Precautions For installation Caution: Ceiling installation must be done by a qualified professional. Contact your dealer for more information. It is not recommended you install the projector yourself. Only use the projector on a solid, level surface. Serious injury and damage can occur if the projector is dropped Place the projector in a horizontal position ... -
Page 15: Projector Installation
DU6675/DW6655/DX6635 User Manual Caution for Ceiling Mounting Installation When installing and using the projector with a method other than floor standing installation. For ceiling mounting installation, please use to fix the projector in place. Please UL Listed ceiling mounts and M4 screws, maximum depth of screw: 12 mm, the distanace from wall to projector must be kept 30cm at least for proper ventilation. -
Page 16: Installing Or Removing The Optional Lens
DU6675/DW6655/DX6635 User Manual Installing or Removing the Optional Lens Caution: Do not shake or place excessive pressure on the projector or the lens components as the projector and lens components contain precision parts. When shipping the projector with the optional lens, remove the optional lens before shipping the projec-tor. The ... -
Page 17: Installing The Optional Color Wheel
DU6675/DW6655/DX6635 User Manual Installing the Optional Color Wheel The projector comes with a four-segment color wheel installed. An additional six-segment color wheel is optional. To replace the color wheel (located under the lamp cover adjacent to lamp 1) refer to the follow-ing guide. -
Page 18: Remote Control And Operation Range
DU6675/DW6655/DX6635 User Manual Remote Control and Operation Range Inserting the Remote Control Batteries 1. Remove the battery compartment cover by sliding the cover in the direction of the arrow. 2. Place two AA batteries with the correct polarity. 3. Slide on the cover as the arrow in the illustration. -
Page 19: Turning On The Projector
DU6675/DW6655/DX6635 User Manual Turning on the Projector Once the projector is correctly located and the power cable and other connections are in place, it is important that the projector is powered on correctly in order to avoid damage to components and un-necessary wear and tear. -
Page 20: Turning Off The Projector
DU6675/DW6655/DX6635 User Manual Turning off the Projector Once the projector is no longer required, it is important to shut it down correctly to avoid damage or unnecessary wear and tear to the projector. Note: Do not unplug the power cable from the wall outlet or projector when the projector is powered on. Do-ing so ... -
Page 21: Adjusting Projected Image Position
Adjusting Projected Image Position The DU6675/DW6655/DX6635 projector has the lens shift feature and the image can be vertically shifted without moving the projector. The lens shift bit is shown in the percentage of the screen height. The project installed on the desk can move up and down by 50% (0.5V). -
Page 22: Adjusting The Focus And Zoom
DU6675/DW6655/DX6635 User Manual Adjusting the Focus and Zoom The focus and zoom can be adjusted manually from the projector control panel or remote control. Refer to the following guides to adjust the focus and zoom manually. Press the Focus or Zoom button on the control key panel or remote control to adjust the Fo-cus/Zoom using the... -
Page 23: Making Connections
DU6675/DW6655/DX6635 User Manual Making Connections Follow the instructions below to connect the DU6675/DW6655/DX6635 projector to the video source, external control equipment (if any) and AC power supply. When connecting to the equipment, use the correct signal cable to connect to the signal source and ensure that the cable is securely connected. Fasten the nut on the joint and connect the signal source equipment to the projector according to the figure below. -
Page 24: Connecting To The Control Equipment
DU6675/DW6655/DX6635 User Manual Connecting to the Control Equipment The projector has the following control port for connecting to the control equipment: HDBaseT/LAN (Network control): The projector supports network control. LAN and Digital share the port. If only network control is used, you can connect the LAN on the projector to PC or through the local network. Refer to the remote control guidelines for more detail information. -
Page 25: Connecting To The Screen Trigger
DU6675/DW6655/DX6635 User Manual Connecting to the Screen Trigger If your projection system includes the Electric projection screen and other 12V trigger device, you can connect these devices to the 12V trigger to output and configure the output 12V signal settings, such as automation and the aspect ration of 16:10 through OSD control to Trigger. -
Page 26: Connecting To External Hdbaset Transmitter
RJ-45 cable. If the Digital Transmitter you purchased supports the input and output of the IR remote control, the control signals from the IR remote control can be sent to the DU6675/DW6655/DX6635 projector via the RJ-45 cable. Note: The projector supports the video signal, R-232, IR remote control and the reception of the network control ... -
Page 27: Convenient Features
DU6675/DW6655/DX6635 User Manual CONVENIENT FEATURES Changing the OSD Language The project can show the English, French, Spanish, Deutsch, Portuguese, Simplified Chinese, Traditional, Japanese and Korean menu. Press MENU to show OSD and press ◄► to select SETUP menu. Press ▲▼ to select the... -
Page 28: Changing Lamp Mode
DU6675/DW6655/DX6635 User Manual Changing Lamp Mode The projector has two lamp modes available, Normal and Eco. The Normal mode is used for every-day standard projection, whereas the Eco mode is used for saving power and lamp life. To change the Lamp Mode, refer to the following guides. -
Page 29: Freezing A Picture
DU6675/DW6655/DX6635 User Manual Freezing a Picture The projected image can be frozen for short periods of time by using the remote control. This feature is useful for capturing still images from movies or freezing an animation at a particular point. To freeze the projected image, refer to the following guide. -
Page 30: Unlocking The Projector
DU6675/DW6655/DX6635 User Manual Unlocking the Projector To unlock the projector, refer to the following guide 1. When the projector is locked, either by re-quest during operation or at start up, the locked message is displayed. 2. To unlock the projector, enter the previously defined PIN code to activate the projector. -
Page 31: Using On-Screen Display
DU6675/DW6655/DX6635 User Manual Using On-Screen Display Navigating the OSD You can use the remote control or the buttons on the top of the projector to navigate and make changes to the OSD. The following illustration shows the corresponding buttons on the remote control and on the projector 1. -
Page 32: Menu Tree
DU6675/DW6655/DX6635 User Manual Menu Tree Use the following illustrations to quickly find a setting or determine the range for a setting Main Menu Submenu Picture Picture Mode High Bright Presentation Video Brightness Contrast Saturation Sharpness Color Temperature Native 6500K 7800K... - Page 33 DU6675/DW6655/DX6635 User Manual Main Menu Submenu Signal Auto Search On / Off Auto Sync Adjust Always / Auto Color Space Auto YCbCr YPbPr RGB-PC RGB-Video VGA Setup H Total V Start H Phase V Start Aspect Ratio 16:10 16:9 1.88:1 2.35:1...
- Page 34 DU6675/DW6655/DX6635 User Manual Main Menu Submenu Remote Sensor Front/Back Front Back HDBaseT Trigger Control Panel Lock Security Lock Installation Projection Mode Desktop Front Desktop Rear Ceiling Front Ceiling Rear Standardby Mode Network Standby Normal High Altitude On/Off AutoPower Off On/Off...
-
Page 35: Osd Operation - Picture
DU6675/DW6655/DX6635 User Manual OSD Operation - PICTURE Picture Mode Use ◄ or ► to select a set of preset picture mode High Bright: The highest brightness output mode is suitable for the occasion where high brightness is needed. Presentation: The best image effect is suitable for the presentation or picture. - Page 36 DU6675/DW6655/DX6635 User Manual Sharpness Use ◄► to adjust the sharpness. The purpose of this adjustment is to change the value of the high-frequency detail. Color Temperature Use ◄► to adjust the color temp of the projected image, the option can be 6500K, 7800K, 9300K and Native.
-
Page 37: Osd Operation - Signal
DU6675/DW6655/DX6635 User Manual Noise Reduction Use ◄► to adjust the noise of the projected image. This function is suitable for removing the noise of the image in interlaced scanning input. Generally, noise reduction can lower the value of the high-frequency detail and make the image softer. - Page 38 DU6675/DW6655/DX6635 User Manual Select input source to VGA. Select Input source from BNC, the input source can be RGBHV or Component signal from computer or component video enabled device. DVI-D Select input source from DVI-D output of the computer or media device.
-
Page 39: Osd Operation Setup
DU6675/DW6655/DX6635 User Manual OSD Operation SETUP Language Select the familiar OSD Menu language. English, French, Spanish, Deutch, Portuguese, Simplified Chinese, Traditional, Japanese and Korean. Lamp Mode Use the ◄► function to select the single-lamp or dual-lamp mode. Dual: Enable the dual-lamp projection mode. - Page 40 DU6675/DW6655/DX6635 User Manual Lamp Power Use the ◄► function to select Normal, Eco or Custom Power Level mode. Normal: Projection is carried out using the normal lamp power to obtain the brightest projection display. Eco: Projection is carried out in the energy saving mode to ensure the longest service life of the lamp.
- Page 41 DU6675/DW6655/DX6635 User Manual Set the 3D format and 3D sync signal. The projector detects the signal type and display the available options for setting, the unavailable option is grayed out. Before performing the 3D setting, ensure that the input signal is connected.
- Page 42 DU6675/DW6655/DX6635 User Manual Advance Setting Startup Logo Use the ◄► function to turn on/off the Startup Logo. Remote Sensor This function allows you to setup the IR control signal receiving by the projector. Front/Back: Both front IR and back IR recevior are turned on.
-
Page 43: Osd Operation - Installation
DU6675/DW6655/DX6635 User Manual OSD Operation - INSTALLATION Projection Mode Use the ◄► function to select a projection mode: Desktop Front, Desktop Rear, Ceiling Front and Ceiling + Rear . Standby Mode Use the ◄► to select standby mode to Normal or Network Standby. - Page 44 DU6675/DW6655/DX6635 User Manual RS232 Baud Rate: Set the transmission rate to 38400, 19200, 9600. The setting of the transmission rate is dependent on the length of the RS-232 cable. Low transmission rate is usually set for long transmission cables. If RS-232 is used for remote control and the signal is unstable or no communication is connected, select a suitable transmission rate.
- Page 45 DU6675/DW6655/DX6635 User Manual Lens Control Select this function to open the Lens Control menu for adjustment of Zoom, Focus or Shift. You can use the Enter button to switch the Zoom/Focus or Shift menu. Use ◄► to adjust zooming and horizontal shift of the lens, or use ▲▼...
-
Page 46: Osd Operation- Service
DU6675/DW6655/DX6635 User Manual OSD Operation- SERVICE Model Display the Projector model name. Serial Number Display the serial number of the projector. Software Version Display the software version of the projector. Source Information Display the current input source information. Lamp Status Display the current lamp status such as usage time, extimated remaining lamp life…etc. -
Page 47: Maintenace
SERVICE". The lamp should be replaced when the projected image is obviously darkened. Contact your local dealer to purchase the authorized new lamp suitable for your projector. Note: Purchase the lamp module produced by Vivitek. Using the lamp that is not made by Vivitek may affect the performance of the projector or damage the projector.. - Page 48 DU6675/DW6655/DX6635 User Manual Remove the screw on the lamp cover (A), and lift the 4 Install the new lamp module(s) and re-place the lamp lamp cover as shown (B) cover. Loosen the two captive screws on the lamp module 5 Tighten the two captive screws on the lamp module .
-
Page 49: Cleaning The Projector
DU6675/DW6655/DX6635 User Manual Cleaning the projector Cleaning the Cabinet Refer to the following guide to clean the projector cabinet. Wipe off dust with a clean dampened cloth. Moisten the cloth with warm water and mild detergent and wipe the cabinet. - Page 50 DU6675/DW6655/DX6635 User Manual 2. The rear exhaust vent can be accessed as shown 3. Gently slide the flter holders in the direction shown 4. Lift the filter foams from all three filteholders in the direction shown. Remove them completely from each filter holder and discard.
-
Page 51: Specification
DU6675/DW6655/DX6635 User Manual Specification... -
Page 52: Product Dimensions
DU6675/DW6655/DX6635 User Manual Product Dimensions... -
Page 53: Suppoerted Signal Input Timing
DU6675/DW6655/DX6635 User Manual Suppoerted Signal Input Timing... -
Page 54: About The Vivitek Support
DU6675/DW6655/DX6635 User Manual About the VIVITEK support If you cannot find solutions from this user guideline, please contact us using the contact information below: North America Vivitek Service Center 15700 Don Julian Road, Suite B City of Industry, CA. 91745 U.S.A...
Need help?
Do you have a question about the DU6675 and is the answer not in the manual?
Questions and answers