Table of Contents
Advertisement
Quick Links
Phottix Atlas Instructions
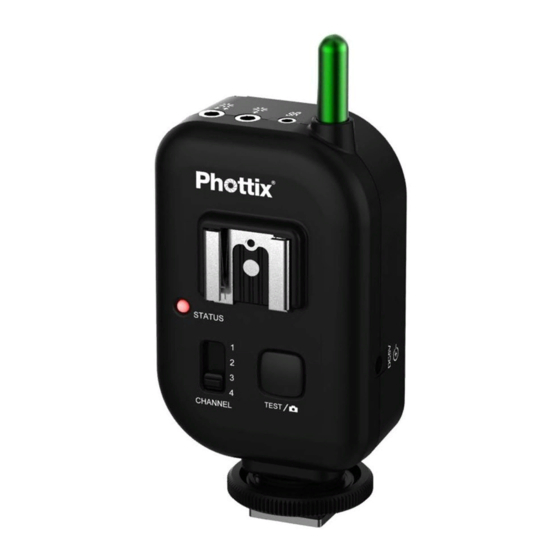
Parts
1) Power Switch
2) WRS Mode Switch
3) DC Power Port
4) Channel Selector Switch
5) Test / Shutter Button
6) Flash Hot Shoe Connection
7) Camera Hot Shoe Connection
8) Locking Ring
9) Flash in/out Port
10) Flash out Port
11) Antennae
12) Tripod Lug
13) Battery Cover
14) Battery Compartment
Please Note: The Phottix Atlas' hot shoe connection is designed to fire
speedlight-type flashes that are triggered by the center contact. Some flashes (by
Nissin, Sigma, and other manufacturers) are not triggered by the center hot shoe
contact but by specific secondary contacts. Please check your flash manual for
specifics. These flashes can be fired by PC Sync if available. The Atlas is
designed to work in Manual Exposure mode and no TTL functions.
Tip: Turn off all devices – flashes/strobes, cameras, and Phottix Atlas
transceivers- when connecting and disconnecting devices.
Inserting Batteries
1. Press the battery cover in while pushing it away from the Atlas. The
battery cover will snap open.
2. Lift the battery cover.
3. Insert AA batteries as shown.
4. Close the battery cover and push the cover back into the locked position.
Test / Shutter Button
1. The Test / Shutter Button will test fire remote flashes/strobes or take a
photo when the Phottix Atlas is used as a wireless remote.
2. To Test: Press the Test / Shutter Button – remote flashes connected to
Phottix Atlas transceivers on the same channel will fire.
For Wireless Remote: See Using the Atlas as a wireless remote below
Advertisement
Table of Contents

Subscribe to Our Youtube Channel
Related Manuals for Phottix Atlas


Summary of Contents for Phottix Atlas
- Page 1 Nissin, Sigma, and other manufacturers) are not triggered by the center hot shoe contact but by specific secondary contacts. Please check your flash manual for specifics. These flashes can be fired by PC Sync if available. The Atlas is designed to work in Manual Exposure mode and no TTL functions.
- Page 2 Status LED The Status LED on the front of the Phottix Atlas will flash green when it is ready to transmit or receive signals. The LED will turn solid red when a signal is sent or received. Turning units on/off 1.
- Page 3 4. Turn on the flash/strobe and the Phottix Atlas. Set the camera and flash to Manual mode. * It is not unusual for the flash to discharge once after turning on the Phottix Atlas. Connecting a local flash on a bracket...
- Page 4 * On compatible cameras Using the Atlas as a wireless remote in WRS Mode* WRS Mode – Wireless Remote Sync Mode – allows you to use the Atlas as a wireless shutter release and fire remote flashes – in sync. Using this function requires a minimum of three Atlas transceivers –...
- Page 5 3. The Status light will blink green – twice as fast as it does in regular transceiver mode. To turn off Transmitter Only Mode: 1. Turn off the Atlas transceiver 2. Turn the Atlas transceiver back on – it will start in regular transmit / receiver mode. Using with Sekonic Light Meters...
- Page 6 For best results position the Atlas so the antenna is vertical. If you find your flash will not trigger: 1) reposition the remote flash or strobe; 2) change the channel on the Atlas transceivers.
- Page 7 FCC ID: XBYFKT05ZE This device complies with Part 15 of the FCC Rules. Operation is subject to the following two conditions: (1) this device may not cause harmful interference, and (2) this device must accept any interference received, including interference that may cause undesired operation.
Need help?
Do you have a question about the Atlas and is the answer not in the manual?
Questions and answers