
Related Manuals for Roland SK-50


Summary of Contents for Roland SK-50
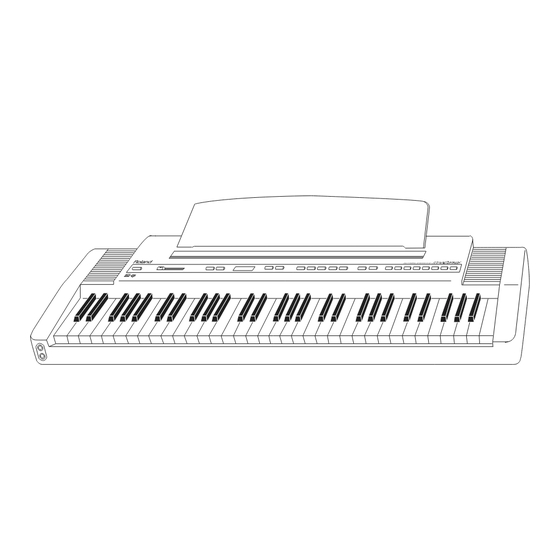
- Page 1 OWNER’S MANUAL MULTI TIMBRAL KEYBOARD SK-50 SOLO Volume Using the SK-50 with a Computer and other MIDI equipment 26053767 '94-3-E2-21S...
-
Page 2: Table Of Contents
System/GS Format, a amplifier and speakers — all in one comprehensive package. Thanks to its COMPUTER connector, the SK-50 is ready to be played by computer after making one simple connection. This makes it ideal for not only Desk Top Music creation, but for multi-media applications as well. Before connecting with a computer or other MIDI-equipped device, please refer to the separate “ENSEMBLE... -
Page 3: Important Notes
IMPORTANT NOTES • Never use benzene, thinners, alcohol or solvents of any kind, to avoid the risk of discoloration and/or deformation. Power Supply Memory Backup • Be sure to use only the adaptor supplied with the unit. Use of any other power adaptor could result •... -
Page 4: Music Rest
Concerning Symbols Used In This Manual This manual contains a number of sections which explain how to use the panel buttons on the SK-50. For any setting which can be made individually for each of the Parts, PART will appear where it is introduced. Any setting changes that are made for any of these Part-specific settings will affect only the Part which you have currently selected ( p. -
Page 5: Panel Descriptions
1. PANEL DESCRIPTIONS POWER VOLUME PITCH BEND TRANSPOSE CHORUS REVERB 1. POWER Switch Press to turn power ON or OFF. The indicator will be lit whenever power is ON. 2. VOLUME Slider Provides control over the volume of the sound output from the speakers and headphone jacks. 3. - Page 6 9. MASTER Button ( p. 24) Press this button to make settings which affect the overall performance of the SK-50. 10. MIDI Button ( Ensemble Volume p. 23) Hold this button down to make settings for MIDI.
- Page 7 8) These jacks accept the input of audio signals coming from some external unit. These signals are mixed with the audio produced by the SK-50 itself, and then output through the speakers and the audio OUTPUT jacks. 16. Audio OUTPUT Jacks (RCA Phono Jacks) ( p.
-
Page 8: Making The Connections
Connect the AC Adaptor All you need to do to get the SK-50 set up and ready to play music is to connect the supplied AC Adaptor to the instrument’s DC IN jack and plug the adaptor into a wall outlet. -
Page 9: Connect The Audio Cable
When you wish to enjoy the instrument’s sound at an even greater volume by connecting it to a keyboard amp, or when you wish to record your music onto a tape recorder, connect an audio cable between the OUTPUT jacks on the SK-50 and the audio input jacks on the external device. -
Page 10: Connecting Headphones
RS232C - 1 USE ROLAND ACK, ACB ADAPTOR ONLY Making connections for MIDI or a COMPUTER When intending to connect the SK-50 to a computer, or use MIDI to connect a sequencer or sound generating unit, please refer to the “ENSEMBLE Volume.”... -
Page 11: Turning On The Power
POWER VOLUME The SK-50’s POWER indicator lights, and the number of the Tone that was used the last time will be indicated in the display. * If you have any external audio equipment connected to the INPUT jacks of the SK-50, turn ON those devices first. -
Page 12: Listening To The Demos
Mel Torme, and the group “Chicago”. As a composer, John has written music for a wide variety of television, film and radio projects. John has become a regular spokesperson for Roland Corporation while utilizing his experience as a dynamic performing musician, composer, and educator. -
Page 13: Auditioning The Sounds
Select a Tone or a Drum Set PART First of all, you will probably want to try out some of the many sounds offered by the SK-50. Two separate categories of sounds are available: Tones and Drum Sets. Tones : When using Tones, the same Tone will sound through the full extent of the keyboard, no matter which key is pressed. - Page 14 Changing the Number To select among the 8 Tones within any Bank, press one of the NUMBER buttons (1—8). The indicator on whichever button you have pressed will light, and the Tone’s number is shown in the display. Number of Selected Tone When you play the keyboard you will now hear the Tone you just selected.
-
Page 15: Selecting Drum Sets
Selecting Drum Sets A total of 9 Drum Sets are provided. They can be selected from Banks “d1” and “d2”. Since there is no difference between the “d1” and “d2” Banks, either one of them can be selected. Changing Banks Select “d1”... -
Page 16: Making Use Of Effects
6. MAKING USE OF EFFECTS The following explains how to make effective use of a number of additional features. This effect adds notes one octave lower than those actually played to make what is played sound fatter: When this key is pressed... This note also sounds *The FAT effect cannot be obtained with Drum Set sounds. -
Page 17: Chorus
CHORUS Adds greater spaciousness and depth to the sound. It is most effective when applied to organ or string Tones. Turning CHORUS ON/OFF PART Press the CHORUS button, and confirm that its indicator is lit. The chorus effect is now on. CHORUS REVERB To turn it OFF, press the CHORUS button again, and confirm that the indicator has gone out. - Page 18 Setting the Chorus Depth (Level) PART By changing the level (0—127), you can control the degree to which the Chorus effect is applied. Hold down the CHORUS button, and press either UP or DOWN enough times to arrive at the desired depth setting.
-
Page 19: Reverb
REVERB Adds reverberations to what you play so it sounds as if it were being played in a concert hall. Turning REVERB ON/OFF PART Press the REVERB button, and confirm that its indicator is lit. The reverb effect is now on. CHORUS REVERB To turn it OFF, press the REVERB button again, and confirm that the indicator has gone out. -
Page 20: Pitch Bend/Modulation
Setting the Reverb Depth (Level) PART By changing the level (0—127), you can control the degree to which the Reverb effect is applied. Hold down the REVERB button, and press either UP or DOWN enough times to arrive at the desired depth setting. - Page 21 Pitch Bend Range Setting PART Perform the steps below to set the range over which the pitch will change while using the Pitch Bend effect. While holding down the PITCH BEND button, press either UP or DOWN until you have obtained the desired amount of pitch change.
-
Page 22: Key Transpose
KEY TRANSPOSE Key Transpose allows you to shift the range of the keyboard in semitone units. It is a convenient feature to use when wishing to accommodate the pitch of a singer’s voice, for making songs in a difficult key easier to play, or when you wish to play notes located beyond the normal range of the keyboard. -
Page 23: Changing Parts
7. CHANGING PARTS The SK-50 provides 16 Parts. Parts can be likened to the parts that make up an orchestra, since in both cases a different sound is required to be produced by each. On the SK-50 an ensemble effect can be obtained by having a number of Parts play together. But since the SK-50’s keyboard can only play one Part at a time, you will need to use a computer or sequencer to simultaneously play a number of Parts. -
Page 24: Settings For The Parts
8. SETTINGS FOR THE PARTS For each individual Part you can make settings which control their volume level and panning (orientation of sound image for stereo output). Additionally, settings can be made on an individual Part basis for every item which is indicated with PART throughout this manual. -
Page 25: Master Settings
Value for the setting 1. MASTER TUNE (TUNE) There may be times when you will wish to adjust the tuning of the SK-50 to match other instruments that are being played in a group. MASTER TUNE can conveniently be adjusted at such times. - Page 26 3. PEDAL ASSIGN (PEDAL) The PEDAL jack on the instrument’s rear panel accepts connection of an optionally available damper pedal (such as the DP-2 or DP-6), or an expression pedal (such as the EV-5). With a damper pedal connected, you obtain the “hold” effect when the pedal is depressed. With sounds such as the piano which normally tend to decay rapidly, the hold effect causes these sounds to decay more slowly than usual (much like the damper pedal on a piano).
-
Page 27: Reverting To The Default Settings
10. REVERTING TO THE DEFAULT SETTINGS By following the steps below, you can have all the settings in the SK-50 returned to their original factory values. This is known as “initialization.” Performing an Initialization While holding down the MASTER button, press “8” in the NUMBER buttons. -
Page 28: Specifications
SPECIFICATIONS Keyboard 61 keys (touch sensitive) Parts 1—16 Maximum Polyphony 28 Voices Sounds 226 Tones 9 Drum Sets (include 1 SFX Set) Effects Reverb, Chorus Display 8-segment LED,4 characters Connectors Output Jacks (L/R) Input Jacks (L/R) Headphone Jacks: 2 Pedal Jack MIDI Connectors (IN/OUT) Computer (Serial I/F) Connector Speakers... - Page 29 Information When you need repair service, call your local Roland Service Station or the authorized Roland distributor in your country as shown below. ARGENTINA INDONESIA KUWAIT SOUTH AFRICA IRELAND Instrumentos Musicales PT CITRARAMA That Other Music Shop The Dublin Service Centre Easa Husain Al-Yousifi S.A.
Need help?
Do you have a question about the SK-50 and is the answer not in the manual?
Questions and answers