Table of Contents
Advertisement
Quick Links
Advertisement
Table of Contents

Related Manuals for enphase AC Battery


Summary of Contents for enphase AC Battery
- Page 1 INSTALLATION MANUAL Enphase AC Battery 2016-11 141-00036, Rev 01...
-
Page 2: Contact Information
Product information is subject to change without notice. All trademarks are recognized as the property of their respective owners. For warranty text, refer to enphase.com/warranty. User documentation is updated frequently; Check the Enphase website (enphase.com/support) for the latest information. Read the Enphase Enlighten terms of service at enphase.com/en-us/legal/terms-of-service. -
Page 3: Table Of Contents
Planning ..............................8 Preparation ............................8 Installing the AC Battery ........................10 1. Choose a Location for the AC Battery .................... 10 2. Install the Wall-Mount Bracket ......................11 3. Install the AC Disconnect (if required) ................... 12 4. Wire the Junction Box........................13 5. -
Page 4: Safety
In all cases: If safe to do so, switch off the AC breaker for the AC Battery circuit, and if a disconnect switch is present, switch off the AC disconnect for the AC Battery circuit. Contact the fire department or other required emergency response team. - Page 5 Damage to the battery can occur from over-discharge. While in storage, the AC Battery will discharge. If the battery state of charge falls to 0%, the AC Battery can be damaged or destroyed. Because of this, the AC Battery must only be stored for a limited amount of time.
- Page 6 When replacing an Enphase AC Battery, you must replace it with an AC Battery of the same type, with the same AC current rating. When stored, the AC Battery is not connected to the grid and no automatic charge of the battery is possible.
-
Page 7: The Enphase Ac Battery
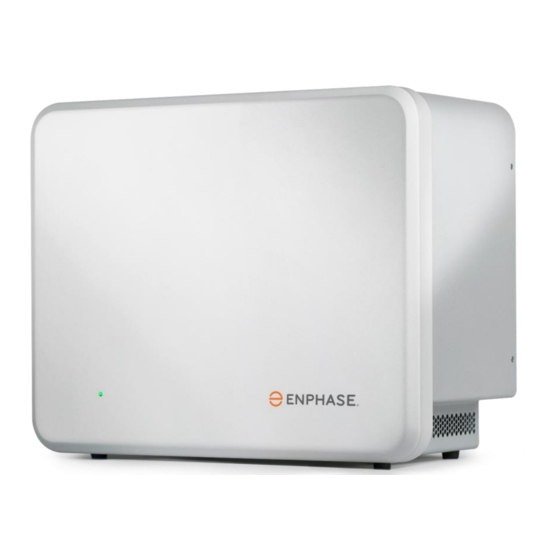
The Enphase AC Battery The Enphase AC Battery™ is the heart of the Enphase Storage System. The AC Battery is simple to install, safe, very reliable, and provides the lowest lifetime energy cost for both new solar customers and retrofit customers. -
Page 8: Block Diagram
Envoy-S. For that reason, it is critical that the Envoy-S and AC Battery(ies) are located as close as possible to each other. The Envoy should be located within 65 feet (20 m) electrical distance from the AC Battery(ies). - Page 9 Install the PV system and the Envoy-S as directed by the installation manuals. e. To record the location(s) of the AC Battery(ies), peel the removable serial number label from each battery and affix it to the respective location on a paper installation map. You will scan this map later using the Enphase Installer Toolkit™...
-
Page 10: Installing The Ac Battery
Consider the dimensions of the AC Battery, easy access, height, and length of cable when selecting the location. g. Do not block the vents or allow liquids to contact the AC Battery. The AC Battery is not waterproof. h. Select a location where you can interconnect to the site’s load center using an appropriate branch circuit. -
Page 11: Install The Wall-Mount Bracket
Verify that the wall-mount bracket is solidly attached to the wall. WARNING! Risk of injury and equipment damage. Do not mount an AC Battery on a bracket that is not properly mounted. If installing additional batteries, install the adjacent wall-mount brackets in an interleaved fashion, as needed. -
Page 12: Install The Ac Disconnect (If Required)
WARNING! Risk of equipment failure. Size the conductor gauge to account for voltage rise for both the branch circuit and all upstream conductors leading back to the PCC (point of common coupling). Refer to the technical brief on voltage rise at enphase.com/support. © 2016 Enphase Energy Inc. -
Page 13: Wire The Junction Box
Neutral. b. Using the conductors and suitable conduits, connect the AC disconnect (if used) and the first adjacent AC Battery junction box. Use the openings provided by the knockouts to connect the conduit and pass the wires through them. NOTE: Do not modify or rewire the pre-installed wiring or bonding connections in the junction box. -
Page 14: Mount The Ac Battery On The Wall
WARNING: Take care when lifting the AC Battery. The AC Battery is heavy and may require two persons to lift. a. Using both hands, take the AC Battery from the packaging and place it right side up on a flat surface. Be sure that the AC connector is not pinched underneath. -
Page 15: Energize And Commission The System
Turn on the circuit feeding the AC Battery(ies). c. The AC Battery LED should now be solid red for the duration of the start-up process. If the LED is not solid red, see following section on Troubleshooting. d. Use the Enphase Installer Toolkit to commission the AC Battery(ies). Once connected to the Envoy, refer to the Installer Toolkit help topics for more information. -
Page 16: Operation
Discharging: The AC Battery discharges power only to service local loads. It does not discharge power through the utility meter onto the electric grid. The AC Battery discharges for use by the home if all of the following occur: ... -
Page 17: Troubleshooting
If needed, you can also provision devices either by scanning the AC Battery(ies) bar code(s) or by performing a device scan. If the AC Battery(ies) cannot be detected by the device scan or if the AC Battery(ies) are not communicating, you need to relocate the Envoy-S to be electrically closer to the AC Battery(ies). This is because the Envoy-S communicates with the AC Battery using power line communications. -
Page 18: Relocate The Envoy
If the AC Battery is not working correctly, perform the following steps. If the issue persists, contact Enphase Customer Support at enphase.com/en-us/support/contact. If the AC Battery LED is off, turn off the breaker for the branch circuit, wait for at least one minute, ... -
Page 19: Battery Led Is Solid Amber
The AC Battery requires an ambient temperature between -4° F (-20° C) and 113° F (45° C), and where relative humidity is between 5 and 95 percent. Check that the front, top, and sides of the AC Battery array have at least one foot of unobstructed ... -
Page 20: Removing Or Replacing An Ac Battery
Battery to ‘Fall Asleep’. Therefore, Enphase recommends that you initiate Sleep Mode 24-48 hours in advance of the physical removal of the AC Battery. This is to ensure that sufficient time has passed to allow the AC battery to ‘Fall Asleep’. You can initiate Sleep Mode in one of three ways: Remotely (Recommended). -
Page 21: Re-Installing The Ac Battery
AC Battery Installation 2. Once you have confirmed that the AC Battery has ‘Fallen Asleep’, turn off power to AC Battery at the main load center. Verify that all power is removed from the system before attempting to remove the AC battery. -
Page 22: Replacing The Ac Battery
NOTE: When replacing an Enphase AC Battery, you must replace it with an AC Battery of the same type, with the same AC current rating. Follow the steps in “5. Mount the AC Battery on the Wall” starting on page 10. After installing the new AC Battery, do the following: 1. - Page 23 Communications LED flashes green during the scan. Device Communications LED Device Scan button 4. Log in to Enlighten to use Enlighten’s Array Builder to add the newly detected device to the virtual array. © 2016 Enphase Energy Inc. 141-00036 Rev 01...
-
Page 24: Technical Data
Cooling Natural convection: No fans. Grid configuration TN-C-S Features and Compliance Compatibility Compatible with grid-tied PV systems using the Enphase Envoy-S™ Metered gateway. Communication Power Line Communication (PLC), TCP/IP through Envoy-S. Services Maximizing self-consumption of solar, time-of-use bill management, power...
Need help?
Do you have a question about the AC Battery and is the answer not in the manual?
Questions and answers