Table of Contents
Advertisement
Advertisement
Table of Contents

Related Manuals for Leica Zeno 20


Summary of Contents for Leica Zeno 20
- Page 1 Leica Zeno 20 Android User Manual Version 1.1 English...
- Page 2 Product Identifica- The type and serial number of your product are indicated on the type plate. tion Always refer to this information when you need to contact your agency or Leica Geosystems authorised service workshop. Trademarks and • The operating system is using the Android Open Source Project (AOSP). The license...
- Page 3 Service Description myProducts Add all Leica Geosystems products that you and your company own. View detailed information on your products, buy additional options or Customer Care Packages (CCPs), update your prod- ucts with the latest software and keep up-to-date with the latest documentation.
-
Page 4: Table Of Contents
Changing the Battery 4.2.3 Charging the Battery Power Functions Connecting the Zeno 20 to a PC with the Micro-USB Cable Optimising the Zeno 20 for GNSS Tracking Setting up the Zeno 20 with a Disto S910 Software Overview: Home Screen, Navigation, Apps and Widgets Settings 5.2.1... - Page 5 Care and Transport Transport Storage Cleaning and Drying Technical Data Zeno 20 Technical Data Conformity to National Regulations Dangerous Goods Regulations Software Licence Agreement Zeno 20 Android, Table of Contents...
-
Page 6: Safety Directions
Important paragraphs which must be adhered to in practice as they enable the product to be used in a technically correct and efficient manner. Zeno 20 Android, Safety Directions... -
Page 7: Definition Of Use
Additional Advice • The Zeno 20 is essentially an enhanced PDA (personal digital assistant) used in geospatial applications. This device is to be used for data logging and data commu- nication for industrial applications only and not for domestic consumer applica- tions. -
Page 8: Responsibilities
• To ensure that it is used in accordance with the instructions. • To be familiar with local regulations relating to safety and accident prevention. • To inform Leica Geosystems immediately if the product and the application becomes unsafe. • To ensure that the national laws, regulations and conditions for the operation of e.g. - Page 9 Precautions: Make sure that the battery terminals do not come into contact with metallic objects. Only Leica Geosystems authorised service workshops are entitled to repair these prod- WARNING ucts. ...
-
Page 10: Electromagnetic Compatibility Emc
WARNING Although the product meets the strict regulations and standards which are in force in this respect, Leica Geosystems cannot completely exclude the possibility that other equipment may be disturbed. The product is a class A product when operated with the internal batteries. In a domestic environment this product may cause radio interference in which case the user may be required to take adequate measures. - Page 11 Precautions: Although the product meets the strict regulations and standards which are in force in this respect, Leica Geosystems cannot completely exclude the possibility that other equipment can be disturbed or that humans or animals can be affected. • Do not operate the product with radio or digital cellular phone devices in the vicinity of filling stations or chemical installations, or in other areas where an explosion hazard exists.
-
Page 12: Fcc Statement, Applicable In U
• Connect the equipment into an outlet on a circuit different from that to which the receiver is connected. • Consult the dealer or an experienced radio/TV technician for help. Changes or modifications not expressly approved by Leica Geosystems for compliance WARNING could void the user's authority to operate the equipment. -
Page 13: Ices-003 Statement, Applicable In Canada
:(1) Ll'appareil ne doit pas produire de brouillage. (2) L'utilisateur de l'appareil doit accepter tout brouillage radioélectrique subi, même si le brouillage est susceptible d'en compromettre le fonctionnement. Zeno 20 Android, Safety Directions... -
Page 14: Description Of The System
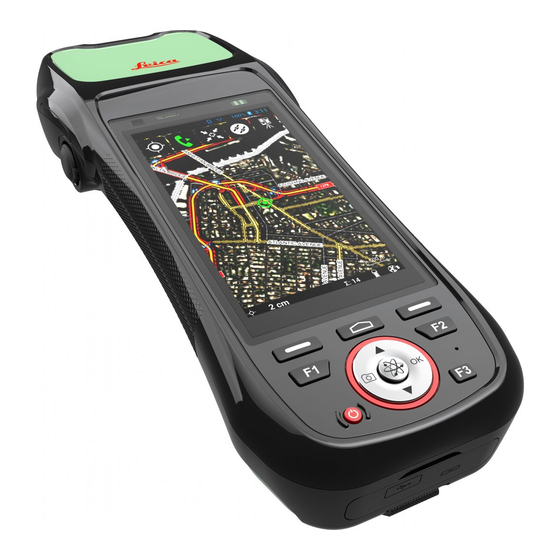
Description of the System Overview Zeno 20 General The Zeno 20 is a compact, high performance, low weight device with an integrated Description high accuracy GNSS, designed for outdoor & fieldwork usage. The Zeno 20 can with- stand severe environmental conditions including vibration, shock, moisture and temperature variations. -
Page 15: System Concept
• If ordered, the Zeno Mobile or Zeno Connect for Zeno 20. This User Manual only describes the Android version of the Zeno 20. For more information about the other version refer to the respective User Manual. The Zeno 20 is delivered with the operating system and software that you ordered. -
Page 16: Data Storage Concept
The delivered Leica Geosystems USB flash drive contains system software and is not certified for permanent data transfer i.e. as data storage for measure- ment data. Use only certified industrial grade USB flash drives such as the Leica MS1 (order number 765199). -
Page 17: Zeno 20 Components
• Desktop Charger (823055) • Additional Battery (823054) • Zeno 20 Pole Plate (823052) • Zeno 20 Pole Plate and Disto S910 Pole Plate (823053) • Additional Stylus (823049) • Disto FTA360 Adapter for Zeno 20 (827546) • Screen Protection Foil for Zeno 20 (823050) •... -
Page 18: User Interface
If camera app is opened: Press to take a picture. Press to take a picture. Camera Key Programmable hot keys. Programmable hot keys. For detailed information on the programmable hot keys, refer to "5.3.1 Hot Keys". Zeno 20 Android, User Interface... -
Page 19: Operating Principles
To close the virtual keyboard Press the left softkey on the keypad or the softkey “Back” on the screen. Gestures for Touch-Screen Tap: Tap and hold: 009105_001 009106_001 Swipe: 009107_001 Zoom in: Zoom out: Rotate: 009108_001 009111_001 009110_001 Zeno 20 Android, User Interface... -
Page 20: Led Indicators On Zeno
LED Indicators on Zeno 20 LED Indicators a) Battery LED b) GPS LED 009326_001 Status of the LED The Zeno 20 device has Light Emitting Diode indicators. They indicate the basic status Indicators of the device. Status of LED Description Battery LED Batteries are in use (discharging). -
Page 21: Operation
009802_001 Step Description Ensure that the display of the Zeno 20 is free of dust and grease. The non-reflecting display foil (b) has a carrier foil (a) with the name of the foil printed on it. Peel away the carrier foil from the display foil. - Page 22 The slots for the SIM card and the SD card are inside the battery compart- ment of the Zeno 20. Turn off the Zeno 20. Push the release lever on the back side of the Zeno 20 to the position “unlocked” and remove the cover of the battery compartment. Remove the battery.
-
Page 23: Attaching The As10/As05 Antenna To The Zeno 20
Batteries Battery Power The Zeno 20 device is designed to work with one removable battery placed inside the System battery compartment. An internal backup battery is also included, which allows to hot- swap the removable battery while the device is running. The fully charged battery provides several hours of battery life. -
Page 24: Changing The Battery
Ensure that the handheld is put into stand-by mode. Place the Zeno 20 on a stable surface, with the back side facing up. While pushing the release lever to the position “unlocked”, open and remove the cover of the battery compartment. -
Page 25: Charging The Battery
Only use the charger delivered with the Zeno 20. Similar to a smartphone, the Zeno 20 switches on automatically when you attach it to a power adapter. While charging, the device cannot be switched off. To reduce the charging time, turn off GPS. -
Page 26: Power Functions
Turning the Zeno 20 Step Description On: Step-by-step Place the Zeno 20 on a flat and stable surface or hold the device in your hand. Ensure that either the device is connected with the AC power adapter or the batteries are charged up. -
Page 27: Connecting The Zeno 20 To A Pc With The Micro-Usb Cable
20. If an SD card is inserted into the Zeno 20 and the handheld device is connected to a PC, you can also access the data that is stored on the SD card. Optimising the Zeno 20 for GNSS Tracking... -
Page 28: Setting Up The Zeno 20 With A Disto S910
Zeno 20. 009345_001 For more information on how to use the Zeno 20 with a Disto S910, refer to the respective software documentations. Accuracy of Measured Points When using the combination of Zeno 20 and Disto S910, the accuracies of the points measured with the Disto S910 depend on different variables. -
Page 29: Software
009081_001 a) Bluetooth status (on/off) b) Current volume setting/vibration mode c) Wifi status (on/off) and reception d) Modem status (on/off) and reception e) Battery status: remaining power and charging/discharging mode f) Current time g) Airplane mode Zeno 20 Android, Software... - Page 30 Use the softkeys within the navigation bar to navigate through Android. The same function of the softkeys can be executed by pressing the according hard key on the Zeno 20 keyboard (refer to " Functions of the Keys"). Back: Returns to the last page. This function also applies to pages within an app.
- Page 31 This decreases the power consumption of the Zeno 20 and thus increases the lifetime of the battery. In order to display the main settings of the Zeno 20 directly from any menu, slide down the notification drawer with two fingers. 009112_001 Apps and Widgets The home screen can have multiple pages which you can access by swiping to the left or to the right.
-
Page 32: Settings
– Define the system language and the input method. – Execute factory resets. • ACCOUNTS – Add an account. • SYSTEM – Change the settings for date and time. – Define the settings for accessibility. – Display basic phone information and execute system updates. Zeno 20 Android, Software... -
Page 33: Changing The Operating System Language
5.2.2 Resetting the Zeno 20 Device Performing a Resetting the Zeno 20 device back to factory Factory Reset default is helpful if some components of the device are not working correctly anymore. During a factory reset, Android (including all drivers) is rein- stalled completely. -
Page 34: Useful Applications
Note: The functions that you assign to the hotkeys do not apply when working within Zeno Mobile. There are predefined functions for Zeno Mobile. For infor- mation on these key functions refer to the according software documentation. Zeno 20 Android, Software... -
Page 35: Screenshots
File Manager Browse for a File The OI File Manger allows you to browse for files that are stored on the Zeno 20, on with the a USB stick plugged into the Zeno 20 or on an SD card inserted in the Zeno 20. -
Page 36: Boot Logo Changer
5.3.6 Boot Logo Changer Customise the You can customise the start-up screen of the Zeno 20 device Start-Up Screen by using the app “Boot Logo Changer”. This app is installed per default on your Android device. 1)To change the start-up screen, place the desired image file in the root directory of the device: /storage/sdcard0 or /storage/sdcard1. -
Page 37: Care And Transport
Shipping When transporting the product by rail, air or sea, always use the complete original Leica Geosystems packaging, transport container and cardboard box, or its equivalent, to protect against shock and vibration. Shipping, transport When transporting or shipping batteries, the person responsible for the product must... -
Page 38: Cleaning And Drying
Cables and plugs Keep plugs clean and dry. Blow away any dirt lodged in the plugs of the connecting cables. Connectors with Wet connectors must be dry before attaching the dust cap. dust caps Zeno 20 Android, Care and Transport... -
Page 39: Technical Data
Protection against water, dust and sand IP67 (IEC60529) Dust tight Waterproof to 1 m temporary immersion Humidity Protection: Up to 90 % The effects of condensation are to be effectively counteracted by peri- odically drying out the device. Zeno 20 Android, Technical Data... -
Page 40: Conformity To National Regulations
• FCC Part 15, 22 and 24 (applicable in US). national regulations • Hereby, Leica Geosystems AG, declares that the Zeno 20 and the Zeno 20 are in compliance with the essential requirements and other relevant provisions of Direc- tive 1999/5/EC and other applicable European Directives. The declaration of conformity may be consulted at http://www.leica-geosystems.com/ce. -
Page 41: Dangerous Goods Regulations
Leica Geosystems has developed Guidelines on “How to carry Leica products” and “How to ship Leica products” with Lithium batteries. Before any transpor- tation of a Leica product, we ask you to consult these guidelines on our web page (http://www.leica-geosystems.com/dgr) to ensure that you are in accord- ance with the IATA Dangerous Goods Regulations and that the Leica products can be transported correctly. -
Page 42: Software Licence Agreement
Leica Geosystems. Such software is protected by copyright and other laws and its use is defined and regulated by the Leica Geosystems Software Licence Agreement, which covers aspects such as, but not limited to, Scope of the Licence, Warranty, Intellectual Property Rights, Limitation of Liability, Exclusion of other Assurances, Governing Law and Place of Jurisdiction. - Page 44 837160-1.1.0en Original text Printed in Switzerland © 2015 Leica Geosystems AG, Heerbrugg, Switzerland Leica Geosystems AG Heinrich-Wild-Strasse CH-9435 Heerbrugg Switzerland Phone +41 71 727 31 31 www.leica-geosystems.com...
Need help?
Do you have a question about the Zeno 20 and is the answer not in the manual?
Questions and answers