
Subscribe to Our Youtube Channel
Related Manuals for Digitus DA-71101


Summary of Contents for Digitus DA-71101
-
Page 1: Quick Installation Guide
SATA TO IDE, SATA TO SATA, SSD/HDD MOUNTING FRAME Quick Installation Guide DA-71101: 9.5mm, IDE DA-71103: 9.5mm, SATA DA-71100: 12.7mm, IDE DA-71102: 12.7mm, SATA... -
Page 2: Technical Features
Supports: Windows 2000 / 2003 / XP / Vista / 7 / 8, Linux, Mac OS 10 Aluminum Alloy shell for better heat dissipation DA-71100 - HDD frame IDE to SATA 12,7mm Product Size: 129*128*12.7mm DA-71101 - IDE to SATA 9,5mm Product Size: 129*128*9.5mm DA-71102 - SATA to STATA (III) 12,7mm Product Size: 129*128*12.7mm Real highest 6.0Gps SATAIII transfer speed, compatible to SATAI, SATAII... - Page 3 First, unscrew the cover on the bottom of the notebook/laptop.
- Page 4 Remove the cover. Uninstall the CD-ROM driver inside the notebook/laptop.
- Page 5 12.7mm or 9.5 mm. In order to pick up the suitable 2nd HDD Caddy, it has to make sure the connector of CD-ROM driver is for SATA or IDE. DA-71101: 9.5mm, IDE DA-71103: 9.5mm, SATA DA-71100: 12.7mm, IDE DA-71102: 12.7mm, SATA...
- Page 6 Please remove the front panel of the driver. And then, unscrew the buckle on the other side of the driver.
-
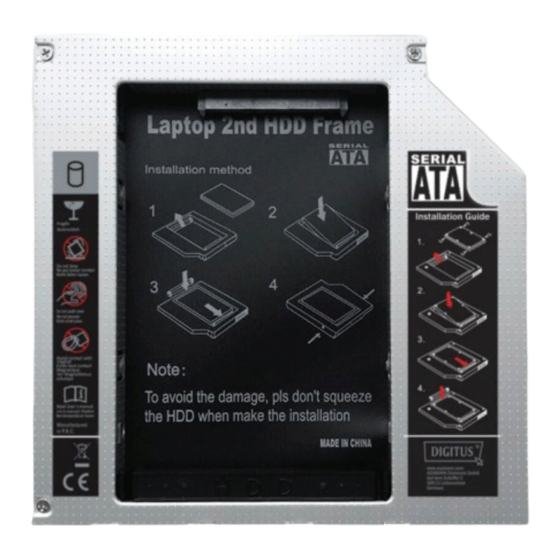
Page 7: Installation Method
Installation Method: Unpack the hard drive. Lift the hard drive caddy retaining latch. Install the screws to the hard drive 1.Insert the hard drive into the hard drive caddy. - Page 8 2. Slide the hard drive into the connector until it locks into place. 3. Lower the hard drive caddy retaining latch until it snaps closed...
- Page 9 Please assemble the panel and buckle along with the 2nd HDD Caddy, which have been chosen previously. Insert the 2nd HDD Caddy back into the notebook.
- Page 10 Finally, install the screws to the cover on the bottom of laptop again.
Need help?
Do you have a question about the DA-71101 and is the answer not in the manual?
Questions and answers