Table of Contents
Advertisement
Quick Links
Advertisement
Table of Contents

Related Manuals for B+B SmartWorx SmartFlex


Summary of Contents for B+B SmartWorx SmartFlex
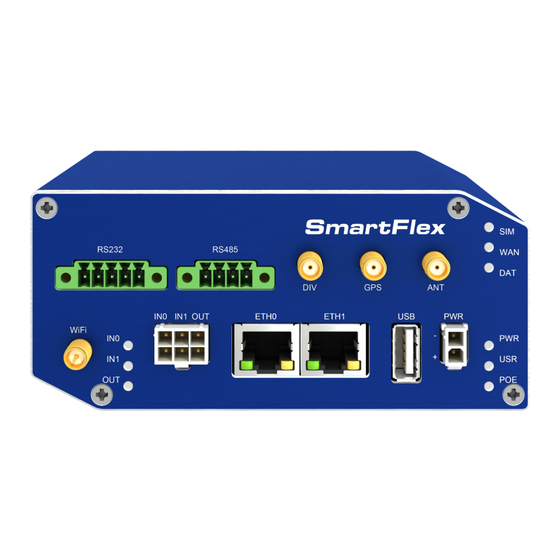
- Page 1 LTE Industrial Router SmartFlex CONFIGURATION MANUAL...
-
Page 2: Firmware Version
Advantech B+B SmartWorx s.r.o., Sokolska 71, 562 04 Usti nad Orlici, Czech Republic Document No. MAN-0023-EN, revision from September 27, 2017. Released in the Czech Republic. -
Page 3: Table Of Contents
SmartFlex Contents 1 Basic Information 1.1 Standard Equipment ....... . . - Page 4 SmartFlex 4.3.6 Switch between SIM Cards Configuration ....4.3.7 Examples of SIM Card Switching Configuration ....
- Page 5 SmartFlex 5 Customization 5.1 User Modules ........125 6 Administration 6.1 Users...
-
Page 6: List Of Figures
SmartFlex List of Figures Example of the Web Configuration ......Mobile WAN status ........ - Page 7 SmartFlex IPsec Tunnels Configuration ......Topology of IPsec Configuration Example .....
- Page 8 SmartFlex Access to the Internet from LAN – sample topology ....135 Access to the Internet from LAN – LAN configuration ....136 Access to the Internet from LAN –...
-
Page 9: List Of Tables
SmartFlex List of Tables Mobile Connection ........ - Page 10 SmartFlex OpenVPN Configuration Example ......IPsec Tunnel Configuration ......
-
Page 11: Basic Information
LANs, automatic teller machines (ATM), other self-service terminals, and many other devices. SmartFlex SR300 version of the router (LAN) is an ideal device for the realization of a secure connection of two local area networks (LANs). Interconnection is carried out using two ETHERNET 10/100 interfaces and secure tunnel (IPsec, OpenVPN, L2TP). -
Page 12: Advantages In Relation To V2 Concept Routers
Examples would include using SMS or checking the status of the binary input. SmartFlex routers can automatically update their configurations and firmware from a central server, allowing for mass reconfiguration of multiple routers at the same time. -
Page 13: This Configuration Manual Describes
SmartFlex and both are supported. Additional EUI-64 IPv6 addresses of network interfaces are generated automatically by standard methods. There is a NAT64 internal gateway network interface for automatic translation between IPv6 and IPv4 (see Chapter for more information). This gateway works together with DNS64 seamlessly (for domain names translation). -
Page 14: Access To The Web Conf
SmartFlex 2. Access to the Web Configuration Attention! Wireless transmissions work only when you activate the SIM card for data traffic and insert it into the router. Remove the power source before inserting the SIM card. You may use the web interface to monitor, configure and manage the router. To do so, enter the router’s IP address in your browser. -
Page 15: Certificates And Preventing The Security Message
SmartFlex password as soon as possible! For increased security of the network connected to the router, change the default router password. When the default password of the router is still active, the Change password title is highlighted in red. When you successfully enter login information on the login page, web interface will be displayed. - Page 16 SmartFlex Access the router via the new domain name address (E.g. https://00-11-22-33-44-55). If you see the security message, add an exception so the next time the message will not pop up (E.g. in Firefox Web browser). If there is no possibility to add an exception,...
-
Page 17: Status
SmartFlex 3. Status 3.1 General Status Selecting the General item will open a screen displaying a summary of basic information about the router and its activities. This page is also displayed when you login to the web interface. Information is divided into several sections, based upon the type of router activity or the properties area: Mobile Connection, Primary LAN, Secondary LAN, Peripheral Ports and System Information. -
Page 18: Primary Lan, Secondary Lan, Tertiary Lan, Wifi
SmartFlex Continued from previous page Item Description Tx Overruns Lost sent packets because of overload. Uptime Indicates how long the connection to the cellular network has been established. Table 1: Mobile Connection 3.1.2 Primary LAN, Secondary LAN, Tertiary LAN, WiFi Items displayed in this part have the same meaning as items in the previous part. -
Page 19: Peripheral Ports
SmartFlex 3.1.3 Peripheral Ports Item Description Expansion Port 1 Expansion port fitted to the position 1 (None indicates that this position is equipped with no port) Expansion Port 2 Expansion port fitted to the position 2 (None indicates that this... -
Page 20: Mobile Wan Status
SmartFlex 3.2 Mobile WAN Status The SmartFlex SR300 (LAN version) does not display the Mobile WAN status option. The Mobile WAN menu item contains current information about connections to the mobile network. The first part of this page (Mobile Network Information) displays basic information about mobile network the router operates in. -
Page 21: Description Of Periods
SmartFlex If a neighboring cell is highlighted in red, there is a risk that the router may repeatedly switch between the neighboring cell and the primary cell. This can affect the performance of the router. To prevent this, re-orient the antenna or use a directional antenna. -
Page 22: Mobile Wan Status
SmartFlex The middle part of this page displays information about transferred data and the number of connections for both SIM cards (for each period). Item Description RX data Total volume of received data TX data Total volume of sent data... -
Page 23: Wifi
SmartFlex 3.3 WiFi This item is available only if the router is equipped with a WiFi module. Selecting the WiFi item in the main menu of the web interface will display information about the WiFi access point (AP) and associated stations. -
Page 24: Wifi Scan
SmartFlex 3.4 WiFi Scan This item is available only if the router is equipped with a WiFi module. Selecting the WiFi Scan item scans for neighboring WiFi networks and displays the re- sults. Scanning can only be performed if the access point (WiFi AP) is off. -
Page 25: Wifi Scan
SmartFlex WiFi Scan output may look like this: Figure 4: WiFi Scan... -
Page 26: Network Status
SmartFlex 3.5 Network Status To view information about the interfaces and the routing table, open the Network item in the Status menu. The upper part of the window displays detailed information about the active interfaces only: Interface Description eth0, eth1, eth2... -
Page 27: Description Of Information In Network Status
SmartFlex Continued from previous page Item Description packets – received packets errors – number of errors dropped – dropped packets overruns – incoming packets lost because of overload. frame – wrong incoming packets because of incorrect packet size. packets – transmit packets errors –... -
Page 28: Network Status
SmartFlex Figure 5: Network Status... -
Page 29: Dhcp Status
SmartFlex 3.6 DHCP Status Information about the DHCP server activity is accessible via DHCP item. The DHCP server provides automatic configuration of the client devices connected to the router. The DHCP server assigns each device an IP address, subnet mask, default gateway (IP address of router) and DNS server (IP address of router). -
Page 30: Dhcp Status Description For Ipv4 And Ipv6 Leases
SmartFlex Records in the DHCP Status window are divided into separate parts according to LAN and WLAN interface and IPv4 (DHCP) and IPv6 (DHCPv6) – there are parts Active DHCP Leases (LAN), Active DHCPv6 Leases (LAN), Active DHCP Leases (WLAN) and Active DHCPv6 Leases (WLAN) if the router has WiFi and WLAN network interface is enabled. -
Page 31: Ipsec Status
SmartFlex 3.7 IPsec Status Selecting the IPsec option in the status menu of the web page will bring up the information for any IPsec Tunnels that have been established. If the tunnel has been built correctly, the screen will display IPsec SA established (highlighted in red in the figure below.) If there is no... -
Page 32: Dyndns Status
SmartFlex 3.8 DynDNS Status The router supports DynamicDNS using a DNS server on www.dyndns.org. If Dynamic DNS is configured, the status can be displayed by selecting menu option DynDNS. Refer to www.dyndns.org for more information on how to configure a Dynamic DNS client. -
Page 33: System Log
SmartFlex 3.9 System Log If there are any connection problems you may view the system log by selecting the System Log menu item. Detailed reports from individual applications running in the router will be dis- played. Use the Save Log button to save the system log to a connected computer. (It will be saved as a text file with the .log extension.) The Save Report button is used for creating de-... -
Page 34: Example Program Syslogd Start With The Parameter -R
SmartFlex The following example (figure) shows how to send syslog information to a remote server at 192.168.2.115 on startup. Figure 10: Example program syslogd start with the parameter -R... -
Page 35: Configuration
SmartFlex 4. Configuration 4.1 LAN Configuration To enter the Local Area Network configuration, select the LAN menu item in the Config- uration section. The LAN item will expand in the menu on the left, so you can choose the proper Ethernet interface to configure: Primary LAN for the router’s first Ethernet interface (ETH0), Secondary LAN for the router’s second Ethernet interface (ETH1) and Tertiary LAN... -
Page 36: Configuration Of The Network Interface - Ipv4 And Ipv6
SmartFlex Item Description DHCP Client Enables/disables the DHCP client function. If in IPv6 column, the DHCPv6 client is enabled. DHCPv6 client supports all three meth- ods of getting an IPv6 address – SLAAC, stateless DHCPv6 and statefull DHCPv6. disabled – The router does not allow automatic allocation of an IP address from a DHCP server in LAN network. -
Page 37: Dhcp Server
SmartFlex Item Description Bridged Activates/deactivates the bridging function on the router. no – The bridging function is inactive (default). yes – The bridging function is active. Media Type Specifies the type of duplex and speed used in the network. Auto-negation – The router automatically sets the best speed and duplex mode of communication according to the network’s... -
Page 38: Ipv6 Prefix Delegation
SmartFlex Do not to overlap ranges of static allocated IP addresses with addresses allocated by the dynamic DHCP server. IP address conflicts and incorrect network function can occur if you overlap the ranges. Item Description Enable dynamic DHCP leases Select this option to enable a dynamic DHCP server. -
Page 39: Ipv6 Prefix Delegation Configuration
SmartFlex Item Description Enable IPv6 prefix delegation Enables prefix delegation configuration filled-in below. Subnet ID The decimal value of the Subnet ID of the Ethernet inter- face. Maximum value depends on the Subnet ID Width. Subnet ID Width The maximum Subnet ID Width depends on your Site Prefix –... -
Page 40: Lan Configuration Examples
SmartFlex 4.1.3 LAN Configuration Examples Example 1: IPv4 Dynamic DHCP Server, Default Gateway and DNS Server The range of dynamic allocated IPv4 addresses is from 192.168.1.2 to 192.168.1.4. The address is allocated for 600 second (10 minutes). Default gateway IP address is 192.168.1.20 DNS server IP address is 192.168.1.20... -
Page 41: Lan Configuration For Example 1
SmartFlex Figure 14: LAN Configuration for Example 1... -
Page 42: Network Topology For Example 2
SmartFlex Example 2: IPv4 Dynamic and Static DHCP server The range of allocated addresses is from 192.168.1.2 to 192.168.1.4. The address is allocated for 600 seconds (10 minutes). The client with the MAC address 01:23:45:67:89:ab has the IP address 192.168.1.10. -
Page 43: Lan Configuration For Example 2
SmartFlex Figure 16: LAN Configuration for Example 2... -
Page 44: Network Topology For Example 3
SmartFlex Example 3: IPv6 Dynamic DHCP Server The range of dynamic allocated IPv6 addresses is from 2001:db8::1 to 2001:db8::ffff. The address is allocated for 600 second (10 minutes). The router is still accessible via IPv4 (192.168.1.1). Figure 17: Network Topology for Example 3... -
Page 45: Lan Configuration For Example 3
SmartFlex Figure 18: LAN Configuration for Example 3... -
Page 46: Vrrp Configuration
SmartFlex 4.2 VRRP Configuration VRRP via IPv6 (VRRPv3) is not supported. Select the VRRP menu item to enter the VRRP configuration. VRRP protocol (Virtual Router Redundancy Protocol) allows you to transfer packet routing from the main router to a backup router in case the main router fails. (This can be used to provide a wireless cellular backup to a primary wired router in critical applications.) If the Enable VRRP is checked, you... -
Page 47: Topology Of Vrrp Configuration Example
SmartFlex Item Description Ping IP Address Destinations IP address for the Ping commands. IP Address can not be specified as a domain name. Ping Interval Interval in seconds between the outgoing Pings. Ping Timeout Time in seconds to wait for a response to the Ping. -
Page 48: Example Of Vrrp Configuration - Backup Router
SmartFlex Figure 21: Example of VRRP configuration – backup router... -
Page 49: Mobile Wan Configuration
SmartFlex 4.3 Mobile WAN Configuration The SmartFlex SR300 (LAN version) does not display the Mobile WAN configuration option. Select the Mobile WAN item in the Configuration menu section to enter the cellular network configuration page. See Mobile WAN Configuration page in Figure 23. -
Page 50: Mobile Wan Connection Configuration
SmartFlex Continued from previous page Item Description Network type Specifies the type of protocol used in the mobile network. Automatic selection – The router automatically selects a trans- mission method according to the availability of transmission tech- nologies. It is also possible to select one of the following specific methods of data transmission: LTE, UMTS/HSPA, GPRS/EDGE. -
Page 51: Dns Address Configuration
+ bind. The disabled option deactivates checking of the connection to the mobile network. For SmartFlex SR305 routers connected to Verizon carrier (autodetected by the router): The retry interval for connecting to the mobile network prolongs with more retries. First two retries are done after 1 minute. -
Page 52: Example Of Check Connection Configuration
SmartFlex Item Description Ping IP Address Specifies the ping queries destination IPv4 address or domain name. Available in IPv4 and IPv4/IPv6 IP Mode. Ping IPv6 Address Specifies the ping queries destination IPv6 address or domain name. Available in IPv6 and IPv4/IPv6 IP Mode. -
Page 53: Switch Between Sim Cards Configuration
SmartFlex If the parameter Data Limit State (see below) is set to not applicable or Send SMS when data limit is exceeded in SMS Configuration is not selected, the Data Limit set here will be ignored. 4.3.6 Switch between SIM Cards Configuration In the lower part of the configuration form you can specify the rules for toggling between... -
Page 54: Switch Between Sim Cards Configuration
SmartFlex Continued from previous page Item Description BIN0 State Configure the use of SIM cards based on binary input 0 state: not applicable – It is possible to use the SIM regardless of BIN0 state. on – Only use the SIM card if the BIN0 state is logical 0 –... -
Page 55: Parameters For Sim Card Switching
The range in this parameter is from 1 to 10000 minutes. Table 27: Parameters for SIM card switching Specific behavior of SmartFlex SR305 routers connected to Verizon carrier described in Chapter 4.3.3... -
Page 56: Mobile Wan Configuration
SmartFlex Figure 23: Mobile WAN Configuration... -
Page 57: Examples Of Sim Card Switching Configuration
SmartFlex 4.3.7 Examples of SIM Card Switching Configuration Example 1: Timeout Configuration Mark the Switch to default SIM card after timeout check box, and fill-in the following values: Figure 24: Configuration for SIM card switching Example 1 The first attempt to change to the default SIM card is carried out after 60 minutes. When the first attempt fails, a second attempt is made after 30 minutes. -
Page 58: Pppoe Bridge Mode Configuration
ETH port of the router. You assign the IP address of the SIM card to the PC. For SmartFlex SR306 and SmartFlex SR307 routers: If you enable PPPoE bridge mode, it is not possible to use SMS Configuration features – the router will not send SMS and you can not control the router via SMS! Send SMS feature in Administartion section will not work. -
Page 59: Pppoe Configuration
SmartFlex 4.4 PPPoE Configuration PPPoE (Point-to-Point over Ethernet) is a network protocol which encapsulates PPPoE frames into Ethernet frames. The router uses the PPPoE client to connect to devices support- ing a PPPoE bridge or server. The bridge or server is typically an ADSL router. -
Page 60: Pppoe Configuration
SmartFlex Continued from previous page Item Description Specifies the Maximum Receiving Unit. The MRU identifies the max- imum packet size, that the router can receive via PPPoE. The default value is 1492 B (bytes). Other settings can cause incorrect data trans- mission. -
Page 61: Wifi Configuration
SmartFlex 4.5 WiFi Configuration This item is available only if the router is equipped with a WiFi module. Configure the WiFi network by selecting the WiFi item in the main menu of the router web interface. Activate WiFi by selecting Enable WiFi at the top of the form. You may set the following properties listed in the table below. - Page 62 If no country code is specified or if the wrong country code is en- tered, the router may violate country-specific regulations for the use of WiFi frequency bands. This option is not available on SmartFlex SR305 routers – the "US" country code is set by default on these versions of router. HW Mode HW mode of WiFi standard that will be supported by WiFi access point.
- Page 63 SmartFlex Continued from previous page Item Description Authentication Access control and authorization of users in the WiFi network. Open – Authentication is not required (free access point). Shared – Basic authentication using WEP key. WPA-PSK – Authentication using higher authentication meth- ods PSK-PSK.
- Page 64 SmartFlex Continued from previous page Item Description WEP Key 1–4 Allows entry of four different WEP keys: WEP key in ASCII format must be entered in quotes. This key can be specified in the following lengths. – 5 ASCII characters (40b WEP key) –...
- Page 65 SmartFlex Continued from previous page Item Description RADIUS Acct Access password of RADIUS accounting server. Define only if dif- Password ferent from the authentication and authorization server. In AP mode only and with one of RADIUS authentications selected. RADIUS Acct Port RADIUS accounting server port.
-
Page 66: Wifi Configuration
SmartFlex Continued from previous page Item Description Syslog Level Logging level, when system writes to the system log. Verbose debugging – The highest level of logging. Debugging Informational – Default level of logging. Notification Warning – The lowest level of system communication. -
Page 67: Wifi Configuration
SmartFlex Figure 27: WiFi Configuration... -
Page 68: Wlan Configuration
SmartFlex 4.6 WLAN Configuration This item is available only if the router is equipped with a WiFi module. The WiFi LAN and DHCP server page is displayed by selecting WLAN in the configuration section. You will then be able to set the following properties (see table below). Use the Enable WLAN interface check box at the top of this form to enable WiFi LAN interface. -
Page 69: Wlan Configuration
SmartFlex Continued from previous page Item Description DHCP Client Activates/deactivates DHCP client. If in IPv6 column, the DHCPv6 client is enabled. IP Address A fixed IP address of the WiFi interface. Use IPv4 notation in IPv4 column and IPv6 notation in IPv6 column. Shortened IPv6 notation is supported. -
Page 70: Backup Routes
SmartFlex 4.7 Backup Routes Using the configuration form on the Backup Routes page, you can back up the primary con- nection with alternative connections to the Internet (mobile network) or enable Multiple WANs mode. It is also possible to prioritize each backup connection option. Switching between connections is carried out according to order of priority and the state of the connections. -
Page 71: Backup Routes Configuration
SmartFlex Item Description Enable backup The default route is selected according to the settings below. If dis- routes switching abled (unchecked), the backup routes system operates in the back- ward compatibility mode based on the default priorities of the network interfaces (listed below). -
Page 72: Default Priorities For Backup Routes
SmartFlex Network interfaces belonging to individual backup routes are also checked before use for flags which indicate the state of the interface. (E.g. RUNNING on the Network Status page.) This prevents, for example, the disconnection of an Ethernet cable. You can fill-in one or both Ping IP Addresses (IPv4 and IPv6) –... -
Page 73: Static Routes
SmartFlex 4.8 Static Routes Static routes can be specified on the Static Routes configuration page. A static route provide fixed routing path through the network. It is manually configured on the router and must be updated if the network topology was changed recently. Static routes are private routers unless they are redistributed by a routing protocol. -
Page 74: Firewall Configuration
SmartFlex 4.9 Firewall Configuration The first security element for incoming packets is a check of the enabled source IP ad- dresses and destination ports. There is independent IPv4 and IPv6 firewall since there is dual stack IPv4 and IPv6 implemented in the router. If you click the Firewall item in the Configura- tion menu on the left, it will expand to IPv4 and IPv6 options and you can click IPv6 to enable and configure the IPv6 firewall –... -
Page 75: Filtering Of Incoming Packets
SmartFlex Item Description Source IP address the rule applies to. Use IPv4 address in IPv4 Firewall Configuration and IPv6 address in IPv6 Firewall Configuration. Protocol Specifies the protocol the rule applies to: all – The rule applies to all protocols. -
Page 76: Example Of The Ipv4 Firewall Configuration
SmartFlex Continued from previous page Item Description Protocol Specifies the protocol the rule applies to: all – The rule applies to all protocols. TCP – The rule applies to TCP protocol. UDP – The rule applies to UDP protocol. ICMP/ICMPv6 – The rule applies to ICMP protocol. In IPv6 Firewall Configuration there is the ICMPv6 option. -
Page 77: Topology For The Ipv4 Firewall Configuration Example
SmartFlex Figure 32: Topology for the IPv4 Firewall Configuration Example Figure 33: IPv4 Firewall Configuration Example... -
Page 78: Nat Configuration
SmartFlex 4.10 NAT Configuration To configure the address translation function, click on NAT in the Configuration section of the main menu. There is independent IPv4 and IPv6 NAT configuration since there is dual stack IPv4 and IPv6 implemented in the router. The NAT item in the menu on the left will expand to IPv4 and IPv6 options and you can click IPv6 to enable and configure the IPv6... -
Page 79: Nat Configuration
SmartFlex Item Description Public Port Public port for the translation rule. Private Port Private port for the translation rule. Type Protocol type – TCP or UDP. Server IPv4 address In IPv4 NAT Configuration only. IPv4 address where the router forwards incoming data. -
Page 80: Examples Of Nat Configuration
SmartFlex Continued from previous page Item Description Masquerade outgoing packets Activates/deactivates the network address tran- slation function. Table 38: Remote Access Configuration Attention! Enable remote HTTP access on port activates the redirect from HTTP to HTTPS protocol only. The router doesn’t allow unsecured HTTP protocol to access the web configuration. -
Page 81: Topology For Nat Configuration Example 1
SmartFlex Figure 35: Topology for NAT Configuration Example 1 Figure 36: NAT Configuration for Example 1... -
Page 82: Topology For Nat Configuration Example 2
SmartFlex Example 2: IPv4 NAT Configuration with More Equipment Connected In this example, using the switch you can connect more devices behind the router. Every device connected behind the router has its own IP address. Enter the address in the Server IPv Address field in the NAT dialog. -
Page 83: Nat Configuration For Example 2
SmartFlex Figure 38: NAT Configuration for Example 2... -
Page 84: Openvpn Tunnel Configuration
SmartFlex 4.11 OpenVPN Tunnel Configuration Select the OpenVPN item to configure an OpenVPN tunnel. The menu item will expand and you will see four separate configuration pages: 1st Tunnel, 2nd Tunnel, 3rd Tunnel and 4th Tunnel. The OpenVPN tunnel function allows you to create a secure connection between two separate LAN networks. - Page 85 SmartFlex Continued from previous page Item Description Remote IPv6 Subnet IPv6 address of the remote IPv6 network. Equivalent of the Re- mote Subnet in IPv4 section. Remote IPv6 Prefix IPv6 prefix of the remote IPv6 network. Equivalent of the Remote Subnet Mask in IPv4 section.
-
Page 86: Openvpn Configuration
SmartFlex Continued from previous page Item Description Authenticate Mode Specifies the authentication mode: none – No authentication is set. Pre-shared secret – Specifies the shared key function for both sides of the tunnel. Username/password – Specifies authentication using a CA Certificate, Username and Password. -
Page 87: Openvpn Tunnel Configuration
SmartFlex There is a condition for tunnel to be established: WAN route has to be active (for example mobile connection established) even if the tunnel does not go through the WAN. The changes in settings will apply after pressing the Apply button. -
Page 88: Example Of The Openvpn Tunnel Configuration In Ipv4 Network
SmartFlex 4.11.1 Example of the OpenVPN Tunnel Configuration in IPv4 Network Figure 40: Topology of OpenVPN Configuration Example OpenVPN tunnel configuration: Configuration Protocol UDP Port 1194 1194 Remote IP Address 10.0.0.2 10.0.0.1 Remote Subnet 192.168.2.0 192.168.1.0 Remote Subnet Mask 255.255.255.0 255.255.255.0... -
Page 89: Ipsec Tunnel Configuration
SmartFlex 4.12 IPsec Tunnel Configuration To open the IPsec Tunnel Configuration page, click IPsec in the Configuration section of the main menu. The menu item will expand and you will see four separate configuration pages: 1st Tunnel, 2nd Tunnel, 3rd Tunnel and 4th Tunnel. The IPsec tunnel function allows you to create a secured connection between two separate LAN networks. - Page 90 SmartFlex Continued from previous page Item Description Second Remote IPv4 subnet mask of the second network behind remote side of Subnet Mask/Prefix the tunnel, or IPv6 prefix (single number 0 to 128). For IKE Pro- tocol = IKEv2 only. Remote Protocol/Port Specifies Protocol/Port of remote side of the tunnel.
- Page 91 SmartFlex Continued from previous page Item Description IKE Algorithm Specifies the means by which the router selects the algorithm: auto – The encryption and hash algorithm are selected au- tomatically. manual – The encryption and hash algorithm are defined by the user.
-
Page 92: Ipsec Tunnel Configuration
SmartFlex Continued from previous page Item Description Authenticate Mode Specifies the means by which the router authenticates: Pre-shared key – Sets the shared key for both sides of the tunnel. X.509 Certificate – Allows X.509 authentication in multi- client mode. - Page 93 SmartFlex ******************** certification authority ************************ openssl rand -out private/.rand 1024 openssl genrsa -des3 -out private/ca.key 2048 openssl req -new -key private/ca.key -out tmp/myrootca.req openssl x509 -req -days 7305 -sha1 -extensions v3_ca -signkey private/ca.key -in tmp/myrootca.req -out ca.crt ******************** server cert ************************************* openssl genrsa -out private/server.key 2048...
- Page 94 SmartFlex FQDN (for example, @director.companyname.cz) – the @ symbol proceeds the FQDN. User FQDN (for example, director@companyname.cz) The certificates and private keys have to be in the PEM format. Use only certificates containing start and stop tags. The random time, after which the router re-exchanges new keys is defined as follows:...
-
Page 95: Ipsec Tunnels Configuration
SmartFlex Figure 41: IPsec Tunnels Configuration... -
Page 96: Example Of The Ipsec Tunnel Configuration In Ipv4 Network
SmartFlex We recommend that you maintain the default settings. When you set key exchange times higher, the tunnel produces lower operating costs, but the setting also provides less security. Conversely, when you reducing the time, the tunnel produces higher operating costs, but provides for higher security. -
Page 97: Gre Tunnels Configuration
SmartFlex 4.13 GRE Tunnels Configuration GRE is an unencrypted protocol. GRE via IPv6 is not supported. To open the GRE Tunnel Configuration page, click GRE in the Configuration section of the main menu. The menu item will expand and you will see four separate configuration pages: 1st Tunnel, 2nd Tunnel, 3rd Tunnel and 4th Tunnel. -
Page 98: Example Of The Gre Tunnel Configuration
SmartFlex Figure 43: GRE Tunnel Configuration 4.13.1 Example of the GRE Tunnel Configuration Figure 44: Topology of GRE Tunnel Configuration Example... -
Page 99: Gre Tunnel Configuration Example
SmartFlex GRE tunnel configuration: Configuration Remote IP Address 10.0.0.2 10.0.0.1 Remote Subnet 192.168.2.0 192.168.1.0 Remote Subnet Mask 255.255.255.0 255.255.255.0 Table 45: GRE Tunnel Configuration Example Examples of different options for configuration of GRE tunnel can be found in the application... -
Page 100: L2Tp Tunnel Configuration
SmartFlex 4.14 L2TP Tunnel Configuration L2TP is an unencrypted protocol. L2TP via IPv6 is not supported. To open the L2TP Tunnel Configuration page, click L2TP in the Configuration section of the main menu. The L2TP tunnel function allows you to create a password protected connection between 2 LAN networks. -
Page 101: Example Of The L2Tp Tunnel Configuration
SmartFlex 4.14.1 Example of the L2TP Tunnel Configuration Figure 46: Topology of L2TP Tunnel Configuration Example Configuration of the L2TP tunnel: Configuration Mode L2TP Server L2TP Client Server IP Address — 10.0.0.1 Client Start IP Address 192.168.2.5 — Client End IP Address 192.168.2.254... -
Page 102: Pptp Tunnel Configuration
SmartFlex 4.15 PPTP Tunnel Configuration PPTP is an unencrypted protocol. PPTP via IPv6 is not supported. Select the PPTP item in the menu to configure a PPTP tunnel. PPTP tunnel allows pass- word protected connections between two LANs. It is similar to L2TP. The tunnels are active after selecting Create PPTP tunnel. -
Page 103: Example Of The Pptp Tunnel Configuration
SmartFlex 4.15.1 Example of the PPTP Tunnel Configuration Figure 48: Topology of PPTP Tunnel Configuration Example Configuration of the PPTP tunnel: Configuration Mode PPTP Server PPTP Client Server IP Address — 10.0.0.1 Local IP Address 192.168.1.1 — Remote IP Address 192.168.2.1... -
Page 104: Services
SmartFlex 4.16 Services 4.16.1 DynDNS The DynDNS function allows you to access the router remotely using an easy to remem- ber custom hostname. This DynDNS client monitors the IP address of the router and up- dates the address whenever it changes. In order for DynDNS to function, you require a pub- lic IP address, either static or dynamic, and an active Remote Access service account at www.dyndns.org. -
Page 105: Http
SmartFlex 4.16.2 HTTP HTTP protocol (Hypertext Transfer Protocol) is internet protocol used for exchange of hy- pertext documents in HTML format. This protocol is used for accessing the web server used for user’s configuration of the router. Recommended usage however is of HTTPS protocol, which used encryption for secure exchange of transferred data. -
Page 106: Ntp
SmartFlex 4.16.3 NTP The NTP configuration form allows you to configure the NTP client. To open the NTP page, click NTP in the Configuration section of the main menu. NTP (Network Time Protocol) allows you to periodically set the internal clock of the router. The time is set from servers that provide the exact time to network devices. -
Page 107: Snmp
SmartFlex 4.16.4 SNMP The SNMP page allows you to configure the SNMP v1/v2 or v3 agent which sends in- formation about the router (and its expansion ports) to a management station. To open the SNMP page, click SNMP in the Configuration section of the main menu. SNMP (Simple Net- work Management Protocol) provides status information about the network elements such as routers or endpoint computers. -
Page 108: Oid Basic Structure
SmartFlex Activating the Enable I/O extension function allows you monitor the binary I/O inputs on the router. Selecting Enable M-BUS extension and entering the Baudrate, Parity and Stop Bits lets you monitor the meter status connected via MBUS interface. MBUS expansion port is not currently supported, but it is possible to use an external RS232/MBUS converter. -
Page 109: Snmp Configuration Example
SmartFlex This means that the router provides for example, information about the internal temperature (OID 1.3.6.1.4.1.248.40.1.3.3) or about the power voltage (OID 1.3.6.1.4.1.248.40.1.3.4). For binary inputs and output, the following range of OID is used: Description .1.3.6.1.4.1.30140.2.3.1.0 Binary input BIN0 (values 0,1) .1.3.6.1.4.1.30140.2.3.2.0... -
Page 110: Mib Browser Example
SmartFlex Figure 54: MIB Browser Example In order to access a particular device enter the IP address of the SNMP agent which is the router, in the Remote SNMP agent field. The dialog displayed the internal variables in the MIB tree after entering the IP address. Furthermore, you can find the status of the internal variables by entering their OID. -
Page 111: Smtp
SmartFlex 4.16.5 SMTP Use the SMTP form to configure the Simple Mail Transfer Protocol client (SMTP) for send- ing e-mails. IPv6 e-mail servers are supported. Item Description SMTP Server Address IPv4 address, IPv6 address or domain name of the mail server. - Page 112 SmartFlex Commands and parameters can be entered only in lowercase. Example of sending an e-mail: email –t john@doe.com –s "System Log" -m "Attached" -a /var/log/messages The command above sends an e-mail to address john@doe.com with the subject "System Log", body message "Attached" and attachment messages file with System Log of the router...
-
Page 113: Sms
SmartFlex 4.16.6 SMS The SMS Configuration page is not available for the SmartFlex SR300 routers (LAN version). Open the SMS Configuration page, click SMS in the Configuration section of the main menu. The router can automatically send SMS messages to a cell phone or SMS message server when certain events occur. -
Page 114: Control Via Sms
SmartFlex After you enter a phone number in the Phone Number 1 field, the router allows you to configure the control of the device using an SMS message. You can configure up to three numbers for incoming SMS messages. To enable the function, mark the Enable remote control via SMS check box. -
Page 115: Control Sms
SmartFlex Continued from previous page Description set profile std Sets the standard profile set profile alt1 Sets the alternative profile 1 set profile alt2 Sets the alternative profile 2 set profile alt3 Sets the alternative profile 3 reboot The router reboots... -
Page 116: List Of At Commands
SmartFlex AT Command Description AT+CGMI Returns the specific identity of the manufacturer. AT+CGMM Returns the specific model identity of the manufacturer. AT+CGMR Returns the specific model revision identity of the manufacturer. AT+CGPADDR Displays the IP address of the usb0 interface. -
Page 117: Sms Configuration For Example
SmartFlex Examples of SMS Configuration Example 1 Sending SMS Configuration After powering up the router, the phone with the number entered in the dialog receives an SMS in the following form: Router (Unit ID) has been powered up. Signal strength –xx dBm. -
Page 118: Sms Configuration For Example 2
SmartFlex Example 2 Sending SMS via Serial Interface on the Port 1 Figure 57: SMS Configuration for Example 2 Example 3 Control the Router Sending SMS from any Phone Number Figure 58: SMS Configuration for Example 3... -
Page 119: Sms Configuration For Example 4
SmartFlex Example 4 Control the Router Sending SMS from Two Phone Numbers Figure 59: SMS Configuration for Example 4... -
Page 120: Ssh
SmartFlex 4.16.7 SSH SSH protocol (Secure Shell) allows to carry out a secure remote login to the router. Con- figuration form of SSH service can be done in SSH configuration page under Services menu item. By ticking Enable SSH service item the SSH server on the router is enabled. -
Page 121: Expansion Port Configuration
SmartFlex 4.17 Expansion Port Configuration Configuration of the expansion port can be done via Expansion Port 1 or Expansion Port 2 items in the menu. If the router has the RS232 interface, you configure it with the Expansion Port 1 selection. -
Page 122: Expansion Port Configuration 1
SmartFlex Continued from previous page Item Description Mode Mode of connection: TCP server – The router will listen for incoming TCP connection requests. TCP client – The router will connect to a TCP server on the specified IP address and TCP port. -
Page 123: Expansion Port Configuration
SmartFlex When you mark the Use DTR as control of TCP connection check box, the router uses the data terminal ready (DTR) single to control the TCP connection. The remote device sends a DTR single to the router indicating that the remote device is ready for communications. -
Page 124: Examples Of The Expansion Port Configuration
SmartFlex 4.17.1 Examples of the Expansion Port Configuration Figure 62: Example of Ethernet to serial communication Figure 63: Example of serial port extension... -
Page 125: Usb Port Configuration
SmartFlex 4.18 USB Port Configuration You can use a USB to RS232 converter to send data out of the serial port from the Ethernet network in the same manner as the RS232 expansion port function. To specify the values for the USB port parameters, click USB Port in the Configuration section of the main menu. -
Page 126: Usb Port Configuration 2
SmartFlex If you mark the Reject new connections check box, then the router rejects any other con- nection attempt. This means that the router no longer supports multiple connections. If you mark the Check TCP connection check box, the router verifies the TCP connection. -
Page 127: Examples Of Usb Port Configuration
SmartFlex Figure 64: USB configuration 4.18.1 Examples of USB Port Configuration Figure 65: Example 1 – USB port configuration... -
Page 128: Example 2 - Usb Port Configuration
SmartFlex Figure 66: Example 2 – USB port configuration... -
Page 129: Scripts
SmartFlex 4.19 Scripts There is possibility to create your own shell scripts executed in the specific situations. Go to the Scripts page in the Configuration section in the menu. The menu item will expand and there are Startup Script, Up/Down IPv4 and Up/Down IPv6 scripts you can use – there is IPv4 and IPv6 independent dual stack. -
Page 130: Up/Down Scripts
SmartFlex When the router starts up, stop syslogd program and start syslogd with remote logging on address 192.168.2.115 and limited to 100 entries. Add these lines to the Startup Script: killall syslogd syslogd -R 192.168.2.115 -S 100 4.19.3 Up/Down Scripts Use the Up/Down IPv4 and Up/Down IPv6 page to create scripts executed when the Mobile WAN connection is established (up) or lost (down). - Page 131 SmartFlex After establishing or losing an IPv6 WAN connection (connection to mobile network), the router sends an email with information about the connection state. It is necessary to configure SMTP before. Add this line to the Up Script field: email -t name@domain.com -s "Router" -m "Connection up."...
-
Page 132: Automatic Update Configuration
SmartFlex 4.20 Automatic Update Configuration The router can be configured to automatically check for firmware updates from an FTP site or a web server and update its firmware or configuration information. IPv6 sites/servers are supported. Use the Automatic update menu to configure the automatic update settings. It is also possible to update the configuration and firmware through the USB host connector of... -
Page 133: Example Of Automatic Update
firmware compatibility is at the beginning of the user module’s Application Note. 4.20.1 Example of Automatic Update In the following example the router checks for new firmware or configuration file each day at 1:00 a.m. An example is given for the SmartFlex router. Firmware file: http://example.com/SPECTRE-v3-LTE.bin Configuration file:... -
Page 134: Example Of Automatic Update Based On Mac
4.20.2 Example of Automatic Update Based on MAC In the following example the router checks for new firmware or configuration each day at 1:00 a.m. An example is given for the SmartFlex router with MAC address 00:11:22:33:44:55. Firmware file: http://example.com/SPECTRE-v3-LTE.bin Configuration file:... -
Page 135: Customization
SmartFlex 5. Customization 5.1 User Modules You may run custom software programs in the router to enhance the features of the router. Use the User Modules menu item to add new software modules to the router, to remove them, or to change their configuration. Use the Browse button to select the user module (compiled module has tgz extension). -
Page 136: User Modules
SmartFlex Module name Description MODBUS TCP2RTU Provides a conversion of MODBUS TCP/IP protocol to MDBUS RTU protocol, which can be operated on the serial line. Easy VPN client Provides secure connection of LAN network behind our router with LAN network behind CISCO router. -
Page 137: Administration
SmartFlex 6. Administration 6.1 Users This configuration function is only available for users assigned the admin role! To assign roles and manage user accounts open the Users form in the Administration section of the main menu. The first frame of this configuration form contains an overview of available users. -
Page 138: Change Profile
SmartFlex Ordinary users are not able to access router via Telnet, or SFTP. Read only FTP access is allowed for these users. Figure 73: Users 6.2 Change Profile In addition to the standard profile, up to three alternate router configurations or profiles can be stored in router’s non-volatile memory. -
Page 139: Change Password
SmartFlex 6.3 Change Password Use the Change Password configuration form in the Administration section of the main menu for changing your password used to log on the device. Enter the new password in the New Password field, confirm the password using the Confirm Password field, and press the Apply button. -
Page 140: Set Sms Service Center Address
SmartFlex 6.5 Set SMS Service Center Address The SmartFlex SR300 router does not support the Set SMS Service Center Address option. The function requires you to enter the phone number of the SMS service center to send SMS messages. To specify the SMS service center phone number use the Set SMS Ser- vice Center configuration form in the Administration section of the main menu. -
Page 141: Unblock Sim Card
SmartFlex 6.7 Unblock SIM Card The SmartFlex SR300 router does not support the Unblock SIM Card option. SIM card can be unblocked on Unblock SIM Card administration page. The SIM card can be either unblocked or just the SIM code can be changed. In both cases the PUK code into SIM PUK field and new SIM code into New SIM PIN field has to be entered. -
Page 142: Backup Configuration
SmartFlex 6.9 Backup Configuration Keep in mind potential security risks when creating backup, especially for user accounts. Secured connection to the router should be used. You can save actual configuration of the router using the Backup Configuration item in the Administration menu section. If you click on this item a configuration pane will open, see figure 81. -
Page 143: Update Firmware
SmartFlex 6.11 Update Firmware Select the Update Firmware menu item to view the current router firmware version and load new firmware into the router. There is current firmware version and firmware filename written out. When loading the new firmware, it has to have this name. To load new firmware, browse to the new firmware file and press the Update button to begin the update. -
Page 144: Reboot
SmartFlex After the firmware update, the router will automatically reboot: Starting with FW 5.1.0, a mechanism to prevent multiple startups of the firmware update is included. Firmware update can cause incompatibility with the user modules. It is recom- mended to update user modules to the most recent version. Information about user module and firmware compatibility is at the beginning of the user module’s Application Note. -
Page 145: Typical Situations
SmartFlex 7. Configuration in Typical Situations Although Advantech B+B SmartWorx routers have wide variety of uses, they are commonly used in the following ways. All the examples below are for IPv4 networks. These examples are not suitable for SmartFlex SR300 router (no cellular module). -
Page 146: Access To The Internet From Lan - Lan Configuration
SmartFlex Figure 86: Access to the Internet from LAN – LAN configuration Mobile WAN Configuration Use the Mobile WAN item in the Configuration section to con- figure the connection to the mobile network. (Fig. 87.) In this case (depending on the SIM card) the configuration form can be blank. -
Page 147: Backup Access To The Internet From Lan
SmartFlex 7.2 Backup Access to the Internet from LAN Figure 88: Backup access to the Internet – sample topology The configuration form on the Backup Routes page lets you back up the primary connection with alternative connections to the Internet/mobile network. Each backup connection can be assigned a priority. -
Page 148: Backup Access To The Internet - Wifi Configuration
SmartFlex LAN configuration In the LAN item, Primary LAN, you can use the factory default configu- ration as in the previous situation. The ETH1 interface on the front panel of the router is used for connection to the Internet. It can be configured in Secondary LAN. Connect the cable to the router and set the appropriate values as in Fig. -
Page 149: Backup Access To The Internet - Wlan Configuration
SmartFlex Figure 91: Backup access to the Internet – WLAN configuration Mobile WAN configuration To configure the mobile connection it should be sufficient to in- sert the SIM card into the SIM1 slot and attach the antenna to the ANT connector. (Depending on the SIM card you are using). -
Page 150: Backup Access To The Internet - Backup Routes Configuration
SmartFlex Backup Routes configuration After setting up the backup routes you will need to set their priorities. In Figure the eth1 wired connection has the highest priority. If that connection fails, the second choice will be the WiFi wlan0 network interface. The third choice will be the mobile connection –... -
Page 151: Secure Networks Interconnection Or Using Vpn
SmartFlex 7.3 Secure Networks Interconnection or Using VPN Figure 94: Secure networks interconnection – sample topology VPN (Virtual Private Network) is a protocol used to create a secure connection between two LANs, allowing them to function as a single network. The connection is secured (encrypted) and authenticated (verified). -
Page 152: Secure Networks Interconnection - Openvpn Configuration
SmartFlex Mobile WAN configuration The mobile connection can be configured as described in the previous situations. (The router connects itself after a SIM card is inserted into SIM1 slot and an antenna is attached to the ANT connector.) Configuration is accessible via the Mobile WAN item the Configuration section. (See Chap- ter 4.3.1). -
Page 153: Serial Gateway
SmartFlex 7.4 Serial Gateway Figure 96: Serial Gateway – sample topology The router’s serial gateway function lets you establish serial connectivity across the Internet or with another network. Serial devices (meters, PLC, etc.) can then upload and download data. (See Fig. 96.) To use this function the router model must have a serial interface (port). -
Page 154: Serial Gateway - Konfigurace Expansion Port 1
SmartFlex Figure 97: Serial Gateway – konfigurace Expansion Port 1 To communicate with the serial device (PLC), connect from the PC (Labeled as SCADA in Fig. 96) as a TCP client to the IP address 10.0.6.238, port 2345 (the public IP address of the SIM card used in the router, corresponding to the usb0 network interface). -
Page 155: Glossary And Acronyms
SmartFlex 8. Glossary and Acronyms Backup Routes Allows user to back up the pri- GRE Generic Routing Encapsulation (GRE) is mary connection with alternative connections to a tunneling protocol that can encapsulate a wide the Internet/mobile network. Each backup con- variety of network layer protocols inside virtual nection can have assigned a priority. - Page 156 SmartFlex growth of the Internet and the predicted deple- (2001:0db8:85a3:0042:1000:8a2e:0370:7334), tion of available addresses, a new version of IP but methods of abbreviation of this full notation (IPv6), using 128 bits for the address, was de- exist. veloped in 1995.
- Page 157 SmartFlex tween computer systems over packet-switched, ity (CA). A root certificate is part of a public key variable-latency data networks. infrastructure scheme. The most common com- mercial variety is based on the ITU-T X.509 stan- OpenVPN OpenVPN implements virtual pri-...
- Page 158 SmartFlex SNMP The Simple Network Management Pro- messages, in this case referred to as datagrams, tocol (SNMP) is an Internet-standard protocol to other hosts on an Internet Protocol (IP) net- for managing devices on IP networks. Devices work without prior communications to set up spe- that typically support SNMP include routers, cial transmission channels or data paths.
- Page 159 SmartFlex to provide a wireless cellular backup to a primary less of location. The Internet can be considered wired router in critical applications). a WAN as well, and is used by businesses, gov- ernments, organizations, and individuals for al- WAN A wide area network (WAN) is a network most any purpose imaginable.
-
Page 160: Index
9. Index DNS64 ........Domain Name System ....see DNS DoS attacks . - Page 161 Authenticate Mode ....PIN number ......Encapsulation Mode .
- Page 162 SmartFlex Switch between SIM Cards ....USB Port ....... . .
-
Page 163: Recommended Literature
SmartFlex 10. Recommended Literature Advantech B+B SmartWorx: Commands and Scripts for v2 and v3 Routers, Application Note Advantech B+B SmartWorx: SmartCluster, Application Note Advantech B+B SmartWorx: R-SeeNet, Application Note Advantech B+B SmartWorx: R-SeeNet Admin, Application Note Advantech B+B SmartWorx: OpenVPN Tunnel, Application Note...
Need help?
Do you have a question about the SmartFlex and is the answer not in the manual?
Questions and answers