Raymarine S1000 Installation Manual
Hide thumbs
Also See for S1000:
- Manual (80 pages) ,
- User manual (40 pages) ,
- Installation manual (37 pages)

Related Manuals for Raymarine S1000


Summary of Contents for Raymarine S1000
-
Page 1: Installation Guide
87040_1.book Page 1 Wednesday, December 22, 2004 12:32 PM SmartPilot S1000 Autopilot Installation Guide Document Number: 87040-1 Date: December 2004... - Page 2 87040_1.book Page 2 Wednesday, December 22, 2004 12:32 PM Welcome to the Raymarine S1000 Autopilot Congratulations on having bought a Raymarine S1000 Autopilot. This state-of-the-art product is specifically designed to be easily integrated with your boat’s steering system, and enable you to automatically control the steering.
-
Page 3: Installation Overview
87040_1.book Page 1 Wednesday, December 22, 2004 12:32 PM S1000 Autopilot Installation Guide Installation overview Connect the autopilot pump to your existing steering system. Page 9 Bleed the steering system. Page 12 Secure the autopilot pump. Page 16 Fit the course computer. -
Page 4: This Guide
S1000 Autopilot Installation Guide This guide Before starting to install your S1000 Autopilot, please take time to read this guide. In particu- lar, please take note of the safety and electromagnetic compatibility (EMC) information at the end of this guide. -
Page 5: What You Need
87040_1.book Page 3 Wednesday, December 22, 2004 12:32 PM S1000 Autopilot Installation Guide What you need Parts supplied Elbow fitting, x 4 Straight fitting x 2 Autopilot Pump Anti-vibration mounts x 2 'T' fitting x 2 High pressure Low pressure... - Page 6 87040_1.book Page 4 Wednesday, December 22, 2004 12:32 PM S1000 Autopilot Installation Guide Tools & materials required Pencil Screwdriver, No. 2 Pozidriv Countersink Drill Screwdriver, Screwdriver, small, medium, Absorbent, flat blade flat blade disposable wipes...
-
Page 7: Locating The Course Computer
If you have internet access, please view the installation video on line at www.raymarine.com. Before you disturb your hydraulic steering system, we strongly recommend that you consult the manufacturer and read the steering system manuals. - Page 8 87040_1.book Page 6 Wednesday, December 22, 2004 12:32 PM S1000 Autopilot Installation Guide Locating autopilot pump Autopilot pump to be lower than helm pump Provide protection Install in a dry location. from physical damage. Do not fit in engine compartments, near fuel tanks or in any other area where fuel vapor is likely.
- Page 9 87040_1.book Page 7 Wednesday, December 22, 2004 12:32 PM S1000 Autopilot Installation Guide Using the hydraulic hoses Three, pre-assembled hydraulic hoses are supplied. Two of these are dark-colored, high pressure steering hoses and the third is a transparent low-pressure hose.
- Page 10 87040_1.book Page 8 Wednesday, December 22, 2004 12:32 PM S1000 Autopilot Installation Guide Sealing hydraulic joints CAUTION: Do not use sealing tape on any part of a hydraulic system, as this can disintegrate and the resulting particles can cause blockages in the hydraulic system.
-
Page 11: Connecting The Autopilot Pump
87040_1.book Page 9 Wednesday, December 22, 2004 12:32 PM S1000 Autopilot Installation Guide Installation procedures 1. Connecting the autopilot pump Connecting the autopilot pump, sheet 1 WARNING: Do not allow hydraulic fluid to come into contact with your skin. Wear the protective nitrile gloves provided when working with hydraulic fluid. - Page 12 87040_1.book Page 10 Wednesday, December 22, 2004 12:32 PM S1000 Autopilot Installation Guide Connecting the autopilot pump, sheet 2 Connecting the autopilot pump, sheet 2 Set steering to dead ahead Set steering to dead ahead Remove & retain the helm pump Remove &...
- Page 13 87040_1.book Page 11 Wednesday, December 22, 2004 12:32 PM S1000 Autopilot Installation Guide Connecting the autopilot pump, sheet 3 Connect hydraulic steering hoses from Re-connect the ram hoses to the autopilot pump Port and Starboard appropriate helm pump 'T' connectors.
-
Page 14: Bleeding The Steering System
87040_1.book Page 12 Wednesday, December 22, 2004 12:32 PM S1000 Autopilot Installation Guide 2. Bleeding the steering system WARNING: Do not allow hydraulic fluid to come into contact with your skin. Wear the protective nitrile gloves provided when working with hydraulic fluid. - Page 15 87040_1.book Page 13 Wednesday, December 22, 2004 12:32 PM S1000 Autopilot Installation Guide Bleed procedure, sheet 2 Using a suitable screwdriver, turn the autopilot pump shaft so that the flat on the shaft is toward the PORT side of the pump SLOWLY turn the wheel counter-clockwise and observe the bubbles in the transparent tube.
- Page 16 87040_1.book Page 14 Wednesday, December 22, 2004 12:32 PM S1000 Autopilot Installation Guide Bleed procedure, sheet 3 Using a suitable screwdriver, turn the autopilot pump shaft so that the flat on the shaft is toward the starboard (STBD) side of the pump SLOWLY turn the wheel clockwise and observe the bubbles in the transparent tube.
- Page 17 87040_1.book Page 15 Wednesday, December 22, 2004 12:32 PM S1000 Autopilot Installation Guide Bleed procedure, sheet 4 Top up the hydraulic fluid. Correct fluid level Helm pump Turn the autopilot pump bleed screw, fully clockwise, and hand-tighten it. Replace the helm pump breather cap.
- Page 18 87040_1.book Page 16 Wednesday, December 22, 2004 12:32 PM S1000 Autopilot Installation Guide 3. Securing the pump Securing the pump Place the pump at the intended Drill two 1/8" (3.4 mm) pilot holes for the fixing screws location and mark holes for the fixing screws.
- Page 19 87040_1.book Page 17 Wednesday, December 22, 2004 12:32 PM S1000 Autopilot Installation Guide 4. Fitting the course computer Securing course computer Mark holes for fixing screws. Drill two 1/82" (3.4 mm) pilot holes for fixing screws Countersink pilot holes to prevent Partially screw in the screws provided, damage to the mounting surface.
- Page 20 87040_1.book Page 18 Wednesday, December 22, 2004 12:32 PM S1000 Autopilot Installation Guide 5. Fitting miscellaneous items Buzzer Locating Securing / " Mark holes for fixing screws. Drill two (3.4 mm) pilot holes. Countersink pilot holes to prevent Secure the buzzer with the screws damage to the mounting surface.
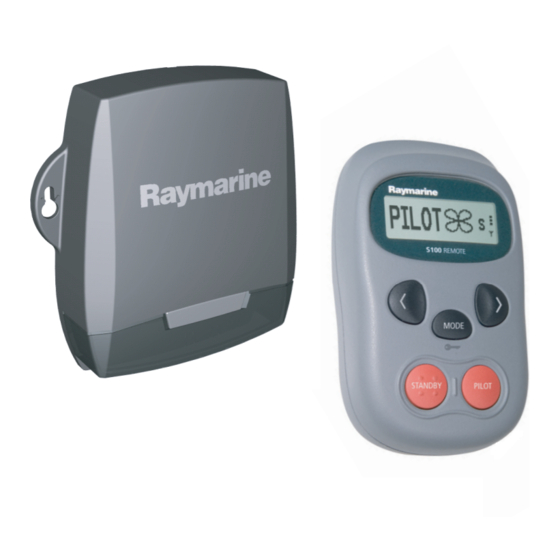
- Page 21 87040_1.book Page 19 Wednesday, December 22, 2004 12:32 PM S1000 Autopilot Installation Guide Fitting S100 Remote cradle On belt clip At fixed position Mark holes for the fixing screws. / " Drill three (3.4 mm) pilot holes for the fixing screws Countersink the pilot holes to prevent damage to the mounting surface.
- Page 22 87040_1.book Page 20 Wednesday, December 22, 2004 12:32 PM S1000 Autopilot Installation Guide In-line power switch Locating Fit the in-line power switch in an easily-accessible location. Securing inch (18 mm) inch (5 mm) maximum Ensure the protrusion on the switch barrel goes fully into the mounting hole.
-
Page 23: Electrical Connections Overview
87040_1.book Page 21 Wednesday, December 22, 2004 12:32 PM S1000 Autopilot Installation Guide 6. Electrical connections Overview Summary WARNING: Before making electrical connections to any part of the S1000 system, ensure the power source for the system is switched off. Course Computer Autopilot Pump RF ground... -
Page 24: Connecting Wires
87040_1.book Page 22 Wednesday, December 22, 2004 12:32 PM S1000 Autopilot Installation Guide Connecting wires When you need to join thin, data wires, use the Scotchlock connectors provided. Procedures Diagram A: Connecting RF ground - preferred method Course computer S1000 Autopilot... - Page 25 87040_1.book Page 23 Wednesday, December 22, 2004 12:32 PM S1000 Autopilot Installation Guide Connecting RF ground - alternative method Note: Use this method of connecting the terminal, ONLY if the boat does not have an RF grounding plate. Do NOT connect the terminal to any other point.
- Page 26 87040_1.book Page 24 Wednesday, December 22, 2004 12:32 PM S1000 Autopilot Installation Guide Diagram B: Connecting power & autopilot pump Course computer S1000 Autopilot Product Code: A18107 0191 POWER PUMP FCC ID PJ5S1000 IC: 4069B-S1000 Raymarine Ltd Portsmouth PO3 5TD England...
- Page 27 Course Computer. For details of the NMEA Spur connections, refer to Diagram D Each time power is applied to an S1000 Autopilot connected to a Raymarine GPS (via NMEA or SeaTalk), the S1000 will set the GPS filtering to WEAK.
-
Page 28: Nmea Connections
S1000 Autopilot Installation Guide Diagram D: NMEA connections Course Computer Using with Raymarine GPS If a Raymarine GPS (such as the Raystar 120 or 125) is to be connected to the S1000 Autopilot via NMEA, lines must all be NMEA in out, +ve correctly connected. - Page 29 87040_1.book Page 27 Wednesday, December 22, 2004 12:32 PM S1000 Autopilot Installation Guide Secure wires Course Computer POWER PUMP Post installation This completes the installation procedure. Now carry out the procedures (below).
-
Page 30: Post Installation
If the steering feels uneven and/or less responsive than it was before you installed your S1000 Autopilot, you may need to bleed the entire steering system. To do this, use the purge procedure at the following web address: http://www.seastarsteering.com/OUTBOARD/oboard.htm?../FILL_PURGE/FillPurge.htm&1... - Page 31 WARNING: Before switching on power to the course computer, make sure that personnel are clear of the steering gear and that the boat is securely moored. 1. Switch on power to the S1000 system. 2. Carry out the commissioning procedure.
- Page 32 87040_1.book Page 30 Wednesday, December 22, 2004 12:32 PM S1000 Autopilot Installation Guide Commissioning using Autolearn - sheet 1 WARNING: The Autolearn process takes your boat through a series of zig-zag maneuvers, so a significant amount of CLEAR SPACE is required in front of your boat. Do NOT start Autolearn unless this space is available.
- Page 33 87040_1.book Page 31 Wednesday, December 22, 2004 12:32 PM S1000 Autopilot Installation Guide Commissioning using Autolearn - sheet 2 Press PILOT to begin. Your boat will then make a series of LEARNING... STEP 1 zig-zag turns and the S100 display will show the Autolearn step numbers (counting up).
- Page 34 87040_1.book Page 32 Wednesday, December 22, 2004 12:32 PM S1000 Autopilot Installation Guide...
-
Page 35: Specifications
87040_1.book Page 33 Wednesday, December 22, 2004 12:32 PM S1000 Autopilot Installation Guide Specifications System Approvals: FCC, EMC, CE, IC Autopilot pump Voltage:10.5 V dc to 13.8 V dc Current consumption: 4 A at 100 psi (69 kP), 7 A at 500 psi (3449 kP) Dimensions: 6.5 in (165 mm) x 2.5 in (65 mm) x 3.2 in (82 mm) -
Page 36: Safety Notices
Information To the best of our knowledge, the information in this guide was correct when it went to press. However, Raymarine cannot accept liability for any inaccuracies or omissions it may contain. In addition, our policy of continuous product improvement may change specifications without notice. Therefore, Raymarine cannot accept liability for any differences between the product and this guide. -
Page 37: Suppression Ferrites
Raymarine. D3548-6 Connections to Other Equipment If your Raymarine equipment is to be connected to other equipment using a cable not supplied by Raymarine, a suppression ferrite MUST always be attached to the cable near the Raymarine unit. - Page 38 87040_1.book Page 36 Wednesday, December 22, 2004 12:32 PM Raymarine UK Ltd, Raymarine Inc, Quay Point, 22 Cotton Road, Northarbour Road Unit D, Nashua, Portsmouth, New Hampshire 03063-4219, Hampshire PO6 3TD, USA. United Kingdom. Tel: +1 603.881.5200 Tel: +44 (0) 23 9269 3611 Fax: +1 603.864.4756...
Need help?
Do you have a question about the S1000 and is the answer not in the manual?
Questions and answers