Table of Contents
Advertisement
Advertisement
Table of Contents

Related Manuals for GME TX665


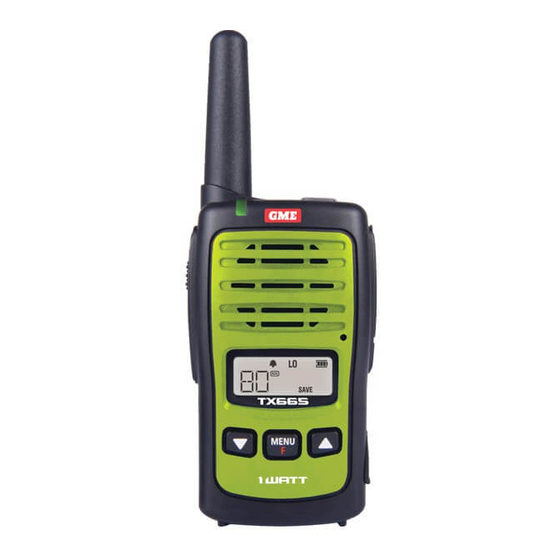
Summary of Contents for GME TX665
-
Page 2: Table Of Contents
LCD ICONS ......... 7 MENU ..........15 CHARGING THE BATTERY ..... 8 Using the Menu ......15 Charging the TX665 Single Unit ..8 Channel selection ......15 Charging the TX665 Twin Pack ..8 Duplex mode selection....16 In-vehicle charging ......9 CTCSS and DCS Code Selection .. -
Page 3: Important Information Concerning Uhf Cb Radio
IMPORTANT INFORMATION CONCERNING UHF CB RADIO The use of the Citizen Band radio service is licensed in Australia by the ACMA Radio communications (Citizens Band radio Stations) Class Licence and in New Zealand by the Ministry of Economic Development New Zealand (MED). A General User Radio Licence for Citizens Band radio and operation is subject to conditions contained in those licences. -
Page 4: Emergency Channels
+60°C. SUPPLIED WITH TX665 TX665TP • TX665 radio • 2 x TX665 radios • Belt clip • 2 x Li-ion battery packs (1000 mAh) • Li-ion battery pack (1000 mAh) • 2 x belt clips • AC adaptor •... -
Page 5: Optional Accessories
OPTIONAL ACCESSORIES • Twin desktop charger (BCD018) Faceplate colours (HA001) • • USB 12V vehicle charger (BCV010) • Speaker microphone (MC007) • Leather carry case (LC008) • Clear acoustic tube and lapel microphone (HS010) • Ear microphone (HS009) FEATURES TRANSMIT (TX) 1.0/0.5 watt RF power: Selectable transmitter power allows you to conserve battery power when transmitting in close range by using the Low Power setting. -
Page 8: Charging The Battery
CHARGING THE TX665 SINGLE UNIT The TX665 is supplied with a 240V AC adaptor and a USB lead. The AC adaptor will charge a fully discharged TX665 battery pack to full capacity in around 2 hours. To charge the radio 1. -
Page 9: In-Vehicle Charging
IN-VEHICLE CHARGING A 12V vehicle charger (BCV010) is available as an accessory. This will charge a single fully discharged TX665 battery pack to full capacity in around 4 hours using 12V DC from your vehicle’s accessory socket. When connecting the 12V vehicle charger to the twin desktop charger, two fully discharged TX665 battery packs can be charged to full capacity in around 6* hours (with radios switched off). -
Page 10: Battery Usage
3. Slide the battery cover downwards with your thumb then lift the cover clear to remove it. Connector Red wire Slide battery cover to Wires remove Battery 4. Unplug the connector at the top of the battery compartment and remove the battery. 5. -
Page 11: Using Ctcss/Dcs
USING CTCSS/DCS If you are expecting to receive signals on a busy channel, you can program that channel for CTCSS/DCS operation and get the other person to call you using the same CTCSS/DCS tone. Your radio will then remain in Standby and ignore all other signals until your selected CTCSS/DCS tone is received. -
Page 12: Transmitting
TRANSMITTING To transmit, press and hold the PTT (Push-To-Talk) switch. The other radio you are talking to must be set to the same channel. Hold the radio approximately 2 – 5 cm from your mouth with the antenna vertical and speak into the built-in microphone. While the PTT switch is pressed, the LED indicator on the upper edge of the radio will light RED and the icon will appear on the LCD. -
Page 13: Duplex Operation
DUPLEX OPERATION Duplex operation allows the radio to transmit on a different frequency to that which it receives. This allows operation through repeater stations in your area. Repeaters automatically re-transmit your signal over a much wider area, providing greatly increased range. The Duplex mode only works on designated repeater channels 1 – 8 and 41 –... -
Page 14: To Scan
TO SCAN Briefly press F followed by . The icon will flash and the channel numbers will change as the radio scans through the channels. To change the scan direction while scanning, briefly press To stop scanning, briefly press F followed by . -
Page 15: Menu
Channels that have Silent mode enabled will now remain quiet unless a signal containing your chosen code is received. NOTE: Silent mode cannot be activated unless a CTCSS or DCS code has been selected via the Menu key (See Menu options for more details). If CTCSS/DCS tones are set to ‘Off’, any attempt to activate the Silent mode will be ignored. -
Page 16: Duplex Mode Selection
DUPLEX MODE SELECTION The Duplex option only appears in the Menu if a repeater channel (1 – 8 or 41 – 48) is selected. To enable duplex on a repeater channel 1. Hold the MENU key for 2 seconds. The channel number will flash. 2. -
Page 17: Transmitter Power
NOTE: Silent mode will only be enabled on channels you select. Other channels will remain open to all incoming signals. To Disable Silent mode on a Channel 1. Select the required channel. The CTCSS/DCS Code will be displayed. 2. Press and hold the SQL key for about 2 seconds. The selected code number will disappear from the display on that channel. -
Page 18: Roger Beep Tone
To set the Squelch 1. Hold the MENU key for 2 seconds. The channel number will flash. 2. Press the MENU key repeatedly until ‘Sq’ is displayed. The current Squelch level will flash. 3. Press the keys to adjust the Squelch level from 1 (most sensitive) to 5 (least sensitive) or select AUT (Auto) for an automatic setting. -
Page 19: Dual Watch
4. To disable the Call Melodies select ‘oF’. 5. Press the PTT to confirm and store your selection. To send the Call Alarm Melody Press the PTT TWICE quickly. The icon will appear and the LED indicator will light RED for a few seconds as the melody is sent. The melody will be heard in the speaker of the receiving radio. -
Page 20: Ctcss Tone Frequencies
CTCSS TONE FREQUENCIES FREQUENCY FREQUENCY FREQUENCY FREQUENCY 67.0 107.2 167.9 159.8 71.9 110.9 173.8 165.5 74.4 114.8 179.9 171.3 77.0 118.8 186.2 177.3 79.7 123.0 192.8 183.5 82.5 127.3 203.5 189.9 85.4 131.8 210.7 196.6 88.5 136.5 218.1 199.5 91.5 141.3 225.7 206.5... -
Page 21: Uhf Cb Operating Frequencies
UHF CB OPERATING FREQUENCIES Frequency (MHz) Frequency (MHz) Frequency (MHz) 476.425 477.100 476.7875 476.450 477.125 476.8125 476.475 477.150 476.8375 476.500 477.175 476.8625 476.525 477.200 476.8875 476.550 477.225 476.9125 476.575 477.250 476.9375 476.600 477.275 476.9625 476.625 477.300 476.9875 476.650 477.325 477.0125 476.675 477.350 477.0375... -
Page 22: Specifications
SPECIFICATIONS GENERAL Frequency Range: 476.425 – 477.4125 MHz Channel Spacing: 12.5 kHz No of Channels: 80, (75 voice, 2 telemetry RX only, 3 for future use). CTCSS Codes: 50 DCS Codes: 104 Dimensions: (W x H x D): 52 mm x 89 mm x 29 mm (without antenna) Complies with: AS/NZS 4365: 2011 POWER SUPPLY... -
Page 23: Sc Contract Warranty Against
CONTRACT WARRANTY AGAINST DEFECTS This warranty against defects is given by Standard Communications Pty Ltd ACN 000 346 814 (We, us, our or GME). Our contact details are set out in clause 2.7. 1. Consumer guarantees 1.1 Our goods come with guarantees that cannot be excluded under the Australian Consumer Law. -
Page 24: Warranty Period
(f) goods where the serial number has been removed or made illegal. 4. Warranty period 4.1 We provide the following warranty on GME and Kingray products. No repair or replacement during the warranty period will renew or extend the warranty period past the period from original date of purchase. - Page 25 TX655 DESKTOP CHARGER MOUNT GUIDE...
Need help?
Do you have a question about the TX665 and is the answer not in the manual?
Questions and answers