Table of Contents
Advertisement
Advertisement
Table of Contents

Subscribe to Our Youtube Channel
Related Manuals for GME TX655


Summary of Contents for GME TX655
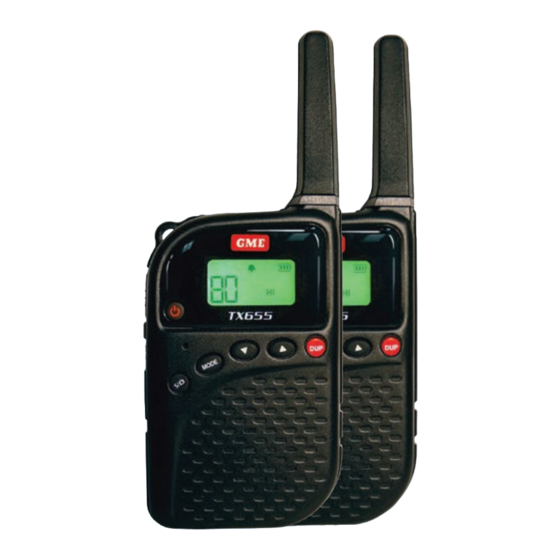
- Page 1 1 watt compact UHF CB radios I N S T R U C T I O N M A N U A L...
-
Page 2: Table Of Contents
AgAInST DEFECTS ....22 Roger Beep ......14 ACCESSORIES SupplIEd • 2 x TX655 radios (with internal battery) • 2 x smart chargers with twin adaptor • Instruction manual WARNING - SAFETY INFORMATION the tX655 is a radio transmitting device. • W hen transmitting, keep the antenna more than 25 mm from any part of the head or body. • D o not transmit near electrical blasting equipment or in explosive atmospheres. • D o not allow children to operate a radio transmitter unsupervised. PA G E 2 i n s t r u c t i o n m A n u A l... -
Page 3: Important Information
IMpORTANT READ ALL INSTRUCTIONS carefully and completely before operating your radio and retain this manual for future reference. NEVER connect the radio to a power source other than the supplied battery. This may damage your product. DO NOT place your radio in front of a vehicle airbag. DO NOT use your radio with a damaged antenna. DO NOT attempt to modify your radio in any way. ALWAYS charge your radio at normal room temperature. ALWAYS switch off your radio where notices restrict the use of two‑way radio or mobile telephones. ONLY use gME approved rechargeable batteries with the supplied charger. AVOID exposing your radio to water. It is not waterproof. AVOID storing or charging your radio in direct sunlight. AVOID storing or using your radio where temperatures are below ‑20°C or above +60°C. IMpORTANT INFORMATION CONCERNING uHF CB RAdIO T he use of the Citizen Band radio service is licensed in Australia by the ACMA Radiocommunications (Citizens Band Radio Stations) Class Licence and in new Zealand by the Ministry of Economic Development new Zealand (MED). A general User Radio Licence for Citizens Band radio and operation is subject to conditions contained in those licences. T he class licence for users and equipment operating in the CB/PRS 477 Mhz band has been amended. This radio meets the new 80... -
Page 4: Possible Issues
expanded to 80 channels thereby doubling the channel capacity and relieving congestion in the UhF CB/PRS band. O riginal 40 channel wideband radios will continue to operate on the original 40 channels, however they will not be able to converse on the newer channels 41 – 80. The newer narrowband radios will be able to converse with all older 40 channel wideband radios on all channels 1 to 40 as well as the newer channels allocated from 41 to 80. T he mixing of narrowband and wideband radios in the same spectrum can cause some possible operating issues of interference and varying levels of received volume. PossiBle issUes When a new narrowband radio receives a transmission from an older wideband radio the speech may sound loud and distorted – simply adjust your radio volume for best performance. When an older wideband radio receives a signal from a new narrowband radio, the speech may sound quiet ‑ simply adjust your radio volume for best performance. Depending on how close your receiving radio is to another transmitting radio, there can be interference from the transmitting radio if it is using a channel adjacent to the channel you are listening to. Simply try going up or down a few channels from the currently selected channel. The above situations are not a fault of the radio but a symptom of operating wideband and narrowband radios in the same bandwidth. This possible interference will decrease over time as the population of wideband radios ages and decreases. Further information and updates are available from the Australian Communications and Media Authority (ACMA) at www.acma.gov.au and the Ministry of Economic Development (MED), Radio Spectrum Management at: www.rsm.govt.nz The ACMA has allocated channels 5/35 for emergency use only. Channel 5 is the primary Simplex Emergency Channel. Where a Channel 5 repeater is available, you should select Duplex on Ch 5. NOTE: Channel 35 is the input channel for the Channel 5 repeater therefore Channel 35 should also not be used for anything other than emergency transmissions. -
Page 5: Telemetry Channels
TElEMETRY CHANNElS ACMA regulations have allocated channels 22 and 23 for telemetry only applications and have prohibited the transmission of speech on these channels. Consequently the TX655 has a transmit‑inhibit applied to channels 22 and 23. In the event that additional telemetry/telecommand channels are approved by the ACMA, these channels shall be added to those currently listed where voice transmission is inhibited. Currently transmissions on channels 61, 62 and 63 are also inhibited and these channels are reserved for future allocation. FEATuRES Microprocessor Controlled Frequency Synthesiser: Allows • user programmable control of scanning, channel memories and selected feature options. • Programmable Scan Function: Scans up to 80 UhF CB channels. In-built CTCSS: User selectable Continuous Tone Coded Squelch • system for quiet channel operation. 1 watt/0.5 watt RF Power: When transmitting in close range • you can conserve battery power by using the Low Power setting. Individually Programmable Duplex Function: User selectable •... -
Page 6: Batteries And Charging
BATTERIES ANd CHARGING Fitting the Batteries The TX655 uses an internal Lithium‑Ion battery which has been pre‑installed. For removal or replacement please contact your local Dealer. Unauthorised attempts to remove or replace the battery will void your warranty and may damage your radio. Charger Installation Connect the power adaptor to the mains power supply and connect the adaptor’s DC plugs to the charger cradles. The LED’s will not be lit. Battery Charging Insert your radio into one of the charging cradles until it clicks into place. The ‘Charging’ LED will light RED and the radio will start charging. If the LED does not light RED or both LEDs blink in RED and gREEn, remove and refit the radio into the cradle again until the ‘Charging’ LED lights RED. The charging time for a fully discharged battery is typically 6 ‑ 7 hours. When the battery is fully charged the ‘Charged’ LED will light GrEEn. Charging Adaptor Plugs Power Adaptor ‑Input: 100~240 V AC ‑ Output: 9 V 500 mA Charging Cradle LEDs PA G E 6 i n s t r u c t i o n m A n u A l... -
Page 7: Radio Controls
RAdIO CONTROlS Antenna Earphone Jack Microphone Jack neck Lanyard Attachment Push‑to‑ Talk (PTT) Microphone Power on/oFF Duplex monitor/ Lamp Volume Up/ Mode Adjust Volume down/ scan/ Mode Adjust Lock Speaker mode t X 6 5 5 i n s t r u c t i o n m A n u A l PA G E 7... -
Page 8: Lcd Display
lCD DisPlAY 17 16 15 14 13 1. Receiving/Busy Icon 11. Roger Beep Icon 2. transmit icon 12. Dual Watch Icon 3. Key Lock Icon 13. Low TX Power Icon 4. rX monitor icon 14. intercom icon 5. Key Beep Icon 15. VOX Icon 6. room monitor icon 16. hi TX Power Icon 7. Duplex Icon 17. ctcss code Icon/Display 8. -
Page 9: Control Descriptions
Monitor function. The Monitor function is used to temporarily the squelch to check for activity on the current channel regardless of CTCSS code settings. Duplex Button Press this button to select Duplex mode on channels 1 – 8 and 41 – 48. Duplex can be enabled or disabled separately on individual channels. Duplex operation allows the TX655 to transmit on a different frequency to that which it receives. This allows operation through repeater stations in your area. Repeaters automatically re‑transmit your signal over a much wider area, providing greatly increased range. The Duplex mode only works on channels 1 – 8 and 41 – 48. With Duplex selected, your TX655 actually transmits 30 channels higher than it receives. t X 6 5 5 i n s t r u c t i o n m A n u A l... - Page 10 Channel Receive Transmit Selected Channel Channel * Emergency channel only To Activate the Duplex Mode Select a duplex channel (1 – 8 or 41 – 48). Briefly press the DUP button to toggle duplex on or off on that channel. When Duplex mode is enabled on the selected channel, ‘DUP’ appears on the display. Scan/Lock Button Press this button briefly to activate or deactivate scanning where appropriate. Press and hold this button for 2 seconds to activate or deactivate the keypad lock. The keypad lock will prevent some buttons from being pressed accidentally. PA G E 1 0 i n s t r u c t i o n m A n u A l t X 6 5 5...
-
Page 11: Basic Radio Operation
BASIC RAdIO OpERATION The Citizens Band Radio Service operates on a shared channel basis. This means that other users and groups may be using any of the 80 available channels. If the Channel you have selected is already in use please make an alternative selection. To use your radio 1. S witch the TX655 on by pressing the POWER button for 2 seconds. 2. Adjust the volume by pressing the buttons. 3. S elect the required channel by pressing the MODE button then pressing the buttons. 4. Listen first to ensure the channel is clear before transmitting. 5. T o speak, hold the radio upright, about 10 cm from your mouth and press the PTT. Speak slowly and clearly towards the radio. There is no need to shout as the microphone is quite sensitive. Release the PTT when you have finished speaking. ADJUsTiNG THe VolUMe There are 7 volume levels to suit your personal preference. To adjust the volume level, press the button. ‘UL’ is displayed along with a volume level setting between 1 and 7. A beep tone will also... -
Page 12: Selecting Channels
The TX655 is fitted with 38 different CTCSS codes (see code chart). You can select or change the current CTCSS code via the MODE Menu. If the other radios you are communicating with are not using CTCSS, set your CTCSS code to ‘oF’. The TX655 allows CTCSS to be enabled or disabled on individual channels. PA G E 1 2 i n s t r u c t i o n m A n u A l t X 6 5 5... -
Page 13: Tx Power Setting
CTCSS codes do not prevent other radio users from hearing your conversation. They simply allow you to ignore messages from radios that are not using the same code to you. To Change the CTCSS Code on the Selected Channel Press the MODE button repeatedly until ‘CTC’ flashes. Press the buttons to select the desired code or select ‘oF’ to turn CTCSS off. Press the PTT or wait for 5 seconds to store your choice. The CTCSS icon will appear whenever a CTCSS code is enabled on the selected channel. TX PoWeR seTTiNG The TX655 has two transmitter power settings ‑ high and Low. When you are transmitting in close range to other radios you can conserve battery power by using the Low power setting. Select the high power setting only when you need increased range. To Change the Power Setting Press the MODE button repeatedly until ‘Po’ is displayed. Press buttons to select the desired power setting. Select ‘hI’ for high power or ‘Lo’ for Low power. Press the PTT or wait for 5 seconds to store your choice. A ‘hI’ or ‘Lo’ icon will be displayed to indicate the selected power setting. -
Page 14: Hands Free (Vox) Mode
Transmitting While in Dual Watch Mode If the PTT is pressed while the radio is receiving a signal in Dual Watch mode, the radio will transmit on the currently displayed channel. If the PTT is pressed while no signal is present, the radio will transmit on the primary channel. NOTE: the MODE button does not function while the Dual Watch mode is active. HANDs FRee (VoX) MoDe When hands Free (VOX) mode is selected the radio will automatically transmit whenever the Microphone detects your voice (or other nearby noise). It can be used with the internal microphone or with an appropriate audio accessory. To avoid accidental operation and to reduce the chance of being triggered by background noise there are two microphone sensitivity settings – high and Low. To activate the hands Free (VOX) mode, press the MODE button repeatedly until ‘Uo’ is displayed. Press the buttons to select the sensitivity level (hI or Lo) . Press the PTT or wait for 5 seconds to store your choice. This will activate the VOX mode. The icon will be displayed when VOX mode is active. To deactivate the hands Free (VOX) mode, repeat the process above and set the sensitivity setting to ‘oF’. RoGeR BeeP The Roger Beep is a short tone that is automatically added to the end of your transmissions to tell other users that you have finished speaking. To Activate or Deactivate the Roger Beep Press the MODE button repeatedly until ‘rb’ appears. Press the buttons to change the setting to ‘on’ or ‘oF’. Press the PTT or wait... -
Page 15: Room Monitor
To Activate the Room Monitor Mode Press the MODE button repeatedly until ‘bb’ is displayed. Use the buttons to change the setting to ‘on’ or ‘oF’. Press the PTT or wait for 5 seconds to store your choice. The icon will be displayed whenever the Room Monitor is active. NOTE: The Squelch must be closed for the room monitor to operate correctly. IMPORTANT: The Room Monitor function is not a replacement for regularly checking the safety and security of children. If you move out of communication range you will not hear transmissions. iNTeRCoM The intercom function allows you to communicate with another TX655 radio using an optional intercom connector (available separately). To Activate the Intercom Mode Press the MODE button repeatedly until ‘it’ appears. Press the buttons to change the setting to ‘on’ or ‘oF’. Press the PTT or wait 5 seconds to store your choice. The ‘InT’ icon will be displayed when the intercom function is active. sCRAMBleR Your radio incorporates a simple voice scrambler using band inversion. The scrambler is compatible with the majority of scramblers used by other manufacturers, allowing you to enjoy scrambled communications with both gME or non‑gME radios. Once the scrambler has been activated your transmission and reception will only be intelligible to others using the same scrambler technology. -
Page 16: Call Alert
MoNiToR The Monitor function is used to temporarily open the Squelch to check for activity on the current channel regardless of CTCSS code settings. It also sets the squelch to minimum which will allow weaker signals to be heard. To Activate or Deactivate the Monitor Press and hold the MONITOR/LAMP button (below the PTT) for about 2 seconds. The icon will appear when the Monitor is active. When Monitor is activated and there are no signals present, a background hiss will be heard. This is normal. leD FlAsHliGHT The TX655 is fitted with a high intensity LED flashlight. To switch the flashlight LED on or off, briefly press the MONITOR/LAMP button. The flashlight LED will operate only while the radio is switched on. KeY loCK The Key Lock function is designed to avoid accidentally changing the channel or function settings. To Activate or Deactivate the Key Lock Press and hold the button for about 2 seconds. The icon will appear when the Key Lock is active. During this time the Scan, Mode and Duplex buttons are disabled however the Power, PTT, Monitor and Volume buttons are still active. -
Page 17: Channel Scan
If you press the PTT while the radio is scanning, the radio will return to your original channel. Scanning will resume approximately 15 seconds after the channel becomes inactive. Press the button again to deactivate the Scan function. icon will disappear. NOTE: the MODE Menu and Volume adjustments are disabled whilst scanning, however, pressing the or buttons will select the direction of the scan. To increase battery life, use the Scan Mode sparingly. CTCss CoDe sCAN The TX655 has a CTCSS code scan function which can be used to determine the CTCSS code currently being used by signals on the selected channel. To Use the CTCSS Code Scan Press the MODE button repeatedly until the CTCSS code number flashes, then briefly press the button. The icon will appear. The radio will scan through all 38 CTCSS codes comparing them to the signal being received on the selected channel. If your radio matches a CTCSS code with one on the incoming signal, the CTCSS scan will pause for 5 seconds. If you now press the PTT, your radio will transmit using the same CTCSS code as the signal that was detected during the Scan. -
Page 18: Battery Warning Indicator
BATTeRY WARNiNG iNDiCAToR The Battery Warning icon indicates when the battery level is low and the battery needs recharging. If necessary, refer to the instructions to recharge the battery. Operating the radio with a low battery will reduce performance. PoWeR sAVe To conserve battery power the radio will automatically enter a Power Save mode after a short period of inactivity. uHF CB OpERATING FREQuENCIES Channel Frequency (MHz) Channel Frequency (MHz) 476.425~ 476.925 476.450~ 476.950 476.475~ 476.975 476.500~ 477.000 476.525~ 477.025 476.550~ 477.050 476.575~ 477.075 476.600~ 477.100 476.625 477.125 476.650 477.150 476.675... -
Page 19: Trouble Shooting
There are no user settings for the Power Save mode. TRoUBle sHooTiNG If you experience problems with your TX655 first check the Battery Warning icon as low batteries can cause problems such as no transmission, weak reception and poor sound quality. Check the manual and radio display to ensure that functions (such as VOX, Scan or DW) have not been activated by accident. In case of further difficulty please consult your Dealer. Channel Frequency (MHz) Channel Frequency (MHz) 476.4375~ 476.9375 61• 476.4625~ 476.9625 62• 476.4875~ 63• 476.9875 476.5125~ 477.0125 476.5375~ 477.0375 476.5625~ 477.0625 476.5875~ 477.0875 476.6125~ 477.1125 476.6375 477.1375 476.6625 477.1625 476.6875 477.1875~ 476.7125... -
Page 20: Ctcss Tone Frequencies
CTCSS TONE FREQuENCIES Frequency Frequency Frequency 67.0 107.2 167.9 71.9 110.9 173.8 71.9 114.8 179.9 77.0 118.8 186.2 79.7 123.0 192.8 82.5 127.3 203.5 85.4 131.8 210.7 88.5 136.5 218.1 91.5 141.3 225.7 94.8 146.2 233.6 97.4 151.4 241.8 100.0 156.7 250.3 103.5... -
Page 21: Specifications
SpECIFICATION GeNeRAl Complies with: A S/nZS 4365:2011 for radio communications equipment in the UhF CB and personal radio service. Frequency Range: 476.425 – 477.4125 Mhz Number of Channels: 8 0 (75 Voice, 2 Telemetry‑RX only, 3 guard‑RX only) Channel Spacing: 12.5 khz Operating Mode: Simplex or half duplex Privacy Codes: 38 Operating Temperature: ‑10˚C to + 60˚C Battery Source: L i‑Ion 3.7 V DC 720 mAh rechargeable battery pack Operating Time: 10 Hrs (Transmit 5%, Receive 5%, Standby 90%) TRANsMiTTeR RF Output: hi – 1 watt, Low – 0.5 watts Modulation: Fm Max. -
Page 22: Warranty Against Defects
GME CONTRACT WARRANTY AGAINST dEFECTS This warranty against defects is given by Standard Communications Pty Ltd ACn 000 346 814 (We, us, our or gME). Our contact details are set out in clause 2.7. 1. Consumer guarantees 1.1 O ur goods come with guarantees that cannot be excluded under the Australian Consumer Law. You are entitled to a replacement or refund for a major failure and for compensation for any other reasonably foreseeable loss or damage. You are also entitled to have the goods repaired or replaced if the goods fail to be of acceptable quality and the failure does not amount to a major failure. 1.2 T o the extent we are able, we exclude all other conditions, warranties and obligations which would otherwise be implied. 2. Warranty against defects 2.1 T his Warranty is in addition to and does not limit, exclude or restrict your rights under the Competition and Consumer Act 2010 (Australia) or any other mandatory protection laws that may apply. 2.2 W e warrant our goods to be free from defects in materials and workmanship for the warranty period (see warranty table) from the date of original sale (or another period we agree to in writing). -
Page 23: Warranty Period
( c) r epairs performed other than by our authorised representative; ( d) d efects or damage resulting from misuse, accident, impact or neglect; ( e) g oods improperly installed or used in a manner contrary to the relevant instruction manual; or ( f) g oods where the serial number has been removed or made illegal. 4. Warranty period 4.1 W e provide the following warranty on gME and Kingray products. no repair or replacement during the warranty period will renew or extend the warranty period past the period from original date of purchase. WARRANTY PERIOD PRODUCT TYPE 477 MH uHF cB portable transceivers 1 year... - Page 24 PN: 310538 DN: 45711-4...
Need help?
Do you have a question about the TX655 and is the answer not in the manual?
Questions and answers