Table of Contents
Advertisement
Advertisement
Table of Contents

Subscribe to Our Youtube Channel
Related Manuals for Helion Rock Rider Brushless


Summary of Contents for Helion Rock Rider Brushless
- Page 1 HLNA0769 1/10 Rock Rider Brushless (US)
-
Page 2: Notice
Legal Entire contents ©2016 Helion RC Before using your product, review all documentation and inspect the product carefully. If for some reason you decide it is not what you wanted, then do not continue with unpacking, setup or operation of your product. Your local hobby dealer cannot accept a product for return or exchange after partaking in actions that produce wear and tear. -
Page 3: Table Of Contents
Contents Notice ..................4 Precautions................. 4 Package Contents ..............5 Needed to Complete ..............5 Introduction ................6 Features ..................6 Getting Started ................7 Ikonnik SR2+ Radio System ........... 10 Wiring Schematic ..............14 ESC Programming and Calibration .......... 14 General Care ................15 Maintenance ................ -
Page 4: Precautions
Therefore this product is not intended for use or maintenance by children without direct adult supervision. Helion RC and your hobby dealer shall not be liable for any loss or damages, whether direct, indirect, special, incidental, or consequential, arising from the use, misuse, or abuse of this product or any product required to operate or maintain it. - Page 5 • If you have little or no experience operating R/C models, we strongly recommend you seek the assistance of your local hobby dealer. • Do not expose the transmitter to water or excessive moisture. • Do not operate radio controlled products in a lightning or thunder storm. •...
-
Page 6: Package Contents
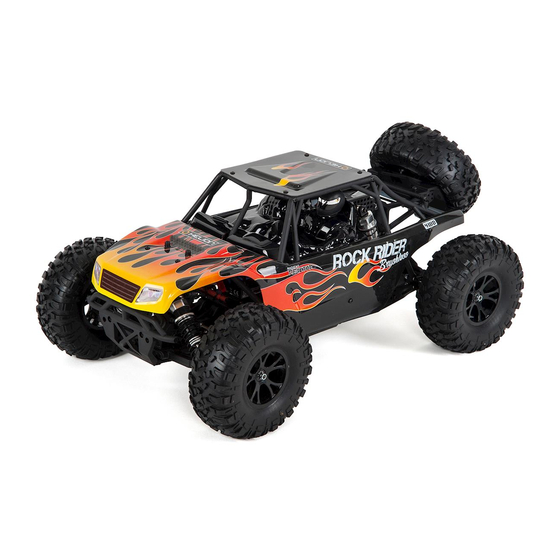
Packing a 3300kV brushless motor, 50A all-weather ESC and the same, proven, 4WD powertrain that gives the Rock Rider platform its beans, the Rock Rider Brushless is a car that’s been thoroughly tested in the full range of off-road conditions and has passed with flying colors. -
Page 7: Getting Started
• Aluminum threaded shocks • High Performance 21-Turn 550 size motor • Water resistant receiver box with an all-weather servo and ESC • 6-link rear axle • Transmission cover for belt and braces spur gear protection • Semi-scale Rock Racer looks Getting Started 1. - Page 8 5. Re-insert the fully charged battery pack into the cradle and tightly secure it with the hook and loop straps. 6. Ensure the radio switch is in the OFF position, then connect the battery to the ESC. 7. Remove the battery cover from the underside of the ET3 transmitter. Insert four AA alkaline cells - ensuring correct polarity - then replace the battery cover.
- Page 9 9. Locate the switch and turn ON your Rock Rider Brushless. In the unlikely event that the car does not operate, see the PAIRING / BINDING instructions detailed on page 12. 10. Replace the body and secure it with the four body clips.
- Page 10 Refer to the full Rock Rider Brushless manual (that is available online) to confirm that the LVC (Low Voltage Cutoff) point has been correctly set for NiMH and not for LiPo or other lithium chemistry battery. The procedure for checking or setting the LVC for NiMH batteries is coverered in great detail in the full manual.
- Page 11 4. Press and hold the PAIR / BIND button on the receiver then switch the receiver on. The receiver’s LED will flash to indicate that it is in PAIR / BIND mode. 5. Press and hold the PAIR / BIND button on the transmitter then switch the transmitter on.
-
Page 12: Specifications
282g (0.62lb) without batteries Helion 50A Brushless System Overview The Helion brushless motor and ESC form a great powerplant to satisfy your need for speed and performance. Though engineered for value, performance was definitely a factor. We’ve included some great features for you to help keep your system running in top shape while keeping your battery upgrade path open since it is compatible with LiPo batteries. - Page 13 Refer to the diagram below to check the connections of your system. Some brushless motors, such as the Helion 3300kV unit included with your vehicle, use only black wires, this is okay. On sensorless brushless systems the motor will change operating...
- Page 14 Understanding the LED Status Light and Alert Tones The Helion ESC is programmed to communicate with you to let you know its status. LED in normal use • If the throttle trigger is in the neutral range, neither the red LED nor the green LED will light up.
- Page 15 0.2 seconds. Setting the Throttle (Throttle Range Calibration) Your Rock Rider Brushless throttle comes pre-calibrated, however in order to make the ESC match the throttle range when you use a new ESC, a new transmitter, or after changing the settings of the neutral position of throttle channel, ATV or EPA parameters, you must calibrate it.
- Page 16 Programming your ESC Your Helion 50A brushless is a programmable ESC. Although the default settings should work well for most users, these settings exist so that you can fine-tune the performance of your ESC. It’s various parameters can be adjusted using a series of button presses and by counting LED flashes.
- Page 17 2. Forward / Reverse Brake: This setting is useful for normal operation since it allows for using reverse throttle to back out when no other options exist. NOTE: THE MOST IMPORTANT SETTING IS THE LOW VOLTAGE CUT-OFF THRESHOLD (ITEM 3). PLEASE READ THE DESCRIPTION AND USAGE TEXT TO BETTER UNDERSTAND HOW TO USE THIS FEATURE Item 2 –...
- Page 18 1. when the battery voltage is calculated at the selected voltage or less for more than 2 seconds. Since the setting is ‘per cell’ this means that if you are running a 2 cell battery, the voltage protection will activate relative to 2 x 2.6V = 5.2V.
- Page 19 WARNING: BE SURE TO CHECK YOUR MAXIMUM BRAKE SETTINGS BY DRIVING FROM FULL THROTTLE TO FULL HARD BRAKE IN AN OPEN AREA. IF THE REAR TIRES COME OFF THE GROUND CAUSING A FRONT FLIP, THE VEHICLE WILL TUMBLE OUT OF CONTROL AND COULD CAUSE PERSONAL OR PROPERTY DAMAGE.
- Page 20 Turn OFF ESC and Transmitter Press and hold the SET button then Turn ON the ESC RED LED flashes indicating you are in program mode RED LED flashes to indicate set GREEN LED flahes Program Item 1: value: 1-2, press button to cycle 1 time to set Item 1 Running Mode through available values...
- Page 21 Adjusting and Tuning Your Vehicle The Rock Rider Brushless XLR has been engineered with some available tuning options listed here for reference. The default configuration has been chosen to provide what we feel is the most enjoyable experience for most operating conditions.
-
Page 22: General Care
Ride Height Adjustment It is ideal to have the drive shafts above level but still allow the shocks to extend when you lift the vehicle while the vehicle is sitting on a flat surface with the body installed. Use the threaded adjustment collars to achieve the desired ride height. -
Page 23: Maintenance
Maintenance We want you to enjoy your product to its fullest potential. For this to happen it is important to keep your product clean and properly maintained. Lack of cleaning and maintenance can cause component failure. For best and continued performance from your product it is recommended to briefly inspect your product for damage every few uses. -
Page 24: Setting The Gear Mesh
Gears Periodically remove the gear cover to clearly inspect the gears and ensure there is no debris in the gear compartment. Proper gear mesh setting is crucial for proper operation and life of gears in your product. It is important to have the pinion gear (attached to motor) as close to the spur gear (attached to drive shaft) as possible yet while providing a minimal amount of backlash. - Page 25 shock shaft and bottom of the shock. Doing so will reduce the life of the shock and cause a shock to leak oil. Be sure to clean the shocks regularly with a clean and dry soft bristle brush and/or rag. CAUTION: NEVER USE SPRAY CLEANERS TO CLEAN YOUR SHOCKS, DOING SO CAN CAUSE DAMAGE TO THE SEALS, CAUSING THEM TO LEAK MORE AND REDUCE THE LIEF AND PERFORMANCE OF YOUR SHOCKS.
-
Page 26: Storage And Disposal
• To reattach the tire to the wheel, use hobby grade Cyanoacrylate (CA) glue and apply small amounts (one drop at a time) between the tire and wheel. Allow the glue to fully dry before operating your vehicle. • When reinstalling tires, use caution when tightening the nuts that secure the wheels to the vehicle. -
Page 27: Exploded Views
Exploded Views HLNA0839 HLNA0839 HLNA0801 HLNA0801 HLNA0842 HLNA0842 HLNA0803 HLNA0803 HLNA0918 (M3) XXXX HLNA0918 (M3) HLNA0799 HLNA0848 (E2.5) HLNA0910 HLNA0794 HLNA0798 HLNA0881 HLNA0799 HLNA0800 HLNA0909 HLNA0840 HLNA0840 HLNA0802 HLNA0802 HLNA0840 HLNA0840 HLNA0802 HLNA0802 HLNA0803 HLNA0803 HLNA0796 HLNA0834 HLNA0834 HLNA0837 HLNA0837 HLNA0831 (15x10x4) HLNA0813 HLNA0819... - Page 28 HLNA0852 (M3 x 10) HLNA0852 (M3 x 10) HLNA0809 HLNA0856 (M3 x 20) HLNA0935 (M3 x 12) HLNA0809 HLNA0859 (M3 x 12) HLNA0808 HLNA0858 (M3 x 8) HLNA0862 (M3 x 36) HLNA0797 HLNA0856 (M3 x 18) HLNA0928 (M3 x 10) HLNA0928 (M3 x 10) HLNA0794 HLNA0930...
-
Page 32: Spare Parts List
Spare Parts List HLNA0793 .....Printed body- Rock Rider Brushless HLNA0794 .....Front Shock Complete 2pcs HLNA0795 .....Diff. gearbox HLNA0796 .....Rear Shock, Complete, 2 pcs: Rock Rider HLNA0797 .....Front Shock Tower HLNA0798 .....Front Shock Springs HLNA0799 .....Front Shock Shaft + Piston Sets HLNA0800 .....Front Shock Bodies... - Page 33 HLNA0829 .....Antenna Pipe 2sets HLNA0830 .....Servo Saver HLNA0831 .....Metal Bushing 15*10*4 6pcs HLNA0832 .....Metal Bushing 8*5*2.5 6pcs HLNA0833 .....M0.6 Pinion Gear 17T(EP)1pc HLNA0834 .....Shock Ball End 6pcs HLNA0835 .....Servo Link Ball End 6pcs HLNA0836 .....Steering Linkage Ball End 6pcs HLNA0837 .....Ball A 6pcs HLNA0838 .....Ball B 6pcs HLNA0839 .....Ball C 6pcs HLNA0840 .....Shock O-ring (Lower)6pcs...
- Page 34 HLNA0867 .....Pinion Gear 23T 1pc HLNA0868 .....Wheel 2pcs HLNA0869 .....Roll cage Top Frame HLNA0870 .....Roll cage side Frame 2pcs HLNA0871 .....Roll cage Front 1pc HLNA0872 .....Roll cage rear plate 1pc HLNA0873 .....Rear link holder HLNA0874 .....Rear Central CVD rear half HLNA0875 .....Spare wheel support HLNA0876 .....Roll cage window frame 1pc HLNA0877 .....Rear axle housing...
- Page 35 HLNA0905 .....Driver helmet 2pcs HLNA0906 .....Driver Blister set w/decal HLNA0907 .....Rear diff shaft 1pc HLNA0908 .....Ball Bearing (11*5*4) 6pcs HLNA0909 .....Rear Shock Shaft&piston set 2sets HLNA0910 .....Rear Shock Body 2pcs(Al) HLNA0911 .....Pin 2*13mm 6pcs HLNA0912 .....Servo Horns HLNA0913 .....Servo Post 2sets HLNA0914 .....Washer (8*5*0.2mm) 6pcs HLNA0915 .....Flat Head Hex (M3*6) 6pcs HLNA0916 .....Set Screw M3*10 6pcs...
- Page 36 Helion RC product. If you purchased your Helion RC product from a HobbyTown® internet site not affiliated with a local store, please consult that site for its service policies.
-
Page 37: Warranties
LODGING A CLAIM To lodge a claim, present the goods to your place of purchase (retailer where you bought the product) with your original purchase receipt and a written explanation of the defect. The place of purchase (retailer where you bought the product) will then contact Model Engines (Aust.) Pty. - Page 38 Helion-RC.com...
Need help?
Do you have a question about the Rock Rider Brushless and is the answer not in the manual?
Questions and answers