Table of Contents
Advertisement
Advertisement
Table of Contents

Related Manuals for Expobar ONYX


Summary of Contents for Expobar ONYX
- Page 1 O N Y X & O N Y X USER MANUAL UM_EN Part No.: 1764280_03...
-
Page 2: Table Of Contents
MACHINE STORAGE AND DISPOSAL......................9 Long-term storage requirements ............................9 Machine disposal requirements............................9 TECHNICAL SPECIFICATIONS ........................10 ONYX 2GR MINI machine data .............................10 ONYX 2GR MINI accessories ............................10 ONYX 2GR MINI front view ............................11 ONYX 2GR MINI external dimensions ........................11 ONYX 2GR MINI+ machine data ...........................12 ONYX 2GR MINI+ accessories ............................12... - Page 3 The portafilter set ................................30 Inserting the portafilter in the group ...........................30 Espresso brewing ................................31 Steaming and frothing milk ..............................32 Steaming milk with the Turbo Steamer - ONYX Pro ..................33 Dispensing hot water ...............................34 CLEANING AND CARE ............................35 Cleaning reminders ................................35 Daily cleaning ..................................35...
- Page 4 View the dispensing counters ............................42 Activating automatic cleaning ............................42 Activating/deactivating standby (energy saver) mode ....................43 USER PROGRAMMING - ONYX Pro ....................44 User programming menu features ..........................44 Entering and exiting the user programming menu ...................... 44 Powering the machine OFF/ON from the touchscreen .................... 45 Adjusting dose programming ............................
-
Page 5: Manual Revisions
MANUAL REVISIONS ONYX & ONYX Rev. # Date TSB# Description April 12, 2017 None First draft released for technical review. May 25, 2017 None Tech review comments addressed, content edited. Aug. 04, 2017 None Update machine dimensions. Add compliance code information. -
Page 6: Notifications
NOTIFICATIONS ONYX & ONYX Explanation of descriptions There are five different levels of notification intensity within this manual, as identified by the signal words DANGER, WARNING, IMPORTANT, NOTE and PRO TIP. The level of risk and importance of the notification is determined by the following definitions. Always observe the warnings to ensure safety and prevent potential injury and product damage. -
Page 7: General
GENERAL ONYX & ONYX Introduction Thank you for choosing an ONYX espresso machine. We hope you enjoy it ! Please read this user manual carefully before Do not discard this manual, it will be useful for using the machine. future reference. If damaged or lost, request a This manual contains important instructions new copy from the manufacturer/distributor. -
Page 8: Precautions
GENERAL ONYX & ONYX Warnings (continued) In case of emergency, (e.g., the machine catches units high of the same model. Do not place fire or becomes unusually hot or noisy), other heavy items on top of the box. disconnect the power immediately and turn off If the machine is likely to be exposed to the water supply. -
Page 9: Transport
TRANSPORT ONYX & ONYX Packaging The machine is shipped in a custom-designed carton which utilizes model-specific polystyrene cushions to protect it from damage. The machine’s carton features standardized handling symbols to explain proper shipping and storage methods. The machine must remain in a horizontal position during the transport. Do not store or handle the machine except on its feet. -
Page 10: Technical Specifications
TECHNICAL SPECIFICATIONS ONYX & ONYX ONYX 2GR MINI machine data ONYX 2GR MINI EBED-C32B-12AO (Standard) Compliance codes: EBED-C32B-22AO (Take Away) Temperature control system: Pressure switch Dispensing control system: Individual group programming capability Steam wand: 1 unit Turbo steamer: Not available... -
Page 11: Onyx 2Gr Mini Front View
TECHNICAL SPECIFICATIONS ONYX & ONYX ONYX 2GR MINI front view Drink Keypads Steam Knob Hot Water Knob Brewing Group Brewing Group Hot Water Tap Power Switch Steam Wand Heating Lamp Steam Manometer Drip Tray ONYX 2GR MINI external dimensions Dimension... -
Page 12: Onyx 2Gr Mini+ Machine Data
TECHNICAL SPECIFICATIONS ONYX & ONYX ONYX 2GR MINI+ machine data ONYX 2GR MINI+ EBED-C82B-12AO (Standard) Compliance codes: EBED-C82B-22AO (Take Away) Temperature control system: Pressure switch Dispensing control system: Individual group programming capability Steam wand: 2 units Turbo steamer: not available... -
Page 13: Onyx 2Gr Mini+ Front View
TECHNICAL SPECIFICATIONS ONYX & ONYX ONYX 2GR MINI+ front view Drink Keypads Steam Knob Steam Knob Brewing Group Brewing Group Power Switch Steam Wand Steam Wand Heating Lamp Steam Manometer Hot Water Tap Drip Tray ONYX 2GR MINI+ external dimensions... -
Page 14: Onyx 2Gr Machine Data
TECHNICAL SPECIFICATIONS ONYX & ONYX ONYX 2GR machine data ONYX 2GR EBEE-D41B-12AO (Standard) Compliance codes: EBEE-D41B-22AO (Take Away) Temperature control system: PID control Dispensing control system: Display control + individual group programming capability Steam wand: 2 unit Turbo steamer: not available... -
Page 15: Onyx 2Gr Front View
TECHNICAL SPECIFICATIONS ONYX & ONYX ONYX 2GR front view Drink Keypads Display Steam Knob Steam Knob Hot Water Knob Steam Wand Hot Water Tap Steam Wand Power Switch Heating Lamp Drip Tray Brewing Group ONYX 2GR external dimensions Dimension Length... -
Page 16: Onyx 3Gr Machine Data
TECHNICAL SPECIFICATIONS ONYX & ONYX ONYX 3GR machine data ONYX 3GR ECGF-H41B-12AO (Standard) Compliance codes: ECGF-H41B-22AO (Take Away) Temperature control system: PID control Dispensing control system: Display control + individual group programming capability Steam wand: 2 units Turbo steamer: not available... -
Page 17: Onyx 3Gr Front View
TECHNICAL SPECIFICATIONS ONYX & ONYX ONYX 3GR front view Drink Keypads Display Steam Knob Steam Knob Hot Water Knob Steam Wand Hot Water Tap Brewing Group Steam Wand Power Switch Drip Tray Heating Lamp ONYX 3GR external dimensions Dimension Length... -
Page 18: Onyx Pro 2Gr Machine Data
TECHNICAL SPECIFICATIONS ONYX & ONYX ONYX Pro 2GR machine data ONYX EFEE-D41B-22AO (Take Away, non-Turbo Steamer, 240V) EFEE-D61B-22AO (Take Away, Turbo Steamer-equipped, 240V) EFGE-G61B-12AO (Standard, non-Turbo Steamer) Compliance codes: EFGE-G41B-22AO (Take Away, non-Turbo Steamer) EFGE-G41B-12AO (Standard, Turbo Steamer-equipped) EFGE-G61B-22AO (Take Away, Turbo Steamer-equipped) -
Page 19: Onyx Pro 2Gr Front View
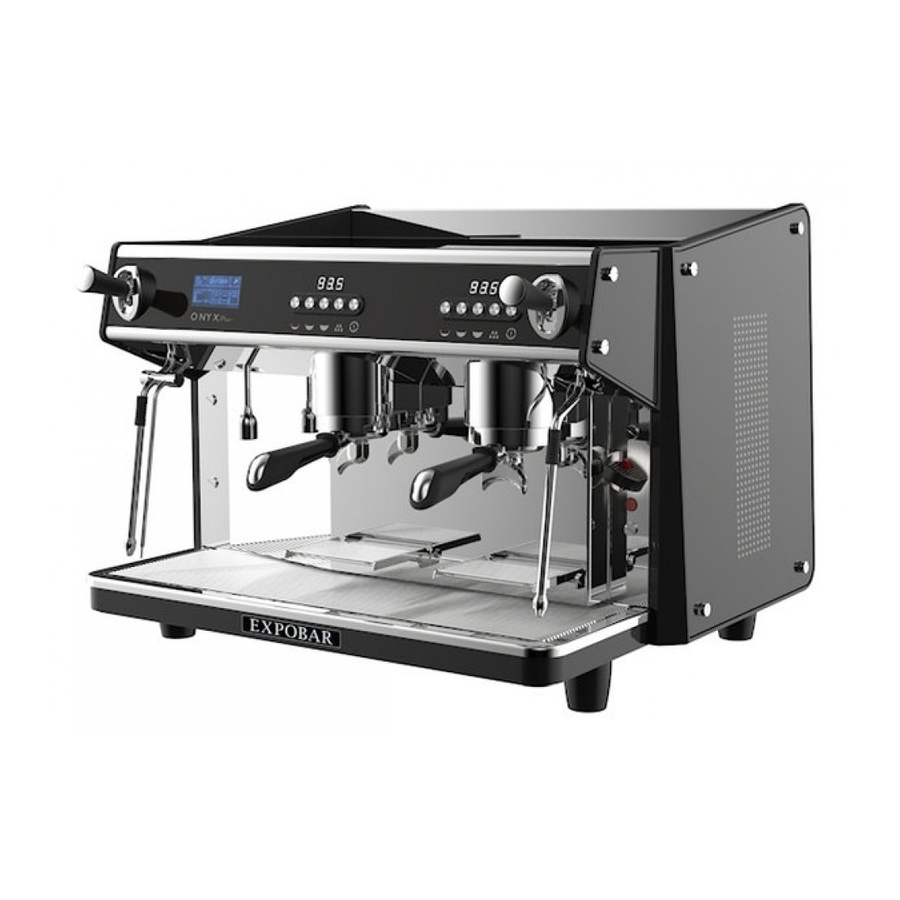
TECHNICAL SPECIFICATIONS ONYX & ONYX ONYX Pro 2GR front view Group Temperature Displays Display Drink Keypads Steam Knob / Steam Knob Turbo Steamer Knob - optional Steam Wand Hot Water Tap Power Switch Heating Lamp Steam Wand / Turbo Steamer -... -
Page 20: Onyx Pro 3Gr Machine Data
TECHNICAL SPECIFICATIONS ONYX & ONYX ONYX Pro 3GR machine data ONYX Pro 3GR EGGF-H61B-12AO (Standard, non-Turbo Steamer) EGGF-H41B-22AO (Take Away, non-Turbo Steamer) Compliance code: EGGF-H41B-12AO (Standard, Turbo Steamer-equipped) EGGF-H61B-22AO (Take Away, Turbo Steamer-equipped) Temperature control system: PID control Dispensing control system:... -
Page 21: Onyx Pro 3Gr Front View
TECHNICAL SPECIFICATIONS ONYX & ONYX ONYX Pro 3GR front view Group Temperature Displays Drink Keypads Display Steam Knob / Steam Knob Turbo Steamer Knob - optional Steam Wand Hot Water Tap Brewing Group Steam Wand / Power Switch Turbo Steamer -... -
Page 22: Buttons And Controls - Onyx
ONYX & ONYX Machine controls ONYX is controlled by a combination of manual control knobs and push buttons at each brewing group for dispensing, combined with a digital display to provide user feedback during operation and programming. Control functions are explained below. -
Page 23: Buttons And Controls - Onyx Pro
ONYX & ONYX Machine controls ONYX Pro is controlled by a capacitive interface LED touchscreen to provide user feedback during operation, monitoring machine status and performing user programming and machine adjustments, customization and cleaning along with push buttons at each brewing group for dispensing. Control functions are explained below. -
Page 24: Installation And Start Up
INSTALLATION AND START UP ONYX & ONYX Machine positioning MIN. 30 cm MIN. 10 cm Install within 0-3º horizontal. Installing the machine in the service area must be performed by a qualified person. As the machine may be quite heavy, at least two strong, capable individuals are recommend to work together to lift and position the machine. -
Page 25: Drain Connection Checklist
INSTALLATION AND START UP ONYX & ONYX Drain connection checklist 1. Connect one end of the flexible drain tube to the drain cup outlet. (It is located under the drip tray and grill. Contact a service technician to do this task you are unsure how to access this area of the machine.) -
Page 26: Water Connection Checklist
INSTALLATION AND START UP ONYX & ONYX Water connection checklist Connecting the machine to the domestic water supply must be performed by a qualified person. Contact a service technician to do this task you are not confident about performing the steps below. -
Page 27: Boiler Pressure And Temperature Information
INSTALLATION AND START UP ONYX & ONYX Boiler pressure and temperature information Boiler pressure is directly controlled by water temperature. The steam boiler’s optimal temperature operating range is from 116-120 C for milk steaming and brewing results. (The factory default... -
Page 28: Electrical Connection Checklist
INSTALLATION AND START UP ONYX & ONYX Electrical connection checklist DANGER! If the mains cable or plug is damaged, it must be replaced by the manufacturer, its service agent or similarly qualified persons in order to avoid SERIOUS INJURY OR... -
Page 29: Initial Starting Procedure
INSTALLATION AND START UP ONYX & ONYX Initial starting procedure Steam knob Power switch Heating lamp Before using the machine be sure to: Ensure the machine’s domestic water supply is opened at the tap. Turn on the main power switch and wait a few minutes for the boiler to heat up. -
Page 30: The Portafilter Set
OPERATION ONYX & ONYX The portafilter set Filter basket locking spring Filter basket Portafilter spring slot Single espresso portafilter and filter basket (7g) Double espresso portafilter and filter basket (14g) Inserting the portafilter in the group Align the portafilter's two flanges with the two Insert the portafilter and rotate it slots in the group housing. -
Page 31: Espresso Brewing
OPERATION ONYX & ONYX Espresso brewing 1. Unlock and remove the 2. Fill the filter basket with 3. Press the coffee with portafilter from the group espresso-grind coffee (approx. the coffee tamper. head. 7g for single or 14g for a double espresso). -
Page 32: Steaming And Frothing Milk
OPERATION ONYX & ONYX Steaming and frothing milk Open Open Steaming Frothing 2. Immerse the steam wand into the milk, making sure the wand tip is 1. Place the steam wand over submerged. Open the steam knob/handle again to begin steaming the drip tray and open the or frothing the milk. -
Page 33: Steaming Milk With The Turbo Steamer - Onyx Pro
OPERATION ONYX & ONYX Steaming milk with the Turbo Steamer - ONYX Pro Frothing Open Open 1. Place the Turbo steam wand over the drip tray 2. Immerse the Turbo steam wand into the milk, and open the steam handle for a few seconds to making sure the wand tip is submerged. -
Page 34: Dispensing Hot Water
When the desired amount of hot water is dispensed, close the tap or press the hot water button again to stop dispensing. (For ONYX Pro the dispensing will stop automatically after the programmed dispensing time is reached, or after 30 seconds - whichever is shorter). -
Page 35: Cleaning And Care
CLEANING AND CARE ONYX & ONYX Cleaning reminders • To keep the machine looking and working like new, always follow all the cleaning and care instructions provided in this manual. • For safety always turn the machine off at the main power switch when cleaning the exterior surfaces. -
Page 36: Daily Flushing - Onyx
CLEANING AND CARE ONYX & ONYX Daily flushing - ONYX Blind gasket 1. Place the blind gasket in the emptied portafilter, 2. Turn off the machine at the main switch, then then lock the portafilter into the brewing group. press and hold the group’s middle button (2 Short Espressos) then turn the machine back on at the main switch. -
Page 37: Daily Flushing - Onyx Pro
CLEANING AND CARE ONYX & ONYX Daily flushing - ONYX Pro Blind gasket 1. Place the blind gasket in the emptied portafilter, 2. Enter the user programming and select the then lock the portafilter into the brewing group. automatic cleaning cycle on the touchscreen. -
Page 38: Weekly Cleaning With Espresso Machine Detergent - Onyx
CLEANING AND CARE ONYX & ONYX Weekly cleaning with espresso machine detergent - ONYX Blind gasket Professional espresso machine detergent Part no: 1104162 1. Place the blind gasket in the emptied portafilter. 2. Add 7-10g of espresso machine detergent to the portafilter, then lock the portafilter into the brewing group. -
Page 39: Weekly Cleaning With Espresso Machine Detergent - Onyx Pro
CLEANING AND CARE ONYX & ONYX Weekly cleaning with espresso machine detergent - ONYX Pro Blind gasket Professional espresso cleaning detergent Part no: 1104162 1. Place the blind gasket in the emptied portafilter. 2. Add 7-10g of espresso machine detergent to the portafilter, then lock the portafilter into the brewing group. -
Page 40: User Programming - Onyx
USER PROGRAMMING - ONYX ONYX & ONYX User programming menu features The machine is equipped a programmable interface that allows users to set or adjust the following features and parameters with guidance from the digital display. The following items can be viewed or adjusted via the left-side brewer bank’s buttons:... -
Page 41: Setting The Time And Day
USER PROGRAMMING - ONYX ONYX & ONYX Setting the time and day Use the following steps to set the time and day displayed by the machine: Enter the dose programming menu. The display will show Doses Programming. Long press the Continuous Dispensing button again for two seconds until the display shows Clock Adjust. -
Page 42: View The Dispensing Counters
USER PROGRAMMING - ONYX ONYX & ONYX View the dispensing counters Use the following steps to view the running counters for service and total and running number of coffees that have been dispensed by the machine: Enter the dose programming menu. The display will show Doses Programming. -
Page 43: Activating/Deactivating Standby (Energy Saver) Mode
USER PROGRAMMING - ONYX ONYX & ONYX Activating/deactivating standby (energy saver) mode The machine has a standby (energy saver) function which can be activated/deactivated as follows: Activating Standby- • Press and hold the Continuous Dispensing button then press the 2 Short Espressos button. The display will show Standby. -
Page 44: User Programming - Onyx Pro
USER PROGRAMMING - ONYX Pro ONYX & ONYX User programming menu features The machine is equipped a programmable touchscreen interface that allows users to set or adjust the following features and parameters with guidance from the digital display. The following items can be viewed or adjusted via the left-side brewer bank’s buttons:... -
Page 45: Powering The Machine Off/On From The Touchscreen
USER PROGRAMMING - ONYX Pro ONYX & ONYX Powering the machine OFF/ON from the touchscreen To power the machine down at the end of a use period without using the main switch do the following: Press the Settings button for six seconds until the user programming menu appears on the touchscreen. -
Page 46: Activating/Deactivating Eco Mode
USER PROGRAMMING - ONYX Pro ONYX & ONYX Activating/deactivating ECO mode The machine has a standby (energy saver) function which can be activated/deactivated as follows: Use the following steps to activate or deactivate the ECO mode: Press the Settings button for six seconds until the user programming menu appears on the touchscreen. -
Page 47: Setting The Time, Day And Auto On/Off Functions
USER PROGRAMMING - ONYX Pro ONYX & ONYX Setting the time, day and auto on/off functions Adjust the time, day of the week, and automatic daily power on/off times as follows: Press the Settings button for six seconds until the user programming menu appears on the touchscreen. -
Page 48: View The Dispensing Counters
USER PROGRAMMING - ONYX Pro ONYX & ONYX View the dispensing counters Use the following steps to view the running counters for service and total and running number of coffees, teas, flushes and service by group and for the entire machine: Press the Settings button for six seconds until the user programming menu appears on the touchscreen. -
Page 49: Machine Alerts
To alert users that routine service of the machine is due or against a situation that could possibly cause damage to the machine, ONYX has the following alerts programmed into its software: Fault in flow meter X / Flow fault detected in... -
Page 50: Troubleshooting
TROUBLESHOOTING ONYX & ONYX Machine faults Problem Possible cause Solution Check that the plug is correctly The plug is not correctly inserted and that the power inserted into the power socket socket is operational. The machine does not start up The circuit breaker and/or Check that they are connected. -
Page 51: Service Information
SERVICE INFORMATION ONYX & ONYX Notes:... - Page 52 For the warranty to be valid the conditions for maintenance must have been followed according to our instructions, proper precaution has been made and warranty claim been issued without delay. The affected equipment may not be used during awaiting service if there is any risk that the damage or defect would worsen.
Need help?
Do you have a question about the ONYX and is the answer not in the manual?
Questions and answers