Table of Contents
Advertisement
Quick Links
Advertisement
Chapters
Table of Contents

Related Manuals for Uconnect 5.0/5.0 NAV


Summary of Contents for Uconnect 5.0/5.0 NAV
- Page 1 UCONNECT 5.0/5.0 NAV OWNER’S MANUAL SUPPLEMENT...
-
Page 2: Safety Guidelines 3
MEDIA MODE ..............27 UCONNECT 5.0/5.0 NAV VOICE RECOGNITION QUICK TIPS ......33 UCONNECT PHONE . -
Page 4: Table Of Contents
▫ FCC Declaration ......4 SAFE USAGE OF THE UCONNECT SYSTEM..4 ▫ Touchscreen ......4 ▫... -
Page 5: Safe Usage Of The Uconnect System
4 SAFETY GUIDELINES • If necessary, use a lint-free cloth dampened with a SAFE USAGE OF THE UCONNECT SYSTEM cleaning solution, such as isopropyl alcohol or an iso- • Read all instructions in this manual carefully before propyl alcohol and water solution ratio of 50:50. Be sure using your system to ensure proper usage! to follow the solvent manufacturer’s precautions and... -
Page 6: Information About Radio Frequency Radiation
SAFETY GUIDELINES 5 NOTE: This equipment has been tested and found to Information About Radio Frequency Radiation comply with the limits for a Class B digital device, pursu- Exposure To Radio Frequency Radiation ant to Part 15 of the FCC Rules. These limits are designed to provide reasonable protection against harmful interfer- The radiated output power of the internal wireless radio ence in a residential installation. -
Page 7: Cybersecurity
The risk of unauthorized and unlawful access to your vehicle systems may still exist, even if the most recent version of vehicle software (such as Uconnect software) is installed. - Page 8 • Routinely check www.driveuconnect.com/software-update to learn about available Uconnect software updates. • Only connect and use trusted media devices (e.g. personal mobile phones, USBs, CDs). Privacy of any wireless and wired communications cannot be assured.
- Page 10 INTRODUCTION CONTENTS UCONNECT 5.0 SYSTEM ....10 UCONNECT 5.0 SYSTEM W/NAVIGATION — IF EQUIPPED......13...
-
Page 11: Introduction 9
10 INTRODUCTION UCONNECT 5.0 SYSTEM... - Page 12 ALWAYS drive safely with your hands on the steer- screen. ing wheel. You have full responsibility and assume all risks related to the use of the Uconnect features 4 — ENTER/BROWSE & TUNE/SCROLL and applications in this vehicle. Only use Uconnect Push the ENTER/BROWSE button to accept a highlighted when it is safe to do so.
- Page 13 12 INTRODUCTION 8 — MEDIA 11 — MUTE Pushing the MEDIA button will allow you to switch to Push the MUTE button for activation/deactivation of the Media mode (Disc, USB/iPod, AUX, Bluetooth.) volume. 9 — RADIO 12 — SCREEN ON/OFF Push the RADIO button on the faceplate to enter Radio Push the SCREEN ON/OFF button on the faceplate to turn Mode.
-
Page 14: If Equipped
INTRODUCTION 13 UCONNECT 5.0 SYSTEM W/NAVIGATION — IF EQUIPPED... - Page 15 Trip and Clock. so can result in breaking the touchscreen. 6 — PHONE 1 — EJECT Push the PHONE button to access the Uconnect Phone feature. Push the EJECT button to eject the disc. 7 — NAVIGATION 2 —...
- Page 16 INTRODUCTION 15 10 — ON/VOLUME Rotate the rotary knob to adjust the Volume. Push the ON/VOLUME button to turn on the system. Push the ON/VOLUME button a second time to turn off the system. 11 — MUTE Push the MUTE button for activation/deactivation of the volume.
- Page 18 CONTENTS WHAT IS UCONNECT? ....18 IDENTIFYING YOUR RADIO ....20...
-
Page 19: What Is Uconnect
WHAT IS UCONNECT? Before you drive, familiarize yourself with the easy-to-use Uconnect System. • The Uconnect Voice Command And Uconnect Phone Buttons On Your Steering Wheel • The buttons let you use your voice to give commands, make phone calls, respond to text messages hands-free, enter navigation destinations and control your radio and media devices. - Page 20 ALL ABOUT UCONNECT 19 1 — Uconnect Phone Hang Up Button 8 — Eject Button 2 — Uconnect Voice Command Button 9 — CD Slot 3 — Steering Wheel Audio Controls (Left) 10 — Uconnect Radio 4 — Uconnect Phone Mute Button 11 —...
-
Page 21: Identifying Your Radio
ALWAYS drive safely with your hands on the steer- ing wheel. You have full responsibility and assume all risks related to the use of the Uconnect features and applications in this vehicle. Only use Uconnect when it is safe to do so. Failure to do so may result in an accident involving serious injury or death. - Page 22 RADIO MODE CONTENTS ▫ Setting Presets ......23 RADIO MODE ......22 ▫...
-
Page 23: Radio Mode
22 RADIO MODE RADIO MODE Fast Seek Up Press and hold the “Seek Up” button to advance the Volume & Mute radio through the available stations or channels at a Rotate the rotary knob to adjust the Volume. When the faster rate, the radio stops at the next available station or audio system is turned on, the sound will be set at the same channel when the button is released. -
Page 24: Direct Tune
RADIO MODE 23 Direct Tune If you accidently entered the wrong station number, press the “CLR” button to clear the radio station numbers and re-enter the correct station number. Once the last digit of a station has been entered, the Direct Tune touchscreen will close and the system will automati- cally tune to that station. -
Page 25: Siriusxm Satellite Radio Mode - If Equipped
24 RADIO MODE When you are receiving a station that you wish to commit SiriusXM services require subscriptions, sold separately into memory, press and hold the desired numbered button after the 12-month trial included with the new vehicle for more that two seconds or until you hear a confirmation purchase. -
Page 26: Audio
RADIO MODE 25 Audio Equalizer Press the “Equalizer” button to adjust the Bass, Mid and Treble. Use the “+” or “–” buttons to adjust the equalizer to your desired settings. Press the “back arrow” button when completed. 1. Push the SETTINGS button located on the faceplate. 2. - Page 27 26 RADIO MODE Speed Adjustable Press the “Speed Adjusted Volume” button to select be- tween OFF, 1, 2 or 3. This will increase the radio volume relative to a increase in vehicle speed. Press the “back arrow” button when completed. Loudness Press the “Loudness”...
- Page 28 MEDIA MODE CONTENTS ▫ USB/iPod Mode ......30 MEDIA MODE ......28 ▫...
-
Page 29: Media Mode
28 MEDIA MODE MEDIA MODE Fast Seek Up Media Mode is entered by pushing the MEDIA button Press and hold the “Seek Up” button and the desired located on the faceplate. Once in MEDIA mode, press the mode will begin to fast forward through the current “Source”... -
Page 30: Disc Mode
MEDIA MODE 29 Shuffle matically be pulled into the Disc player and the Disc icon will illuminate on the radio display. If a Disc does not go Press the “Shuffle” button to play the selections on the into the slot more than 1.0 inch (2.5 cm), a disc may already USB/iPod or Bluetooth (if supported) device in random be loaded and must be ejected before a new Disc can be order to provide an interesting change of pace. -
Page 31: Usb/Ipod Mode
30 MEDIA MODE USB/iPod Mode AUX Mode USB/iPod Mode is entered by either inserting a USB Jump AUX Mode is entered by inserting a AUX device using a Drive or iPod cable into the USB port or by pushing the cable with a 3.5 mm stereo audio jack into the AUX port or MEDIA button located left of the display. -
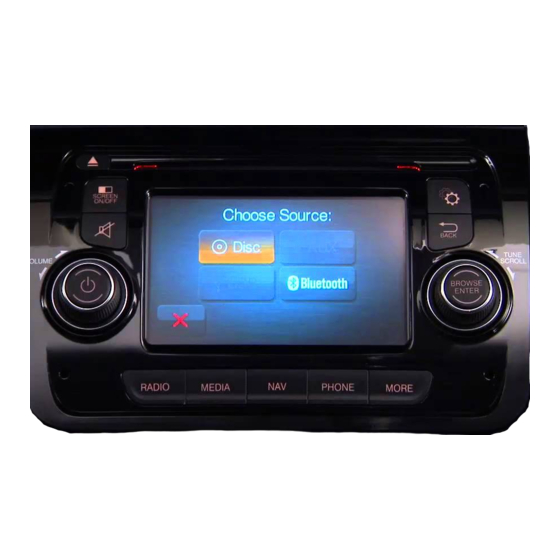
Page 32: Bluetooth Mode
Adjust the volume with the details. VOLUME rotary knob, or with the volume of the attached Once the Bluetooth device is paired to the Uconnect device. System, push the MEDIA button. Once in MEDIA mode, NOTE: The vehicle radio unit is acting as the amplifier for press the “Source”... - Page 34 UCONNECT VOICE RECOGNITION ...34 ▫ Introducing Uconnect.....34 ▫ Phone ....... .38 ▫...
-
Page 35: Uconnect Voice Recognition
You have full responsibility and assume • Two buttons on either side of the touchscreen display all risks related to the use of the Uconnect features and applications in this vehicle. Only use Uconnect when it is safe to do so. Failure to do so may result in an accident involving serious injury or death. -
Page 36: Get Started
5. You can interrupt the help message or system prompts 4 — Push To End Call by pushing the VR or PHONE button and saying a Voice Command from current category. All you need to control your Uconnect system with your voice are the buttons on your steering wheel. -
Page 37: Basic Voice Commands
36 UCONNECT 5.0/5.0 NAV VOICE RECOGNITION QUICK TIPS Basic Voice Commands Radio The basic Voice Commands below can be given at any Use your voice to quickly get to the AM, FM or SiriusXM point while using your Uconnect system. -
Page 38: Media
UCONNECT 5.0/5.0 NAV VOICE RECOGNITION QUICK TIPS 37 • Change source to USB • Play artist Beethoven; Play album Greatest Hits; Play song Moonlight Sonata; Play genre Classical TIP: Press the “Browse” button on the touchscreen to see all of the music on your iPod or USB device. Your Voice Command must match exactly how the artist, album, song and genre information is displayed. -
Page 39: Phone
“Call PHONE button . After the beep, say... “Reply.” John Smith work.” 2. Listen to the Uconnect prompts. After the beep, repeat one of the pre-defined messages and follow the system prompts. -
Page 40: Additional Information
UCONNECT 5.0/5.0 NAV VOICE RECOGNITION QUICK TIPS 39 Additional Information PRE-DEFINED VOICE TEXT REPLY RESPONSES Yes. Stuck in traffic. See you later. © 2016 FCA US LLC. All rights reserved. Mopar and Uconnect are registered trademarks and Mopar Owner Start without I’ll be late. - Page 42 ▫ Mute (Or Unmute) Microphone During Call..45 OPERATING UCONNECT PHONE ... .42 ▫ Pairing A Phone ......43 ▫...
-
Page 43: Operating Uconnect Phone
42 UCONNECT PHONE The Uconnect allows you to dial a phone number with WARNING! your mobile phone using simple voice commands. ALWAYS drive safely with your hands on the wheel. NOTE: You have full responsibility and assume all risks • The Uconnect requires a mobile phone equipped with related to the use of the Uconnect features and applications in this vehicle. -
Page 44: Pairing A Phone
7. During the pairing stage, a screen is displayed indicat- ing the progress of the operation. To use the Uconnect feature, you must first pair your Bluetooth phone with the Uconnect system. Refer to 8. If the pairing procedure is completed successfully, a UconnectPhone.com for pairing procedure unique to your... -
Page 45: Phonebook Download - Phonebook Transfer From Mobile Phone
• This downloaded phonebook cannot be edited or de- Bluetooth phone connection is made to the Uconnect, for leted on the Uconnect. These can only be edited on the example, after you start the vehicle. mobile phone. The changes are transferred and updated NOTE: to Uconnect Phone on the next phone connection. -
Page 46: Mute (Or Unmute) Microphone During Call
Bluetooth connections menu for a To use this function, the mobile phone must support the device registered as Uconnect. After enabling this function SMS exchange function via Bluetooth. on the mobile phone, it must be disconnected and recon-... -
Page 47: Sms Message Options
Changing The Volume During a phone call, use the radio VOLUME rotary knob to adjust the volume to a comfortable level while the Uconnect system is speaking. Please note the volume setting for Uconnect is different than the audio system. - Page 48 MORE BUTTON CONTENTS ▫ Trip Computer......48 MORE MAIN MENU ..... .48 ▫...
- Page 49 You have full responsibility and assume and define two separate trips called Trip A and Trip B for all risks related to the use of the Uconnect features monitoring the vehicle’s complete journey in a similarly and applications in this vehicle. Only use Uconnect independent manner.
- Page 50 ▫ Read Me First ......50 NAVIGATION (UCONNECT 5.0N) — IF EQUIPPED......50...
- Page 51 ALWAYS drive safely with your hands on the steer- Setting Up ing wheel. You have full responsibility and assume all risks related to the use of the Uconnect features When you first switch on navigation, you have to answer a and applications in this vehicle. Only use Uconnect few set-up questions.
- Page 52 NAVIGATION 51 Safety Settings We recommend using the safety settings to make your driving as safe as possible. These are some of the options included in the safety settings: • Show safety reminders. • Warn when driving faster than allowed. You can also drive more safely by using voice commands to control navigation.
- Page 53 52 NAVIGATION NOTE: Press the “Arrow” button to the right of the list to expand the list of suggested towns. When the correct city or town appears in the list, press the name to select the destination. 6. Enter the house number, then press the “OK” button. 5.
- Page 54 NAVIGATION 53 7. The location is shown on the map. Press the “Select” 8. When the new route is shown, press the “Done” button. button to continue or press the “Back” button to enter For more information about the route, press the “Details” another address.
- Page 55 54 NAVIGATION Safety Mode The navigation SW will switch to “Safety Mode,” with a dedicated menu structure, when driving above a threshold speed of 5 mph (8.0 km/h). In this mode, only that functionality is available that can be used safely when driving.
- Page 56 NAVIGATION 55 To view the route summary, push the right-hand panel on the status bar in the Driving view or press the “View route” button in the Main Menu and then press the “Show route summary” button. The types of route you can choose from are as follows: •...
- Page 57 56 NAVIGATION Using Arrival Times After entering a destination, press the “YES” button when asked about an arrival time to enter a preferred arrival time. You can set your navigation system to ask you if you need to arrive at a particular time when you plan a route. The navigation system calculates your arrival time and shows you whether you will arrive on time.
- Page 58 NAVIGATION 57 Navigation Menu Options When you press the “Drive to” button you can set your destination in many ways, not just by entering the address. The other options are listed below: Home Press this button to navigate to your Home location. You will probably use this button more than any other.
- Page 59 58 NAVIGATION Recent Destination Press this button to select your destination from a list of places you have recently used as destinations. Point Of Interest Press this button to navigate to a Point of Interest (POI). Latitude Longitude Press this button to enter a destination using latitude and longitude values.
- Page 60 NAVIGATION 59 Position Of Last Stop Press this button to select your last recorded position as your destination. Planning A Route In Advance To plan a route in advance, follow these steps: You can use your navigation system to plan a route in 1.
- Page 61 60 NAVIGATION 5. If Route planning settings are set to “Ask me every time Navigation uses IQ Routes to work out the best possible I plan”, select the type of route you want to plan: route at that time. This is useful to see how long a •...
- Page 62 NAVIGATION 61 Show Map Of Route Press this button to see an overview of the route using the map browser. Show Route Demo Press this button to watch a demo of the journey. You can interrupt the demo at any time by pressing the screen. Show Route Summary Press this button to open the route summary screen.
- Page 63 Voice Control WARNING! (Continued) About Voice control related to the use of the Uconnect features and appli- cations in this vehicle. Only use Uconnect when it is Instead of pressing the touchscreen to control your naviga- safe to do so. Failure to do so may result in an accident tion system, you can use your voice to control navigation.
- Page 64 NAVIGATION 63 NOTE: Press the “Help” button in the Main menu then The Driving View press “What can I say?” to see a full list of commands you can say. 2. When you hear a beep, say a command of your choice. For example, you can say “Navigate home.”...
- Page 65 64 NAVIGATION The Driving View 4. Road sign information or the next street name. 5. Speed limit, if known To see the difference between your preferred arrival time and your estimated arrival time, check the Leeway checkbox in the Status bar settings. Press this part of the status bar to switch between a 3D map and a 2D map.
- Page 66 NAVIGATION 65 Driving View Symbols Using Lane Guidance Navigation instructions muted There are two types of lane guidance: This symbol is shown when the navigation in- 1. Lane images structions have been muted. To hear navigation instructions again, push the middle panel in the status bar.
- Page 67 66 NAVIGATION 2. Instructions in the status bar NOTE: If no lane guidance is shown in the status bar and all lanes are highlighted, you can use any lane. Changing Your Route Making Changes To Your Route After you plan a route, you may want to change the route or even the destination.
- Page 68 NAVIGATION 67 Change Route Menu To change the current route or your destination, press one of the following buttons: Change Destination Press this button to change the current destination. When you change the destination, you are shown the same options and asked to enter the new address in the same way as when you plan a new route.
- Page 69 68 NAVIGATION Travel Via Press this button to change your route by selecting a location you want to travel past, maybe so you can meet someone on the way. When you select a location to travel past, you are shown the same options and asked to enter the new address in the same way as when you plan a new route.
- Page 70 NAVIGATION 69 About Waypoints 4. Choose the location for your waypoint from a choice of Home, Favorite, Address, Recent destination, POI, You can choose to use waypoints for any of the following longitude/latitude, or position of last stop. reasons: On the route summary screen, a message confirms that •...
- Page 71 70 NAVIGATION 5. Choose the location for your waypoint from a choice of 4. Press the waypoint you want to move up or down. Home, Favorite, Address, Recent destination, POI, You will see a touchscreen with the name of your latitude/longitude or position of last stop.
- Page 72 NAVIGATION 71 Reactivating A Waypoint To view the map in this way, press “View map” or “View route”, then “Show map of route” in the Main menu. NOTE: You can only reactivate a waypoint that has already You view different locations on the map by moving the been visited.
- Page 73 72 NAVIGATION 3. Zoom bar There are two types of voice available when navigating: Zoom in and out by moving the slider. 1. Computer voices — Computer voices are generated by your navigation system. They read traffic and voice Options command responses.
- Page 74 NAVIGATION 73 Settings About Settings You can change the way your navigation system looks and behaves. Most of the settings on your system can be accessed by pressing the “Settings” button in the Main Menu. Use Night Colors Press this button to display the map in darker colors. NOTE: Your navigation system can switch between day and night colors depending on the time of day.
- Page 75 74 NAVIGATION Turn Off Voice Guidance Press this button to switch off voice guidance. You will no longer hear spoken route instructions but you will still hear information such as traffic information and warnings. Voice guidance is also switched off when the main unit volume is muted. Turn On Voice Guidance Press this button to switch on voice guidance and hear spoken route instructions.
- Page 76 NAVIGATION 75 Make Your Own Menu Press this button to add up to six buttons to your own personalized menu. If there are only one or two buttons in your menu, both buttons are shown in the Driving view. If you have three or more buttons in your menu, then a single button is shown in the Driving view which opens your menu when pressed.
- Page 77 76 NAVIGATION To create a new Favorite, press the “Add” button then enter To view or change an existing Favorite, press one of the the location address in the same way that you enter an items in the list. To see more Favorites on the map, press address when you plan a route.
- Page 78 NAVIGATION 77 Route Planning Press the “Route planning” button to set the way your navigation system calculates the routes that you plan. Press the button for each option to change the settings. Route Types on these lanes, you may need to have more than one person in the vehicle, for example, or the vehicle may need to use Set the type of route you want your navigation system to environmentally-friendly fuel.
- Page 79 78 NAVIGATION Status Bar Press this button to select the information you want to see on the status bar: • Horizontal — Show the status bar at the bottom of the Driving view. • Vertical — Show the status bar on the right-hand side of the Driving view. •...
- Page 80 NAVIGATION 79 Map Colors Press this button to select the color schemes for day and night map colors for 2D and 3D mode. Press the “Search” button to search for a color scheme by typing the name. 2D/3D Settings Press this button to set the default view of the map. To switch between 2D and 3D views while driving, press the left side of the status bar in Driving View.
- Page 81 80 NAVIGATION Switch Map Press this button to select the map you want to use for route planning and navigation. Although you can store more than one map on the navigation system, you can only use one map at a time for planning and navigation. To switch from the current map to plan a route in another country or region, simply press this button.
- Page 82 NAVIGATION 81 Manage POIs Press this button to manage your own Point of Interest (POI) categories and locations. You can set your navigation system to let you know when you are near to selected POI locations. For example, you could set the navigation system to let you know when you are approaching a gas station.
- Page 83 82 NAVIGATION Units Press this button to set the units used for navigation features such as route planning. Keyboard Press this button to select the keyboards that will be available for your use and the layout of the Latin keyboard. You use the keyboard to enter names and addresses, such as when you plan a route or search for the name of a town or a local restaurant.
- Page 84 NAVIGATION 83 Advanced Settings Press this button to select the following advanced settings: • Show house number before street name — When this setting is selected, addresses are shown with the house number followed by the street name, such as 10 Downing Street. •...
- Page 85 84 NAVIGATION Me And My Navigation Press this button to find technical information about your navigation system and to select whether you want to share information with TomTom. Reset Factory Settings Press this button to delete all your personal navigation settings and restore the standard factory settings to your navigation system.
- Page 86 NAVIGATION 85 Navigation Updates NOTE: To update the map, a USB device that meets the following requirements must be used: The Navigation maps can be updated using a USB device to download the most • 8 GB of free memory recent maps.
- Page 87 86 NAVIGATION Creating POIs 8. The POI is created and saved in the selected category. 1. Press the touchscreen to open the Main menu. Using POIs To Plan Route 2. Press the “Settings” button. When you plan a route, you can use a POI for the destination or as a waypoint.
- Page 88 NAVIGATION 87 7. The parking lot closest to the city center is shown at the 2. Select the categories you want to be shown on the map. top of the list. 3. Press the “Done” button. 8. The following list explains the distances shown next to 4.
- Page 89 88 NAVIGATION 3. Set the distance as 500 yards and press the “OK” button. You can create your own POI categories and add your own POI locations to these categories. 4. Press the “Sound effect” button and then press the “Next”...
- Page 90 NAVIGATION 89 Help 5. Select a center from the list, the nearest is shown at the top of the list. About Getting Help Your navigation system shows your position on the map Press the “Help” button in the Main menu to navigate to along with a description of the location.
- Page 91 90 NAVIGATION Help Menu Options NOTE: In some countries, information may not be avail- able for all services. Call For Help Press this button to find the contact details and location of a service center. Drive To Help Press this button to plan a driving route to a service center. Where Am I Press this button to see your current location on the map.
- Page 92 NAVIGATION 91 What Can I Say Press this button to see a list of commands you can say when using voice control. Guided Tours Press this button to view a selection of guided tours relating to your navigation system. Safety And Other Guides Press this button to read a selection of guides, including a First Aid guide.
- Page 93 92 NAVIGATION Favorites Changing The Name Of A Favorite To change the name of a Favorite, do the following: About Favorites Favorites provide an easy way to select a location without 1. Press the touchscreen to bring up the Main menu. the need to enter the address.
- Page 94 NAVIGATION 93 4. Press the Favorite you want to delete. This Document Use the left and right arrows to choose another Favorite Great care was taken in preparing this document. Constant from your list. product development may mean that some information is not entirely up to date.
- Page 95 94 NAVIGATION this material is subject to the terms of a license agreement. Any unauthorized copying or disclosure of this material will lead to criminal and civil liabilities. Data Source © 2016 TomTom All rights reserved. The software included in this product contains copyrighted software that is licensed under the GPL.
- Page 96 17UC5PM-526-AB ©2016 FCA US LLC. All Rights Reserved. Second Edition Chrysler, Dodge, Jeep, Ram, Mopar and Uconnect are trademarks of FCA US LLC. Uconnect 5.0/5.0 NAV FIAT is a registered trademark of FCA Group Marketing S.p.A., Printed in the USA...
Need help?
Do you have a question about the 5.0/5.0 NAV and is the answer not in the manual?
Questions and answers