
Related Manuals for mensor CPC8000


Summary of Contents for mensor CPC8000
- Page 1 Operating Instructions High-End Pressure Controller CPC8000 CPC8000 High-End Pressure Controller PN 0018508001V...
- Page 2 This Caution symbol indicates danger for the system and material if the respective safety precautions are not taken. This Notice symbol does not indicate safety notices but information for a better understanding of the facts Operating Instructions - CPC8000...
-
Page 3: Table Of Contents
5.4 Turning on the CPC8000 ........ - Page 4 6.2.14.3 Vent Mode ............. . 50 6.2.14.4 State of the isolation valves when the CPC8000 is off ......52 7.
- Page 5 11.5 WIKA Worldwide ............. . 112 Operating Instructions - CPC8000...
- Page 6 High-End Pressure Controller CPC8000 NOTES Operating Instructions - CPC8000...
-
Page 7: General Information
Mensor, this warranty does not apply. The judgment of Mensor will be fnal as to all matters concerning condition of the product, the cause and nature of a defect, and the necessity or manner of repair. Service, repairs or disassembly of the product in any manner, performed without specifc factory permission, voids this warranty. -
Page 8: Trademarks And Copyrights (C)
Mensor and its suppliers shall not be held to any liability for any damages sufered or incurred by the end user (including, but not limited to, general, special, consequential or incidental damages including damages for loss of business profts, business interruption, loss of business information and the like), arising from or in connection with the delivery, use or performance of the software program. -
Page 9: After The Warranty
High-End Pressure Controller CPC8000 1.6.1 After the Warranty Mensor’s concern with the performance of this instrument is not limited to the warranty period. We provide complete repair, calibration and certifcation services after the warranty for a nominal fee as explained in Section 10, Maintenance. - Page 10 High-End Pressure Controller CPC8000 NOTES Operating Instructions - CPC8000...
-
Page 11: Safety Notices
The system is powered via the power cable with a voltage that can cause physical injury. Even after disconnecting the system from the power supply, dangerous voltages can temporarily occur due to capacitance. Repairs must be performed only by authorized service personnel. Additional safety notices are found throughout this manual. Operating Instructions - CPC8000... -
Page 12: Warnings And Caution Notices
(printed circuit boards) to prevent static discharge damage to sensitive electronic components. Additional Warning and Caution notes are included throughout this manual. Operating Instructions - CPC8000... -
Page 13: Product Description
• 0.008% IS-33 (IntelliScale-33) sensor option • Complies with latest CE and 61010 regulations The CPC8000 is designed to automate the testing and calibration of all types of pressure devices and instruments. Up to three removable / interchangeable pressure transducers are available in full scale (FS) ranges from 0.36 to 6,000 psig, 7.5 to 6015 psia. -
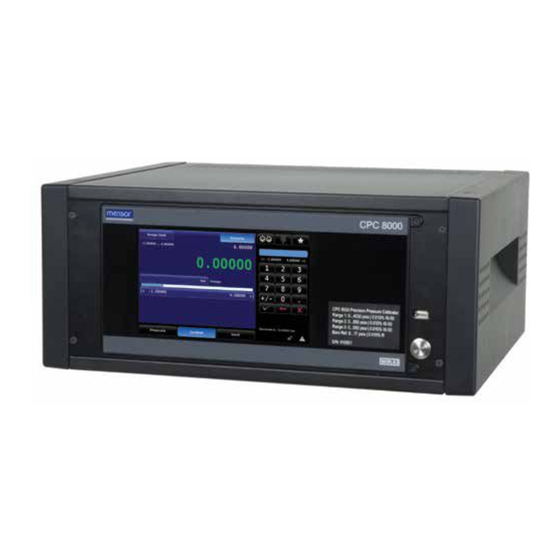
Page 14: Front Panel
CPC8000 3.2 Front Panel The front of the CPC8000 has a smooth, uncluttered appearance (see fgure 3.2). Its main feature is the large color display plus an identifcation label in the lower right corner of the display panel. The display panel is hinged for easy access to remove or replace the transducer modules inside. -
Page 15: Screen Navigation
The smaller area (Data Entry) on the right side, has the number key pad, variable sliders or discrete choice buttons (radio buttons) that all act to input alpha numeric information or mode changes relating to the test or calibration information being shown on the left. Operating Instructions - CPC8000... -
Page 16: Main Features
■ Multiple languages; simply touch one of the national flags on the display to instantly change the on-screen text language, and the corresponding number and date formats. For more detailed informa- tion see Section 7.1.1, Language. Operating Instructions - CPC8000... -
Page 17: Specifications
National Institute of Standards and Technology NIST). A calibration data report has been provided with your new CPC8000 instrument, traceable to NIST. The calibration program at Mensor is accredited to both ISO/IEC 17025:2005 and Z540-1-1994 by A2LA. Mensor, LP is registered to ISO 9001:2008. -
Page 18: General Specifications
Conformity certifcate. Complies with EN50081, EN50082, and EN61010-1. Calibration certifcate Includes calibration certifcate(s). The Mensor calibration laboratory is accredited in accordance with the recognized Internal Standard ISO/IEC 17025:2005 and also meets the requirements of ANSI/NCSL Z540-1-1994. Accreditation is by the American Association for Laboratory Accreditation (A2LA). -
Page 19: Transducer Removal/Replacement
10:1 of the primary transducer. In other words, the lowest full scale range in the CPC8000 cannot be less than one tenth of the range of the primary transducer full scale range (see Section 4.6, Transducer... -
Page 20: Regulator Ranges
CPC8000 4.5 Regulator Ranges The CPC8000 is supplied with one of fve diferent needle valve regulators (NVR) modules. Table 4.5 shows each regulator and its corresponding pressure range limits: LP (low pressure), MP (medium pressure), SP (standard pressure), HP (high pressure) and EP (extended pressure). -
Page 21: Transducer Choices
CPC8000 4.6 Transducer Choices Transducer measuring modes can be gauge, absolute, or bi-directional. The CPC8000 will be equipped with one, two or three transducers of the same mode. Transducer type will be “Standard” (uncertainty of 0.03% FS, 0.01% FS, or 0.01% IS-50) or “Premium” (uncertainty of 0.008% IS-33, or 0.008% IS-50). -
Page 22: Transducer Type / Range / Mode / Uncertainty
CPC8000 4.6.1 Transducer Type / Range / Mode / Uncertainty Each transducer within the CPC8000 or additional transducers will conform to the limits shown in the fol- lowing table. Table 4.6.1 - Transducer Type / Range / Mode / Uncertainty... -
Page 23: Intelliscale
In practice, the standard Mensor IntelliScale specifcation is 0.01% IS-50. This means that the full scale lower half (50% of the total range) has an uncertainty of 0.01% of that portion of the range, while the upper half of the total range has an uncertainty of 0.01% of the pressure reading. - Page 24 High-End Pressure Controller CPC8000 NOTES Operating Instructions - CPC8000...
-
Page 25: Installation
Vacuum: minimum 50 liters per minute (if required) 5.1 Initial Installation The initial installation of the CPC8000 includes the following steps: Unpack the system, place it in a suitable work place, connect it, switch it on and confgure. A Quick Start Guide has been placed inside the shipping box containing your instrument. This guide provides a quick reference to the pneumatic and electrical connections and an introduction to the opera- tor interface. -
Page 26: Dimensions
Basic instrument: LP-NVR (-14.5 … 90 psi / 0 … 105 psi abs.) 6 mm Tube OD x 7/16-20 Male SAE/MS Straight Thread Date of manufacture: 12/2012 Mensor - 201 Barnes Drive - San Marcos, TX 78666 rear view Operating Instructions - CPC8000... -
Page 27: Turning On The Cpc8000
Operating temp. : 15 ... 45°C Serial number: 910021 Basic instrument: LP-NVR (-14.5 … 90 psi / 0 … 105 psi abs.) Date of manufacture: 12/2012 Mensor - 201 Barnes Drive - San Marcos, TX 78666 BAROMETRIC SUPPLY EXHAUST VENT... - Page 28 In the Measure mode a pressure applied to the Measure/Control port is measured by the instrument sensor. ■ Barometric Reference The Barometric Reference port is connected to the internal barometric sensor and should be left open to atmospheric pressure. Operating Instructions - CPC8000...
-
Page 29: Pneumatic Connections And Pressure Fittings
5.6 Pneumatic Connections and Pressure Fittings The CPC8000 is supplied with fve 1/4 in. tube OD x 7/16-20 male SAE/MS straight thread adaptors or fve 6 mm tube OD x 7/16-20 male SAE/MS straight thread adaptors (per order). The 7/16-20 male SAE/ MS straight thread end of the adaptors should be connected to the instrument’s 7/16-20 female SAE/MS... -
Page 30: Electrical & Communication Connections
Serial number: 910021 Basic instrument: LP-NVR (-14.5 … 90 psi / 0 … 105 psi abs.) Date of manufacture: 12/2012 Mensor - 201 Barnes Drive - San Marcos, TX 78666 Note: USB ports are compliant with the industry standard. Pin 1... -
Page 31: Notices Regarding The Electrical Connections
5.7.1.4 USB Host Interface The USB Host interface is a service port used to upgrade software and download information from the device. It has the same function as the USB Host port on the front of the CPC8000. 5.7.1.5 USB Device Interface The USB Device jack is a standard USB Type B receptacle interface used for remote communication. - Page 32 Max. switching voltage: 125VAC, 60VDC ■ Max. switching current: 1A ■ Max. switching power: 62.5VA, 30W The instrument can be set to respond to the digital inputs and to change the outputs based on certain conditions. See section 7.5.2.5.8. Operating Instructions - CPC8000...
-
Page 33: Local Operation
6.1 will appear. This is the main operating screen. At this point the CPC8000 is ready for operation. However, for critical tests and measurements allow the unit to warm up for at least 15 minutes with power on to ensure rated accuracy. -
Page 34: Buttons, Keys, Switches, Tabs, And Other Terms
6.1.2 Map of the Main Screen Features Figure 6.1.2 is a map of the main screen features and refects a CPC8000 without any of the extra display options. The map includes a title box for each screen feature and the section number of the explanatory text about the feature and its use. -
Page 35: Main Screen Features
The presently active range is highlighted. Touch either one of the listed ranges, or [Autorange] and that choice is immediately efective. If the CPC8000 is under pressure, only those transducers with ranges equal to or above the internal pressure are allowed to be chosen. -
Page 36: Pressure Reading
To edit the setpoint value, frst touch the [Setpoint] button. This will activate the system for setpoint changes. The sidebar will display the default number key pad or a pre-chosen setpoint entry method. To change the setpoint value use one of these methods described in Section 6.2.6. Operating Instructions - CPC8000... -
Page 37: Setup
Returns the number key pad to the main screen (see 6.2.6.1). Sets the setpoint step value (see 6.2.6.2). Sets the selected setpoint digit (see 6.2.6.3). Activates a program and program control (see 6.2.6.4). Figure 6.2.6 - Setpoint Entry Methods Operating Instructions - CPC8000... -
Page 38: Number Key Pad
Step Up [ ] or the Step Down [ key. If the Enter [ ] key is pressed the newly entered value will register as a new setpoint value on the main screen rather than a step value. Operating Instructions - CPC8000... -
Page 39: Digital Step
If the resolution of the instrument were set to 4 then the right most digit in the Digital Step screen would correspond to the least signifcant digit of the setpoint and the left two digits in the Digital Step screen would not be used. Operating Instructions - CPC8000... -
Page 40: Program Data Entry
CPC8000 6.2.6.4 Program Data Entry The Program Data entry method provides an automated way to interact with the CPC8000. Many setting or process that can be entered manually can be programmed into the unit and saved and used in the Program portion of the data entry screen. -
Page 41: Favorites
/ [Troubleshoot] screen where errors can be viewed. See Section 7.5.2.5.9, Trouble- shoot for more information. The error register will clear itself when it is viewed, however, this does not correct the error. A corrective action still must be specifcally addressed. Operating Instructions - CPC8000... -
Page 42: Secondary And Tertiary Displays
Section 7.1.2, Secondary and Tertiary Display. Secondary Display Tertiary Display Figure 6.2.9a - Secondary and Tertiary Displays Figure 6.2.9b - Screen of Display Choices Operating Instructions - CPC8000... -
Page 43: Limits
The bar graph is always active and reports in real time the pressure at the Measure/Control port. This provides a visual comparison between the actual pressure and the user selected control limits. Bar Graph Figure 6.2.11 - Bar Graph Operating Instructions - CPC8000... -
Page 44: Pressure Units
CPC8000 6.2.12 Pressure Units The pressure units that the CPC8000 is currently using are displayed very near the center of the main screen, just above the bar graph. To change pressure units, touch the current unit symbol to display a page of the units menu in the sidebar. -
Page 45: Operating Modes
CPC8000 6.2.14 Operating Modes The CPC8000 has three operating modes: Measure, Control, and Vent. After the system has been switched on, and after a subsequent short self-test, the instrument will automatically be placed in Mea- sure mode. The operator can switch from one mode to another by using the mode selection keys located just below the front panel display. -
Page 46: Measure Mode
Measure mode. The setpoint value can be input while in the Measure mode then Control mode can be activated by press- ing the [Control] key and the CPC8000 will start to control to the setpoint value. Operating Instructions - CPC8000... - Page 47 1) In Autorange Mode when the system pressure is outside of the connected transducer range. NC = Normally Closed 2) In Range Hold mode when another transducer is selected. Otherwise it is open. 6.2.14.1b - Isolation Valves in Measure Mode Operating Instructions - CPC8000...
-
Page 48: Control Mode
The Control mode is activated by pressing the [Control] button in the main menu. The Control mode can be accessed from the Measure mode or the Vent Mode by pressing the [Control] button. In the Control mode the CPC8000 acts as a precision pressure controller and provides a stable pressure output at the Measure/Control port. - Page 49 NO = Normally Open outside of the connected transducer range. NC = Normally Closed 2) In Range Hold mode when another transducer is selected. Otherwise it is open. Figure 6.2.14.2b - Isolation Valves in Control Mode Operating Instructions - CPC8000...
-
Page 50: Vent Mode
Personnel and sensitive equipment should not be in close proximity to the vent port during venting. WARNING! In some cases venting high pressure will cause a loud sound. Personnel should wear a hearing protection device when working with high pressures. Operating Instructions - CPC8000... - Page 51 NO = Normally Open outside of the connected transducer range. NC = Normally Closed 2) In Range Hold mode when another transducer is selected. Otherwise it is open. Figure 6.2.14.3b - Illustration Showing Isolation Valves in Vent Mode Operating Instructions - CPC8000...
-
Page 52: State Of The Isolation Valves When The Cpc8000 Is Off
CPC8000 6.2.14.4 State of the isolation valves when the CPC8000 is of When the CPC8000 is turned of the valves revert to their normal state: either Normally Open (NO) or Normally Closed (NC) as indicated above. Operating Instructions - CPC8000... -
Page 53: Setup
■ Admin ■ Gateway ■ Vent Rate ■ Port ■ Vent Limit ■ DHCP Serial ■ Baud ■ Data Bits ■ Stop Bits ■ Parity ■ Echo Figure 7b - Menu Tree of the Setup Menus Operating Instructions - CPC8000... -
Page 54: General Tab
7.1 General Tab 7.1.1 Language The languages that are available in the CPC8000 are shown by pressing Setup [ ], then press the [General] tab, and then the [Language] button. Note that the active language is indicated on the right side of the [Language] button. -
Page 55: Brightness
“bar graph” will appear in the sidebar. This shows the relative volumes available and can be changed by sliding ones fnger up and down on the bar graph or simply touching an area on the graph that corresponds to the desired volume level. Figure 7.1.4 - Volume Operating Instructions - CPC8000... -
Page 56: Load (Configuration)
When the [Load] button is chosen a choice of several confgura- tions are displayed on the sidebar. When one confguration is chosen its saved parameters and settings will be active in the instrument. Figure 7.1.5 - Load (confguration) Operating Instructions - CPC8000... -
Page 57: Save (Configuration)
5 psi per second. These param- eters can be set and assigned (saved) in one of the confguration numbers and recalled (loaded) before this test is run. Operating Instructions - CPC8000... -
Page 58: Sensor Tab
The flter can be set to Of, Low, Normal or High simply by pressing the associ- ated button on the right site of the menu. Figure 7.2.1 - Filter Operating Instructions - CPC8000... -
Page 59: Resolution (Display Digits)
This same selection of units can be accessed directly from the Main screen by pressing the button displaying the current units. Figure 7.2.3 - Units Operating Instructions - CPC8000... -
Page 60: Rate Units
0.703069 as the multiplier. The new user unit associated with this base unit and multi- plier would now be displayed when that User Unit is chosen in the main menu or on the Setup [ [Sensor] / [Units] screen . Figure 7.2.5 - User Units and User units Multiplier Operating Instructions - CPC8000... -
Page 61: Vent Rate
The vent limit can be set within the values shown for the limits above the keypad. Figure 7.2.7 - Vent Limit Operating Instructions - CPC8000... -
Page 62: Control Tab
These limits can only be set within the range of the active sensor. When the CPC8000 is in Autorange the limits can only be set within the range of the primary transducer which, by convention, will have the widest range. -
Page 63: Stable Limits
] menu. Both of these are used to defne a stable condition for pressure control or measurement (see fgure 7.3.2a). When the controller enters a stable condition the font color for the pressure indica- tion will change from white to green. For example, an operator would like the CPC8000 to show a stable ±... -
Page 64: Rate Setpoint
] / [Control] menu. The rate setpoint sets the rate of pressure change when the CPC8000 is controlling up or down to a setpoint. The rate is limited to 0.001% of the full scale range/second to 10% of the full scale range/second. -
Page 65: Remote Tab
CPC8000. When the [Command Set] button is chosen any of the listed command sets seen in the side bar can be selected. This will immediately change the active command set enabling the instrument to respond to commands in that set. -
Page 66: Ieee-488 Address
If a DHCP server fails to respond, DHCP will automatically turn of. Turning DHCP of allows the ethernet parameters to be edited and a static IP address assigned. Figure 7.4.3 - Ethernet Settings Operating Instructions - CPC8000... -
Page 67: Serial Settings
Figure 7.4.4 - Serial Settings 7.4.5 USB Device Setting The USB Device jack is a standard USB Type B receptacle interface used for remote communication. The USB Driver can be downloaded at http://www.mensor.com/download_software_instrument_en_um.wika. Operating Instructions - CPC8000... -
Page 68: Applications Tab
Both passwords can be changed and saved in the [Admin] page within the [Setup] [ ] / [Applications] section. If the passwords are forgotten, contact Mensor or your local Mensor service center for instructions to access the protected areas and to reset the passwords. Operating Instructions - CPC8000... -
Page 69: Calibration Of Internal Transducers
This section is included for those who wish to calibrate their CPC8000 within their own calibration lab. Because calibration involves special training and calibration components that are not addressed here, only personnel qualifed in calibration procedures should be allowed to calibrate the CPC8000. -
Page 70: Calibration Environment
CPC8000 7.5.2.1 Calibration Environment For maximum accuracy, allow the CPC8000 to warm up for a minimum of 30 minutes in an ambient temperature within the compensated range prior to commencing a calibration. In addition the instrument should be at rest on a stable platform that is free of excessive vibration and shock. - Page 71 Setup for Gauge or Differential Pressure PRESSURE SUPPLY LINE REGULATOR Computer (optional) METERING VENT VALVE SHUT-OFF VALVE VOLUME CONTROLLER RS232, IEEE488, Ethernet, or USB PRESSURE MEASURE/CONTROL PORT PRESS CPC8000 REFERENCE PORT PRESSURE STANDARD REFERENCE ATMOSPHERE Figure 7.5.2.4 - Calibration Setup Operating Instructions - CPC8000...
-
Page 72: Calibration Adjustment Procedure
7.5.2.5 Calibration Adjustment Procedure There are three methods that can be used to calibrate all of the transducers in the CPC8000. A simple [1-Point Calibration] can be used to adjust a single point (usually the zero point). A [2-Point Calibration] extends this capability to adjust two points (usually points close to the Zero and Span). -
Page 73: 1-Point Calibration
Measure/Control port to bring the pressure down to a value closer to absolute zero. Mensor recommends a value greater than or equal to 600 mtorr. The value for the absolute pressure reading from the reference standard should be recorded by pressing the [New Value] button. -
Page 74: 2-Point Calibration
After the value has been accepted by pressing the [check] mark on the numeric key pad the value will appear with a green background where the [New Value] button was. These actions complete the low point calibration. Operating Instructions - CPC8000... -
Page 75: Linearize
The [Linearize] application (see fgure 7.5.2.5.3a) provides a place to record [As Found] calibration data and to linearize each internal transducer in the CPC8000 using that data. An “as found calibration” can be performed by connecting a suitable pressure standard to the Measure/Control port, placing the instru- ment in [Measure] mode and supplying all 11 pressure points across the complete range of the trans- ducer being calibrated. - Page 76 In the Live Cal, the reference standard is connected to the Measure/Control port and the CPC8000 is placed in Measure mode. Choose the transducer to be tested by pressing the [Primary], [Secondary], [Tertiary], or [Barometer] button. The reference pressure generated by the standard is recorded in the “Reference”...
-
Page 77: Head Correction (Password Protected)
(elevation) compared to the sensor inside of the CPC8000. Touching any of the active buttons in this screen will activate the number key pad. Each of the four rows in fgure 7.5.2.5.4 represent a diferent parameter in the head correction calculation. -
Page 78: Programs
] / [Applications] / [Programs] screen is used to create, view and edit programs that are used to automatically run a sequence of commands within the CPC8000. There are two tabs at the bottom of the Program screen shown in fgure 7.5.2.5.6a. The Display tab provides a place to view each program or add a new one. - Page 79 Starts the sequence from the beginning (None) SETPOINT Sets the control setpoint for the instrument (Numerical Entry) SETPOINT% Sets the control setpoint in % of current range (Numerical Entry) WAIT Waits for a manual input or stable condition (Stable or Input) Operating Instructions - CPC8000...
-
Page 80: Favorites
“Vent”. Each input can be assigned to one of the choices listed on the right by pressing the input then the choice. [ Keylock ] will lock out the touch screen interface preventing local operation and [Start] will start the most recent program selected in Favorites [ ] menu. Figure 7.5.2.5.8a - Digital Input Operating Instructions - CPC8000... -
Page 81: Troubleshoot
In fgure 7.5.2.5.8b Output 1 (one) is assigned to the [Vent] mode of the instrument. Output 1 will be energized when the CPC8000 is in Vent mode. Each output can be assigned to one of the choices listed on the right by pressing the output and then the choice. Each output switch will be energized when the assigned instrument mode is active. -
Page 82: Advanced
Point] & [Linerization]) should only be used with close supervision from Mensor Custom- er Service. Changing parameters within this section will change the regulator response and may cause the CPC8000 to fail to meet control specifcations or output pressure Caution that could damage externally connected instruments. - Page 83 After the instrument has been powered on and the main screen is displayed press the Setup [ ] key and then press the [Info] tab. Information displayed will be the Mensor contact address information, the instrument’s serial number, frmware version and a list of the integrated sensors and other information.
- Page 84 High-End Pressure Controller CPC8000 Notes Operating Instructions - CPC8000...
-
Page 85: Remote Operation
<CR> and/or a <LF>. A query command ends with a ? for queries. The data column represents the response of the CPC8000. All response strings begin either with a space character or an “E” representing that there is an error in the error queue. - Page 86 High-End Pressure Controller CPC8000 Table 8.2 - Mensor Command Set Command/Query Data Function/Response See section 8.2 text on previ- Returns data per the current output format. ous page Acquire? 15 char string. This command is used when multiple computers would like to control the instrument.
- Page 87 Returns the number of decimal points. (See: Resolution) Default none Sets the default values. Desiredpress <sp><n>,Decimal value Sets the reference pressure for <n>th linear- ity point (0 based index). Must be greater than <n-1>’s “Desiredpress” value. See Section 7.5.2.5.3, Linearize. Operating Instructions - CPC8000...
- Page 88 Gets the Ethernet gateway address. nnn<cr><lf> Height value in inches Sets the head pressure height in inches. Height? <sp>+n.nnnnnE+nn<cr><lf> Gets the head pressure height in inches. <sp>MENSOR, CPC8000, Ssssss is the serial number, v.v.vv is the ssssss,v.v.vv<cr><lf> CPC8000 software version. Operating Instructions - CPC8000...
- Page 89 Sets the lower control limit for the instru- current units. ment LowerLimit? <sp>+n.nnnnnE+nn<cr><lf> Returns the lower control limit for the instru- ment in current units. Lowovershoot Does not apply to the CPC8000 Lowovershoot? <sp>YES<cr><lf> Returns Yes Measure none Instrument placed in Measure Mode Measure? <sp>(YES or No)<cr><lf>...
- Page 90 7 or 8 Sets the serial data bits. Sdata? <sp>n<cr><lf> Returns the serial data bits number. Sensor 1, 2, 3, or PRIMARY, Sets the active sensor. SECONDARY, TERTIARY Sensor? <sp>XXXXXXX,1<cr><lf> Returns active sensor in long string format. Operating Instructions - CPC8000...
- Page 91 Sparity? <sp>CCCC<cr><lf> Returns the serial parity. Srqmask Stable,Error or both Sets the CPC8000 to issue a service request (SRQ) over the IEEE when the pressure control is stable, or an error occurs. These are 80 hex and 40 hex respectively.
- Page 92 Changes the termination character for all command sets. If not using GPIB, EOI will add CRLF. DEFAULT restores default termi- nation. For Mensor it is CRLF, and for WIKA SCPI it is LF. Units units code or text (see table Sets the instrument engineering units.
-
Page 93: Scpi Wika Command Set
Returns the units conversion factor. :REFerence [:HEIGht] <n> Sets the head pressure height. :HEIGht? Returns the head pressure height. :MODE? Returns “OFF”, “GAS”, or LIQUID”. :MODE OFF/GAS/LIQUID Sets the head pressure mode. :MEDium<n> Sets the medium density. :MEDium? Returns medium. Operating Instructions - CPC8000... - Page 94 Returns the pressure units. :INDEX <n> Sets the global remote unit by index number. :INDEX? Returns the index number. Index Unit mbar kp/cm² lbf/ft² cmH2O(4°C) inH2O(4°C) inH2O(20°C) inH2O(60°F) ftH2O(4°C) mmHg(0°C) cmHg(4°C) inHg(0°C) inHg(60°F) user user user Operating Instructions - CPC8000...
- Page 95 Returns the rate at which the controlled vent goes to atmosphere. :SYSTem :DETECT SLOW/FAST/CANCEL Not used, kept for backwards compatibility :DETECT? Returns “0”. :TARE :STATe ON/OFF/1/0 Tare the current reading. The same tare value is applied to all measuring sensors. :STATe? Returns the tare value. Operating Instructions - CPC8000...
-
Page 96: Scpi Error Messages And Error Codes
Regulator error message Default confguration not found Calibration mode active! Deactivate before setting C0..C3 Sensor not available DCS instance not available Create DCS instance failed DCS still active Command currently not allowed General purpose error message Operating Instructions - CPC8000... -
Page 97: Command Emulation
Sets command set to PCS 200 _pcs4 list? Returns range list _pcs4 opt? Returns option list (old pcs400 format) _pcs4 option? Returns option list. _pcs4 outform<digit> Sets output format. _pcs4 outform? Returns the current output format. Operating Instructions - CPC8000... - Page 98 Returns the number of the currently active transducer. _pcs4 xducerid? Returns the internal transducer number, serial number, min and max sensor range. _pcs4 zero? Returns the stored zero ofset of the active transducer and turndown in the current pressure units. Operating Instructions - CPC8000...
-
Page 99: Options
15 inches by 24 inches by 26 inches (38.10 cm x 60.96 cm x 66.04). Figure 9.1 - Transport Case 9.2 Rack Mount Kit This kit provides the materials and instructions necessary for the user to convert a desk top CPC8000 for installation into a standard 19” rack. 9.3 Barometric Reference Transducer This optional transducer allows gauge mode instruments to operate in absolute mode, and similarly, absolute mode instruments to operate in gauge mode. -
Page 100: Model 75 Pressure Booster System
9.4 Model 75 Pressure Booster System To control pressure, the CPC8000 requires a pressure supply of 10% above the full scale of the instru- ment. For ranges of 3000 psi or greater, this is above the typical gas bottle/cylinder. The Model 75 Pressure Booster System provides the ability to boost bottle pressure up to the supply pressure require- ments of all possible CPC8000 range confgurations while maximizing gas bottle/cylinder usage. -
Page 101: Maintenance
High-End Pressure Controller CPC8000 10. Maintenance The CPC8000 was designed for maintenance-free operation. User maintenance is not recommended. If you have questions not covered by this manual, call 1.800.984.4200 (USA only), or 1.512.396.4200 for assistance or send an e-mail to tech.support@mensor.com. - Page 102 The setpoint value is not reached. Check whether the value of the supply pressure is the value required, and leak test the plumbing. If you need help or assistance, contact Mensor at Phone: 1.512.396.4200 or 1.800.984.4200 (USA only) Web site: www.mensor.com Fax: 512.396.1820 E-mail: sales@mensor.com...
-
Page 103: Pressure Transducer Location
The panel can then swing away to reveal the transducers lined up across the interior. If the system has not been powered down, opening the front panel will trip an inter- lock to vent the system to atmosphere. Operating Instructions - CPC8000... - Page 104 In this case a manifold seal plate is supplied and attached at the Mensor factory for this purpose. The D-sub connectors for unused slots can remain unplugged.
-
Page 105: Appendix
High-End Pressure Controller CPC8000 11. Appendix Table 11.1 – Measurement Units Table 11.2 – Conversion Factors, bar Table 11.3 – Conversion Factors, psi Table 11.4 – Conversion Factors, millitorr WIKA Worldwide Operating Instructions - CPC8000... -
Page 106: Measurement Units
@0 degrees Celcius mmHg @0C centimeters of mercury @0 degrees Celcius cmHg @0C meter of mercury @0 degrees Celcius mHg 0C meters of water @20 degrees Celcius mH2O @20C meters of water @4 degrees Celcius mH2O @4C Operating Instructions - CPC8000... - Page 107 High-End Pressure Controller CPC8000 meters of sea water grams per centimeter squared g/cm kilogram per meters squared kg/m pascals megapascals dynes per centimeter squared dyn/cm percent full scale % FS User 1 User 1 User 2 User 2 Operating Instructions - CPC8000...
-
Page 108: Conversion Factors, Bar
Millimeter mercury column 0ºC (Torr) mmHg (0ºC) 1.333224E-03 7.500615E+02 Centimetres mercury column 4ºC cmHg (4ºC) 1.333224E-02 7.500615E+01 Inch mercury column 0ºC inHg (0ºC) 3.386380E-02 2.953006E+01 Inch mercury column 60ºF inHg (60ºF) 3.376850E-02 2.961340E+01 user user user Operating Instructions - CPC8000... -
Page 109: Conversion Factors, Psi
0.03714250 ftSW 2.243611 0.445710 inHg @60F 2.041772 0.4897707 Torr 51.71508 0.01933672 mTorr 51715.08 0.00001933672 micronHg @0C 51715.08 0.00001933672 mmHg @0C 51.71508 0.01933672 cmHg @0C 5.171508 0.1933672 mHg 0C mH2O @20C 0.704336 1.419777 mH2O @4C 0.7030890 1.422295 Operating Instructions - CPC8000... -
Page 110: Conversion Factors, Millitorr
@0C 3.5% salinity 0.00004338408 23049.92831 0.000001315786 760002.2299 0.000001333220 750063.6259 mbar 0.001333220 750.0636259 mmH2O @4C 0.0135954 73.5540997 cmH2O @4C 0.001359544 735.5409971 mH2O @4C 0.00001359544 73554.09971 mmHg @0C 0.001 1000.000022 cmHg @0C 0.0001 10000.00022 Torr 0.001 1000.000022 0.0001333220 7500.636259 Operating Instructions - CPC8000... - Page 111 @0C 3.5% salinity 0.00001322347 75623.11663 oz/si 0.0003093875 3232.1992 0.002784488 359.132477 tons/sq ft 0.000001392244 718265.0575 micronHg @0C 1.000000022 tons/sq in 0.001333220 750.0636259 0.0000001333220 7500636.259 mmH2O @20C 0.01361955 73.42388114 cmH2O @20C 0.001361955 734.2388114 mH2O @20C 0.00001361955 73423.88114 Operating Instructions - CPC8000...
-
Page 112: Wika Worldwide
High-End Pressure Controller CPC8000 NOTES Operating Instructions - CPC8000... - Page 113 201 Barnes Drive San Marcos, Texas 78666 phone: 512.396.4200 web site: www.mensor.com e-mail: sales@mensor.com CPC8000 - High-End Pressure Controller PN 0018508001V • 11/2014 WIKA Alexander Wiegand SE & Co. KG Alexander-Wiegand-Straße 30 D-63911 Klingenberg / Germany tel: (+49) 93 72/132-9986 web site: www.wika.de...
Need help?
Do you have a question about the CPC8000 and is the answer not in the manual?
Questions and answers