Table of Contents
Advertisement
U
UI
U I
U
U I
UI
UI
U
U I
U I
U
U
U I
U
U
UI
U
UI
UI
U
U
U I
U
UI
UI
UI
U
UI
U
UI
U
UI
U
U
U
U
U
U
U
U
U
U
U
U
U
UI
U
U I
U
U
U
U
U
UI SmartSeat iss01, 03/2013
I
I
I
I
I
I
I
I
I
S
S
S
S
S
S
S
S
S
S
S
S
S
S
S
S
S
S
S
S
S
S
S
S
S
S
S
S
S
S
S
S
S
S
S
S
S
S
S
S
S
S
S
S
S
S
S
S
S
S
S
S
S
S
ma
ma
ma
ma
m a
ma
m a
ma
ma
ma
ma
m
ma
ma
ma
ma
ma
ma
ma
ma
ma
m
m
ma
m a
ma
ma
ma
ma
ma
ma
ma
m a
ma
ma
m
m
m
ma
m
m a
ma
m
m
m
m
m
m
a
a
a
rt
rt
rt
rt
rt
rt
rt
rt
rt
rt
rt
rt
rt
rt
rt
rt
rt
rt
rt
rt
r
r t
rt
rt
rt
rt
rt
rt
rt
rt
r
rt
r t
rt
rt
rt
rt
rt
r
r
t
t
t
t
t
t
t
t
t
Se
Se
Se
Se
Se
S
Se
S e
Se
S e
Se
Se
S
Se
Se
Se
Se
Se
S e
Se
S e
Se
S
Se
Se
Se
S
Se
Se
S
Se
S e
S e
Se
S
Se
S
Se
S
S
S e
Se
Se
Se
S e
Se
S e
S
S
Se
Se
e
e
e
e
e
e
e
e
e
e
at
at
at
at
at
at
at
at
at
at
at
at
at
at
at
at
at
at
at
at
at
at
at
a t
at
at
a
at
at
at
at
at
at
at
at
at
a
a
a t
a
a
a
a t
a
a t
a
a t
a
t
t
t
t
t
t
t
t
t
t
t
i
i
i
i
i
i
i
i
i
i
i
i
i
i
i
i
i
i
i
i
i
i
i
i
i
i
i
i
i
i
i
i
i
i
i
i
i
i
s s
ss
ss
ss
ss
ss
s s
ss
ss
ss
ss
ss
s
ss
s s
ss
ss
ss
ss
ss
ss
s
ss
s s
ss
ss
s
ss
ss
ss
s
ss
s
s
s s
s
s
ss
s
s
ss
ss
s
s s
ss
s
s s
s
ss
s
s
s
s
s
s
s
s
s
s
01
01
01
01
01
01
01
0
0 1
01
01
01
01
01
01
01
01
01
01
0
0 1
0
0
01
01
0 1
01
0
0
01
01
01
01
0
0
0
01
01
0
0 1
0 1
0
0
1
1
1
1
1
1
1
1
1
1,
1
1
,
,
,
,
,
,
,
,
,
,
,
,
,
,
03
03
03
03
03
03
03
0
03
03
03
03
03
03
03
03
03
03
03
03
0
0 3
0
0 3
03
03
0
0 3
03
03
0
03
03
03
03
03
0
0
0
0 3
0
0
03
03
0 3
03
0
0
03
03
03
03
0 3
0
3
3
3
3
/2
/2
/ 2
/
/ 2
/
/2
/2
/2
/ 2
/2
/
/ 2
/
/2
/2
/2
/2
/2
/2
/2
/2
/
/2
/2
/2
/
/2
/2
/2
/2
/2
/2
/2
/
/ 2
/2
/2
/
/ 2
/2
/
2
2
2
2
2
2
2
2
CareFlexibility
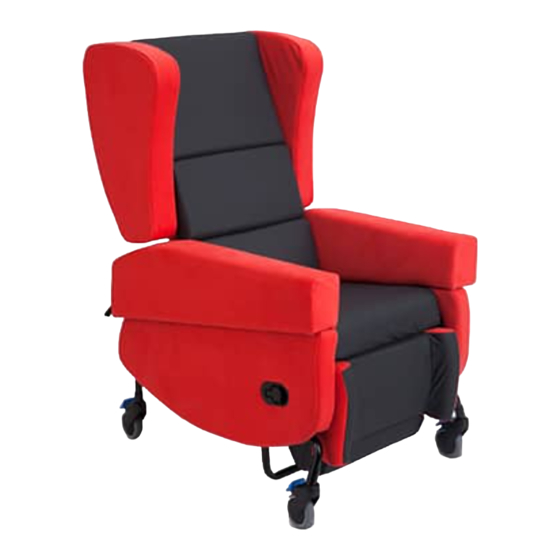
The CareFlex SmartSeat
01
01
01
01
01
01
01
0
01
01
0 1
0
01
01
01
01
01
0 1
01
01
01
01
01
01
0
0
01
01
0
01
01
01
0 1
01
01
01
013
01
01
01
1
1
1
1
1
1
1
1
1
3
3
3
3
3
3
3
3
3
3
3
3
3
3
3
3
3
3
3
3
3
3
3
3
3
3
3
3
3
3
3
3
3
3
3
3
3
3
User instructions
TM
TM
Class 1
Medical Device
Advertisement
Table of Contents

Related Manuals for CareFlex SmartSeat


Summary of Contents for CareFlex SmartSeat
- Page 1 UI SmartSeat iss01, 03/2013 CareFlexibility The CareFlex SmartSeat User instructions Class 1 Medical Device...
- Page 2 CareFlex or your CareFlex Distributor immediately. If you are in any doubt about the safe operation of the SmartSeat,...
-
Page 3: Table Of Contents
Index Who is the SmartSeat for? ..........Chair Set-up ................... Seat Depth ....................Seat Width ....................Seat Height ..................The SmartSeat Chair in Day to Day Use ..Brakes ......................Tilt in Space ..................Legrest ...................... Footplate ....................Arms ...................... -
Page 4: Who Is The Smartseat For
• Where infection control is an issue. The SmartSeat chair is all about keeping the client in a functional position which is also comfortable and minimizes the risk of soft tissue damage. Once set up, the support will accommodate a range of postures. - Page 5 UI SmartSeat iss01, 03/2013 SmartSeat Unique Features The SmartSeat chair incorporates features which allow it to be set up to accommodate different postures and provide seating positions for a range of activities. The key features are: • Tilt-in-Space, which allows the client’s position to be adjusted without affecting pelvic position.
- Page 6 Each SmartSeat chair has a unique chair number which must be quoted during any correspondence with CareFlex or your local CareFlex Distributor. This number is on a silver foil label on the right hand side plate at the bottom of the back frame, above the seat depth adjustment rail at the back of the chair.
-
Page 7: Chair Set-Up
Seat to Floor Height Seat to floor height will have been measured during the initial seating assessment and the SmartSeat chair will have been factory assembled to these measurements but can be adjusted by a technician in the field. Seat Depth It is important to set seat depth correctly in order to prevent ‘sacral sitting’... - Page 8 If the client already has a chair or wheelchair with the correct seat depth, measure this size and use it to set up the SmartSeat chair. Adjusting Seat Depth: 1. Seat depth is adjusted by moving the back of the chair over the seat unit.
-
Page 9: Seat Width
Adjusting Seat Width: Pull the tabs on the back of the arms to 1. Each arm of the SmartSeat has a unique release the mechanism to adjust seat width. adjustment mechanism which allows the arm to be moved in or out relative to the centre of the chair. - Page 10 UI SmartSeat iss01, 03/2013 SmartSeat 3. Once the arm is in the desired position let go of the tab. The arm may jump slightly as the adjustment mechanism locks into the most appropriate position. If the chair is unoccupied, smooth out the lumbar cushion to minimize wrinkling of the cover.
-
Page 11: Seat Height
Again, ensuring the foot is flat and fully supported is important. The SmartSeat chair seat height will have been measured during assessment and the chair made to these dimensions for the client prior to delivery. -
Page 12: The Smartseat Chair In Day To Day Use
UI SmartSeat iss01, 03/2013 SmartSeat The SmartSeat Chair in Day to Day Use Brakes During transfer it is important that the chair is as stable as possible. The chair is fitted with four fully braked castors and the brakes on at least two castors should be engaged before transfer. - Page 13 UI SmartSeat iss01, 03/2013 Tilt-in-Space should be regularly adjusted to facilitate an easy change in weight distribution, thus avoiding pressure build up in any one area. Always warn the client before changing Tilt- in-Space to ensure they do not become distressed or agitated.
-
Page 14: Legrest
Adjusting Legrest Elevation: 1. Manual Format On the manual option of the SmartSeat chair, legrest elevation is controlled by the lever located on the right hand side panel. Pull this lever out and the legrest will begin to raise. It... -
Page 15: Footplate
UI SmartSeat iss01, 03/2013 2. Motorised Format On the motorised option, legrest elevation is controlled by the handset. The top row of two buttons control legrest elevation. The left hand button raises the legrest. The right hand button returns the legrest to its lowered position. - Page 16 UI SmartSeat iss01, 03/2013 SmartSeat Footplate Angle / Plantar Flexion Control The footplate has three angle settings to provide comfort and support plantar flexion. As the legrest is elevated, having a 90° angle at the ankle will become more uncomfortable.
- Page 17 UI SmartSeat iss01, 03/2013 Seat to Footplate Height The SmartSeat chair has an articulating legrest which has a naturalistic movement to provide support to the lower leg as the knees flex. This means that for the majority of occupants the footplate will provide consistent support as the legrest elevates.
-
Page 18: Arms
SmartSeat Arms Arm Removal and Side Transfer The arms of the SmartSeat chair can be removed for servicing and for side transfer. If the intention is to regularly remove the arms then the arm location locking device can be disabled so that the arms can be lifted off the chair easily. - Page 19 UI SmartSeat iss01, 03/2013 3. Re-fit the arm by reversing the above process. Frequent Arm Removal: 1. If the arm is going to be removed frequently, as would be expected if regular side transfers are being made, the locking device can be disabled.
-
Page 20: Options
UI SmartSeat iss01, 03/2013 SmartSeat Accessories and Options Contoured Back As with all CareFlex chairs, a contoured back option is available which offers simple lateral support, helping to limit leaning and give additional control during upper trunk movement. When ordered as an option on a new chair... - Page 21 UI SmartSeat iss01, 03/2013 3. Lift the middle back cushion off from the front of the chair. The cover fits over the frame and foam to keep the foam in place. Carefully twist the frame out of the cover, one corner at a time.
-
Page 22: Adjustable Laterals
There is a danger that if cage. The adjustable laterals can be retro an occupant leans forward and then fitted to any SmartSeat chair. Each lateral is rocks back they may injure their adjusted independently. The objective of using back against the firm support of the laterals. - Page 23 UI SmartSeat iss01, 03/2013 Width The Adjustable Laterals have 5cm of width adjustment in 1cm increments. The width position is controlled by a pull-out indexer. Adjusting the Width: 1. To adjust the position of the laterals, pull out the indexer and, whilst holding the lateral pad, slide the lateral to the desired position.
-
Page 24: Headrest
Headrests The complete range of CareFlex headrests are available for the SmartSeat chair. These are attached to the thin round bar between the push handles on the back of the chair. Each headrest has a strap attached to its top edge. -
Page 25: Pommel
UI SmartSeat iss01, 03/2013 Pommel A pommel can be used to control knee position, usually by abducting (pushing apart) the knees to help keep the seating position stable and level. The pommel is designed to separate the knees and support the whole inside of the knee joint. - Page 26 UI SmartSeat iss01, 03/2013 SmartSeat Pommel Receiving Bracket Fitting If ordered with a chair, the pommel receiving bracket will be fastened in place. If retro-fitting a pommel to an existing chair, the receiving bracket will need to be fastened in place on the seat frame.
-
Page 27: Belts And Harnesses
Pelvic Belt coming over the hips between 45° and 60° degrees. CareFlex pelvic belts are intended to pull back over the hips at an angle between 45° and 60°. This angle helps to maintain a vertical pelvis by simultaneously pulling the hip joint down and back. - Page 28 UI SmartSeat iss01, 03/2013 SmartSeat mounting bars and re-thread the end of the webbing through the tri-glide. Adjust the length of the belt by threading more or less webbing through each tri-glide buckle. Plain Pelvic Belt The Pelvic Belt is a simple strap made from 50mm webbing with a double adjustable side release buckle.
- Page 29 UI SmartSeat iss01, 03/2013 made from neoprene. Padded Pelvic Belt Set-up: 1. To set up the overall length of the belt, pull the D-rings towards the central side release buckle. Set the main length of the belt through the tri-glide buckles on the rear bottom edge of the back frame.
- Page 30 UI SmartSeat iss01, 03/2013 SmartSeat thighs so that they sit at right angles to the seat board. 4-Point Pelvic Belt Set-up – Main Belt: 1. Adjust the main webbing strap through the central side release buckle so that there is approximately 15cm of loose webbing each side of the buckle.
- Page 31 UI SmartSeat iss01, 03/2013 thread the end of the webbing through the tri- glide. Adjust the length of the belt by threading more or less webbing through each tri-glide buckle. 4. Once the tension is correct on both sets of straps, Re-adjust seat width as per the earlier instructions.
- Page 32 UI SmartSeat iss01, 03/2013 SmartSeat client’s rib cage and the top sections of the harness pad sit over the collar bones. This will ensure that the webbing straps do not rub. 2. In day to day use when transferring a client to or from the chair, undo the shoulder straps and one of the bottom straps.
- Page 33 UI SmartSeat iss01, 03/2013 Groin Harness A groin harness helps to keep the user positioned correctly in the chair. Adjusting the Groin Harness: 1. Position the loose webbing straps over the arms of the chair and transfer the client onto the chair so that they are sitting on the groin harness.
-
Page 34: Tray
UI SmartSeat iss01, 03/2013 SmartSeat Tray The SmartSeat chair has a tray which can be used as a surface for activities and, when the chair is upright, to support cups and plates. The tray rests across the arms of the chair and is made from moulded plastic. - Page 35 UI SmartSeat iss01, 03/2013 the earlier section ‘Occasional Arm Removal’. 2. With the arms removed you will see plates surrounding the mounting points for the arm location pegs. The plates are held in place with counter-sunk allen screws. Use a 3mm allen...
-
Page 36: Motorised Smartseat
Chargers: 1. Only chargers supplied by CareFlex should be used to charge CareFlex chairs. Do not use a CareFlex charger to charge other products. 2. Plug the charger in to a mains outlet with the power OFF. - Page 37 Move the chair when it is connected to the mains. • Charge the batteries when there is a client in the chair. If, after charging, the motor actuators do not work, take the chair out of service immediately and contact CareFlex or your local Distributor.
-
Page 38: Care & Maintenance
If you are unsure of the chair’s covering material, contact CareFlex with the serial number for the chair which will allow CareFlex to trace the specification of the chair. - Page 39 Always try to avoid storing or using the chair in areas where it may obstruct exits or passageways • The SmartSeat chair must never be used in motor vehicles for client transportation • Do not charge the chair’s batteries when a client is sat in the chair (motorised versions) •...
- Page 40 To inside of To inside UI SmartSeat iss01, 03/2013 right arm of left arm Seat Width Small SmartSeat SmartSeat 28-40cm Lateral Width 13-23cm Max Width Frame Length 63cm 91cm clearance Max Length 21cm 164cm 100kg Max User Weight 60kg Product Weight...
Need help?
Do you have a question about the SmartSeat and is the answer not in the manual?
Questions and answers