Table of Contents
Advertisement
Advertisement
Table of Contents

Related Manuals for SolarEdge Power Optimizer


Summary of Contents for SolarEdge Power Optimizer
-
Page 2: Disclaimers
The material furnished in this document is believed to be accurate and reliable. However, SolarEdge assumes no responsibility for the use of this material. SolarEdge reserves the right to make changes to the material at any time and without notice. You may refer to the SolarEdge web site (www.solaredge.com) for the most updated version. -
Page 3: Support And Contact Information
Before contacting, make sure to have the following information at hand: Model and serial number of the product in question The error indicated on the inverter screen or on the SolarEdge monitoring portal, if there is such an indication. System configuration information, including the type and number of modules connected and the number and length of strings. -
Page 4: Table Of Contents
Step 3, Connecting Power Optimizers in Strings..............14 Step 4, Providing Installation Information ................15 Step 5, Verifying Proper Power Optimizer Connection............15 Step 6, Disabling SafeDC™ (Only when Connecting to Non-SolarEdge Inverters without SMI) 16 Step 7, Commissioning ......................17 Appendix A: Troubleshooting ................... 18 For Installations with SolarEdge Inverters ...............18... -
Page 5: Chapter 1: Safety
Cette unité doit être opérée suivant les instructions trouvées dans ce document. CAUTION: Cutting the power optimizer input or output cable connector is prohibited and will void the warranty. Sectionner les cables d’entrées ou de sortie de l’optimiseur est interdit et annule sa garantie. - Page 6 In order to ensure mechanical compatibility of the SolarEdge optimizers and the modules to which they are connected: Use identical connectors from the same manufacturer and of the same type on both the power optimizers and on the modules;...
- Page 7 Chapter 1: Safety IMPORTANT SAFETY FEATURE: Each power optimizer is equiped with a SafeDC mechanism which ensures the optimizer outputs a safe 1V voltage until connected to the SolarEdge inverter or SMI, and the inverter/SMI are turned When connecting the power optimizers to a non-SolarEdge inverter without a Safety and monitoring Interface, you must disable the SafeDC before connecting to the inverter.
-
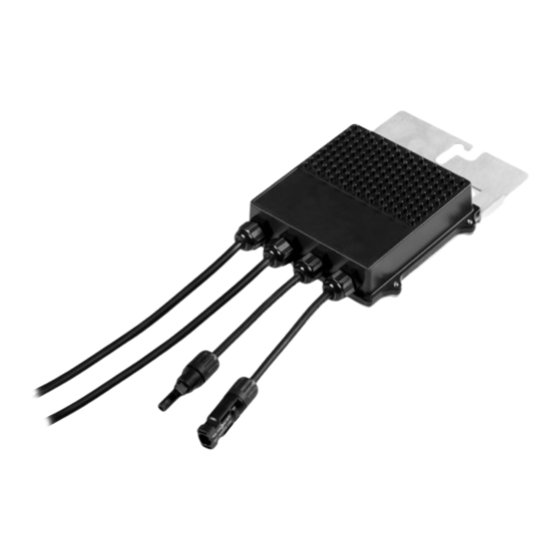
Page 8: Chapter 2: Introducing The Solaredge Power Optimizers
SolarEdge inverters. Power optimizers with P/N starting with "OPI", “OPJ” or “PxxxI” have the IndOP™ feature. Each power optimizer transmits its module’s performance data over the DC power line. When using a SolarEdge inverter, these signals are received by the inverter and can be used for maintenance and remote monitoring. -
Page 9: Chapter 3: Power Optimizer Installation
Site Installation General Workflow The following is the workflow for installing and setting up a new site, using a SolarEdge inverter or a non- SolarEdge one (with or without SMI). Most of these procedures can also be used for modifying an existing site. - Page 10 Installing the SolarEdge inverter Refer to SolarEdge Inverter Installation Connecting the strings to the Manual inverter Commissioning and activating the installation Connecting the inverter to the SolarEdge monitoring server (optional) Configuring the inverter (optional) SolarEdge Power Optimizers Installation Guide – MAN-01-00112-1.2...
-
Page 11: Planning The Power Optimizers Installation
Use the minimum and maximum string lengths, depending on the inverter type. The string lengths are specified in Power Optimizer Datasheets supplied with the power optimizers. Refer to the SolarEdge Site Designer for string length verification. -
Page 12: Planning Connection To Non-Solaredge Inverters (With Or Without Safety & Monitoring Interface)
Figure 3: Power optimizers connected in series directly to a non-SolarEdge inverter Installation Equipment List Standard tools can be used during the installation of the SolarEdge power optimizer. The following is a recommendation of the equipment to be used: Drilling machine and bits suitable for the surface on which the optimizer will be installed 1/4’’... -
Page 13: Package Contents
Grounding washers (North America only) Installing the Power Optimizer Step 1, Mounting and Grounding the Power Optimizers Use the power optimizer mounting brackets to attach the power optimizer to the racking, as described below. Determine the power optimizer mounting location. - Page 14 6-14 AWG, and must be sized for equipment grounding per NEC 250.122 requirements. Tighten the screws connecting the power optimizer to the frame and the grounding terminal screw. Apply torque of 9.5 N*m / 7 lb*ft.
-
Page 15: Step 2, Connecting A Module To A Power Optimizer
► To connect a string of modules: Connect the Minus (-) output connector of the string’s first power optimizer to the Plus (+) output connector of the string’s second power optimizer. Connect the rest of the power optimizers in the string in the same way. -
Page 16: Step 4, Providing Installation Information
Make sure the modules are exposed to sunlight during this process; otherwise, the power optimizers may not be powered. If you use a tracker, the power optimizer will turn ON only if the tracker is tracking the sun and at least 2W are provided by the module. -
Page 17: Step 6, Disabling Safedc™ (Only When Connecting To Non-Solaredge Inverters Without Smi)
SolarEdge power optimizers are provided in a SafeDC mode: when connected to a PV module these power optimizers will output a safe voltage of 1VDC until they are paired either with a SolarEdge inverter or with the SolarEdge Safety & Monitoring Interface, and until power production has started. -
Page 18: Step 7, Commissioning
Chapter 3: Power Optimizer Installation Disable the SafeDC (refer to the SolarEdge Key User Manual (http://www.solaredge.com/groups/support/downloads) The SafeDC mode is now disabled and the voltage of each power optimizer equals the voltage of the module (Voc). WARNING: The DC cables carry a high voltage and the power optimizers no longer output a safe 1V output. -
Page 19: Appendix A: Troubleshooting
String voltage higher than An extra power optimizer is Check if an extra power optimizer is the number of optimizers connected in the string connected in the string. If not – proceed to next solution. -
Page 20: For Installations With Non-Solaredge Inverters
For installation with safety & not connected properly to their monitoring interface: power optimizer inputs Turn OFF the SMI Wait ~30sec until all optimizers are in SafeDC mode Measure the string output using a voltmeter SolarEdge Power Optimizers Installation Guide – MAN-01-00112-1.2... - Page 21 The inverter is not The inverter voltage is below Refer to inverter manual or module waking up wakeup voltage datasheet to determine the minimum string length SolarEdge Power Optimizers Installation Guide – MAN-01-00112-1.2...
Need help?
Do you have a question about the Power Optimizer and is the answer not in the manual?
Questions and answers