Table of Contents
Advertisement
Available languages
Available languages
Advertisement
Table of Contents

Subscribe to Our Youtube Channel
Related Manuals for Stuart smp30


Summary of Contents for Stuart smp30
- Page 1 Melting Point Apparatus SMP30 Instruction Manual Version 1.2...
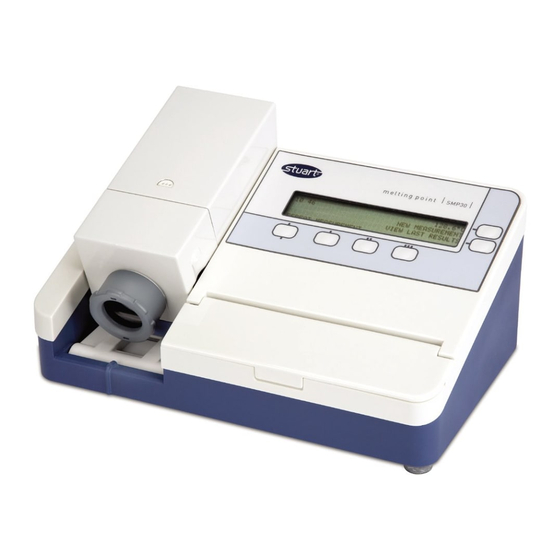
- Page 2 English Figure 1 (Front View) Power On/Off (at rear) Printer output Sample block (at rear) LCD screen Viewer Control key-pad Capillary storage Figure 2 (Rear View) Mains power Printer output Power On/Off switch input...
-
Page 3: General Description
120 seconds. An alarm will If the equipment is not used in the sound to indicate that the SMP30 is ready to manner described in this manual and with start to heat at the pre-programmed rate. Once... -
Page 4: Preparation For Use
Should neither lead be suitable take the lead 5.1 Controls with the UK plug and replace the plug with a Figure 1 and 2 show the features for the SMP30. suitable alternative. This involves cutting off the moulded plug, preparing the cable and Mains On/Off: This is a rocker type switch. - Page 5 EXIT current menu/action. Use the upper menu key next to the “YES” option to select one of the SMP30’s three programmable preset methods and proceed to step 2. Or use the lower menu key next to the...
- Page 6 Note:- To change the values in the preset Note:- Only full length capillary tubes (100mm) programmes please see section 5.7 should be used with the SMP30. If capillary tubes smaller than 60mm in length are used for 3. If “NO” has been selected the screen will...
- Page 7 Enter key to select “DONE” to end the Note:- To be able to print the stored instruments heating program. temperature values the accessory printer SMP30/1 needs to be connected to the 5.5 Saving Melt Temperatures instrument. 1. During the ramping phase of the melt determination the I, II and III keys can be used 3.
- Page 8 SMP30; “COOLING TO AMBIENT”. below. Once the SMP30 has returned to ambient temperature, the screen will automatically display the main menu. 7. Pressing the Enter key again to select “EXIT”...
- Page 9 NEXT Note:- A hardcopy of the stored temperatures can only be produced by using the optional accessory printer SMP30/1. An Use the upper and lower menu keys next to example printout is shown in figure 3. “UP” and “DOWN” to set the plateau SMP30 temperature.
-
Page 10: Maintenance And Servicing
5.9 Calibration display visible inside the viewing eyepiece. To adjust the position of the display, please use the A customer adjustment to the instruments following procedure:- calibration can be performed. Please contact the technical support department for details of the 1. -
Page 11: Warranty
This warranty does NOT apply if damage is caused by fire, accident, misuse, neglect, Description Catalogue No incorrect adjustment or repair, damage caused by Printer SMP30/1 incorrect installation, adaptation, modification, Capillaries, fitting of non-approved parts or repair by open at both ends (pack of 100) SMP1/4 unauthorised personnel. -
Page 12: Specification
8. Specification Overall dimensions Height: 170mm Depth: 200mm Width: 325mm Weight: 3.6kg Technical Specifications Temperature range Ambient to 400°C Temperature resolution 0.1°C Ramp rate 0.55°C to 10.0°C/ minute Cooling Time 350°C to 50°C – 12 minutes Number of samples Three Display Alphanumeric, 4 x 40 character LED Sensor... - Page 13 Français Illustration 1 (Vue avant) Interrupteur Marche/Arrêt (à l’arrière) Compartiment Prise d’imprimante d’échantillons (à l’arrière) Écran LCD Lentille d’observation Clavier de Stockage des commande capillaires Illustration 2 (Vue arrière) Prise secteur Prise d’imprimante Interrupteur Marche/Arrêt...
-
Page 14: Consignes De Sécurité
Si l’appareil n’est pas utilisé conformément pendant 120s. Une alarme retentit pour indiquer aux directives détaillées dans ce manuel ou que le SMP30 est prêt à chauffer au taux avec des accessoires différents de ceux préprogrammé. Après la fusion et l’arrêt du cycle, recommandés par Cole-Parmer, la protection... -
Page 15: Préparation À L'utilisation
« O », vous éteignez les suivantes : l’appareil. PHASE -MARRON Prise d’imprimante : Il est possible de NEUTRE -BLEU raccorder le SMP30 à une imprimante TERRE -VERT/JAUNE optionnelle via la prise DIN 5 broches afin d’imprimer les résultats. - Page 16 APPAREIL DE MESURE DU POINT DE FUSION Clavier : Ce clavier à membrane permet de Après une courte pause, l’écran principal et trois contrôler l’appareil SMP30 à l’aide des boutons options de menu apparaissent. suivants : Remarque : - Tous les écrans de menu affichent l’heure et la température actuelle...
- Page 17 Utilisez la touche de menu du haut en regard de SUIVENT l’option « OUI » pour sélectionner l’une des trois méthodes prédéfinies programmable du SMP30 et passer à l’étape 2. Ou utilisez la touche de menu du bas en regard de l’option « NON » pour Réglez le taux de rampe à...
- Page 18 Remarque : Utilisez uniquement des tubes taux sélectionné dans la méthode. capillaires longs (100 mm) avec le SMP30. Si vous utilisez des tubes capillaires d’une 09:00 112.0°C longueur inférieure à 60 mm pour RAMPE 1.0°C/min...
- Page 19 3. Utilisez la touche de menu du bas en regard Vous pouvez accéder aux réglages de l’appareil de « AFFICHER LES RÉSULTATS » pour afficher uniquement à la mise sous tension du SMP30. l’écran de résultats illustré ci-dessous : Pour modifier les réglages suivants de l’appareil, accédez au menu correspondant.
- Page 20 SORTIE PROGRAMME 1 PLATEAU 100°C HAUT AUGMENTATION 1.0°C/min CHANGER 3. L’écran suivant du SMP30 s’affiche : ALARME AU PLATEAU : ALLUME Sélectionnez le numéro de programme prédéfini CHANGER? à l’aide des touches de menu du haut et du bas SORTIE en regard de « HAUT » et « BAS ».
- Page 21 9:03 9:03 09:00 112.0°C Illustration 3 (Exemple d’une impression IMPRIMER LES RESULTATS réalisée à l’aide de l’imprimante SMP30/1) AFFICHER LES DERNIERS RESULTATS TERMINE 5.9 Étalonnage Le client a la possibilité d’étalonner l’appareil. Veuillez contacter le service d’assistance technique pour plus d’information sur la 3.
-
Page 22: Maintenance Et Entretien
6. Maintenance et entretien AVERTISSEMENT : Veillez à déconnecter l’appareil de l’alimentation secteur avant toute opération de maintenance ou 14° 96° d’entretien. 82° Cet appareil ne nécessite aucune opération de maintenance régulière. Le seul entretien requis consiste à nettoyer les surfaces internes et externes à... -
Page 23: Garantie
Bâtiment le Deltaparc Silic pars Nord 2 7 rue du Canal BP 55437 Villepinte 95944 ROISSY Charles de Gaulle France Tél : +33 1 48 63 77 99 Fax : +33 1 48 63 78 01 Email : cpservice@coleparmer.com Web : www.stuart-equipment.fr... -
Page 24: Caractéristiques Techniques
8. Caractéristiques techniques Dimensions générales : Hauteur : 170 mm Profondeur : 200 mm Largeur : 325 mm Poids : 3,6 kg Caractéristiques techniques : Plage de températures de la température ambiante à 400 °C Résolution de la température 0,1 °C Taux de rampe de 0,5 °C à 10,0 °C/minute Temps de refroidissement de 350 °C à 50 °C – 12 min Nombre d’échantillons Trois Affichage... - Page 25 Italiano Figura 1 (frontale) Pulsante on/off (retro) Blocco porta- Uscita stampante campioni (retro) Schermo LCD Oculare Tastiera di Alloggiamento controllo tubi capillari Figura 2 (retro) Ingresso connettore Uscita stampante Pulsante on/off alimentazione...
-
Page 26: Descrizione Generale
120 secondi. Il suono di un allarme indica che dall’apparecchio. SMP30 è pronto per iniziare a riscaldarsi alla velocità pre-programmata. Quando la fusione è Condizioni di esercizio previste: avvenuta e il ciclo si è interrotto, il ❖ Solo per uso in ambienti chiusi... -
Page 27: Preparazione All'uso
Nota: per controllare che il connettore e i fusibili Uscita stampante: è possibile collegare siano adatti alla tensione e alla potenza indicate l’apparecchio SMP30 alla stampante opzionale, consultare la targhetta dei dati nominali attraverso un connettore DIN a 5 pin, per dell’apparecchio. - Page 28 Tastiera: la tastiera a membrana controlla Le tre opzioni di menu sono: l’apparecchio SMP30 con i tasti seguenti: RIPETERE LA MISURAZIONE Esegue una nuova fusione utilizzando i parametri della fusione precedente Pulsanti di menu/opzione nella parte NUOVA MISURAZIONE superiore ed inferiore: selezionano l’opzione...
- Page 29 3. Se è stata selezionata l’opzione “NO” sullo Nota: si raccomanda di utilizzare soltanto schermo appare: tubi capillari integrali (100 mm) per l’apparecchio SMP30. Se i tubi capillari utilizzati per la determinazione del punto di 09:00 50.0°C PLATEAU 100°C CAMBIO? fusione hanno una lunghezza inferiore a 60 GIÙ...
- Page 30 7. Quando il punto di fusione è stato Nota: per stampare i valori di temperatura determinato, premere il pulsante invio per memorizzata la stampante SMP30/1 deve selezionare “ESEGUITO” e terminare il essere collegata allo strumento. programma di riscaldamento dello strumento.
- Page 31 SMP30; default “RAFFREDDAMENTO A TEMPERATURA 1. Assicurarsi che lo strumento sia collegato alla AMBIENTE”. Quando SMP30 è ritornato a temperatura ambiente, lo schermo visualizza rete elettrica, ma che l’interruttore sia spento. automaticamente il menu principale. 2. Quando si accende lo strumento, tenere 7.
- Page 32 schermata con le specifiche opzioni di PROGRAMMA 1 impostazione, mentre “NO” consente di PLATEAU 100°C visualizzare sullo schermo il parametro successivo. SEGUENTE Se si preme “SÌ”, selezionare i pulsanti di menu nella parte superiore ed inferiore per definire l’impostazione, ovvero ALLARME STABILIZZAZIONE “ACCESO”...
- Page 33 109.9...C 109.9...C 109.9...C 9:03 9:03 9:03 Figura 3 (esempio di stampa della SMP30/1) Figura 4 (angoli di regolazione del blocco porta-campioni) Nota: non sottoporre a sollecitazioni il meccanismo di regolazione, né applicare forza eccessiva quando si modificano la posizione o l’angolo del blocco...
-
Page 34: Manutenzione E Assistenza
Descrizione Codice catalogo 2. Girare la vite sul lato destro del blocco Stampante SMP30/1 porta-campioni in senso orario per abbassare Tubi capillari, aperti l’immagine nell’oculare o girare la vite in su entrambe le estremità senso antiorario per alzare l’immagine... - Page 35 8. Specifiche Dimensioni complessive: Altezza: 170 mm Profondità: 200 mm Larghezza: 325 mm Peso: 3,6 kg Dati tecnici: Campo di temperatura: Temperatura ambiente fino a 400°C Risoluzione temperatura 0,1°C Velocità di rampa da 0,5°C a 10,0°C/minuto Tempo di raffreddamento da 350°C a 50°C – 12 minuti Numero di campioni Display alfanumerico, 4 linee da 40 caratteri (LED)
- Page 36 Espan ~ ol Figura 1: Vista frontal Interruptor de encendido/apagado (en la parte posterior) Bloque de Salida de impresora muestras (en la parte posterior) Pantalla LCD Visor Teclado de Almacenamiento control de capilares Figura 2: Vista posterior Entrada de Salida de Interruptor de encendido/ alimentación eléctrica...
-
Page 37: Descripción General
Cole-Parmer, la protección ofrecida puede completamente programables. Cuando el ciclo de verse afectada. fusión se inicia, la unidad SMP30 se calienta hasta la meseta de temperatura programada a la Este equipo se ha diseñado para funcionar en las velocidad máxima, y a continuación se estabiliza condiciones siguientes: a dicha temperatura durante 120 segundos. -
Page 38: Preparación Para El Uso
CUALIFICADO. Salida de impresora: si se desea, se puede conectar la unidad SMP30 a una impresora, Nota: Consulte la placa de características del mediante un zócalo DIN de 5 pines, para imprimir equipo para asegurarse de que utiliza el enchufe los resultados obtenidos. - Page 39 Las tres opciones de menú son: REPETIR MEDICIÓN Teclado: la unidad SMP30 se controla mediante - Realizar una nueva fusión con los parámetros este teclado de membrana, que cuenta con los utilizados en la fusión anterior.
- Page 40 SMP30 y continúe con el paso 2, o utilice la tecla pulsadas durante más de dos segundos, de menú inferior situada junto a NO para aumentará la velocidad a la que cambia el valor, configurar un método nuevo y continúe con el hasta que se suelte la tecla.
- Page 41 Nota: Para poder imprimir los valores de punto de fusión, pulse la tecla Intro para temperatura almacenados, se debe haber seleccionar HECHO y finalizar el programa de conectado la impresora SMP30/1 al calentamiento del instrumento. instrumento. 5.5 Almacenamiento de temperaturas de Pulse la tecla de menú...
- Page 42 RAMPA. El instrumento no tiene que estar conectado a una fuente de alimentación eléctrica para conservar los resultados registrados. 3. En la unidad SMP30 aparecerá la pantalla siguiente: 5.7 Cambio de los ajustes del instrumento ALARMA A MESETA : ENCENDIDO Sólo se puede acceder al menú...
- Page 43 por ejemplo, ALARMA EN MESETA: ACTIVADA y temperatura de meseta. Si mantiene las teclas DESACTIVADA. Cuando haya terminado, pulse la pulsadas durante más de dos segundos, tecla Intro para seleccionar HECHO y continuar aumentará la velocidad a la que cambia el valor, con el siguiente ajuste del instrumento.
- Page 44 Nota: Sólo podrá obtener una copia impresa de las temperaturas almacenadas con la impresora SMP30/1 opcional. En la figura 3 se muestra una salida impresa de ejemplo. SMP30 Serial number 00001 Software issue 080716 14° Calibrated 08 SEPTEMBER 08 96°...
-
Page 45: Mantenimiento Y Servicio
ADVERTENCIA: Asegúrese de que la unidad esté desconectada de la red eléctrica antes Descripción Número de catálogo de efectuar tareas de servicio o Impresora SMP30/1 mantenimiento. Capilares, abiertos por ambos extremos Este equipo no precisa un servicio periódico. El (paquete de 100) SMP1/4 único mantenimiento necesario consiste en... -
Page 46: Especificaciones
8. Especificaciones Dimensiones totales: Altura: 170 mm Profundidad: 200 mm Anchura: 325 mm Peso: 3,6 kg Especificaciones técnicas: Rango de temperaturas De ambiente a 400°C Resolución de temperatura 0,1°C Velocidad de rampa De 0,5°C a 10°C/minuto Tiempo de enfriamiento De 350°C a 50°C en 12 minutos Número de muestras Tres Pantalla... - Page 47 Deutsch Abbildung 1 (Vorderansicht) Netzschalter (auf der Rückseite) Druckerausgang Probenblock (auf der Rückseite) LCD-Bildschirm Okular Bedientastenfeld Kapillarfach Abbildung 2 (Rückansicht) Netzstromeingang Druckerausgang Netzschalter...
-
Page 48: Allgemeine Beschreibung
120 Sekunden bei dieser ❖ Umgebungstemperaturbereich: Temperatur. Ein akustischer Alarm weist darauf +5°C bis +40°C hin, dass der SMP30 zur Aufheizung mit der ❖ Höhenlagen bis 2000 m vorprogrammierten Geschwindigkeit bereit ist. ❖ Relative Luftfeuchtigkeit maximal 80 % Wenn der Schmelzvorgang beendet ist und der ❖ Schwankungen in der Stromversorgung... -
Page 49: Vorbereitung Für Den Einsatz
Wippenschalter. Bei Drücken von „I“ schaltet sich das Gerät EIN, bei Drücken von „O“ schaltet es SPANNUNGSFÜHREND - BRAUN sich AUS. NEUTRAL - BLAU MASSE - GRÜN-GELB Druckerausgang: Der SMP30 kann über die 5-polige DIN-Buchse an den optionalen Zubehördrucker angeschlossen werden, um die Resultate auszudrucken. - Page 50 Hinweis: Alle Menübildschirme zeigen die Temperaturmesswerts. Uhrzeit und die aktuelle Blocktemperatur an. Tastenfeld: Das Folientastenfeld dient zur Nachfolgend sind die drei Menüoptionen Bedienung des SMP30 über folgende Tasten: beschrieben: MESSUNG WIEDERHOLEN Obere und untere Menü-/ - Durchführung eines neuen Schmelzvorgangs mit...
- Page 51 Wählen Sie mit der oberen Menütaste neben der Option „JA“ eines der voreingestellten Verfahren Stellen Sie mithilfe der oberen und unteren des SMP30 und fahren Sie mit Schritt 2 fort, oder Menütaste neben den Optionen „AUF“ und stellen Sie mithilfe der unteren Menütaste neben „AB“...
- Page 52 RAMPING AT 1.0°C/min „RESULTATE DRUCKEN“, um die FERTIG gespeicherten Temperaturwerte über den Zubehördrucker auszudrucken. Hinweis: Damit die gespeicherten 7. Wählen Sie nach Beendigung des Temperaturwerte ausgedruckt werden Schmelzprogramms mit der Eingabetaste die können, muss der Zubehördrucker SMP30/1 an das Gerät angeschlossen werden.
- Page 53 3. Drücken Sie die untere Menütaste neben „RESULTATE ANZEIGEN“, um den Der Zugriff auf die Geräteeinstellungen ist nur Ergebnisbildschirm einzublenden, wie unten direkt nach dem Einschalten des SMP30 möglich. gezeigt: Folgende Geräteeinstellungen können über dieses ROHR 1 ERGEBNIS 1-2 OF 7 112.0°C...
- Page 54 Legen Sie mit der oberen und unteren Menütaste „AB“ die Nummer des voreingestellten neben „JA“ und „NEIN“ fest, ob die Einstellung Programms. Wählen Sie mithilfe der Eingabetaste „Alarm bei Prozesstemperatur“ geändert werden die Option „ÄNDERN“, um das Verfahren zu soll. Bei Wahl von „JA“ erscheint ein Bildschirm bearbeiten.
- Page 55 5.11 Einstellung der HUD-Anzeige des 9:03 9:03 9:03 Probenblocks Abbildung 3 (Beispielhafter Ausdruck mit dem SMP30/1) An beiden Seiten des Probeblocks befindet sich jeweils eine mit den Fingern einstellbare 5.9 Kalibrierung Schraube, über die Sie die Position der HUD- Temperaturanzeige im Okular ändern können.
-
Page 56: Wartung Und Service
Das folgende Zubehör ist bei Ihrem Händler vor arretieren. Ort erhältlich. 6. Wartung und Service Beschreibung Katalog-Nummer Drucker SMP30/1 WARNUNG: Stellen Sie sicher, dass das Gerät Kapillare, an beiden von der Stromversorgung getrennt ist, bevor Enden offen (100 St.) SMP1/4 Sie Service- oder Wartungsarbeiten Kapillare, an einem durchführen. -
Page 57: Spezifikation
8. Spezifikation Gesamtabmessungen: Höhe: 170 mm Tiefe: 200 mm Breite: 325 mm Gewicht: 3,6 kg Technische Daten: Temperaturbereich Umgebungstemperatur bis 400°C Temperaturauflösung 0,1°C Heizrate 0,5°C bis 10,0°C/Minute Abkühlzeit 350°C auf 50°C – 12 Minuten Probenzahl Drei Anzeige LCD, Alphanumerisch, 4 x 40 Zeichen Sensor PT1000 Speicherkapazität... - Page 58 Notes...
- Page 59 Additional Information Year of CE Marking: 2008 Place of Issue Stone, Staffordshire, UK Date of Issue June 2009. Revised 26 January 2017 Authorised Representative Carl Warren Title Technical Manager Signature Declaration of Conformity is also available to view online at www.stuart-equipment.com...
- Page 60 INSPECTION REPORT MODEL SMP30 ELECTRICAL SAFETY ❏ ✓ 1. Earth continuity ❏ ✓ 2. Insulation ❏ ✓ 3. Flash test FUNCTIONAL ❏ ✓ 1. Indicators ❏ ✓ 2. Temperature control ❏ ✓ 3. Visual acceptance QUALITY CONTROL INSPECTOR Cole-Parmer Ltd.
Need help?
Do you have a question about the smp30 and is the answer not in the manual?
Questions and answers