
Related Manuals for Primera FX500E


Summary of Contents for Primera FX500E
- Page 1 201017-FX500E User's Manual © 2017 All rights reserved For the most recent version of this manual please visit http://primeralabel.eu/europe/manuals.html...
- Page 2 Notices : The information in this document is subject to change without notice. NO WARRANTY OF ANY KIND IS MADE WITH REGARD TO THIS MATERIAL, INCLUDING, BUT NOT LIMITED TO, THE IMPLIED WARRANTIES OF MERCHANTABILITY AND FITNESS FOR A PARTICULAR PURPOSE.
-
Page 3: Table Of Contents
Section 7: Technical Specifications .............32 Index .........................33 Important Notice: our FX500e will appear as Argox CP-3140L printer. We recommend renaming the printer's name to FX500e to simplify the workflow. To do so please follow the instructions in Section 2B, page 7. -
Page 5: Section 1: Getting Started
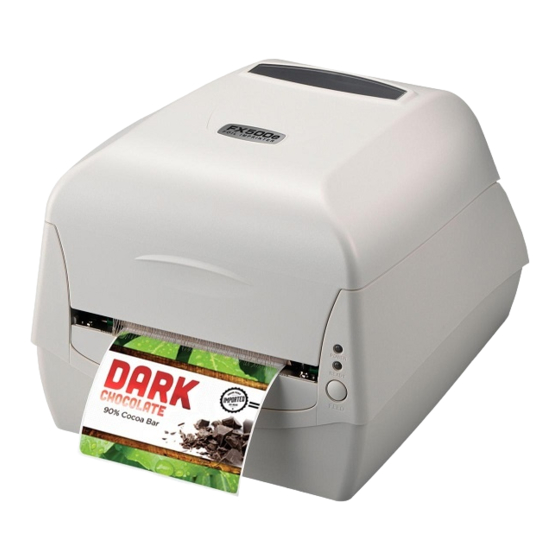
Section 1: Getting Started THANK YOU… … for choosing an FX500e Foil Imprinting System. The FX500e Foil Imprinter adds brilliant, shiny highlights to your pre-printed or blank labels. This User's Manual is your complete step-by-step guide to quickly and easily setting up and printing with your new Foil Imprinting System. -
Page 6: Unpacking And Inspection
B. UNPACKING AND INSPECTION While unpacking your printer, inspect the carton to ensure that no damage has occurred during shipping. Make sure that all supplied accessories are included with your unit. The follow- ing items should be included: • Foil Imprinter •... -
Page 7: Identifying The Parts
C. IDENTIFYING THE PARTS This illustration shows the front of the printer with its control but- tons and LED indicator lights: Top Cover Power LED Ready LED Feed Button This illustration shows the input ports and power switch found on the rear panel of the printer. - Page 8 This illustration shows the interior view of the printer. Ribbon Supply Holder Ribbon Pick-up Holder Media Shields Media Hanger Media Compartment Module Release Latch (Push) Print Head Ribbon Supply Holder Media Shaft Transmissive Sensor Media Guides Reflective sensor Head-Open Sensor Platen Roller 4 Getting Started...
-
Page 9: Section 2: Hardware And Software Setup
Click Cancel and do not install the driver using this wizard. 5. Download the driver at: http://primeralabel.eu/ en/driver/fx500e.html. On the prompt, Windows Printer Driver, select “I accept…”and click "Next". Hardware and Software Setup... - Page 10 Assign the directory to keep FX500e driver, (for example: C:\ Primera) and click "Next". Click "Finish". Select "Install printer drivers" and Click "Next". On the Seagull Driver Wizard promt, select the first radio button to attach the printer via "USB"...
- Page 11 10. Enter Printer name (i.e. FX500e) and select "do not share this printer”, and click "Next". Note: We recommend renaming the printer's name to FX500e to simplify the workflow 11. Check all the data on the showing screen, if it is correct, click "Finish".
-
Page 12: Loading Label Stock
C. LOADING LABEL STOCK The inside wound or outside wound media rolls can be loaded into the printer in the same way. In case media roll may become dirty or dusty during shipment, handling, or storage, firstly remove the out- side length of media, which helps to avoid dragging adhesive or dirty media between the print head and platen roller. -
Page 13: Adjusting The Label Stock Sensor
5. Pull a short length of Media Shaft media till it reaches the Platen Roll of printer. . 6. Press the lock of Media Guide at the right to adjust media guides’ positions. Make sure media stays under the Media Media Guides Shaft and centrally under both of the... -
Page 14: Loading The Ribbon
E. LOADING THE RIBBON The following steps only apply to thermal transfer printing mode only. Direct thermal does not need ribbon to be installed. Note: Media and ribbon types should be matched to provide with optimal print results. Always use ribbon that is wider than the media to protect the print head from wear. - Page 15 5. Install the other ribbon roll and rotate it until the notches align and lock into the left side of Ribbon Pick-up hub, and then the right Note: The Ribbon Pick-up Holder accepts the coated side of ribbon to be wound ink-side IN or wound ink-side OUT.
-
Page 16: Section 3: Printing
Section 3: Printing Your printer ships with a version NiceLabel Free 2017 Primera Edition and BarTender UltraLite Primera Edition. These easy-to-use softwares are designed to allow you to create label designs with text, shapes or barcodes quickly and simply. The following is a BarTender Ultralite tutorial to guide you through creating and printing a sam- ple label. - Page 17 3. Select "FX500e". Click "Next". 4. Select "Specify Custom Settings". Click "Next". Printing...
- Page 18 5. Select "Single item per page". Click "Next". 6. Select "No, it does not". Click "Next". Printing...
- Page 19 7. Select "Rectangle". Click "Next". 8. Set the page size, width and height to match labels installed in the printer. Click "Next". Printing...
- Page 20 Check the "Picture" box to add a background photo or graphic to your label. Click "Next". If you click "Finish", the remaining default wizard options will be set and no picture will be added. 10. Select "Embedded Picture". Click the "File" Button to browse to the location of your photo/graphic file.
- Page 21 11. Review the label setup summary. If it is correct, click "Finish". Your blank label will be displayed. After you click Finish, you can always go back and change any of these settings, by going to the File Menu and selecting "Page Setup". Basic and advanced settings are available on the various tabs.
- Page 22 If you are adding metallic or colour highlights to a label you can open the label file that you have used to print the labels. Afterward you can add the picture for the highlights for easier positioning of the highlights. While dragging the box with the highlights, it becomes transparent and you can easily position it at the desired position.
-
Page 23: Printing From Bartender
1. To print, click the Print button or go to the File Menu and select "Print". The Print Dialog window will appear. 2. Select the FX500e. 3. Set the number of copies. 4. Click "Document Properties" to adjust darkness, speed, etc. -
Page 24: Sealing Labels With Clear Film
C. SEALING LABELS WITH CLEAR FILM Clear film is also available for FX500e. It lets you produce labels with a high degree of resistance to water, chemicals, cleaning solu- tions, UV and other harsh environmental factors 1. Load a clear film ribbon. For instructions see Section 2E. -
Page 25: Page Setup Tab
The Printing Preferences menu includes plenty of options, but not all of them are really necessary to change or they even don’t have any effects. This is because the driver was originally designed for extended professional use. So only the involved options will be explained Page Setup Tab In the first area you can pre-define settings for specific label stock. -
Page 26: Printing From Other Programs
Options Tab Either use the Current Printer Setting or choose your own Darkness and Speed Settings. Adjust these values to your needs. Recommended settings on Primera certified foils: Foil Darkness Speed Gold/Silver Metallic 8 4 inch/s Blue/Red Metallic 4 inch/s... -
Page 27: Section 4: Troubleshooting
Section 4: Troubleshooting A. CREATING A FULL BLEED PRINT (CLEAR FILM SEALING) 1. If you are having trouble making the image cover the entire label, first make sure the image is printing at least as big as the label size you have selected. To accomplish this using NiceLabel or BarTender, make the image a few millimeters larger than the label by dragging the image over the edge of the label on all sides. -
Page 28: Factory Defaults
C. FACTORY DEFAULTS If the printer prints only one label at a time and doesn’t accept any new jobs, you have to restore the printer drivers Factory Defaults. To restore the Factory Defaults, follow the steps below: 1. Turn on the printer and wait till both "Ready" indicator and "Power"... -
Page 29: Troubleshooting By Led Indicators Diagnosis
The following table explains printer controls and indicators’ func- tions to help understanding LED indications and printer status: Control / Function Indicator Power Switch • On: turns on normal operation (at “I” position) • Off: turns off power ( at “O” position) Note: Turn power off before connecting or disconnecting cables Power LED... - Page 30 LED Indicators: Power and Ready LEDs blink at the same tempo Power LED Ready LED Possible Problems Solutions Remarks Media sensor cannot index Check the label path If a continuous label roll label gaps is in use, set “continuous media” printing in driver Check the label sensor settings or commands Media out...
-
Page 31: Miscellaneous
LED Indicators: Only the Power LED blinks Power LED Ready LED Possible Problems Solutions Print head needs to Printing will stop until the print head cools to normal printing temperature. cool down Once it completes, the printer will automatically resume the printing tasks sent previously. Printer head module Close the printer module and then press firmly at unlatched... -
Page 32: Technical Support
If you have difficulties operating your Printer, contact technical support using one of the methods listed below. Source Location Primera Knowledge Base http://kb.primera.com BarTender Software Help files Open the software. Click on the Help Menu - BarTender Help Open the software. -
Page 33: Section 5: Maintenance
Section 5: Maintenance A. CARING FOR YOUR PRINTER To keep the Print Head remain in the best conditions and efficiency and to extend duration for use, regular cleaning action is needed: Note: Always switch off printer power before cleaning. In case of long-time print- ing, surface of print head may be very hot. -
Page 34: Section 6: Label Specifications
Section 6: Label Specifications Important! Test all custom made label stock with the intended printer before order- ing large quantities! Primera will only assume responsibility for custom label stock ordered from Primera. Label Specifications... - Page 35 For these reasons the weight or thickness of the liner is a variable that can not easily be defined. Primera recommends and uses 40# liner with all label stock.
-
Page 36: Section 7: Technical Specifications
Requirements: 5GB free hard drive space, USB 2.0 port Data Interface: USB 2.0 Label Design NiceLabel Free 2017 Primera Edition, BarTender Ultralite Primera Edition Software: Can also be used with most other popular Windows label design software programs Electrical Rating: 24VDC, 2.91A... -
Page 37: Index
Index Adjusting Label Stock Sensor ............9 Factory Defaults ................24 Feed Button ..................3 Full Bleed Print................23 Installing Label Stock ...............8 Installing the Printer ................5 Installing the Printer Driver ............5 Label Specifications ................ 30 LED Indicator ..................25 Loading Ribbon ................10 Location .................... - Page 39 P/N FX500E...
Need help?
Do you have a question about the FX500E and is the answer not in the manual?
Questions and answers