Bunn My Cafe AP Technical Training Manual
Hide thumbs
Also See for My Cafe AP:
- Programming manual (9 pages) ,
- Installation & operating manual (15 pages) ,
- Installation & operating manual (13 pages)
Table of Contents
Advertisement
Advertisement
Table of Contents

Subscribe to Our Youtube Channel
Related Manuals for Bunn My Cafe AP


Summary of Contents for Bunn My Cafe AP
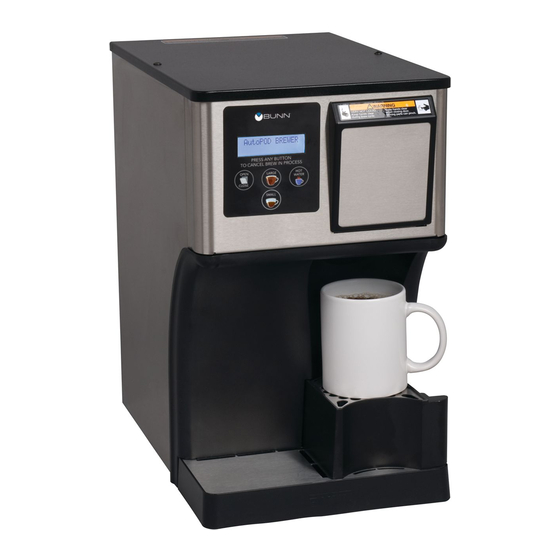
- Page 1 BUNN TECHNICAL TRAINING ® My Cafe® AP...
-
Page 2: Table Of Contents
Tank Draining ........................27 Index Motor Alignment Procedure ..................28 Index Motor Assembly Removal ................. 28 Index Motor Assembly Replacement ................. 28 Triac Map ..........................29 Symptom Reference Guide ....................29 © 2012 Bunn-O-Matic Corporation. All Rights Reserved Rev. B... -
Page 3: Unit 1: Installation
nstallation Unit Objectives Given a realistic scenario depicting a new site install, the learner will be able to install and setup the brewer for customer turnover without error. Given a new machine, all the necessary tools and safety equipment, the learner will be able to install the brewer without error. -
Page 4: Site Requirements
• Weight 30 lbs (13.6 kg.) Water Treatment • Sediment filtration to reduce large particles • Taste and odor filter to remove chlorine • Scale filtration as needed • For best results a BUNN Easy Clear filtration system should be used ® ®... -
Page 5: Initial Start-Up
PRE-INFUSION PLEASE WAIT Brewing Flow Counts FLOW COUNTS XXX PLEASE WAIT ENJOY YOUR BEVERAGE BREWING COMPLETE 8. The brewer is now ready for use in accordance with instructions for coffee brewing. BREWING COMPLETE Bunn-O-Matic Corporation... -
Page 6: Unit 2: Setup
etup Unit Objectives Given a realistic scenario depicting a new site install, the learner will be able to install and setup the brewer for customer turnover without error. Given an installed machine, all the necessary tools and safety equipment, the learner will be able to set the machine up for initial operation. -
Page 7: User Interface
To access the lockout switch: Step 1: Disconnect brewer from power source before removing any panel. Step 2: Access the rear of the machine. Step 3: Remove the rear panel by removing six standard screws. Bunn-O-Matic Corporation... -
Page 8: Programming Menus
“On Position/Locked” The following menu screens will appear to inform you that programming is locked, but still can be accessed to view current settings. !!!Caution!!! Constant Change Memory is Locked Is Not Possible Programming Menus Brew Lockout Prevents brewing if the water temperature is less than the “SET READY” temperature. BREW LOCKOUT ? DONE Brew Oz (A/B) (1-16) - Page 9 Allows testing of load components and switches. It should be used only by a trained technician. Factory Defaults FACTORY DEFAULTS Resets all brew settings and calibrations back to factory presets. AutoPOD Brewer AutoPOD Brewer Single Tank V.09 Single Tank V.09 Informational menu displaying software version number. Bunn-O-Matic Corporation...
- Page 10 Calibrate Brew Inlet Flow After initial start-up, a flow rate calibration may need to be performed. Note: Follow the 8 steps below twice to complete a calibration process. Step 1: Enter the program mode and scroll to the CALIBRATE FLOW menu and select YES. Step 2: Menu screens will scroll to the following messages: Please Wait Go To Brew Position...
-
Page 11: Coffee Brewing
The system will automatically dispense the pod into the pod bin, reset back to standby position and be ready for next brew command. Please Wait Pre Infusion Please Wait Flow Counts XXX Flow Counts XXX Enjoy Brewing Brewing Your Beverage Complete Bunn-O-Matic Corporation... -
Page 12: Unit 3: Machine Composition
achine oMposition Unit Objectives Given a realistic scenario in which the learner has access to the machine’s internal components the learner will understand the composition and functions of the brewer. Given a realistic scenario requiring the learner to access the internal components of the machine the learner will be able to remove the housing and panels. -
Page 13: Exterior Overview
Step 10: Disconnect the harness with the 4 pin connector going to the display board. Step 11: Turn the unit so that the front is facing you and then slide the main outer housing out away from the unit frame. Bunn-O-Matic Corporation... -
Page 14: Machine Function And Operations
Machine Function and Operations PRGM LOCK Main Control Board 1 2 3 4 6 5 4 3 2 1 The main control is the brain of the brewer. The control board is the single component that contains all of the programming software, it interprets all the data it receives from the level and temperature sensors and activates components to fulfill those demands. -
Page 15: Hot Water Dispense
(E) - Coffee Air Pump (F) - Sprayhead assembly E1 - Stream Guide E2 - Pod Holder E3 - Sprayhead E4 - Sprayhead Seal E5 - Air Check Valve (Left) Water Check Valve (Right) E6 - Sprayhead Top Bunn-O-Matic Corporation... - Page 16 The tank is initially filled upon startup and is monitored by a refill or level probe. When commanded by the large or small brew button, the CBA will activate the fill solenoid allowing the regulated water to enter the inlet of the flow meter and exit out the flow meter going to the fill tube located on top of the tank.
-
Page 17: Ejector Assembly
Ejector assembly consists of: (A) - Housing (B) - Brew head assembly with check valves (C) - Pod holder assembly with linkage (D) - Pod screen assembly (E) - Index motor with position disc (F) - Index sensor Bunn-O-Matic Corporation... - Page 18 The Ejector assembly is a critical component used to align the pod holder in different placement positions. The place- ment positions are: load, brew, eject and set back positions. The index motor rotates the position disc and pod holder forward and backward at different intervals. The position disc is slotted and rotates between the index sensor. The index sensor monitors the slots and stops the index motor at the correct placement position for the pod holder during the entire brew process from start to finish.
-
Page 19: Unit 4: Preventive Maintenance
reventive aintenance Unit Objectives Given a realistic scenario depicting a machine requiring a preventive maintenance, the learner will be able to identify which elements of a component need to be serviced without error. Given a machine, all the necessary tools and safety equipment, the learner will be able to identify the components that need to be serviced for the PM. -
Page 20: Preventive Maintenance
Preventive Maintenance In order to maintain proper operation and long service life, BUNN recommends performing the preventive maintenance ® every 6 months. Individual customers will vary with some customers choosing not to receive preventive maintenance. Some of the PM items may require more frequent maintenance depending on the site conditions. - Page 21 □ Using the needle nose pliers, gently grab the strainer tab and pull the strainer out of the valve. □ Clean and rinse the strainer of any sediment or mineral build-up. □ Reassembly is the opposite of disassembly. Inlet Valve Strainer Bunn-O-Matic Corporation...
- Page 22 Step 6: Perform flow calibration. □ Install the top cover and rear cover. □ Reinstall water and connector fitting. □ Reinstall power. □ Reinstall pod bin and drip tray. □ Access programming and go to “CALIBRATE FLOW” menu. □ Depress YES button. □...
-
Page 23: Unit 5: Troubleshooting
roubleshooting Unit Objectives Given a realistic scenario depicting one of several possible machine malfunctions, the learner will be able to effectively troubleshoot, diagnose and repair the malfunction before returning the machine to normal opera- tion. Given a machine displaying an error or warning message, all the necessary tools and safety equip ment, the learner will be able to access the software and use “Service Tools”... -
Page 24: Service Tools
Troubleshooting and Repair The My Café AP brewer features on-board troubleshooting. Since all of the machine’s components are controlled or activated by the control board, you can access various service tool menus to test load components or sensors. The troubleshooting menus give you control to activate load components for the purpose of seeing operation or test- ing of load components with a volt meter. -
Page 25: Index Motor
The wheel rotates when water flows through the meter generating a pulse signal for every amount of milliliters passing through. The flow meter is the primary component for determining the amount of brew water also know as the flow count number. WATER INLET 0 WATER INLET 657 NEXT NEXT Bunn-O-Matic Corporation... -
Page 26: Set Refill Threshold
A low reading (0-2) indicates the probe is grounded. Left side is the actual read- ing and the right side is the adjustable refill threshold. BUNN constant refill threshold is set at 155 from the factory. -
Page 27: Level 3 Programming
REDUCED POWER LEVEL ReducedPowerLevel Reduce power/number only when thin/loose pods cause brewing issues. BREW SEAL WARNING # BrewsSealWarng Sets the count number for "REPLACE SEAL" message. 9950 FACTORY USE ONLY 2nd THERM FAULT DO NOT ADJUST DISABLE ENABLE Bunn-O-Matic Corporation... -
Page 28: Warning Messages
Warning Messages Pod Waste Bin Almost Full Occurs when you are within 5 brews of the programmable BREWS TO EMPTY setting. Pod Waste Bin Full Please Empty Occurs when you are at the BREWS TO EMPTY program setting. Replace Seal The REPLACE SEAL SOON message occurs at 25,000 brews. - Page 29 Note: A small amount of water will remain below the fill tube. If necessary, insert a siphon hose through one of the grommet holes to remove the remaining water. Step 5: Replace the plug and clamp onto the drain hose. Step 6: Replace the rear panel and tighten the 6 screws. Bunn-O-Matic Corporation...
-
Page 30: Index Motor Alignment Procedure
Index Motor Alignment Procedure An alignment tool kit will be needed for the following symptoms: a) Replacing a failed index motor b) Door is partially open during brew c) Water is leaking around sprayhead seal during brew Index Motor Assembly Removal Step 1: Press Open/Close button to open the pod door. -
Page 31: Triac Map
Symptom Reference Guide Problem Probable Cause No Heat Tank Heater Limit Thermostat Temperature Sensor Over Heating (Steaming) Temperature Sensor No Refill Main Water Source Inlet Valve Fill Circuit Grounded Water Flow Path Restricted (flow meter or tank fill tube) Bunn-O-Matic Corporation... - Page 32 Problem Probable Cause No Brew See Problem for “No Refill” Brew Pump Sprayhead Check Valve Large or Small Brew Switch Leak Around Sprayhead/Seal Sprayhead Seal Pod Holder Misaligned Defective Sprayhead No Hot Water Dispense Hot Water Switch Vent Valve Hot Water Air Pump Restricted Hot Water Pickup Tube Excessive Water or Coffee in Drip Tray Air pump not working (pods soaked).
- Page 33 You may subscribe to these videos via email, RSS, or as a podcast. After subscribing, you will be notified when a new video is posted. QR Code Reader For quick and direct access to technical resources on the BUNN Online Learning Center, you can download a QR- Reader application for your SmartPhone . •...
Need help?
Do you have a question about the My Cafe AP and is the answer not in the manual?
Questions and answers