
Related Manuals for Smooth Fitness 7.35


Summary of Contents for Smooth Fitness 7.35
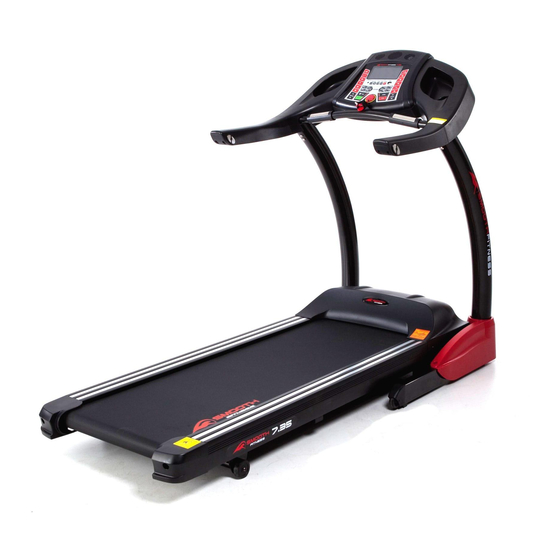
- Page 1 USER’S MANUAL 7.35 MOTORIZED TREADMILL USER WEIGHT LIMITATION: 350lbs (160kgs). SERIAL NUMBER (found on frame):...
- Page 2 7.35 TREADMILL PRECAUTIONS For future service or related questions: Please staple your receipt and/or write in the name and phone number of the retail store where you purchased your treadmill. Name: ______________________________ Phone Number: ___________________ Receipt: ______________________ Precautions: WARNING: To reduce the risk of burns, fire, electric shock, or injury to persons, read the following important precautions and information before operating the treadmill.
-
Page 3: Power Requirements
www.smoothfitness.com POWER REQUIREMENTS Power Requirements: IMPROPER CONNECTION OF THE EQUIPMENT GROUNDING CONNECTOR CAN RESULT IN THE RISK OF AN ELECTRIC SHOCK. CHECK WITH A QUALIFIED ELECTRICIAN OR SERVICE MAN IF YOU ARE IN DOUBT AS TO WHETHER THE PRODUCT IS PROPERLY GROUNDED. DO NOT MODIFY THE PLUG PROVIDED WITH THE PRODUCT, IF IT WILL NOT FIT THE OUTLET;... -
Page 4: Before You Begin
7.35 TREADMILL BEFORE YOU BEGIN Open the boxes: Open the boxes of your new equipment. Inventory all parts included in the boxes, and Supplied Hardware lists on pages 5 for a full count of the parts included. If you are missing any parts or have any questions contact us... -
Page 5: Supplied Hardware
www.smoothfitness.com SUPPLIED HARDWARE Description Qty. Treadmill Base Console Assembly Upright Left Upright Right Left Base Cover #101 #311 #310 Right Base cover #212 Left Handle Bar Right Handle Bar Hardware Kit M8 x 15mm Allen Head Bolt #309 #312 M8 Flat Washer #302 #301 M4 x 10mm Pan Head... - Page 6 7.35 TREADMILL PARTS LIST ITEM Part Number DESCRIPTION Q'TY 101 F500306-000 Base frame 102 F300140-000 Wheel lift arm 103 F500002-002 Upper locking tube 104 H048000-000 Air shock 105 F510003-200 Lower locking tube 106 F500305-000 Lift arm 107 H022144-001 Hex. Screw 39mm 108 H022144-003 Hex.
-
Page 7: Parts List
www.smoothfitness.com PARTS LIST Console F300390-005 Console cover F300391-101 Fan cover F410003-000 Speaker H020201-002 Bolt M3x6mm F373065-000 F340009-000 Operational button H020172-001 Bolt M3x8mm F373201-003 Panel control F300409-000 Lower console cover F373202-000 MP3 module F300281-000 Hand pulse (lower) F300389-101 Upper console cover F270271-000 Hand pulse plate H020109-014... - Page 8 7.35 TREADMILL PARTS LIST Console mast F900340-000 Right handle bar F900339-000 Left handle bar F300313-000 OTC end cap-Right F300312-000 OTC end cap-Left H020207-012 Bolt M4x65mm H020203-001 Bolt M8x15mm F300385-101 Upper motor cover H020803-001 Bolt M4x10mm F300395-101 Left protective cover F517012-003...
-
Page 9: Parts Diagram
www.smoothfitness.com PARTS DIAGRAM... - Page 10 7.35 TREADMILL PARTS DIAGRAM MOST OF THE PARTS SHOWN HERE HAVE BEEN PRE-ASSEMBLED.
- Page 11 www.smoothfitness.com PARTS DIAGRAM MOST OF THE PARTS SHOWN HERE HAVE BEEN PRE-ASSEMBLED.
-
Page 12: Assembly - Please Read All Steps Before Beginning Your Work
7.35 TREADMILL ASSEMBLY – PLEASE READ ALL STEPS BEFORE BEGINNING YOUR WORK. STEP 1: Assemble the Console Support Tube When attaching the right upright (310) first attach the 8 pin data cable to the wire in the upright. This will allow you to pull the data cable up through the upright after installation. - Page 13 www.smoothfitness.com ASSEMBLY STEP 2: Attach Console to left and right console support tubes (1) Connect the two Wires (one 7 Pin and one 5 pin) - Upper (222) (from console) to the same wires – Lower (112) (from right console support tube) as shown in FIG 1.
- Page 14 7.35 TREADMILL ASSEMBLY STEP 3: Attach Handle Bars Note: Left Handle Bar has 2 connector wires 1. Before attaching right handle bar; connect OTC wire (220) (black connector), then fasten handle bar on the console with two M8 x 15mm Allen Head Bolts (306) and two M8 flat washers (313).
- Page 15 www.smoothfitness.com ASSEMBLY STEP 4: Assemble the Base Frame Covers 1. Fasten both the left and right base frame covers with four M4 x 10 MM pan head screws. Tighten all bolts and fasteners now...
- Page 16 7.35 TREADMILL ASSEMBLY Step 5: Attach power cord (133) to front of base from in diagram below. Step 6: Insert Safety Key (218) into Bottom Center of Console prior to operation. Your treadmill will not power up with safety key in place.
-
Page 17: Folding Instructions
www.smoothfitness.com FOLDING INSTRUCTIONS How to fold and unfold the treadmill: Your treadmill can be folded up for space saving storage. To do this follow the instructions here: Fold Up After the workout session, you can fold the treadmill to the upright position. Lift up the rear end of the treadmill until the upper folding latch clicks. -
Page 18: Maintenance
Your treadmill should not have to be lubricated usually within 3 months. Smooth Fitness recommends lubricating the walking deck a minimum of twice a year for light use (2 days a week) and four times a year for heavier use(3 times a week multiple users) -
Page 19: Power Cord
www.smoothfitness.com MAINTENANCE To apply lubricant to the walking belt: 1. Position the walking belt so that the seam is located on top and in center of the walking board. 2. Insert the nozzle of the lubricant container under the belt 3. -
Page 20: Important Steps
7.35 TREADMILL IMPORTANT STEPS Warning: Before using this product, please consult your personal physician for a complete physical examination. Frequent and strenuous exercise should be approved by your doctor first. If any discomfort should result from your use of this product, stop exercising and consult your doctor. -
Page 21: Muscle Chart
www.smoothfitness.com MUSCLE CHART Targeted muscle groups: The exercise routine that is performed on this product will develop primarily lower body muscle groups. These muscle groups are shown in gray color on the chart below. MUSCLE GROUPS Shoulder muscles Calf muscles Pectoral muscles Trapezius muscles Bicep muscle... -
Page 22: Stretching Routine
7.35 TREADMILL STRETCHING ROUTINE Warm up and cool down: A successful exercise program consists of a warm-up, aerobic exercise, and a cool-down. Do the entire program at least two and preferably three times a week, resting for a day between workouts. After several months, you can increase your workouts to four or five times per week. -
Page 23: Safety Key
www.smoothfitness.com Read carefully the following before using your treadmill ♦ Always stretch your muscles before ♦ Always use the handrail when stepping exercise program. Warm up slowly by on or off the treadmill and when walking at a slow speed. Increase changing incline or speed. - Page 24 7.35 TREADMILL Computer Overview Buttons and Windows Safety Key Pad If the safety key is not present the treadmill will not function Display Function Program time length & AGE. TIME/AGE Indicates estimated calories burned. CALORIES Estimated heart rate. PULSE Indicates accumulative distance in ML/KM.
-
Page 25: Exercise Programs
www.smoothfitness.com EXERCISE PROGRAMS Quick Start 1. Attach the “Safety Key” to your clothing. This key will immediately shut off your treadmill if removed and is strongly recommended for your safety. 2. Quick Start: The quickest and easiest way to start your treadmill is to push the Quick Start button. This will cause the display to begin in the “Manual Program”... -
Page 26: Heart Rate Control
7.35 TREADMILL HEART RATE CONTROL TARGET HEART RATE PROGRAM: This program automatically modifies the speed and incline to maintain a preset target heart rate. This target is established in the setup process. The chart on this owner’s manual can be used to determine the appropriate target heart rate. To set up the target heart rate program, you will need to enter the workout time, your age, and your target heart rate. - Page 27 www.smoothfitness.com One Touch Controls SPEED: Right side Handle Bar Touch right outside to increase speed. Touch right inside to decrease speed. Speed adjusts in .5 ml increments. INCLINE: Touch left outside to increase incline. Touch left inside to decrease incline. Incline adjusts in 1 level increments STOP: Touch both outsides of OTC control pads to stop...
- Page 28 7.35 TREADMILL Mp3 Usage Mp3 Indicator: Light will flash when the Mp3 player is in use. USB Port: Mp3 Player input. For use with memory sticks containing Mp3 music files Forwards and reverses song tracks Note: High speaker volume may interfere with the heart rate accuracy. Please decrease the speaker volume when you are...
-
Page 29: Troubleshooting
www.smoothfitness.com TROUBLESHOOTING SYMPTOM CAUSE SOLUTION Console display LED's do A).No power to treadmill. Check the on-off switch not illuminate B).Console wire is not turn off, then turn on connected or partially power. Push START, if there is connected still no power service may be required. - Page 30 Hire and reimburse an independent service technician who will come into the home for the repair, In the event that there is not an available certified Smooth Fitness service technician, Smooth will send the part directly to the consumer and will pay $75 US per occurrence for the labor costs of such repair.
- Page 31 www.smoothfitness.com mooth Fitness 780 5 King of Prussia, PA 19406 Toll Free Customer Service: 1.888.800.1167 Website: www.smoothfitness.com...
Need help?
Do you have a question about the 7.35 and is the answer not in the manual?
Questions and answers