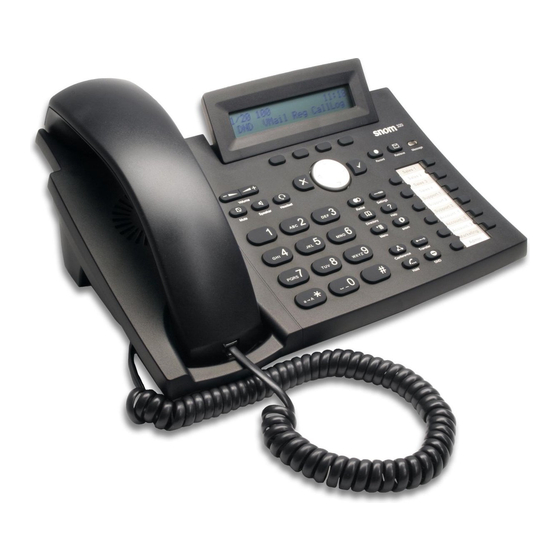
Snom 320 User Manual
Hide thumbs
Also See for 320:
- Manual (112 pages) ,
- Quick start manual (61 pages) ,
- System user's manual (30 pages)
Summary of Contents for Snom 320
- Page 1 Snom320 User's Manual Ver2.0.2 november 07 2017 Ver2.0.1 november 10 2016 Copyright © cloudippbx.com...
- Page 2 Thank you for purchasing Snom320. Make sure and acknowledge that you have read this manual before using Snom320. Package Contents: Package Contents: 1.Main Case 2.Handset 3.Handset Cable 4.AC Power Adaptor 5.Quick Start Guide manual Disclaimer * This document is subject to change without prior notice. * A possibility of noise, broken voice, or disconnection may occur because of customers’...
- Page 3 Maintenance/Cleaning Please use soft dry clothes to clean the device. Don’t use wet clothes. Don’t use volatile chemical like benzene, or thinner since they can damage the device. Don’t use volatile chemical like benzene, or thinner since they can damage the device. If you want to use a chemical wipe, please read the cautionary notes before using it.
- Page 4 Keypad Familiarization 1. Navigation key – for navigation within the display menu and the phone book. 2. Enter key – to confirm actions, selections and inputs. *Always press the “ENTER Key” after inputting the numbers dialed 3. Cancel Key – to cancel actions or inputs. 4.
- Page 5 General Settings 1. Verify device’s IP Address. Press [Help Key] Select [Information], [IPAdr] [MAC] and [Version] will appear. Select [IPAdr] and Press enter [Check] button. 2. Snom320 and the PC must be connected to the same network. Launch any web browser such as Internet Explorer. 2.
- Page 6 3. On the [Setup] options, select [Identity 1]. Display Name and Account: Enter [Unique ID]. Password: Enter [Registered Password] (sent thru mail). * If you changed password, enter your new password. Registrar and Outbound Proxy: Enter Registrar and Outbound Proxy: Enter [Login [Login Server].
- Page 7 4. On the [Setup] options, select [Identity 1], then click [NAT]. Keepalive Interval (seconds): Enter [20] seconds. Keepalive Interval (seconds): Enter [20] seconds. *Click [Save] to save changes. Copyright © cloudippbx.com...
- Page 8 5. On the [Setup] options, select [Preferences]. Web Interface Language: Select [English]. Language: Select [English]. Number Display Style: Select [Number]. Tone Scheme: Select [Japan]. *Click [Save] to save changes Copyright © cloudippbx.com...
- Page 9 6. On the [Setup] options, select [Function Keys] Setting Key Allocations Menu Function keys: HELP Number: Select [Help] TRANSFER Type: Select [DTMF] TRANSFER Number: Select [#9] *Click [Save] to save changes Copyright © cloudippbx.com...
- Page 10 7. On the [Setup] options, select [Advanced] NTP Time Server: Enter [ntp.jst.mfeed.ad.jp]. NTP Refresh Time (sec): Enter [3600] NTP Refresh Time (sec): Enter [3600] Timezone: Select preferred time zone * Click [Save] to save changes. Copyright © cloudippbx.com...
- Page 11 On the [Setup] options, select [Advanced], then click [Audio]. Call Waiting Indication: Select [OFF]. * Click [Save] to save changes. Copyright © cloudippbx.com...
- Page 12 8. On the [Setup] options, select [Advanced], then click [SIP/RIP] Time Support (RFC4028): Select [OFF]. * Click [Save] to save changes Copyright © cloudippbx.com...
- Page 13 9. On the [Setup] options, select [Advanced], then click [Update]. Update Policy: Select [Never update, do not load settings]. Subscribe Config: Select [OFF]. PnP Config: Select [ON]. PnP Config: Select [ON]. * Click [Apply] to save changes. *Click [Reboot] to reboot the device to apply all changes. Copyright ©...
- Page 14 10. On the [Setup] options, select [Software Update]. Manual Software Update Firmware: Enter [http://downloads.snom.com/fw/snom320-8.4.35-SIP-f.bin Click [Load] to load the firmware *It takes few minutes to load the firmware. Please do not unplug or disconnect the device during firmware loading. *The Phone is delivered with preinstalled software (firmware), which allows operating your phone flawlessly. If you require updating the phone’s firmware please follow the instructions above.
- Page 15 VIEWING OF CALL HISTORY 11. On the [Operation] options, select [Home]. You can view the call history on the figure below. You can view the call history on the figure below. Verify from Settings Screen Dialed Numbers: List of previously called/dialed numbers. Missed Calls: List of calls that is terminated before being answered by its intended recipient.
- Page 16 SETTING BLOCKED NUMBERS 11. On the [Operation] options, select [Directory]. Set blocked numbers in the [Add or Edit Entry] area. Example: Name: Type the name of the contact. Name: Type the name of the contact. Number: Type the number @XXX.XXX.XXX.XXXX (Server IP address). Number Type: Select [sip].
- Page 17 SETTING PREFIX (184) *You can make an anonymous call if you put the prefix 184 in Japan. 12. On the [Setup] options, select [Identity 1], then click [SIP]. Dial-Plan String: Enter [ ^(0[0-9]*)$|sip:184¥1@¥d;phone=yes| * You can set up the dial plan for this line here. With a dial plan, you can match user input (digits via keyboard) to specific actions like dialing, using a distinct outgoing identity, etc.
- Page 18 Safety Precautions This manual contains precautions to assure user’s safety while using this product. If the precautions are disregarded, the extent of consequences is presented below. This indicates that ignoring or mishandling of this notice might result to death or serious injury to the person.
- Page 19 Troubleshooting Please check the troubleshooting procedure before requesting a repair. If the problem doesn’t get resolved, please contact us. Problem Problem Solution Solution Plug and Unplug from the power source. (Do this for few times). Wait for at least one minute before plugging the device. General Failure If the problem is not resolved after doing this, please contact our customer support service.


Need help?
Do you have a question about the 320 and is the answer not in the manual?
Questions and answers