Table of Contents
Advertisement
Quick Links
Advertisement
Table of Contents

Related Manuals for Jayco Greyhawk 2018


Summary of Contents for Jayco Greyhawk 2018
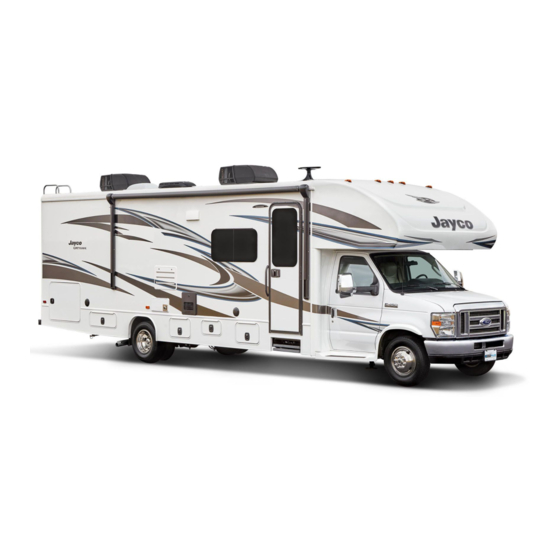
- Page 1 2018 Class C Motorhome Owner’s Manual PRINTED ON RECYCLED PAPER 0188485.2018...
- Page 3 44,683 people. We’re proud of our results, and we know those numbers show that a little initiative can go a long way. The Jayco EcoAdvantage is our way of making sure endless generations can enjoy the Great Outdoors.
-
Page 5: Table Of Contents
Change Of Address/Ownership Suggestions For Obtaining Service Obtaining Service For Separately Warranted Items Obtaining Service At Our Customer Service Facility Parts & Accessories Notice To Jayco Dealers Section 2: Occupant Safety Secondary Means of Escape (Exit Window) Exit Window Label Fire Safety... - Page 6 Table of Contents Campsite Hook-Up Lippert Class C Leveling System (If So Equipped) Emergency Stopping Emergency Towing Front Axle Tire Alignment Wheel Lug Nuts/Wheel Liners Tires Changing A Tire Awnings (if so equipped) Power Awnings (If So Equipped) Awning care Electric patio awning with remote control In Motion Detector (if so equipped) Carefree®...
- Page 7 Table of Contents Battery Isolation Manager (If So Equipped) Auxiliary Start System (If So Equipped) Load Center 120-Volt Circuit Breakers Approximate Electrical Load Ratings 120-Volt (30 AMP) AC System (If So Equipped) 30-amp Power Cord (If So Equipped) Generator Calculating 30 AMP Electrical Load (If So Equipped) Before starting the generator Maintenance Starting the Generator...
- Page 8 Table of Contents Low point drains Exterior fresh water drain Fig. B - Utility Center Potable water only label (Label appearance may not be exact) Fig. C - Utility Water Heater Bypass – 3 Valves/No Utility Center (If So Equipped) Sanitizing the Plumbing System Winterization Water Heater...
- Page 9 Table of Contents Antenna Power Supply (If So Equipped) Satellite (If So Equipped) Section 12: Interior Cleaning The Interior Décor Glass (if so equipped) Furniture Upholstery Window Treatments Window Shades Cabinetry & Tables Interior Wall Panel ABS Plastics Sofa & Dinette Hide-a-bed Sofa or Sofa Sleeper Jack Knife Sofa Dream Dinette unlocked...
- Page 11 WARNING: READ ALL INSTRUCTIONS IN THIS MANUAL AND COMPONENT MANUFACTURER SUPPLIED INFORMATION BEFORE USING YOUR RV. This manual has been provided by your recreational vehicle manufacturer for the sole purpose of providing instructions concerning the operation and maintenance of this recreational vehicle.
- Page 12 Maintenance Record Table of Contents...
-
Page 13: Customer Relations
Canada may differ to conform to Canadian Codes. Dealer Responsibility At the time of sale of the new recreation vehicle, your Jayco dealer is expected to: Deliver your recreation vehicle in the best condition possible. Your recreation vehicle must pass the dealer’s pre-delivery inspection (PDI), including all systems tests. - Page 14 (or any effect of the alterations) to any of the parts, components, systems or assemblies installed by Jayco. Jayco is not responsible for the safety or quality of design features, materials or workmanship of any alterations by such suppliers.
-
Page 15: To Contact Us
Canada. In addition, the club offers a variety of local and regional activities throughout the year. By belonging to the Jayco Travel Club, you will find new ways to enjoy your RV and make friends all across the country. -
Page 16: About This Manual
Section 1: Warranty & Service About This Manual This manual is a guide to operation of the features, equipment and controls in your recreation vehicle. If you find components vary significantly from what is described, please contact your dealer to ensure you have the correct information. Nothing in this manual creates any warranty, either expressed or implied. -
Page 17: Reporting Safety Defects
Section 1: Warranty & Service NOTE: Gives helpful information. This is the safety alert symbol. It is used to alert you to potential personal injury hazards. Obey all safety messages that follow this symbol to avoid possible injury or death. ... -
Page 18: Customer Responsibility
Section 1: Warranty & Service To contact NHTSA by phone: Call the Department of Transportation (DOT) Vehicle Safety Hotline at 1-888- 327-4236, and a NHTSA representative will record your complaint information (TTY: 1-800-424-9153 or 1-202-484-5238). To Contact NHTSA by mail: Office of Defects Investigations/CRD NVS-216 1200 New Jersey Ave SE... -
Page 19: Suggestions For Obtaining Service
Section 1: Warranty & Service Suggestions For Obtaining Service To help ensure your dealer provides the level of service you expect, here are some suggestions we would like to make: Contact your dealer at once… Do not wait until you are ready to use your RV. Your dealer may not be able to service it immediately and/or the repair may require parts be ordered. -
Page 20: Parts & Accessories
Section 1: Warranty & Service The propane system (if so equipped) and all electrical systems must be shut down and turned off. We are not responsible for discharged batteries or propane tanks. During the appropriate season, please ensure the motor home has been winterized. Unless prior approval has been obtained from our Customer Service facility, all personal items must be removed from the area where you are requesting service repair and the refrigerator emptied. - Page 21 TITLED OR REGISTERED IN A BUSINESS NAME OR WHEN THE JAYCO IS SOLD IN CANADA. There is no warranty of any nature made by Jayco beyond that contained in this Limited Warranty. No person has authority to enlarge, amend or modify this Limited Warranty. The dealer is NOT Jayco’s agent.
- Page 22 REPAIR REMEDY: Jayco’s obligation is to repair any covered defect discovered within the warranty coverage period provided: (l) you notify Jayco or an authorized dealer within 10 days of your discovery of a defect; AND (2) you deliver the Motorhome to Jayco OR an authorized dealership at your cost and expense.
- Page 23 Provide the notification mentioned in (1), above, within ten (10) days of the discovery of a defect in material or workmanship; and, Promptly schedule an appointment with and take the Motorhome to Jayco or an independent, authorized dealer. If you need assistance, you may contact:...
- Page 24 Jayco, your Warranty will be registered. The failure to submit this warranty registration to Jayco will not affect your rights under this limited warranty as long as you can present proof of purchase, however, it can cause delays in obtaining the remedies offered by this limited warranty, and it may adversely affect any servicing facility’s ability to...
-
Page 25: Notice To Jayco Dealers
Limited Warranty will not apply to this RV. The Motorized Rental Limited Warranty applies in that situation. If, on the other hand, the Jayco dealer sells this RV to a retail customer then the rental warranty would not be applicable. The rental warranty does not apply to retail consumers. - Page 26 Motorhome when you take delivery of your Motorhome, you MUST notify your Jayco within 10 days of the date of purchase to have defect or damage repaired at no cost to you. Minor adjustments will be performed, free of charge, within 90 days of your purchase;...
- Page 27 Section 1: Warranty & Service contact Jayco, at 903 South Main Street, P. O. Box 460, Middlebury, Indiana 46540, Attn: Customer Service, (574) 825-5861 or (800) 283-8267. WHAT IS NOT COVERED: Equipment and appliances installed after the Motorhome is assembled by Jayco; Motorhomes used for any business and commercial purpose other than for rental purposes;...
- Page 28 CARE AND MAINTENANCE: It is your responsibility to perform proper care and maintenance of the Motorhome and to assure correct load distribution. For details regarding this, please see your owner’s manuals. Please review all manuals and contact Jayco or the supplier of the component part if you have questions.
-
Page 29: Secondary Means Of Escape (Exit Window)
Section 2: Occupant Safety Secondary Means of Escape (Exit Window) Your recreation vehicle has been equipped with a window(s) that serves as a secondary means of escape. The window(s) will allow a quick exit from the vehicle during an emergency if access to the main entrance door is not available. -
Page 30: Fire Safety
Section 2: Occupant Safety Lever style latch Remove the screen by pulling the red tab (upper rightarrow). Pull the lever out from the sash clamps. Swing the lever out so it is positioned straight out from the window. Push the lever (and window) out to open and exit the vehicle. -
Page 31: Smoke Alarm
Section 2: Occupant Safety Inspection and maintenance Read and follow all instructions on the label and user’s manual provided by the fire extinguisher manufacturer. Inspect the extinguisher at least once a week (more frequently if it is exposed to weather or possible tampering). - Page 32 Section 2: Occupant Safety The smoke alarm is operational once the battery is correctly installed. It will not function if the battery is missing, disconnected, dead, the wrong type or not installed correctly. It requires one standard 9V battery. Refer to the user’s guide, for correct battery and installation information, The LED light will indicate the battery is functioning properly.
-
Page 33: Combination Carbon Monoxide /Propane Alarm
Section 2: Occupant Safety Combination Carbon Monoxide /Propane Alarm Your recreation vehicle is equipped with a combination carbon monoxide (CO) / propane alarm that is listed for use in recreation vehicles. The combination carbon monoxide/ propane alarm will only work if it is operational and maintained. ... -
Page 34: Carbon Monoxide/Propane Alarm
Section 2: Occupant Safety by either exiting the recreational vehicle or calling for assistance. Young children and household pets may be the first affected. Your combination carbon monoxide/propane alarm is designed to detect the toxic carbon monoxide fumes that result from incomplete combustion, such as those emitted from appliances, furnaces, fireplaces and auto exhaust. - Page 35 Section 2: Occupant Safety equipment and appliances, and inspect for proper operation of this equipment. Make sure that motor vehicle(s) are not, and have not been, operating in an attached garage or adjacent to the recreation vehicle. If problems are identified during this inspection, have the alarm serviced immediately. Note any combustion equipment not inspected by the technician and consult the manufacturer’s instructions or contact the manufacturer directly for more information about carbon monoxide safety and this alarm...
-
Page 36: Formaldehyde
Section 2: Occupant Safety NOTE: The carbon monoxide/propane alarm manufacturer strongly recommends replacement of the detector five years after the date of purchase. Formaldehyde Some components in the recreation vehicle contain formaldehyde-based adhesives that may release formaldehyde fumes into the air for an unknown period of time. Individuals who are allergic to formaldehyde gas fumes may experience irritation to eyes, ears, nose and throat. -
Page 37: Condensation
Section 2: Occupant Safety Condensation Condensation is a natural phenomenon. The amount of condensation will vary with climate conditions, particularly the relative humidity. Condensation occurs because there is water vapor present in the air. When the temperature reaches the “dew point” the water vapor in the air condenses and changes to a liquid form. - Page 38 Section 2: Occupant Safety Notes: Maintenance Record Table of Contents...
-
Page 39: Vehicle Labels
Section 3: Pre-travel information Vehicle Labels Decals and data plates used throughout the motor home aid in its safe and efficient operation; others give service instructions. Read all decals, data and instruction plates before operating your recreation vehicle. Any decal, data or instruction plate painted over, damaged or removed should be replaced. -
Page 40: Towing & Braking Warning Label
Section 3: Pre-travel information OCCC Label (Occupant & Cargo Carrying Capacity): The upper portion of this yellow label is federally required and indicates the total combined weight value of occupants and cargo that may be placed in or on your motor home as it was manufactured and weighed before leaving the factory. -
Page 41: Loading Your Motorhome
Section 3: Pre-travel information Loading Your Motorhome Never load the motor home in excess of the GVWR or the GAWR for either axle. Overloading your motor home may result in adverse handling characteristics and damage to the chassis. DO NOT EXCEED YOUR GVWR! This means you should weigh your vehicle as loaded for your normal travel to determine the actual weight. -
Page 42: Trailer Plug
Section 3: Pre-travel information Trailer Plug If you choose to tow behind your RV, a chassis manufacturer supplied 7-way trailer plug (located at the hitch) is pre-wired into your motor home. Before hitching up to a trailer, please read Using the Rear Hitch, vehicle weight ratings, etc. Your motor home may have both 4-way and 7-way trailer receptacles. - Page 43 Section 3: Pre-travel information See the Weight Terms and Loading Your RV sections for important information on how towing a vehicle affects the motor home weight. It is important to redistribute the load to avoid component failure as well as to improve the handling characteristics of the vehicle.
- Page 44 Section 3: Pre-travel information Notes: Maintenance Record Table of Contents...
-
Page 45: Vehicle Operation
Section 4: Vehicle Operation Vehicle Operation Your motor home will travel safely and comfortably at highway speed limits. However, it will take longer than a passenger automobile to reach that speed. Allow more time to go around the vehicle you are passing. Avoid situations that might require sudden momentum changes as the length of the motor home affects your ability to quickly cut back into traffic. -
Page 46: Using The Rear Hitch
Section 4: Vehicle Operation Using The Rear Hitch Do not install a frame equalizing type hitch on your motor home. Towing will affect vehicle handling, durability and fuel economy. Exceeding any of the listed weight ratings will result in unacceptable overall vehicle performance. Your safety and satisfaction require proper use of correct equipment. -
Page 47: Power Entrance Step
Section 4: Vehicle Operation In addition, a separate supplemental braking system must be installed if the towed trailer or vehicle meets or exceeds the minimum weight determined by the chassis manufacturer (this minimum weight rating will vary by chassis and chassis manufacturer). Contact your dealer for assistance in determining whether a separate braking system is recommended for your towing and traveling safety. -
Page 48: Keyless Entry (If So Equipped)
Section 4: Vehicle Operation NOTE:Locks on entrance and baggage doors need biannual lubri- cation using a light coat of silicone spray. Conditions such as rain, salt, dust and pollution may increase the maintenance needs. Keyless Entry (if so equipped) The keyless entry system is a battery powered system. The following is an overview for programming and changing batteries on the lock system. - Page 49 Section 4: Vehicle Operation To set a new code, wake up the lock by touching the wake up area. Then touch and hold both the “3|4” button and the ENTER Button for 2 seconds. The system will provide three short beeps, indicating it is ready to accept a new code.
- Page 50 Section 4: Vehicle Operation Trouble shooting After installation the touch pad does not work ● Batteries are dead/need to be replaced or are not installed properly ● Plug not engaged properly Dead Bolt not engaging into Door Frame ● Obstruction in Door Frame Code not working ●...
-
Page 51: Driver & Passenger Seat
Section 4: Vehicle Operation Driver & Passenger Seat Do not adjust the seat while driving. After adjusting the seat, make sure that it is locked in position. To ensure that the seat is locked securely, try to move the seat forward or backward without using the adjusting lever or button. -
Page 52: Seat Belts
Section 4: Vehicle Operation Seat Belts Seat belts should always be worn by anyone who drives or rides in this vehicle. Never use one seat belt for more than one occupant. Never carry more people in the motor home than there are seat belts. Only seats equipped with seat belts are to be occupied while the vehicle is in motion. -
Page 53: Rear Vision Camera
Section 4: Vehicle Operation After adjusting the front driver’s seat, adjust the outside rearview mirrors to your driving preference. Have someone help you adjust the mirrors in the desired direction for maximum rear visibility before driving. During travel, vibration may loosen the fitting holding the mirror(s), causing them to change position. -
Page 54: Lippert Class C Leveling System (If So Equipped)
Section 4: Vehicle Operation When using full hook-up, connect the sewer hose to the campsite sewer hook-up. If applicable, start the refrigerator and the cooling or heating system NOTE: For extended dry camping, management of all your re- sources is essential. Check your battery levels and conserve battery power, use it sparingly. - Page 55 Section 4: Vehicle Operation The control unit is typically located inside the entrance door. Leveling control panel callouts A - Up arrow: scrolls up through the menu on B - Down arrow: scrolls down through the menu on LCD C – Enter: activates modes and procedures indicated on LCD D –...
- Page 56 Section 4: Vehicle Operation ● Coach must be in PARK, with the engine running. Parking brake MUST be engaged. ● ● Air bag pressure automatically lowers when starting the auto or manual level sequence to maximize lift of the jacks. ●...
- Page 57 Section 4: Vehicle Operation Failure to act in accordance with the following warning may result in serious personal injury or death! WHEELS MUST NEVER LEAVE THE GROUND DURING LEVELING OF THE COACH. Press the ON/OFF button to turn the system ON. Press AUTO LEVEL button.
-
Page 58: Emergency Stopping
Section 4: Vehicle Operation Press the ON/OFF button to turn the system OFF. All jacks MUST be inspected to ensure they are retracted before moving the coach. Jack Manual Retract Procedure: ● Coach must be in PARK, with the engine running. ●... -
Page 59: Emergency Towing
Section 4: Vehicle Operation Place the first warning indicator on the traffic side of the recreation vehicle, directed at the nearest approaching traffic. Place the second warning indicator 100 feet behind the recreation vehicle in the center of the lane and toward approaching traffic. Place the third warning indicator 100 feet in front of the recreation vehicle in the center of the lane and away from the traffic approaching from behind. -
Page 60: Wheel Lug Nuts/Wheel Liners
Section 4: Vehicle Operation NOTE: Always have the alignment checked and adjusted by a qualified shop with the proper equipment to handle heavy vehicles. NOTE: A road test by the dealer should be included as part of the pre-delivery inspection. The dealer can check for and correct any steering problems before you take delivery. -
Page 61: Tires
Section 4: Vehicle Operation Wheel lugs If you suspect or notice the wheel stud bolts are cracked or broken, they must be replaced, along with adjacent bolts that have probably also been weakened due to the additional stress placed on them. Aluminum Wheels (if so equipped) Clean the aluminum wheels with a cleaner that is designed for use on aluminum and apply an appropriate protection agent. - Page 62 Section 4: Vehicle Operation Tire wear should be checked frequently. Once a wear pattern becomes firmly established in a tire it is difficult to stop, even if the underlying cause is corrected. Tire pressure Failure to follow proper inflation guidelines may result in tire failure, which, under certain circumstances can cause loss of vehicle control or accidents that may result in property damage, bodily injury and/or death.
-
Page 63: Changing A Tire
Section 4: Vehicle Operation Changing A Tire The motor home is very heavy. Raising the motor home to replace the spare tire should only be done with extreme caution by a qualified technician. The vehicle could slip, causing personal injury or death. DO NOT ATTEMPT TO DO THIS YOURSELF. -
Page 64: Power Awnings (If So Equipped)
Section 4: Vehicle Operation Awning care Keep your awnings clean and in good condition to prevent costly repairs. Periodically check that the fasteners are tight. Tighten if necessary. Keep the awning fabric clean. For detailed cleaning information, refer to the manufacturer’s owner information. - Page 65 Section 4: Vehicle Operation Carefree® LONGITUDE Awnings (If So Equipped) offer the following features: Scissor style arms that do not require vertical ground supports. Adjustable arms with ( 6 ) position pitch adjustment Worm gear driver motor eliminating the need for travel locks. Single switch operation, 12V motorized awning.
-
Page 66: Carefree® Travel'r Awnings (If So Equipped)
Section 4: Vehicle Operation Always operate the awning according to the instructions. Periodically check that the fasteners are tight. (Tighten if necessary) Keep the awning fabric and arms clean. Refer to the manufacturer’s user guide for detailed operating and safety information. Emergency Operation If power to the vehicle is not available, the awning can be retracted by jumping the motor using a 10VDC –... - Page 67 Section 4: Vehicle Operation NOTE: If the awning is equipped with the Direct Response system, this procedure is not applicable. See the manufacturer’s owner’s manual for additional information. Locate and separate the quick disconnects located in the motor arm channel. Position the wires from the motor on the outside of the channel.
- Page 68 Section 4: Vehicle Operation Notes: Maintenance Record Table of Contents...
-
Page 69: Electric Slide Room(S) (If So Equipped)
Section 5: Slideout Systems Electric Slide Room(s) (if so equipped) The mechanical components of the slide out are gear driven. Electric powered slideout room systems have a manual override to allow you to extend or retract the slideout room(s) in case of a power loss. -
Page 70: Slideout Overlap-Outside
Section 5: Slideout Systems Operating the switch after the room is fully extended or retracted may damage the switch and motor. After the slideout is extended, visually inspect the slideout and the surrounding area to make sure the slideout has extended properly and has adequate clearance from any outside obstructions. - Page 71 Section 5: Slideout Systems NOTE: For long-term storage it is recommend the room be closed (retracted). Electric Operation NOTE: Install transit bars (if so equipped) on the slideout room during storage and transportation. Extending/retracting the room Level the unit. Main Power switch at stepwell (locations may vary) must be Verify the battery is fully charged and hooked up to the electrical system.
-
Page 72: Schwintek In-Wall Slideout System
Section 5: Slideout Systems Schwintek In-Wall Slideout System NOTE: Do not operate the switch after the room is fully extended or retracted as damage can occur to the motor and/or switch. The in-wall slideout system requires no maintenance or adjustments. This system has two vertical columns with a drive motor located at the top of each column. - Page 73 Section 5: Slideout Systems Maintenance This slideout system requires very little maintenance. It contains a pre-lubed bearing that is lubricated when the room is moved in and out. Do not spray oil or grease on the rails while the room is extended. Trouble shooting the in-wall slideout system Checking Fuses: The in-wall slide requires a minimum 30-amp fuse.
- Page 74 Section 5: Slideout Systems The malfunctioning controller should have a flashing red LED indicating a halt signal fault (will flash 8 or 9 times). Press the “mode button” six times quickly, then press a seventh time and hold for approximately 5 seconds. The red and green LED’s will flash indicating you are in override mode.
-
Page 75: Error Codes
Section 5: Slideout Systems Pull the motor up until it disengages (about 1/2 inch). Repeat this process for both sides of the slide room. 10. Physically push/ pull the room back into the opening; keep both sides relatively even. 11. The room must be travel locked to keep the room in place for road travel. ... -
Page 76: Norco Slideout Manual Operation
Section 5: Slideout Systems unit (or use a ratchet to actuate the motor) to pull the room in or out. If the motor is functioning, check the room for obstructions. Norco Slideout Manual Operation Locate the included flexible shaft in your owner’s packet. - Page 77 Section 5: Slideout Systems If the room does not move when the switch is pressed, check the following: Make sure the slideout system is turned on. Battery is fully charged and connected. Transit bars have been removed (if so equipped). ...
-
Page 78: Power Gear Slim Rack Slideout System
Section 5: Slideout Systems The room is now free to move. Using either a 5/8” or 3/4” wrench or socket, crank the room either in or out completely. If the slideout system is supplied with a gearbox override (optional), use the crank handle to move the room. - Page 79 Section 5: Slideout Systems Turn ON the on/off switch or key. Press and hold the OUT button (Fig 4). To retract, press and hold the IN button. There will be a slight delay before the room begins moving. The GREEN LED should be solid ON when room is in motion.
-
Page 80: Preventative Maintenance
Section 5: Slideout Systems Fault Codes Fault Fault Type Description Possible Cause Possible Solution Code -Stops have not been set Steps need to be programmed by an authorized Major Stops not programmed -Stops were cleared service facility. -Stops were improperly set Run room in opposite direction. - Page 81 Section 5: Slideout Systems NOTE: After overriding the system, the room control will need to be re-programmed by an OEM authorized dealer. Emergency Retract Mode: Use this procedure when there is NO loss of power or electrical problem with the system. Remove the touchpad (Fig 4) from the wall.
- Page 82 Section 5: Slideout Systems Repeat steps 1-4 for the other side. Place a socket wrench with a 3-inch extension and a 5/8” deep well socket (Fig 12) through the motor access opening and seat the socket onto the coupler (Fig 13). One person alternating from side to side of the room can retract a 1500 lb.
-
Page 83: Section 6: Electrical System Power Gear Ram Slideout System
Section 5: Slideout Systems Power Gear Ram Slideout System Typically used for Class C motorhomes. Manual Override Procedure: The system has been equipped with 3/4” hex override couplers located on the drive component of the system. Due to the size and weight of some rooms, assistance may be needed to push the room in. - Page 84 Section 5: Slideout Systems 12. Return the brake release lever back to the “engaged” position (parallel to the spring lock lever). Pressing the bent end of the spring lock lever will allow the brake lever to be moved. 13. Plug the motor connector back in again. 14.
-
Page 85: The Electrical System
Section 6: Electrical System The Electrical System The RV electrical system is comprised of two independent electrical systems. One operates off of 12-volt DC power and the other off of 120-volt 60hz AC power. All installations have been made in compliance with industry standards applicable on the date of manufacture. Because the electrical equipment and associated circuitry are engineered into a dedicated system specific to your RV, do not make unauthorized changes or add fixed appliances to it. -
Page 86: Controls And Switches
Section 6: Electrical System Controls and Switches Your motor home is equipped with various switches and controls that allow you to operate and monitor the systems in your motor home. Information on these controls and their location will be provided throughout this manual. Additional information on the various components can be found in the component manufacturer’s user guide. -
Page 87: Gfci Receptacle
Section 6: Electrical System The dimmer has a memory so it remembers what the light setting was when the lights were turned OFF. When turned ON again, the lights return to that same setting. NOTE: If your RV model includes the 5 way/8 way remote control: the LIGHT button on the remote only controls the awning LED lights GFCI Receptacle There is a ground fault current interrupter (GFCI) engineered into the electrical system. -
Page 88: Connecting The Power Cord
Section 6: Electrical System Do not hook up the power cord to any receptacle until you have verified proper polarity and grounding. DO NOT plug the shore power cord into a campsite receptacle(s): That has reverse polarity With non-functioning ground circuits That shows outward signs of heat damage. -
Page 89: Inverter (If So Equpped)
Section 6: Electrical System Plug the power cord into the receptacle. Be sure all the power cord prongs are properly plugged into the receptacle. Return to your RV and turn “on” the load center main circuit breaker. The shore line power cord should be unplugged when the recreation vehicle is left unattended. - Page 90 Section 6: Electrical System If your lights are dimming or flickering that usually indicates an overloaded converter. Remove some of the load by turning off DC lights or appliances. Fan is controlled by load. It will begin running at 3 to 6 amp DC draw. It increases in speed with a higher load until 14 to 15 amps.
-
Page 91: Converter W/Charge Wizard (If So Equipped)
Section 6: Electrical System Converter w/charge wizard (if so equipped) Some converters may be equipped with a charge wizard There are (3) possible charging modes; NORMAL, BOOST and STORAGE. The charge wizard will automatically select the best mode to charge your battery. A green LED next to the wizard mode button will indicate by flashes, which mode is currently being used. -
Page 92: Batteries
Section 6: Electrical System Replacing a fuse Before replacing a fuse, always turn off the electrical components protected by it. Disconnect the shore power cord. Turn “off” the inverter (if so equipped). Disconnect the house or auxiliary batteries main negative battery cable. Remove the fuse panel cover to check fuses. -
Page 93: House Batteries
Section 6: Electrical System House Batteries Your motor home is equipped with Group 27 deep cycle batteries. Unless a battery has been fully discharged, house auxiliary batteries are normally charged in one of two ways: When the power cord is plugged into 120-volt shore power, or when the generator (if so equipped) is operational, the inverter/charger functions as a battery charger and will automatically charge the house batteries when required. -
Page 94: 12-Volt Battery Disconnect
Section 6: Electrical System Refer to your Chassis Guide for information pertaining to the chassis batteries. 12-Volt Battery Disconnect The 12-volt battery disconnect switch is typically located near the entrance door. This momentary switch controls a solenoid which connects or disconnects the house batteries. The switch lights up red when turned on. -
Page 95: Load Center
Section 6: Electrical System chassis battery charge is low. The auxiliary start switch can momentarily connect both the house and chassis batteries should the chassis battery become discharged. To operate, depress either the “Aux. Start” switch (located on the front driver’s dash) or the Battery Boost switch on the driver console and hold it down. -
Page 96: Approximate Electrical Load Ratings
Section 6: Electrical System Circuit breakers and fuses will not offer complete protection of the electrical system in the event of power surge or voltage spike. Replacement Only replace circuit breakers with those of the same specified type, voltage, and current rating. -
Page 97: Volt (30 Amp) Ac System (If So Equipped)
Section 6: Electrical System TV Plate/Antenna Booster 1.0 AMP Water Heater 6.0 AMPS Water Pump 7.0 AMPS *Momentary Load 12 Volts: Labeled watts divided by 12 = Power consumed in AMPS 120 Volt System Air cConditioner 18 AMPS Coffee Maker 6-12 AMPS Converter (each) 8 AMPS... -
Page 98: Generator
Section 6: Electrical System Do not hook up the power cord to any receptacle until you have verified proper polarity and grounding. Polarity indicators can be purchased in most electrical and hardware stores. Do not use any cheater plug, adapter or extension cord to reconfigure incoming AC power or break the continuity of the circuit connected to the grounding pin. - Page 99 Section 6: Electrical System NOTE: If your motor home is equipped with the Vega Touch touch- screen system (Entegra) the generator instructions can be found in the Vega Touch User Guide included in your warranty portfolio (or online at http://www.fireflyint.com). Transfer switch The generator interfaces with the 120/240-volt electrical system through a transfer switch that automatically switches between available shore power and generator power.
-
Page 100: Before Starting The Generator
Section 6: Electrical System Before starting the generator Make sure the carbon monoxide detector is working. Turn “off” air conditioners and all other 120-volt appliances. Check for fuel, exhaust and coolant leaks. STOP the generator immediately if there is a fuel, exhaust or coolant leak. Have all leaks repaired prior to placing the generator back in service. -
Page 101: Automatic Generator Start (Ags) (If So Equipped)
Section 6: Electrical System For more information on generator operation and maintenance, refer to the manufacturers owner’s manual. Automatic Generator Start (AGS) (If So Equipped) Class A motorhomes and certain Class C motorhomes may be equipped with an Automatic Generator Start system (AGS). AGS is not currently available on towable models. When enabled, the Automatic Generator Start system will automatically start and stop the generator according to operator or factory pre-selected parameters. - Page 102 Section 6: Electrical System Notes: Maintenance Record Table of Contents...
-
Page 103: Fuel Safety
Section 7: Fuel & Propane System Fuel Safety Automotive fuels can cause serious injury or death if misused or mishandled. If you have further questions, consult your dealer or Customer Service for assistance. Always shut OFF the vehicle engine while refueling. Do not bring or store fuel or other flammable liquids inside the motor home because a fire or explosion may result. -
Page 104: Propane Gas System (If So Equipped)
Section 7: Fuel & Propane System Windows should be closed while driving or running the generator (if so equipped) to avoid drawing dangerous exhaust gases into the motor home. If you suspect that exhaust fumes are entering the passenger compartment, have the cause determined and corrected as soon as possible. -
Page 105: Propane Gas Container
Section 7: Fuel & Propane System NOTE: All propane lines have been checked with air pressure at the time of manufacture. Dealers are required to recheck and adjust pressure before retail delivery. The following label should be kept permanently affixed to the motor home: Propane Label Propane Gas Container Propane is a true gas compressed into a liquid form. -
Page 106: Lp Gas Container Overfill
Section 7: Fuel & Propane System Servicing or filling Always shut OFF the engine while refueling. Do not smoke and do not operate other ignition sources while refueling. When the propane container is disconnected from the main supply hose and the P.O.L. connection, install the P.O.L. plastic cap that is attached to the container. -
Page 107: Propane Use And Safety
Section 7: Fuel & Propane System NOTE: Regulator appearance and type may vary by model. Single stage regulator Some models are equipped with a single stage regulator. Two stage regulator The two-stage regulator has the only moving components in the propane system. Its sole function is to reduce the pressure from the propane containers to a safe and consistent low operating pressure. -
Page 108: Using The Propane System
Section 7: Fuel & Propane System Apply the soapy solution to the outside of the gas piping fittings. If a leak is present, the soapy solution will “bubble” at the leak point. If a leak is indicated, shut off the propane system valve(s) and contact your dealer or qualified propane service representative immediately. -
Page 109: Calculating Propane Gas Usage
Section 7: Fuel & Propane System as the danger of asphyxiation is greater when the appliance is used for long periods of time. FAILURE TO COMPLY MAY RESULT IN DEATH OR SERIOUS INJURY. These warning labels are located in the cooking area to remind the user to provide an adequate supply of fresh air for combustion. - Page 110 Section 7: Fuel & Propane System Use care when fueling your motor fuel tanks and/ or propane containers. Make certain your propane tank is properly fastened in place. This label should be kept permanently affixed to your recreation vehicle. Refueling warning label Maintenance Record Table of Contents...
-
Page 111: Plumbing System
Section 8: Plumbing System Plumbing System There are two different water systems in your recreation vehicle: The fresh water system consists of the fresh water holding tank, faucets and connections, water pump, outside shower assembly (if so equipped), water heater, tub/shower, and water purification system (if so equipped). - Page 112 Section 8: Plumbing System Operation Press only one tact switch at a time. As you push either the FRESH, BLK GREY1 or GREY2 switch, one or more LED lights will illuminate (from left to right) indicating the content level for that tank. When pushing the “BATT” switch, the LED lights illuminate from left (lowest) to right (highest) to indicate the estimated auxiliary battery condition.
-
Page 113: Fresh Water System
Section 8: Plumbing System Fresh Water System All water contains contaminant and mineral particles that can cause fresh water system odors. Untreated well water is a major source of water system odors. The fresh water (potable water) system needs periodic sanitization and winterization to take care of all the components in the plumbing system to discourage the growth of bacteria and other organisms that can contaminate the water supply. -
Page 114: To Replace Canister Filter Cartridge
Section 8: Plumbing System Once activated, the water pump (also known as the demand pump) will self-prime, The pump is designed for intermittent use only. Using the pump and provide water. continuously or with high pressure will shorten the life of the pump and is not covered in your warranty. -
Page 115: Draining The Fresh Water System
Section 8: Plumbing System Clean the inside of the filter housing with mild detergent. Thoroughly rinse and wipe clean. Remove the O-ring from the groove in the housing and wipe clean. Recoat with petroleum jelly. Replace the O-ring in the groove, making sure it is properly seated. Install the new filter cartridge. -
Page 116: Utility Center
Section 8: Plumbing System Open the “low point drains” by turning, then pulling the handles up. They are installed at the lowest point of the water lines. A label is placed on the outside of the RV to indicate where the drains are located. -
Page 117: Fig. B - Utility Center
Section 8: Plumbing System You should always use a non-toxic drinking water hose dedicated only to supplying the motor home with fresh water through the city water connection inlet. To reduce the chance of contamination, prevent the non-toxic drinking water hose from coming into contact with the ground. - Page 118 Section 8: Plumbing System To disconnect Shut OFF the water at the external water source and disconnect the hose. Disconnect the non-toxic drinking water hose from the city water connection inlet and reinstall the city water connection inlet cap. City Fill Tank: Use this setting to fill the water tank from a pressurized water source. If needed, sanitize the water system prior to travel.
-
Page 119: Water Heater Bypass – 3 Valves/No Utility Center (If So Equipped)
Section 8: Plumbing System Place the utility center valves in the “NORMAL” position (Fig A). Turn the water pump ON (make sure you have sufficient 12-volt power). Water will be pumped from the fresh water tank to all faucets. The tank (storage) water heater will fill first, followed by the supply lines and faucets. Enter the motor home and open the cold water supply faucets to bleed air from the water lines. -
Page 120: Sanitizing The Plumbing System
Section 8: Plumbing System Water heater switches (if so equipped): The water heater switches are typically located on the monitor panel. Refer to the Monitor Panel section for function details. Sanitizing the Plumbing System When to sanitize When your motor home is new. At the beginning and end of each season. - Page 121 Section 8: Plumbing System the hose in a container holding the sanitized solution. To assist the syphoning process set the container on a flat surface approximately (2) feet above ground level. Place the utility center valves in the SANITIZE TANK position. Turn the water pump ON.
- Page 122 Section 8: Plumbing System How to sanitize (no utility center) Set the bypass valves to bypass the water heater: valves A&B closed and valve C open (refer to Water Heater Bypass Valves section). Put the sanitizer solution in the fresh water tank: Insert one end of a hose (or funnel) in the gravity fill inlet, insert the other end into a container holding the chlorine solution.
-
Page 123: Winterization
Section 8: Plumbing System NOTE: If a chlorine taste lingers in the water, flush the water sys- tem with a solution consisting of one-quart vinegar to five gallons of clean water. Re-flush as necessary. The vinegar solution may dam- age the water heater or the water filter, so both must be bypassed again before performing this operation. - Page 124 Section 8: Plumbing System Preparing your motor home for colder weather or storage is very important for most states and Canada. Failure to prepare your motor home may cause water supply lines and the water heater to freeze. The motor home should be winterized at the end of the camping season or when the motor home will be exposed to temperatures that will fall at or below 32°F (0°C).
- Page 125 Section 8: Plumbing System 10. Close the faucet hot water lines and repeat with the cold water lines on all the faucets. Flush the toilet a couple of times until you see antifreeze in the bowl. Water can accumulate in the flexible hose and dump connector of the macerator system.
-
Page 126: Water Heater
Section 8: Plumbing System When you are done adding RV antifreeze: 11. Turn the water pump OFF. Turn valve E OFF. Remove the clear hose from the container of RV antifreeze. Leave the water tank shutoff valve D closed to keep antifreeze out of the fresh water tank. - Page 127 Section 8: Plumbing System controls. Double check the bypass valves, make sure they are set properly. Always open both the hot and cold water faucets when filling the fresh water tank to allow air pockets to be forced out of the water heater. Water heater switch (if so equipped) The “propane GAS”...
-
Page 128: High Altitude Deration
Section 8: Plumbing System If an anode rod is mostly eaten away, replace it with a new one. The water heater manufacturer recommends replacement of the anode rod when consumption or weight loss is greater than 75 percent. Operating the water heater without the proper anode rod protection will decrease tank life and will void the tank manufacturer’s warranty on the tank. -
Page 129: Maintenance
Section 8: Plumbing System Close the faucet and turn on the cold water supply. As the tank fills, the air pocket will develop. Repeat this procedure as often as needed to reduce the frequency of the weeping P&T valve. Do not place a valve between the pressure and temperature (P&T) valve and the tank. -
Page 130: Faucets
Section 8: Plumbing System draining. After the water has been allowed to drain from the shower head, return it to the outside shower compartment. Any remaining water in the shower hose will drip or run out; this is not a leak but performs as intended. If you are dry camping, turn the water pump OFF. -
Page 131: Black/Grey Water System And Tanks
Section 8: Plumbing System The shower faucet includes a vacuum breaker for the shower. There are two purposes for this breaker: To prevent siphoning water through the hose from another fixture. To prevent water from being retained in the hose. The showerhead DOES NOT have a complete shut-off valve (the complete shut-off is at the faucet). -
Page 132: Black/Grey Water Holding Tanks
Section 8: Plumbing System roof and must be kept clear of obstructions to perform as intended. On some models, the vent pipe may be part of the drainage system referred to as a “wet vent” (water flows downward as air flows upward in the same pipe). Some models are equipped with a side vent system. -
Page 133: Black & Grey Tank Drains
Section 8: Plumbing System Black & Grey Tank Drains There are labels on the exterior of the recreation vehicle indicating the location of the grey and black tank drains (also called dump valves). Always drain the black water holding tank first so the following grey tank waste water can help rinse any solids or debris from the dump outlet and sewer hose. -
Page 134: Black Tank Flush (If So Equipped)
Section 8: Plumbing System Black Tank Flush (If So Equipped) The black tank flush (no fuss flush) inlet is typically located on the utility center panel. The location may vary depending on your model. The inlet color may be either white or black. Attach a garden hose (connected to a pressurized fresh water source) to the black tank flush inlet. - Page 135 Section 8: Plumbing System +12VDC heaters will operate. This can result in the tanks freezing. The red light on the command center tank switch does not necessarily indicate that ALL heaters are operating; it is a warning that the heater circuit is ON. The tank heater switch should be turned ON: When liquid is present in the holding tanks and the outside temperature approaches and maintains freezing conditions 35°F (2°C) or colder.
- Page 136 Section 8: Plumbing System Flush the toilet and allow at least two gallons (8 liters) of water to flow into the holding tank. Cleaning & Maintenance The toilet should be cleaned regularly for maximum sanitation and operational efficiency. For detailed information refer to the manufacturer’s operator manual. Maintenance Record Table of Contents...
-
Page 137: Air Conditioner
Section 9: Heating and Cooling Air Conditioner The air conditioning system is controlled by a thermostat. Cooled air enters the RV through the grill. Make sure you have sufficient power available before operating the air conditioner. Do not operate the air conditioner without the return air filter. Operating the system without the filter allows the lint and dirt that is normally stopped by the filter to accumulate on the cooling coil of the air conditioner. -
Page 138: Furnace
Section 9: Heating and Cooling rain sensor that will close the vent automatically when it rains. The rain sensor can be turned on/off by holding the DOWN button for 3 seconds. Furnace The furnace installed in your recreation vehicle is controlled by a 12-volt DC thermostat. Depending on your model, there may be up to two thermostats enabling you to control the temperature to your comfort level. -
Page 139: Microwave
Section 10: Appliances Microwave To prevent damage, remove the turntable from the microwave when traveling. Make sure you are connected to a 120-volt power source. Never use the microwave cavity for storage. The microwave cavity should always be empty when not in use. For details on operation, cleaning and safety information, refer to the manufacturer’s user guide. -
Page 140: Cooktops; Range & Oven (If So Equipped)
Section 10: Appliances Cooking With Propane (If So Equipped) See the Propane System Section for important safety instructions. Refer to the manufacturer’s owner’s manual for detailed operating and safety instructions for all propane appliances. Cooktops; Range & Oven (if so equipped) For detailed operating and safety information, refer to the manufacturer’s user guide. -
Page 141: Gas Drop-In Cooktops (If So Equipped)
Section 10: Appliances Do not use aluminum foil on the electric range cooktop, as this material will damage the cooktop surface if it melts. Do not use aluminum foil under any circumstances on the electric range cooktop. Gas Drop-In Cooktops (if so equipped) Depending on your model, it may be equipped with either a 2 burner or 3 burner cooktop. -
Page 142: Refrigerator
Section 10: Appliances Whenever the stove in the RV is being used: The range hood MUST be turned on, and the inner flap MUST be unsnapped and free to move. Failure to do so can create an asphyxiation hazard by restricting air flow to this vent. Refrigerator The refrigerator is not intended for quick freezing or cooling. -
Page 143: Cleaning The Interior
Section 10: Appliances Converter output (12VDC) is not intended for normal operation of the 3-way refrigerator. When the camping trailer is parked and the power cord is plugged in, set the 3-way refrigerator to “AC power.” The “DC mode” is to be used only when traveling and will pull power from the auxiliary battery charge line (if so equipped). - Page 144 Section 10: Appliances steel cleaner. A spray-on stainless steel cleaner works best. IMPORTANT: Do not allow the Stainless Steel Cleaner and Polish to come into contact with any plastic parts such as the trim pieces, dispenser covers or door gaskets. If unintentional contact does occur, clean plastic part with a sponge and mild detergent in warm water.
-
Page 145: Hdtv Antenna/Satellite System(S)
Section 11: Electronics HDTV Antenna/Satellite System(s) Your recreation vehicle may be equipped with an exterior amplified high definition TV antenna. The antenna comes equipped with a signal meter and a power injector to aid in receiving the strongest possible signal when tuning in HDTV stations. -
Page 146: Exterior Entertainment Center (If So Equipped)
Section 11: Electronics Antenna Power Supply (If So Equipped) For good station reception, the antenna power supply must be turned ON to view local television stations. Turning the antenna power supply ON sends 12-volt DC through the cable to the TV roof antenna. The voltage energizes the transistors in the antenna head amplifier. -
Page 147: Cleaning The Interior
Section 12: Interior Cleaning The Interior To keep the value of your recreation vehicle, perform regular maintenance using the proper materials and procedures. Using the wrong cleaner may result in damage to the surfaces in your vehicle. Check with the manufacturer’s information for the recommended cleaning agent. -
Page 148: Cabinetry & Tables
Section 12: Interior Day/Night Shades: Clean with a mild cleaning solution using a sponge or paper towel. Wipe down with water after cleaning and dry thoroughly before raising the shade. Do not use spot remover, household cleaners or detergents to remove soiled spots, as these may cause damage to fabric or loss of color from fading. -
Page 149: Abs Plastics
Section 12: Interior ABS Plastics Dust and wipe clean with soft, damp cloth or chamois, wiping gently. Do not use gritty or abrasive particle soaps or scouring compound to clean ABS plastic. Avoid using “citrus” or biodegradable cleaners that contain “D-Limonene” as they may damage plastic materials. Sofa &... -
Page 150: Dream Dinette Unlocked
Section 12: Interior Trifold Sofa The Trifold Sofa offers very similar features to the traditional hide-a-bed. The following illustrations detail converting the sofa into a bed. Booth Dinette (If So Equipped) The dinette is designed to seat up to four adults. Depending on your model, there may be a storage area in the dinette bench. -
Page 151: Pantry Or Hutch (If So Equipped)
Section 12: Interior free standing dinette chairs be fastened securely at the dinette table, and the folding chairs be secured in a closet or storage area Do not allow occupants to occupy the free standing dinette chairs while the motor home is in transit. -
Page 152: Flooring
Section 12: Interior Solid surface countertops (if so equipped) Soapy water, ammonia based cleaners (not window cleaners as they can leave a waxy build up that may dull the surface) or commercially available solid surface cleaners will remove most dirt and residue from all types of finishes. A damp cloth followed by a dry towel will remove watermarks. -
Page 153: Ceiling Fabric
Section 12: Interior Attach the black plastic hook on the passenger side of the drape, to the loop on the wall behind the passenger’s seat. Attach the Velcro® at the top edge of the drape to the corresponding Velcro® on the cab area roof (above the driver’s and passenger’s doors). - Page 154 Section 12: Interior Notes: Maintenance Record Table of Contents...
-
Page 155: Cleaning The Exterior
Section 13: Exterior Cleaning The Exterior To protect your recreation vehicle’s exterior finish, wash it often and thoroughly. For recreation vehicles with painted exterior graphics: If desired you may wash and wax your vehicle 60 days after purchase. The exterior paint does need time to cure before any wax is applied to the exterior surface. - Page 156 Section 13: Exterior stains. They can be dissolved using ammonia based glass cleaner, warm soapy water and a little “elbow grease”. Once again, after removing stubborn stains immediately rinse with clean water. Drying the recreation vehicle is just as important as washing your vehicle. Tap and well water contain many chemicals that could water stain your vehicle’s finish.
-
Page 157: Frame
Section 13: Exterior Do not use waxes containing high-abrasive compounds. Such waxes remove rust and stains effectively from the paint work, but they are also harmful to the luster of the painted surface since they scrape off the coating. Further, they are detrimental to glossy surfaces, such as the grille, garnish, moldings, etc. -
Page 158: Exterior Roof & Sidewall Vents
Section 13: Exterior the alignment inspected periodically to maintain vehicle steering performance and prevent uneven tire wear as part of your normal maintenance. NOTE: Always have the alignment checked and adjusted by a qualified shop with the proper equipment to handle heavy vehicles. NOTE: A road test by the dealer should be included as part of the pre-delivery inspection. - Page 159 Section 13: Exterior If your recreation vehicle is equipped with a roof ladder, do not leave items attached to it while traveling. The ladder weight capacity should not be exceeded (see ladder capacity label). DO NOT exceed this weight limit.
- Page 160 Section 13: Exterior To check the exterior sidewall sealants, use a stepladder placed safely alongside the vehicle. Do not prop a ladder against the body of the motor home as it may damage the exterior finish Maintenance Record Table of Contents...
-
Page 161: Travel Checklist
Section 14: Additional Information Travel Checklist Following is a preliminary list of items that need to be checked before leaving your home or campsite. This is a general list, which you may want to customize as you determine your own needs. Refer to your Chassis Guide for information on chassis pre-trip inspections and maintenance. - Page 162 Section 14: Additional Information Turn off propane tanks (if so equipped). Empty black and gray holding tank, rinse as needed. Retract any awnings and secure them for transport. Close all the roof vents. Close windows & latch blinds. Disconnect the cable TV and phone hookups and lower the TV antenna. Turn off the interior lights, water heater, furnace and water pump.
- Page 163 Section 14: Additional Information Turn OFF the motor home 12-volt battery disconnect switch. Turn OFF the inverter mode at remote. Disconnect the batteries to prevent battery discharge. Remove all perishables from the refrigerator/freezer. Defrost, wash and dry the interior of the refrigerator/freezer and prop (or block) the doors open so air can circulate and prevent mildew.
- Page 164 Section 14: Additional Information Notes: Maintenance Record Table of Contents...
-
Page 165: Featured Components Quick Reference Chart
Your recreation vehicle may be equipped with some of the items listed below. This is a partial listing and it is not intended to cover all components. All information is the latest available at the time of publication. Jayco reserves the right to change any of the following information without notice. - Page 166 Section 15: Additional Information Toilet Thetford Corp. www.thetford.com Water Heater, Tank DSI Atwood Greenbrier www.atwoodmobile.com Water Heater, Tankless Girard Systems www.greenrvproducts.com Shurflo East www.shurflo.com Water Pump, 12V Maintenance Record Table of Contents...
-
Page 167: Vehicle Maintenance Record
Section 15: Additional Information Vehicle Maintenance Record Make: Model: Model Year: Vehicle Serial#: Engine: Engine Serial#: Service Performed Mileage Work Performed Notes Date Maintenance Record Table of Contents... - Page 168 Section 15: Additional Information Notes: Maintenance Record Table of Contents...
- Page 169 Section 15: Additional Information Jayco Ownership Notification Fax Form To: (800) 825-7876 ATTENTION! Federal record keeping laws require that we maintain a file of owners of our product. Your cooperation in filling out this from will be appreciated. □ □...
Need help?
Do you have a question about the Greyhawk 2018 and is the answer not in the manual?
Questions and answers