Table of Contents
Advertisement
Available languages
Available languages
WARNING! IF THE INFORMATION IN THIS MANUAL IS NOT FOLLOWED EXACTLY, A FIRE
MAY RESULT CAUSING PROPERTY DAMAGE, PERSONAL INJURY OR LOSS OF LIFE.
Made in China
Comfort Home Products, Inc.
12256 William Penn Hwy, Ste A
Huntingdon, PA 16652
UL 2021. FIXED AND LOCATION –DEDICATED ELECTRIC ROOM HEATERS
CUSTOMER: PLEASE RETAIN THIS MANUAL FOR FUTURE USE
WALL MOUNT QUARTZ INFRARED
Operator's Manual
DURA HEAT PHONE NUMBER:
DO NOT DISCARD THIS MANUAL
ELECTRIC HEATER
QWH2100
FOR YOUR SAFETY
DO NOT STORE
OR USE GASOLINE OR
OTHER FLAMMABLE VAPORS
OR LIQUIDS
IN THE VICINITY OF THIS OR
ANY OTHER ELECTRIC APPLIANCE
http://www.worldmkting.com.com
(814) 643-1775
Advertisement
Table of Contents

Related Manuals for Comfort Glow QWH2100


Summary of Contents for Comfort Glow QWH2100
- Page 1 WALL MOUNT QUARTZ INFRARED ELECTRIC HEATER QWH2100 Operator's Manual WARNING! IF THE INFORMATION IN THIS MANUAL IS NOT FOLLOWED EXACTLY, A FIRE MAY RESULT CAUSING PROPERTY DAMAGE, PERSONAL INJURY OR LOSS OF LIFE. FOR YOUR SAFETY DO NOT STORE OR USE GASOLINE OR...
-
Page 2: Important Instructions
IMPORTANT INSTRUCTIONS Read all instructions in this guide before using your Heater. This product is intended for indoor residential, office and personal shop use only, not for industrial or other commercial applications. Use only with electrical wiring that is in good working order and that meets applicable codes and ordinances. If you have any questions whether your wiring is adequate, consult a qualified electrician.: 1. - Page 3 ALWAYS OBSERVE THESE SAFETY PRECAUTIONS WHEN OPERATING YOUR ELECTRIC HEATER ALWAYS Read all instructions before operating. ALWAYS Locate your electric heater away from furniture or loose hanging drapes. ALWAYS Keep the grill away from walls or drapes so as not to block the air intake. (If applicable) ALWAYS Unplug electric heater when not in use.
-
Page 4: Specifications
IMPORTANT SPECIFICATIONS Voltage 120V AC 60HZ; Heating Power 1500 Watts/12.5 Amps Dimensions 17.32” Wide x 4.49” Deep x 19.21” High Weight 10.6 Lbs Grounded Outlet Over-Heat safety feature WALL MOUNTING REQUIRED LOCATING HEATER: This heater is designed to be mounted on a wall only. It will not operate as a freestanding heater and should not be modified to do so. -
Page 5: Installation
INSTALLATION MINIMUM CLEARANCES TO COMBUSTABLES LEFT/RIGHT BOTTOM FRONT REAR *12 Inches 36 Inches 36 Inches 36 Inches 0 Inches Top clearance is from top of the heater to ceiling or other combustible material Bottom clearance is from the bottom of heater to surface of carpet, tile or other combustible material. - Page 6 INSTALLATION Step 1 (Figure 1) DRY WALL: Using the screws and wall anchors provided install into drywall as shown. Check to insure screws are secure. STUD WALL: Using the screws provided install into drywall as shown. Check to insure screws are secure. CONCRETE WALL: Drill ¼...
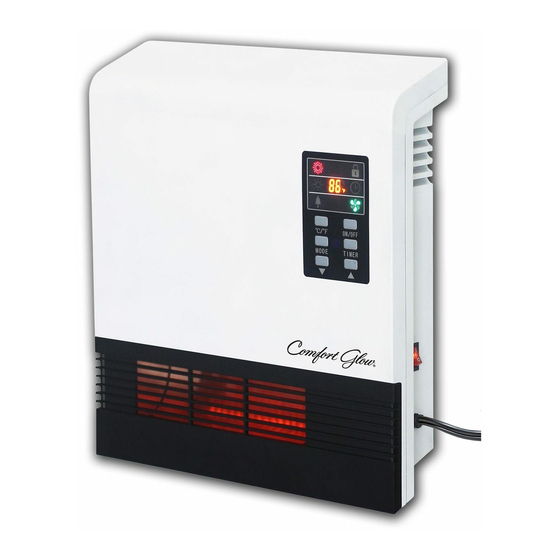
- Page 7 Requires 2 AAA batteries not included 1. Digital display: Indicates temperature or time. 2. High Mode indicator light: Will be lit when High Heat mode is engaged. 3. Low Mode indicator light: Will be lit when Low Heat mode is engaged. 4.
-
Page 8: Operation
OPERATION 1. Turn Main Power switch on rear of appliance to On. Main Power Switch 2. Start and select working mode Turn the heater on by pressing the ON/OFF button on the control panel or by pressing the Power button on the supplied remote control. - Page 9 3. Setting Desired Temperature Adjust the desired temperature by pressing the Up/Down arrows on the control panel or remote control. Desired temperature options vary from 59° to 86°,or from 15°C to 30°C Once you have chosen the desired temperature, the heater will remain on until the room temperature increases to the temperature on the digital display.
- Page 10 The digital display changes from the “temperature” to the “hours” option for the timer. Continue to press the timer button to change the number of hours you would like the heater to run before powering itself off .The hour options for the timer are from 0 to 12 hrs.
-
Page 11: Care And Maintenance
CARE AND MAINTENANCE Turn off the power switch in the rear of the unit. • Unplug the unit and let it cool completely. • • To keep the heater clean, the outer shell may be cleaned with a soft, damp cloth. You may use a mild detergent if necessary. - Page 12 ELECTRIC HEATER WARRANTY LIMITED WARRANTY: A limited warranty is extended to the original purchaser of this heater and warrants against malfunction due to manufacturing defects for a period of (1) one year from the date of retail purchase. Please read and follow all details noted below.
- Page 13 LIMITATIONS: This warranty does not imply or assume any responsibility for consequential damages that may result from the use, misuse, or the lack of routine maintenance of this heating appliance. A cleaning fee and the cost of parts may be charged for appliance failures resulting from lack of maintenance. This warranty does not cover claims, which do not involve defective workmanship or materials.
- Page 14 MURAL CUARZO calentador eléctrico infrarrojo QWH2100 ¡ADVERTENCIA! SI LA INFORMACION EN ESTE MANUAL no ES SEGUIDA EXACTAMENTE, UN RESULTADO del FUEGO mayo que CAUSA DAÑO de PROPIEDAD, HERIDA O PERDIDA PERSONALES DE la VIDA. PARA SU SEGURIDAD No ALMACENE ni UTILICE GASOLINA ni OTROS...
-
Page 15: Instrucciones Importantes
INSTRUCCIONES IMPORTANTES POR FAVOR LEA Y GUARDE ESTAS INSTRUCCIONES DE SEGURIDAD Cuando se usan aparatos eléctricos, siempre las precauciones básicas deben ser seguidas para reducir el riesgo de incendio, descarga eléctrica y lesiones a personas, incluyendo las siguientes: 1. Lea todas las instrucciones antes de usar el calentador. 2. - Page 16 SIEMPRE OBSERVE que ESTAS MEDIDAS DE SEGURIDAD AL OPERAR SU CALENTADORA ELECTRICA Siempre Lea todas las instrucciones antes de operarlo. Siempre Coloque su calentador eléctrico lejos de los muebles o cortinas colgantes. Siempre Mantenga la parrilla lejos de las paredes o lascortinas para no bloquear la entrada de aire. (Si procede) Siempre Desenchufe el calentador eléctrico cuando no esté...
- Page 17 IMPORTANTE PRESUPUESTO Voltaje 120V AC 60HZ; Energía de la calefacción 1500 Watts/12.5 Amps Dimensiones 17.32” Wide x 4.49” Deep x 19.21” High Peso 10.6 Lbs Enchufe de conexión a tierra Característica de seguridad del sobrecalentamiento REQUIERE MONTAJE EN LA PARED UBICACIÓN DEL CALENTADOR: Este calentador solo está...
-
Page 18: Instalación
INSTALACIÓN DISTANCIAS MÍNIMAS CON RESPECTO A COMBUSTIBLES IZQUIERDA PARTE PARTE FRENTE PARTE DERECHA SUPERIOR INFERIOR TRASERA *12 Pulgadas 36 Pulgadas 36 Pulgadas 36 Pulgadas 0 Pulgadas El espacio libre superior es desde la parte superior del calentador hasta el techo u otro material combustible El espacio libre inferior es desde la parte inferior del calentador hasta la superficie de la moqueta, los azulejos u otro material combustible. - Page 19 INSTALACIÓN Paso 1 (Figura 1) PANEL DE YESO: Instale en un panel de yeso tal como se muestra, utilizando los tornillos y los anclajes que se proporcionan. Controle para verificar que los tornillos estén asegurados. PARED DE ENTRAMADO: Usando los tornillos provistos instalar en paneles de yeso como se muestra.
- Page 20 Requiere 2 pilas AAA no incluidas 1. Pantalla digital:Indica temperatura o la hora. 2. Luz indicadora de modo Alto: Se iluminará cuando el modo Alto de calefacción esté activado. 3. Luz indicadora de modo Bajo: Se iluminará cuando el modo Bajo de calefacción esté activado. 4.
-
Page 21: Operación
OPERACIÓN 1. Encienda el interruptor de alimentación principal en la parte posterior del aparato. Interruptor de Alimentación 2. Inicio y selección del modo de funcionamiento Presione el botón de encendido ON/OFF en el panel de control o en el control remoto suministrado para encender el calefactor. - Page 22 3. Ajuste de la temperatura deseada Presione las flechas hacia arriba o abajo en el panel de control o en el control remoto para establecer la temperatura deseada. Las opciones temperaturas varían desde 59℉ a 86℉, o desde 15°C a 30°C. Una vez seleccionada la temperatura deseada, el calefactor permanecerá...
- Page 23 La pantalla digital cambiará de la opción de "temperatura" a "horas" para establecer el temporizador. Siga presionando el botón del temporizador para cambiar la cantidad de horas que desea mantener en funcionamiento el calefactor. Las opciones de horas van de 0 a 12 horas (en incrementos de 1 hora). Los incrementos de horas seleccionadas parpadearán unos segundos, luego volverá...
-
Page 24: Cuidado Y Mantenimiento
Para desbloquear, presione los botones de Subir Temp. y Bajar Temp. simultáneamente durante 3 segundos. Escuchará un pitido. El panel de control y el control remoto se podrán volver a utilizar. CUIDADO Y MANTENIMIENTO Apague el interruptor de alimentación en la parte posterior de la unidad. •... - Page 25 GARANTIA ELECTRICA PORTATIL de CALENTADORA La GARANTIA LIMITADA: Una garantía limitada es extendida al comprador original de esta calentadora y autorizaciones contra falla debido a defectos industriales por un período de (1) un año de la fecha de la compra de la venta al por menor. Lea por favor y siga todos los detalles notados abajo. Los RECLAMOS MANEJARON DE LA SIGUIENTE MANERA: - No REGRESA a COLOCAR DE la COMPRA - Contacta nuestro Departamento de Servicio de Costomer en 1-800-776-9425.
- Page 26 Las LIMITACIONES: Esta garantía no implica ni asume responsabilidad para daños consecuentes que pueden resultar del uso, del maltrato, o de la falta de mantenimiento rutinario de este aparato de la calefacción. Un honorario de limpieza y el costo de partes pueden ser cargados para fracasos de aparato que resultan de la falta de mantenimiento. Esta garantía no cubre reclamos, que no implican habilidad ni materiales defectuosos.
-
Page 27: Consignes Importantes
MURALE QUARTZ INFRAROUGE RÉSISTANCE ÉLECTRIQUE QWH2100 ATTENTION: LE NON-RESPECT DES INFORMATIONS CONTENUES DANS CE MANUEL PEUT RÉSULTER EN UN INCENDIE CAUSANT DES DOMMAGES MATÉRIELS, DES LÉSIONS CORPORELLES OU LA PERTE DE VIES. POUR VOTRE SÉCURITÉ POUR VOTRE SÉCURITÉ NE PAS UTILISER DE GAZ NI AUCUNE AUTRE VAPEUR Comfort Home Products, Inc. - Page 28 S'IL VOUS PLAÎT LIRE ET CONSERVER CES CONSIGNES DE SÉCURITÉ IMPORTANTES Lorsque vous utilisez des appareils électriques, des précautions de base doivent toujours être suivies pour réduire le risque d'incendie, de choc électrique et de blessures corporelles, y compris ce qui suit: 1 Lisez toutes les instructions avant d'utiliser cet appareil.
- Page 29 TOUJOURS SUIVRE CES PRÉCAUTIONS DE SÉCURITÉ LORS DE L'UTILISATION DE CE POÊLE ÉLECTRIQUE TOUJOURS Lire toutes les instructions avant utilisation. TOUJOURS Placer votre poêle électrique à l'écart des meubles ou des draps pendants. TOUJOURS Tenir la grille arrière du poêle éloignée des murs ou des draps pour ne pas obstruer la bouche d'aération.
-
Page 30: Caractéristiques
IMPORTANT CARACTÉRISTIQUES Tension 120V AC 60HZ; Puissance de chauffage 1500 Watts/12.5 Amps Dimensiones 17.32” Wide x 4.49” Deep x 19.21” High Poids 10.6 Lbs Outlet Grounded dispositif de sécurité Over-Heat MONTAGE MURAL REQUIS EMPLACEMENT DE L’APPAREIL CHAUFFANT : Cet appareil chauffant est conçu pour être monté sur un mur seulement. Il ne fonctionnera pas comme appareil chauffant autoportant et ne doit pas être modifié... -
Page 31: Installation
INSTALLATION DÉGAGEMENT MINIMAL DES COMBUSTIBLES GAUCHE DESSUS AVANT ARRIÈRE DROITE *12 Pouces 36 Pouces 36 Pouces 36 Pouces 0 Pouces Le dégagement supérieur est l’espace requis entre le dessus de l’appareil et le plafond ou autre matière combustible Le dégagement inférieur est l’espace requis entre le bas de l’appareil et la surface du plancher en tapis, en tuile ou autre matière combustible. - Page 32 INSTALLATION Étape 1 (Figure 1) CLOISON SÈCHE : Utilisez les vis et les ancrages muraux fournis et installez sur la cloison sèche comme illustré. Vérifiez que les vis soient vissées solidement. COLOMBAGE : À l'aide des vis fournies installer dans une cloison sèche comme indiqué.
- Page 33 2 piles AAA requises non incluses 1. Affichage numérique : indique la température ou le temps. 2. Témoin indicateur du mode Élevé : sera allumé lorsque le mode de chaleur élevé est activé. 3. Témoin indicateur du mode Bas : sera allumé lorsque le mode de chaleur bas est activé.
-
Page 34: Opération
OPÉRATION 1. Mettre l’interrupteur d’alimentation principal à l’arrière de l’appareil à « ON ». Interrupteur d’alimentation Commencer et sélectionner le mode de fonctionnement Allumez l'appareil de chauffage en appuyant sur le bouton ON/OFF sur le panneau de commande ou en appuyant sur le bouton Alimentation sur la télécommande fournie. - Page 35 3. Réglage de la température voulue Ajustez la température voulue en appuyant sur les flèches Haut/Bas sur le panneau de commande ou sur la télécommande. Les options de température varient de 59 ℉ à 86 ℉, ou de 15 °C à 30 °C. Une fois que vous avez choisi la température voulue, l'appareil de chauffage restera allumé...
- Page 36 Les incréments d'heure sélectionnés clignoteront pendant quelques secondes, puis reviendront au réglage de la température voulue. Le témoin indicateur de la minuterie restera allumé aussi longtemps que la minuterie est réglée. L'appareil de chauffage s'éteindra lorsque que l'horloge de chauffage interne comptera à rebours les incréments que vous avez réglés.
- Page 37 SOIN ET ENTRETIEN Fermez l'interrupteur à l'arrière de l'appareil • Déconnectez l'appareil et laissez-le refroidir complètement. • • Pour garder l'appareil de chauffage propre, la couche extérieure peut être nettoyée avec un chiffon humide et doux. Vous pouvez utiliser un détergent doux, si nécessaire. Après le nettoyage, séchez l'appareil avec un chiffon doux.
- Page 38 GARANTIE DU POÊLE ÉLECTRIQUE PORTABLE GARANTIE LIMITÉE: Une garantie limitée est remise à l'acheteur original de ce poêle et le couvre contre le disfonctionnement lié aux défauts de fabrication pendant une période d'un (1) an à compter de la date d'achat du produit. PROCÉDURE DE REVENDICATION: NE PAS RENVOYER LE PRODUIT À...
- Page 39 RESTRICTIONS: Cette garantie n'implique ni ne suppose aucune responsabilité pour les dommages collatéraux pouvant résulter de l'utilisation, de la mauvaise utilisation, ou du manque d'entretien régulier de cet appareil de chauffage. Un frais d'entretien ainsi que le coût des pièces peuvent être facturés pour les défauts de fonctionnement de l'appareil résultant du manque d'entretien.
Need help?
Do you have a question about the QWH2100 and is the answer not in the manual?
Questions and answers