Table of Contents
Advertisement
Quick Links
TFT
inch FHD
24
Description
Important Safety Notice--------------------------------------2
Technical Data--------------------------------------------- ----3
Installation----------------------------------------------------4~5
Troubleshooting---------------------------------------------6~7
On Screen Display------------------------------------------8~9
Lock/unlock, Aging,Factory mode-------------------------10
Mechanical Instructions ------------------------------12~14
Color adjustment --------------------------------------------15
F AQs (Frequently Asked Questions)---------------16~17
Electrical instruction ----------------------------------18~19
Service Tool-----------------------------------------------20~21
DDC Instructions & Serial Number -----------------22~28
DDC DATA -----------------------------------------------29~30
Firmware Upgrade for CPU-
-
-----------------------------------33
Wiring Diagram----------------------------------------------34
ANY PERSON ATTEMPTING TO SERVICE THIS CHASSIS MUST FAMILIARIZE HIMSELF WITH THE CHASSIS
AND BE AWARE OF THE NECESSARY SAFETY PRECAUTIONS TO BE USED WHEN SERVICING ELECTRONIC
EQUIPMENT CONTAINING HIGH VOL TAGES.
CAUTION: USE A SEPARATE ISOLATION TRANSFORMER FOR THIS UNIT WHEN SERVICING.
Published by Philips Consumer Lifestyle Copyright reserved Subject to modification
LCD Colour Monitor
241B4LPCS/00
241B4LPCS/00(AP)
241B4LPCS/01
241B4LPCB/00
241B4LPCB/00(AP)
241B4LPCB/01
241B4LPCB/27
241B4LPCB/69
241B4LPCB/75
241B4LPCB/25
TABLE OF CONTENTS
Page
---------------------------------11
------------------------31~32
SAFETY
REFER TO BACK COVER FOR IMPOR T ANT SAFETY GUIDELINES
Chassis:
Description
Block Diagram------------------------------------------------35
Scaler Diagram & C.B.A. ------------------------------36~41
Power
Diagram & C.B.A. ------------------------------42~44
LED Diagram & C.B.A.--------- -------------------------47~48
IR
Diagram & C.B.A.--------- -------------------------49~50
Jack
Diagram & C.B.A.--------- -------------------------51~52
Tx
Diagram & C.B.A.--------- -------------------------53~54
General product specification------------------------57~76
Exploded V iew -----------------------------------------------77
Spare/
Recommended P
arts List-------------------------78
PCBA photos---------------------------------------------------79
Repair tips-------------------------------------------------80~81
Repair Flow chart----------------------------------------82~83
Safety Test Requirments------------------------------------84
BZL&CTRL BD Replace ---------------------------------------85
Auto Color & User reset --------------------------------86~87
NOTICE
JMar 06 2012
MERIDIAN 4
Horizontal frequencies
30 - 8 3 kHz
Page
GB
Advertisement
Chapters
Table of Contents
Troubleshooting

Related Manuals for Philips 241B4LPCS/00


Summary of Contents for Philips 241B4LPCS/00
-
Page 1: Table Of Contents
AND BE AWARE OF THE NECESSARY SAFETY PRECAUTIONS TO BE USED WHEN SERVICING ELECTRONIC EQUIPMENT CONTAINING HIGH VOL TAGES. CAUTION: USE A SEPARATE ISOLATION TRANSFORMER FOR THIS UNIT WHEN SERVICING. REFER TO BACK COVER FOR IMPOR T ANT SAFETY GUIDELINES Published by Philips Consumer Lifestyle Copyright reserved Subject to modification JMar 06 2012... -
Page 2: Important Safety Notice
SERVICE MANUAL. recommended by Philips must f irst sati sfy himself thoroughly that neither his safety nor the saf e operation of the equipment will be jeopardized by the service method sel ected. -
Page 3: Technical Data
Technical Data Scanning frequencies Ambient temperature: 0 C - 40 C Power input connection Power management Mode VSYN Video Pwr-con Indication Rec. time Susceptibility of display to external environment... -
Page 4: Installation
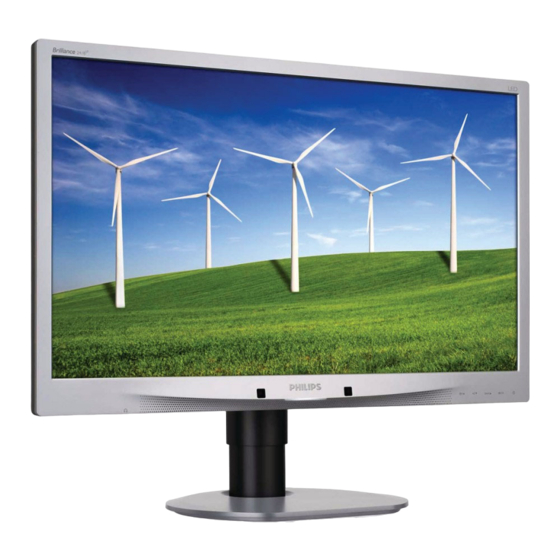
241B4LP LCD Installation Front View Product Description Accessory Pack Unpack all the parts Connecting to Your PC 1) Connect the power cord to the back of the monitor firmly. (Philips has pre-connected VGA cable for the first installation. Rear View... -
Page 5: Troubleshooting
241B4LP LCD Troubleshooting... -
Page 6: Troubleshooting
241B4LP LCD Troubleshooting... -
Page 7: On Screen Display
On-Screen Display Description of the On Screen Display What is the On-Screen Display? Basic and simple instruction on the control keys. - Page 8 On-Screen Display The OSD Tree...
-
Page 10: Philips Pixel Defect Policy
Philips Pixel Defect Policy Philips' Flat Panel Monitors Pixel Defect Policy dark dot Proximity of Pixel Defects Pixel Defect Tolerances Pixels and Sub pixels ACCEPTABLE BRIGHT DOT DEFECTS LEVEL MODEL 241B4LP(Y) Types of Pixel Defects bright dot ACCEPTABLE BLACK DOT DEFECTS... -
Page 11: Mechanical Instructions
Mechanical Instruction... - Page 12 The locking-latch of FFC cable’s Audio bd screw*1...
- Page 18 (optional for 241S4L / 241S4LA / 241S4LC / 241B4LP ) Support 241SB4 support Pixel Rate Horizontal Vertical V_Total Polarity Auto Resolution Timing ( MHz ) ( KHz ) ( Hz ) ( Line ) ( H / V ) 640x350/70 25.175 31.469 70.086...
-
Page 19: Color Adjustment
White color adjustment Product specification Production alignment spec. Quality Inspection specification:... - Page 21 V4.54...
- Page 22 241B4LP LCD DDC Instructions DDC Data Re-programming In case the DDC data memory IC or main EEPROM which storage all factory settings were replaced due to a defect, the serial numbers have to be re-programmed "Analog DDC IC, Digital DDC IC & EEPROM". It is advised to re-soldered DDC IC and main EEPROM from the old board onto the new board if circuit board have been replaced, in this case the DDC data does not need to be re-programmed.
- Page 23 241B4LP LCD DDC Instructions 5. Connect and Mains cord to Monitor as shown in Fig.2. Fig.2 Pin assignments: A. 15-pin D-Sub Connector PIN No. SIGNAL PIN No. SIGNAL DDC +3.3V or +5V Green/ SOG Logic GND Blue Sense (GND) Sense (GND) Bi-directional data Cable Detect (GND) H/H+V sync...
-
Page 24: Ddc Instructions
241B4LP LCD DDC Instructions 6. Setup the Philips-IMS EDID Tools program Step 1: Open Q-EDID Software into your folder as shown in Fig.3. and Fig.4. V030 Fig.3 Fig.4... - Page 25 241B4LP LCD DDC Instructions Step 2: Press “Open File” then choose 241B4LP DDC FILE Fig.5...
- Page 26 241B4LP LCD DDC Instructions Step 3 : Load DDC file success as shown in Fig. 6 . Fig.Step 4 : update Serial number and press enter to correct S/N number shown as Fig.7 . Fig.7...
- Page 27 241B4LP LCD DDC Instructions Step 5 : Press “RUN” to write EDID and serial number shown as Fig.8 . Fig.8 Step 6 : EDID and serial number update success shown as Fig.9 Fig.9...
-
Page 28: Serial Number Definition
241B4LP LCD DDC Instructions 8. Press “Read EDID” to read EDID and serial number shown as Fig.10 . and check Serial number is the same as we set. Note: If not the same, please rewrite EDID S/N again. Fig.10 Serial Number Definition... -
Page 29: Ddc Data
Report information Date generated... 2011/5/31 --------------------------- Software revision..2.11.0.752 Raw data....Monitor #1 [Real-time 0x0021] 00,FF,FF,FF,FF,FF,FF,00,41,0C,B2,08,01,00,00,00,18,15,01,03,0 Model name....241BLP E,35,1E,78,CE,92,65,A6,55,55,9F,28, Manufacturer..... Philips ......Plug and Play ID..PHL08B2 0D,50,54,BF,EF,80,71,40,81,C0,81,80,95,00,B3,00,01,01,01,01, Serial number.... CS0A123456789 01,01,02,3A,80,18,71,38,2D,40,58,2C, Manufacture date..2011, ISO week 24 ......------------------------- 45,00,13,2B,21,00,00,1E,00,00,00,FF,00,43,53,30,41,31,32,33,3 EDID revision.... - Page 30 00A.20202020.2020006B Software revision..2.11.0.752 Raw data....--------------------------- 00,FF,FF,FF,FF,FF,FF,00,41,0C,B2,08,01,00,00,00,18,15,01, 03,80,35,1E,78,CE,92,65,A6,55,55,9F,28, Monitor #1 [Real-time 0x0011] ......Model name....241BLP 0D,50,54,BF,EF,80,71,40,81,C0,81,80,95,00,B3,00,01,01,01, Manufacturer..... Philips 01,01,01,02,3A,80,18,71,38,2D,40,58,2C, Plug and Play ID..PHL08B2 ......Serial number.... CS0A123456789 45,00,13,2B,21,00,00,1E,00,00,00,FF,00,43,53,30,41,31,32,3 Manufacture date..2011, ISO week 24 3,34,35,36,37,38,39,00,00,00,FC,00,32, ------------------------- ......
-
Page 33: Failure Mode Of Panel
241 4L Failure Mode Of Panel Quick reference for failure mode of LCD panel this page presents problems that could be made by LCD panel. It is not necessary to repair circuit board. Simply follow the mechanical Polarizer has bubbles instruction on this manual to eliminate failure by replace LCD panel. - Page 41 241B4LP LCD S c alar Diagram & C .B .A...
- Page 44 241B4LP LCD Power Diagram & C .B .A...
-
Page 46: Control Diagram & C.b
241B4LP LCD C ontrol Diagram & C .B .A. - Page 48 241B4LP LCD L D D C.B .A...
- Page 50 241B4LP LCD C ontrol Diagram & C .B .A.
- Page 52 241B4LP LCD J A C K Diagram & C .B .A.
- Page 54 241B4LP LCD T X Diagram & C .B .A.
-
Page 56: Usb Diagram & C.b
241B4LP LCD U S B Diagram & C .B .A. B4:U3 B3:U2 A5:T4 Top Side Information B4:L6 B3:L5 A5:T2 A3:T3 Y1: 845 B4:C13 B3:F2 A5:L8 A3:L9 X1: 4485 B4:R4 B3:C20 A5:L10 A3:J4 X2: 4105.71 B4:R5 B3:R9 A5:J5 A3:F4 X3: 3090 B4:R19 B3:R7 A5:J3... -
Page 57: General Product Specification
2011.01.13 UC Hsu Initial version Blue: Changes than last version Red: TBD M4 Series Quick Specification table: Rev : M4 241S4 / 241B4 24” Wide 16:9 LCD Monitor Type 2011/07/12 PHILIPS 1 of 20 Brand : Date : Page :... - Page 58 3.17 P )..............12 OWER ENSOR OPTION REFER TO UICK SPECIFICATION TABLE 3.18 S )...............................12 MART OWER OPTION Rev : M4 241S4 / 241B4 24” Wide 16:9 LCD Monitor Type 2011/07/12 PHILIPS 2 of 20 Brand : Date : Page :...
- Page 59 USCEPTIBILITY OF DISPLAY TO EXTERNAL ENVIRONMENT ...............................20 RANSPORTATION TESTS ..................20 ISPLAY DISTURBANCES FROM EXTERNAL ENVIRONMENT .....................20 ISPLAY DISTURBANCES TO EXTERNAL ENVIRONMENT Rev : M4 241S4 / 241B4 24” Wide 16:9 LCD Monitor Type 2011/07/12 PHILIPS 3 of 20 Brand : Date : Page :...
-
Page 60: Foreword
5 Horizontal Frequency Range 30~83 KHz 6 Vertical Frequency Range 56~76Hz 7 Monitor Name (13 characters max.) Philips 241SL 241S4LY 1 User visible strings on .inf file Philips 241SLY (24inch Wide LCD MONITOR 241S4LY) 2 Manufacturer ID ( EDID data) 3 Product ID, "xxxx"... -
Page 61: Scanning Frequencies
30~83 KHz 6 Vertical Frequency Range 56~76Hz 7 Monitor Name (13 characters max.) 241BLPY Panel Suppliers to offer panel specifications. Panel incoming specification: Follow Philips’ specification. AUO M240HW01 VD Type NR. : AUO M240HW01 VD Resolution : 1920 x 1080 (FHD) Outline dimensions : 556.0(H) x 323.2(V) x 11.5(D) mm... -
Page 62: Ambient Temperature
Scaler should be capable of below items. 1) Scaler must support color engine for Image enhancement feature (SmartImage) 2) Scaler must have enough memory to support PerfecTune feature and Philips OSD 3) Scaler must support SmartContras, 20M:1 SCR preferred 4) VGA signal Auto adjustment: Monitor automatically adjusts and optimizes resolution and frequency based on input signal defined by “Source”... -
Page 63: Interface
White connector thumb-operated jackscrews with transplant pin protective cover. Pin Assignment: Pin No. Description T.M.D.S. data2- T.M.D.S. data2+ T.M.D.S. data2 shield No Connect Rev : M4 241S4 / 241B4 24” Wide 16:9 LCD Monitor Type 2011/07/12 PHILIPS 7 of 20 Brand : Date : Page :... - Page 64 : Please refer to cable bundle summary file Connector type : DP1.4 type A cable-connector Pin Assignment : Rev : M4 241S4 / 241B4 24” Wide 16:9 LCD Monitor Type 2011/07/12 PHILIPS 8 of 20 Brand : Date : Page :...
-
Page 65: Timing Requirement
Timing pixel clock over H/W limitation do not support. 1. Factory preset modes and preset modes are defined in the enclosed timing table file Rev : M4 241S4 / 241B4 24” Wide 16:9 LCD Monitor Type 2011/07/12 PHILIPS 9 of 20 Brand : Date : Page :... -
Page 66: Osd/Keypad Functions
OSD Translation 8 LANGUAGES, w/o Turkish. Power On logo Power On Logo: Power On Show up Philips logo 3 seconds Change to input signal. This picture is reference only. The official drawing will send out by PM. -
Page 67: Vga Display Identification
It needs to support AUTO PIVOT function with SmartControl PC application tool. 3.14 Hot-key definition 3.15 Smart Image Rev : M4 241S4 / 241B4 24” Wide 16:9 LCD Monitor Type 2011/07/12 PHILIPS 11 of 20 Brand : Date : Page :... -
Page 68: Perfecttune
(2) Luminance setting : controls to be set to 300 nits with full screen 100 % duty cycle white signal (3) Warm up: more than 30 minutes after power on with signal supplied. Rev : M4 241S4 / 241B4 24” Wide 16:9 LCD Monitor Type 2011/07/12 PHILIPS 12 of 20 Brand : Date : Page :... -
Page 69: Color Temperature Adjustment
= 0.329 ± 0.006 5000K x = 0.345 ± 0.006 PerfecTune II y = 0.357 ± 0.006 Rev : M4 241S4 / 241B4 24” Wide 16:9 LCD Monitor Type 2011/07/12 PHILIPS 13 of 20 Brand : Date : Page :... -
Page 70: Mechanical Characteristics
Mechanical characteristics Cosmetic - Philips ID Mechanical data files - ProE files required Location of Philips logo - Per Philips make-up sheet Gap between panel and front bezel < 1. mm (Typ.) Location of Control icons - Per Philips Graphic sheet... -
Page 71: If Paint Is Used
Base / Pedestal to be Flame Retardant UL 94-HB. All major plastic parts (bezel, back cover) need to be molded from same resin. Plastic resin type selection should be referred to “plastic-Philips Pool monitor”. 5.12 Texture/Glossing of housing The texture area and texture no should follow Philips make-up sheet. -
Page 72: Product Dimension / Weight
241B4LP LCD 5.15 Product dimension / Weight ( Refer to Philips approved SHT 191/SHT560 ) 241S4L/241S4LA Unit dimension : 437*565*207 Packed unit dimension: 476*605*139 mm (WW) Net weight : 5.3kg Gross weight : 6.8kg 241S4LY/241S4LC/241B4LP/241B4LPY Unit dimension : 403*565*227 Packed unit dimension: 405*624*172 mm (WW) Net weight : 6.3 kg... -
Page 73: Pallet / Container Loading
3. Cold Drop test (for design reference) Un-package test 1. Sine vibration (operating) 2. Half sine shock test (non operation) 5.17 Pallet / Container loading (Refer to Philips approved SHT 560) Transportation standards refer to TYE-M0002 ,UAN-D1534 and UAW-0309. Air shipment - 241S4L/241S4LA... - Page 74 Truck shipment- Stacking request in different transportation for all regions except EU/UK(SHT560) A. Air shipment Air Transport Rev : M4 241S4 / 241B4 24” Wide 16:9 LCD Monitor Type 2011/07/12 PHILIPS 18 of 20 Brand : Date : Page :...
-
Page 75: Environmental Characteristics
- Air pressure : 300-1100 mBAR Note: recommend at 5 to 35 C, Humidity less than 60 % Rev : M4 241S4 / 241B4 24” Wide 16:9 LCD Monitor Type 2011/07/12 PHILIPS 19 of 20 Brand : Date : Page :... -
Page 76: Transportation Tests
Display disturbances from external environment According to IEC 801-2 for ESD disturbances Display disturbances to external environment Rev : M4 241S4 / 241B4 24” Wide 16:9 LCD Monitor Type 2011/07/12 PHILIPS 20 of 20 Brand : Date : Page :... - Page 77 241B4LP LCD...
- Page 78 41PCS AS1 AS5 ASM AB1 AB5 ABM AB9 AB7 AB6 ABB location Description PCM code Philips 12NC AUO AUO AUO AUO AUO AUO AUO AUO AUO AUO MAIN (I/F) BOARD ASS'Y 5E.1LJ01.002 POWER BOARD ASS'Y 5E.1LJ02.001 PCBA JACK BOARD ASS'Y 5E.1LJ06.001...
-
Page 79: Pcba Photos
241B4LP LCD Panel PCBA photos ITEM PCM Description LCDM24W M240HW01 VD 5F.LUDP0.011 AUO Z (AUO) 5E.1LJ01.002 MAIN (I/F) BOARD ASS'Y 5E.1LJ02.001 POWER BOARD ASS'Y 5E.1LJ26.001 LED BD ASS'Y ASSY CTRL BD 5E.1LJ03.001 (under BZL ass FRONT (under BZL BEZEL ASS'Y (Black)with 6K.1J414.001) CTRL+LED BD) 5E.1LJ06.001... - Page 80 241 4L 1.4 Attachment of SMDs 0. Warnin - Locate the SMD on the solder lands b means of twee ers and solder the component on one side. Ensure that the component is positioned All ICs and man other semi -conductors are susceptible to correctl on the solder lands (see Fi .2A).
- Page 81 More Information For more information on how to handle BGA devices visit this URL http //www.at ourservice.ce.philips.com (needs subscription). After lo in select Ma a ine then o to Workshop Information. Here ou will find Information on how to deal with BGA-ICs.
-
Page 82: Repair Flow Chart
241 4L Repair Flow Chart Bad Power Board Power Board Check Scaler Board Bad Scaler Board... - Page 83 241 4L Repair Flow Chart Check Power Board Check LCD Panel Control Board Board...
-
Page 84: Safety Test Requirments
241 4L Safet Test Re uirements 3. Equipments and Connection All units that are returned for service or repair must 3.1. Equipments pass the ori inal manufactures safet tests. Safet For example : testin re uires both Hipot and Ground Continuit - Zentech 9032 PROGRAMMABLE AUT O SAFETY testin . - Page 85 241 4L LC Philips Monitor Bezel and CTRL BD replace SOP In order to make the touch function more sensitive. For service repair, please replace the whole module. When received the monitor, either Be el or CTRL BD is out of function, please repair the whole module.
- Page 86 Philips M3 M4 Series Auto Color SOP Step 1: Setup input timing 1920*10 0 and enter factory mode press Menu Down Power buttons at the same time to turn on monitor . Step 2: Move cursor into Burn-in Mode and select to enable burn-in mode.
- Page 87 241 4L Philips M3 M4 Series User reset SOP Step 1: Turn on Monitor and Press Menu button to enter into user mode Choose Setup - Reset - Yes . Step 2: Run Au to Ad ustment...