
Related Manuals for Philips Brilliance 241B7QUPEB


Summary of Contents for Philips Brilliance 241B7QUPEB
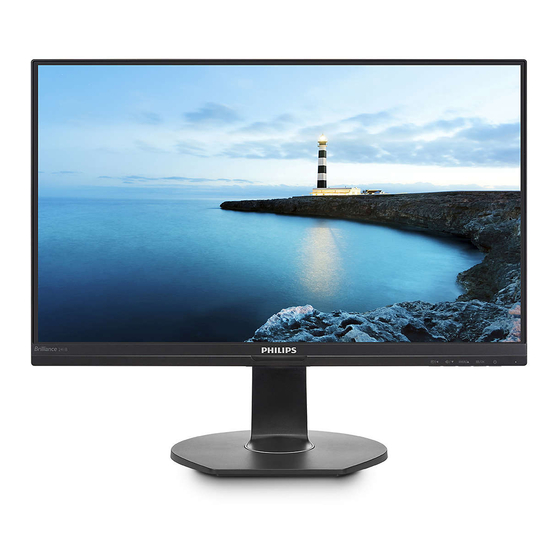
- Page 1 Brilliance 241B7 www.philips.com/welcome EN User manual Customer care and warranty 25 Troubleshooting & FAQs...
-
Page 2: Table Of Contents
6. Technical Specifications ���������������������20 6.1 Resolution & Preset Modes ... 23 7� Power Management ���������������������������24 8� Customer care and warranty ����������25 8.1 Philips’ Flat Panel Monitors Pixel Defect Policy ....25 8.2 Customer Care & Warranty ..28 9� Troubleshooting & FAQs ������������������29 9.1 Troubleshooting ......29... -
Page 3: Important
DC power cord for normal operation. • Please use approved power cord provided by Philips all the time. If your power cord is missing, please 1.1 Safety precautions and contact with your local service maintenance center. - Page 4 1. Important minute break after 50-60-minute • To avoid the risk of shock or continuous screen use is likely to permanent damage to the set, do be better than a 15-minute break not expose the monitor to dust, every two hours. Try to keep your rain, water, or excessive moisture eyes from eye strain while using the environment.
-
Page 5: Notational Descriptions
1. Important Warning 1.2 Notational Descriptions Failure to activate a screen saver, or The following subsections describe a periodic screen refresh application notational conventions used in this may result in severe “burn-in” or “after- document. image” or “ghost image” symptoms that will not disappear and cannot be Notes, Cautions and Warnings repaired. -
Page 6: Disposal Of Product And Packing Material
From the planning, design and production stages, Philips emphasizes the important of making products that can easily be recycled. At Philips, end- of-life management primarily entails This marking on the product or on participation in national take-back... -
Page 7: 2� Setting Up The Monitor
Top Victory Investments Ltd., and Top Victory Investments Ltd. is the warrantor in relation to this product. Philips and the Philips Shield Emblem are registered trademarks of Koninklijke Philips N.V. and are used under license. -
Page 8: Operating The Monitor
2. Setting up the monitor 2.2 Operating the monitor Connecting to your PC Description of the control buttons Kensington anti-theft lock USB downstream USB upstream Earphone jack Ethernet VGA input Switch monitor’s power Power Switch ON and OFF. AC power input Access the OSD menu. - Page 9 On-Screen Display. You can use On-Screen Display (OSD) is a feature this as a reference when you want to in all Philips LCD monitors. It allows an work your way around the different end user to adjust screen performance adjustments later on.
- Page 10 2. Setting up the monitor Resolution notification Height adjustment This monitor is designed for optimal performance at its native resolution, 1920 × 1080 @ 60 Hz. When the monitor is powered on at a different resolution, an alert is displayed on screen: Use 1920 ×...
-
Page 11: Remove The Base Assembly For Vesa Mounting
2. Setting up the monitor 2.3 Remove the Base Assembly Note This monitor accepts a 100mm x for VESA Mounting 100mm Before you start disassembling the VESA-Compliant mounting interface. monitor base, please follow the VESA Mounting Screw M4. Always instructions below to avoid any possible contact manufacturer for wall-mount damage or injury. -
Page 12: 3� Image Optimization
How does it work? • Office: Enhances text and dampens SmartImage is an exclusive, leading brightness to increase readability edge Philips technology that analyzes and reduce eye strain. This mode the content displayed on your screen. significantly enhances readability Based on a scenario you select, and productivity when you’re... -
Page 13: Smartcontrast
Developed for wellbeing, How does it work? Philips LowBlue Mode setting uses When you activate SmartContrast, it will a smart software technology to analyse the content you are displaying... -
Page 14: 4� Powersensor
4. PowerSensor™ detection signal for distances up to 4. PowerSensor™ 120 cm or 47 inches. (Setting 4) • Since some dark colored clothing How does it work? tends to absorb infrared signals even when the user is within 100 cm • PowerSensor works on principle or 40 inches of the display, step up of transmission and reception of... - Page 15 4. PowerSensor™ returned to its default Landscape position. Note A manually selected PowerSensor mode will remain operational unless and until it is readjusted or the default mode is recalled. If you find that the PowerSensor is excessively sensitive to nearby motion for some reason, please adjust to a lower signal strength.
-
Page 16: 5� Usb Docking Display Introduction �14
5.USB docking display Introduction 5.1 How to operate USB docking 5. USB docking display display Introduction DisplayLink Graphics Software If you are among the majority of the Installation Notebook users who do not have the In order to use your USB docking convenience of a docking station, then display, DisplayLink Graphic software is this USB docking display is your best... - Page 17 5.USB docking display Introduction 6. You will be able to see pictures on 2. Click Yes, then software start to the USB docking display after Windows install DisplayLink Core software and completes boot up process. DisplayLink Graphics installs. Controlling the display When devices are attached, an icon appears in the taskbar.
- Page 18 Windows screen resolution. DisplayLink Options to In this section of the menu, a list of devices configure Philips connected DisplayLink devices will appear. 241B7QU device Each of these devices has its own sub- configuration menu. These Submenu options are covered in the table below.
- Page 19 5.USB docking display Introduction Menu Option Sub-menu Option Description Notebook Display Switches off the display of the notebook and makes the DisplayLink display the main display. Note: This option will only appear when 1 DisplayLink USB screen, is connected. It will also only appear on Laptop computers.
- Page 20 5.USB docking display Introduction Setting USB docking Ethernet 3. Right click on the Realtek USB GBE Family Controller icon and click 1. Open “Network Connections” window “Enable”, now you can surf the internet. On Windows 10, Windows 8 or Windows 7, type “ncpa.cpl”...
- Page 21 5.USB docking display Introduction 2. Right click on 2 - USB Audio Device, USB docking station then click Enable Built-in earphone jack, mic in, speakers, ethernet, 1x3.0 USB upstream and 3x3.0 USB downstream makes this display a convenient and time-saving work station using only one single USB cable to connect USB 3.0 upstream/ downstream ports between display and...
-
Page 22: Technical Specifications
6.Technical Specifications 6. Technical Specifications Picture/Display Monitor Panel Type IPS Technology Backlight Panel Size 23.8" W (60.5 cm) Aspect Ratio 16:9 Pixel Pitch 0.275(H) mm x 0.275(V) mm Contrast Ratio (typ.) 1000:1 Optimum Resolution 1920 x 1080 @ 60 Hz Viewing Angle 178°... - Page 23 6.Technical Specifications Power AC Input AC Input AC Input Consumption Voltage at Voltage at Voltage at 100VAC , 60Hz 115VAC , 60Hz 230VAC, 50Hz Normal Operation 22.31W (typ.) 21.64W (typ.) 22.28W (typ.) Sleep (Standby) <0.3W <0.3W <0.3W <0.3W <0.3W <0.3W Off (AC switch) AC Input AC Input...
- Page 24 Finish Texture Note 1. This data is subject to change without notice. Go to www.philips.com/support to download the latest version of leaflet. 2. USB hub is only support mouse or keyboard to wake up the system while on power saving mode.
-
Page 25: Resolution & Preset Modes
6.Technical Specifications 6.1 Resolution & Preset Modes Maximum Resolution 1920 x 1080 @ 60 Hz (analog input) 1920 x 1080 @ 60 Hz (digital input) Recommended Resolution 1920 x 1080 @ 60 Hz (digital input) H. freq Resolution V. freq (Hz) (kHz) 31.47 720 x 400... -
Page 26: 7� Power Management
7.Power Management 7. Power Management If you have VESA DPM compliance display card or software installed in your PC, the monitor can automatically reduce its power consumption when not in use. If an input from a keyboard, mouse or other input device is detected, the monitor will 'wake up' automatically. -
Page 27: 8� Customer Care And Warranty
Pixel Defect Policy single black pixel. Other combinations of lit and dark sub pixels appear as Philips strives to deliver the highest single pixels of other colors. quality products. We use some of the industry's most advanced... - Page 28 Proximity of Pixel Defects Because pixel and sub pixels defects of the same type that are near to one another may be more noticeable, Philips also specifies tolerances for the proximity of pixel defects. Three adjacent lit sub pixels (one white pixel).
- Page 29 In order to qualify for repair or replacement due to pixel defects during the warranty period, a TFT Monitor panel in a Philips flat panel monitor must have pixel or sub pixel defects exceeding the tolerances listed in the following tables.
-
Page 30: Customer Care & Warranty
Please contact our Philips Customer Service Representative or local contact center (by Consumer care number) for more details. Philips Customer Care Center number listed below. -
Page 31: 9� Troubleshooting & Faqs
• Disconnect the monitor from mains • First, ensure that the power button power source immediately for safety on the front of the monitor is in the • Contact with Philips customer OFF position, then press it to the service representative immediately. ON position. - Page 32 Service contact information listed in may cause "burn in", also known as Important information manual and "after-imaging " or "ghost imaging", contact Philips customer service on your screen. "Burn-in", "after- representative. imaging", or "ghost imaging" is a * Functionality different according to well-known phenomenon in LCD display.
-
Page 33: General Faqs
• Shut down your computer, that the panel surface is not disconnect your old monitor and subjected to excessive shocks reconnect your Philips LCD monitor. and is protected from sharp or blunt objects. When handling the • Turn on your monitor and then turn monitor, make sure that there is on your PC. - Page 34 Can I connect my LCD monitor to image” or “ghost image” symptoms any PC, workstation or Mac? that will not disappear and cannot be Ans.: Yes. All Philips LCD monitors are repaired. The damage mentioned above fully compatible with standard is not covered under your warranty.
-
Page 35: Usb Docking Display Faqs
Q14: Where can I find Important Information manual mentioned in EDFU? Ans.: Important Information manual can be download on the Philips website support page. When my headphones are connected to 241B7QU why is there still audio after muting the audio in my notebook or... - Page 36 9.Troubleshooting & FAQs Ans.: The issue can be resolved when switching off the audio in your notebook or desktop. How can I rotate my screen when I rotate my display? Ans.: You would need to use the OSD/ OSD setting/OSD Rotate to rotate your screen.
- Page 37 This product has been manufactured by and is sold under the responsibility of Top Victory Investments Ltd., and Top Victory Investments Ltd. is the warrantor in relation to this product. Philips and the Philips Shield Emblem are regis- tered trademarks of Koninklijke Philips N.V. and are used under license.
Need help?
Do you have a question about the Brilliance 241B7QUPEB and is the answer not in the manual?
Questions and answers