PRESONUS StudioLive Series III Owner's Manual
Rackmount digital mixing
and remote i/o system with avb
Hide thumbs
Also See for StudioLive Series III:
- User manual ,
- Owner's manual (232 pages) ,
- Quick start manual (20 pages)

Related Manuals for PRESONUS StudioLive Series III


Summary of Contents for PRESONUS StudioLive Series III
- Page 1 StudioLive Series III Rack Mixers ™ Rackmount Digital Mixing and Remote I/O System with AVB Owner’s Manual ® English www.presonus.com...
-
Page 2: Table Of Contents
Technical Specifications — 26 StudioLive Series III Rackmount Mixer Getting Started — 4 Block Diagrams — 27 Step 1: Register Your StudioLive Series III Warranty — 28 Rackmount Mixer — 4 Step 2: Add a Control Device — 5 Warranty Information — 28 Wired LAN Networking (Ethernet) —... -
Page 5: Overview
USB recording and playback interface, powerful Fat Channel signal processing, high quality effects, extensive routing, stereo SD recording, and more, StudioLive Series III rack mixers break new boundaries for music performance and production. All you need is a compatible computer with a... -
Page 6: What Is In The Box
QMix®-UC aux-control software for iOS® and Android™ available free from Apple App Store, and Google Play What is in the Box Your StudioLive Series III rackmount mixer package contains the following: PreSonus StudioLive 32R, StudioLive 24R, and StudioLive 16R digital recording and performance mixer... -
Page 7: What You Will Need
Reference Manual at www.presonus.com. What You Will Need The following items are not included with your StudioLive Series III rackmount mixer, but are needed to complete your new mixing system: LAN network with Internet access or an SD or SDHC card with at least 2 GB capacity for firmware updates. -
Page 8: Getting Started
A device running UC Surface Step 1: Register Your StudioLive Series III Rackmount Mixer 1. Go to my.presonus.com and log in or create a new user account, if you don’t have one. 2. Once you have logged into your my PreSonus account, click the Register a Product button at the top of the page. -
Page 9: Step 2: Add A Control Device
(computer, iPad, or Android) to a wireless router. This allows you to quickly connect devices for remote control using UC Surface and QMix-UC. 1. Connect your StudioLive Series III Rackmount mixer to a wireless router with an Ethernet cable. -
Page 10: Wired To A Computer (Usb)
2.3.1 Direct Updating over the Internet The easiest way to update your StudioLive Series III rackmount mixer firmware is to connect your mixer to a device running UC Surface that also has Internet access Power User Tip: Because direct updating from the Internet is the safest and fastest method of updating your mixer’s firmware, it is highly recommended that you use this... -
Page 11: Manual Firmware Updates
Internet access and a method to transfer the file from one computer to another (USB Thumb drive, SD card, etc.). 1. Log in to your my.presonus.com account. 2. Once you have logged in, click the My Products button at the top of the page. -
Page 12: Step 4: Set Up An Avb Network
For complete information on using your StudioLive Series III Rackmount mixer as a stagebox or remote I/O for a StudioLive Series III console mixer, please review the StudioLive Series III Stagebox Mode Addendum. -
Page 13: Hookup
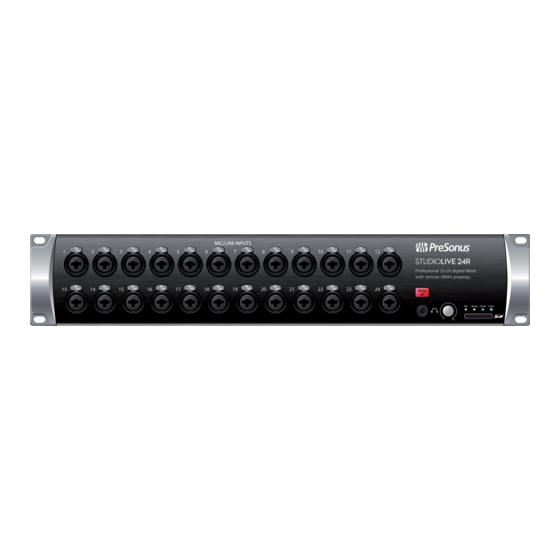
Front Panel Owner’s Manual Hookup Front Panel Power/Status LED. This displays the current state of your StudioLive Series III rackmount mixer: Off. The mixer is not turned on. Blue. The mixer is powered on and operating normally. Flashing Red. There was an error booting the mixer. -
Page 14: Rear Panel
1/4” cables. The ¼-inch TRS connectors bypass the gain stage and are scaled to accept line-level signals up to +18 dBFS. RCA Inputs. The last two inputs on the StudioLive Series III rackmount mixers also feature RCA inputs for connecting consuming line level devices like DVD players. - Page 15 Hookup StudioLive™ Series III Rack Mixers Rear Panel Owner’s Manual Ethernet Port. This RJ-45 port is used to connect your StudioLive to a standard LAN network for control applications only. More information about AVB and control networking can be found in Section 2.4. USB Port.
-
Page 16: Connecting Your Audio System
Connecting Your Audio System StudioLive™ Series III Rack Mixers Level Setting Procedure Owner’s Manual Connecting Your Audio System Before you begin, here are a few rules to get you started: Always turn down the Main and Mix faders in UC Surface as well as the Phones level before making connections. -
Page 17: Level Setting Procedure
Connecting Your Audio System StudioLive™ Series III Rack Mixers Level Setting Procedure Owner’s Manual 5. Select Channel 1 in UC Surface. 6. If your microphone requires phantom power, engage +48V button. 7. Speak or sing into your microphone at approximately the same volume you expect during the performance. -
Page 18: Typical Setup Diagrams
StudioLive™ Series III Rack Mixers Connecting Your Audio System Owner’s Manual Typical Setup Diagrams Typical Setup Diagrams Typical Band Setup (StudioLive 32R) 4.2.1 electric guitar acoustic bass/DI amp (lead) guitar/DI Ch 10 Ch 9 keyboard/DI Ch 6 Ch 5 Ch 8 Ch 4 Ch 2 Ch 7... -
Page 19: Typical Band Setup (Studiolive 16R)
StudioLive™ Series III Rack Mixers Connecting Your Audio System Owner’s Manual Typical Setup Diagrams 4.2.2 Typical Band Setup (StudioLive 16R) electric guitar acoustic wireless backup lead Ch 5 Ch 6 bass/DI amp (lead) guitar/DI vocal vocal Ch 3 Ch 4 Ch 2 Ch 1 drum kit... -
Page 20: Typical Church Setup (Studiolive 32R)
StudioLive™ Series III Rack Mixers Connecting Your Audio System Owner’s Manual Typical Setup Diagrams 4.2.3 Typical Church Setup (StudioLive 32R) acoustic electric guitar electric guitar Ch 10 Ch 9 keyboard/DI guitar/DI amp (rhythm) bass/DI amp (lead) wireless mic backup vocal mics lead vocal Ch 6 Ch 5... -
Page 21: Typical Church Setup (Studiolive 16R)
StudioLive™ Series III Rack Mixers Connecting Your Audio System Owner’s Manual Typical Setup Diagrams 4.2.4 Typical Church Setup (StudioLive 16R) electric guitar acoustic backup lead Ch 5 Ch 6 bass/DI amp (lead) guitar/DI vocal vocal hanging choir mic Ch 3 Ch 4 Ch 2 Ch 1... -
Page 22: Resources
Resources StudioLive™ Series III Rack Mixers Stereo Microphone Placement Owner’s Manual Resources Stereo Microphone Placement The following are a few recording applications to help you get started with your StudioLive. These are by no means the only ways to record these instruments. Microphone selection and placement is an art. -
Page 23: Stereo Microphone Placement
Resources StudioLive™ Series III Rack Mixers Stereo Microphone Placement Owner’s Manual Acoustic Guitar Point a small-diaphragm condenser microphone at the 12th fret, approximately 8 inches away. Point a large-diaphragm condenser microphone at the bridge of the guitar, approximately 12 inches from the guitar. Experiment with distances and microphone placement. - Page 24 Resources StudioLive™ Series III Rack Mixers Stereo Microphone Placement Owner’s Manual Drum Overheads (XY example) Place two small-diaphragm condenser microphones on an XY stereo-microphone holder (bar). Position the microphones so that each one is at a 45-degree angle, pointed down at the drum kit, approximately 7 or 8 feet above the floor or drum riser.
-
Page 25: Compression Setting Suggestions
Owner’s Manual Compression Setting Suggestions The following are the compression presets that were used in the PreSonus BlueMax. We have included them as a jumping- off point for setting up compression on the StudioLive. Vocals Soft. This is an easy compression with a low ratio setting for ballads, allowing a wider dynamic range. - Page 26 Resources StudioLive™ Series III Rack Mixers Compression Setting Suggestions Owner’s Manual Electric Guitar. This is a setting for “crunch” electric rhythm guitar. A slow attack helps to get the electric rhythm guitar “up close and personal” and gives punch to your crunch. THRESHOLD RATIO ATTACK...
-
Page 27: Eq Frequency Guides
Resources StudioLive™ Series III Rack Mixers EQ Frequency Guides Owner’s Manual EQ Frequency Guides Table 1 Instrument What to Cut Why to Cut What to Boost Why to Boost Human Voice 7 kHz Sibilance 8 kHz Big sound 2 kHz Shrill 3 kHz and above Clarity... -
Page 28: Eq Setting Suggestions
Resources StudioLive™ Series III Rack Mixers EQ Setting Suggestions Owner’s Manual Table 2 BOOST • harder bass to low • vocal presence frequency • kick & tom attack instruments (kick, • tom, bass) more finger sound • on bass • guitar and snare brighten vocals, •... - Page 29 Resources StudioLive™ Series III Rack Mixers EQ Setting Suggestions Owner’s Manual Rock Male Vocals LOW ON/OFF LOW SHELF LOW FREQ (Hz) LOW Q LOW GAIN LOW MID LOW MID LOW MID Q LOW MID GAIN ON/OFF FREQ (Hz) HIGH MID ON/ HI MID FREQ HIGH MID Q HIGH MID GAIN...
-
Page 30: Technical Specifications
Resources StudioLive™ Series III Rack Mixers Technical Specifications Owner’s Manual Distorted Electric Guitar LOW ON/OFF LOW SHELF LOW FREQ (Hz) LOW Q LOW GAIN LOW MID LOW MID LOW MID Q LOW MID GAIN ON/OFF FREQ (Hz) HIGH MID ON/ HI MID FREQ HIGH MID Q HIGH MID GAIN... -
Page 31: Studiolive Series Iii Rackmount Mixer Block Diagrams
We’ve finally made block diagrams too large for our printed manuals. Please visit the downloads page for each model on our Web site for the latest block diagrams of the StudioLive Series III rackmount mixers, provided in Adobe PDF format. -
Page 32: Warranty
PreSonus-branded products under normal use. This Limited Warranty applies only to hardware products manufactured by or for PreSonus that can be identified by the PreSonus trademark, trade name, or logo affixed to them. Exclusions and Limitations: This warranty does not cover the following: 1. -
Page 33: Warranty Information
PreSonus will repair or replace, at our sole and absolute option, products covered by this warranty at no charge for labor or materials. If the product must be shipped to PreSonus for warranty service, the customer must pay the initial shipping charges. PreSonus will pay the return shipping charges. - Page 34 How to Get Warranty Service (outside of USA): 5. You must have an active user account with PreSonus and your hardware must be on file with your account. If you do not have an account, please go to: http:// www.presonus.com/registration and complete the registration process.
- Page 35 Integration, and XMAX are trademarks or registered trademarks of PreSonus Audio Electronics, Inc. Capture, Impact, Mixverb Presence, RedLightDist, SampleOne, Studio One, and Tricomp are trademarks or registered trademarks of PreSonus Software Ltd. Mac and Mac OS are registered trademarks of Apple, Inc., in the U.S. and other countries. Windows is a registered trademark of Microsoft, Inc., in the U.S.
- Page 36 StudioLive Series III Rack Mixers ™ Rackmount Digital Mixing and Remote I/O System with AVB Owner’s Manual 18011 Grand Bay Ct. • Baton Rouge, ® Louisiana 70809 USA• 1-225-216-7887 Part# 70-22000062-A www.presonus.com...
Need help?
Do you have a question about the StudioLive Series III and is the answer not in the manual?
Questions and answers