Table of Contents
Advertisement
Advertisement
Table of Contents

Related Manuals for PRESONUS NSB Series


Summary of Contents for PRESONUS NSB Series
- Page 1 NSB-Series Stagebox AVB Remote I/O Owner’s Manual...
-
Page 2: Table Of Contents
1.1 Introduction 1.2 About This Manual 1.3 What’s in the Box 1.3.1 What Else You Need 1.4 Companion PreSonus Products Getting Started 2.1 Direct connect with a StudioLive Series III mixer 2.2 Direct connect with a StudioLive Series III rack mixer 2.3 Using an NSB-series Stage Box with Two or More Mixers... -
Page 3: Overview
More information about AVB Networking best practices and configurations can be found in the PreSonus AVB Networking Guide, and we highly recommend that you review this document as well, to avoid any difficulty in creating your AVB network. This manual covers basic connection and use case con- figurations only. -
Page 4: What Else You Need
1.3.1 What Else You Need AVB Switch. The PreSonus SW5E AVB PoE Switch is fully compatible with all PreSonus AVB products and third-party AVB devices that adhere to the 1722.1 AVB standard. For a complete list of compatible third-party AVB switches, please visit www.presonus.com. - Page 5 AVB mixer, please contact the manufacturer to verify compatibility with this standard. NSB 16.8 or NSB 8.8 Rack adapter. PreSonus has designed the NSB 16.8 and NSB 8.8 adapters to mount the NSB-series stage boxes in stand- ard 19” equipment rack. This accessory is sold separately at your favorite PreSonus dealer or at www.presonus.com.
-
Page 6: Companion Presonus Products
Companion PreSonus Products Welcome to the PreSonus Ecosystem! As a solutions company, we believe the best way to take care of our customers (that’s you) is to ensure that you have the best possible experience from the beginning of your signal chain to the end. In order to achieve this goal, we’ve prioritized seamless integration through- out every design phase of these products from day one. -
Page 7: Getting Started
Getting Started The PreSonus NSB-series stage boxes make it easy to get audio to and from the stage using an AVB net- work. With AVB networking, input and output signals flow through one lightweight CAT5e or CAT6 Eth- ernet cable. In addition, NSB-series’ inputs, preamps, and phantom power can be remotely controlled from your networked StudioLive Series III console or from any device running PreSonus UC Surface touch-control software. - Page 8 Press the Home button on your StudioLive Ser- ies III mixer. Press the Audio Routing icon on the Touch- screen. Press the Remote I/O Setup button on the Touch- screen. Select the NSB 16.8 from the list on the left. 2.1 Direct connect with a StudioLive Series III mixer...
- Page 9 Power User Tip: Because your NSB stage box inputs are most likely routed to multiple sources on your net- work, PreSonus highly recommends designating one mixer to control the NSB preamps. Select the AVB Output Sends you’d like returned to the physical outputs on your NSB stage box.
- Page 10 Press the Apply button when finished. Once send streams from your mixer have been successfully patched, you will see a green status indicator next to your NSB stage box in the setup screen. The Power Network LED on your NSB stage box will turn from green to blue when proper clock sync has been established with the AVB network.
- Page 11 Select NSB 16.8: Send 1-8 from the Available Stream list to patch the first eight NSB inputs to channels 17-24 on your mixer. Select Inputs 25-32 from the Input Streams list. Select NSB 16.8: Send 9-16 from the Available Stream list to patch the second eight NSB inputs to channels 25-32 on your mixer.
- Page 12 Select Input Source and scroll to Inputs 17-32. Assign each to the Network source by pressing the Network button next to each Input. Or..Select each channel and press the Network but- ton from the Input source section in the Fat Chan- nel.
-
Page 13: Direct Connect With A Studiolive Series Iii Rack Mixer
Direct connect with a StudioLive Series III rack mixer In this example, we will be looking at using one NSB 8.8 to expand the I/O capability of the Stu- dioLive 24R rack mixer, so that it has 32 inputs and 16 outputs.Note that the workflow below is identical for NSB 32.16 and NSB 16.8. - Page 14 Power User Tip: Because your NSB stage box inputs are most likely routed to multiple sources on your net- work, PreSonus highly recommends designating one mixer to control the NSB preamps. 6. Select the AVB Output Sends from the StudioLive 24R you’d like returned to the physical outputs on your NSB stage box.
- Page 15 stage box will not be properly synced and you will hear audio artifacts. For more information on clocking over AVB, please review the StudioLive Series III AVB Networking Guide. 7. Press the Apply button when finished. The Power Network LED on your NSB stage box will turn from green to blue when proper clock sync has been established with the AVB network.
-
Page 16: Using An Nsb-Series Stage Box With Two Or More Mixers
AVB switch onboard, you can connect two different devices simultaneously to a single NSB stage box. You also have the option of using a stand-alone AVB switch, like the PreSonus SW5e. Either of the configurations below are supported. - Page 17 2.3 Using an NSB-series Stage Box with Two or More Mixers...
- Page 18 Step 1: Connect Your Rack Mixer (Monitors) to Your Console Mixer (FOH) Press the Home button on your StudioLive Ser- ies III mixer. Press the Audio Routing icon on the Touch- screen. Press the Remote I/O button on the Touch- screen.
- Page 19 In our example, all preamps will be controlled from the Front-of-House mixer, so set the Preamp permissions to StudioLive 32SX. Change the Mode to Monitor Mixer. Note: For complete information on using your rackmount StudioLive Series III mixer as a stage box or monitor mixer with your StudioLive Series III console, please review the StudioLive Series III Stagebox Mode Addendum.
- Page 20 Step 3: Set Preamp Permissions The preamps on NSB-series stage boxes can be controlled from any StudioLive Series III mixer on the network. When you have a stage box feeding more than one mixer, it is recommended that you give only one mixer permission to adjust the NSB preamp levels.
- Page 21 1. In Universal Control, connect to the StudioLive 24R. 2. Click or tap on the Settings Icon. 3. Click or tap on the Network Tab. 4. In the Remote I/O area, select the NSB 8.8. 5. From the drop-down menu, select StudioLive 24R Sends 49-56.
- Page 22 6. Press the Apply button when finished. Step 5: Routing inputs to your console mixer In our example, we are using the NSB 8.8 to add 8 remote inputs to the StudioLive 32S. We will also be routing the audio from the LCD on the console. On the Remote I/O screen, press AVB Inputs.
- Page 23 From the Available Stream list, use the Value encoder to scroll to NSB 8.8 Send 1-8. In our example, we will also be using routing inputs 9-24 on the StudioLive 24R as part of our mix on the StudioLive 32SX. Let’s go ahead and route those now.
- Page 24 Step 6: Engaging the Network Sources on your Console Mixer Press the back arrow to return to the Audio Rout- ing screen. Press the Digital Patching button to open the Digital Patching screen. Scroll to Inputs 9-32 and assign each to the Net- work source by pressing the Network button next to each Input.
- Page 25 Step 7: Routing Inputs to your rack mixer In our example, we are using the NSB 8.8 to also add 8 more inputs to the StudioLive 24R create a full 32-channel mixer. Let’s open up UC Surface and get that routed! 1.
- Page 26 Your StudioLive 24R is now configured as follows: Channels 1-8: Network sourced from StudioLive 32SX Inputs 1-9 Channels 9-16: No network source available. Local sources only (Analog or USB) Channels 17-24: No network source available. Local sources only (Analog or USB) Channels 25-32: Network sourced from NSB 8.8 Inputs 1-8.
- Page 27 4. Click or tap on the icon on Channels 1-8 and Channels 25-32. This will assign the source for each of these channels to the AVB network. 2.3 Using an NSB-series Stage Box with Two or More Mixers...
-
Page 28: Gain Compensation
Gain Compensation When your NSB-series stage box is connected to multiple mixers, you have the option to designate only one to have control over the preamps. In this way, only one engineer is in charge of gain staging on stage. Once the preamp level is set by the master mixer, every other mixer on the network has the option of listening to the same stream or the gain compensated stream. -
Page 29: Remote Preamp Control (Uc Surface)
You can now control the preamp level and phantom power for your NSB stage box from the Fat Channel on your console, in the same way that you control the local inputs. After you have set the preamp levels, enable Gain Compensation from the LCD. - Page 30 Select the channel for which you’d like to set the gain. You can now control the preamp level and phantom power for your NSB stage box from the Fat Channel in UC Surface, in the same way that you control the local inputs. After you have set the preamp levels, enable Gain Compensation.
- Page 31 Note: If you do not enable Gain Compensation, making a change on the mixer with preamp control over the NSB stage box will change it for any device listening to that stream on the network. 3.2 Remote Preamp Control (UC Surface)
-
Page 32: Hookup
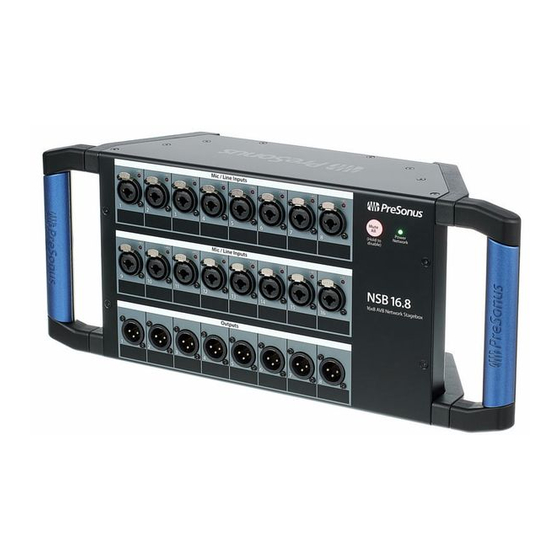
These inputs use TRS-XLR combo jacks that can accept both XLR and balanced or unbalanced 1/4” cables. The XLR inputs provide access to the onboard PreSonus XMAX microphone preamplifiers, for use with all types of microphones. The XMAX preamp features a Class A input buffer circuit, followed by a dual- servo gain stage. -
Page 33: Left-Panel Connections
AVB switch. Power User Tip: Please refer to the section on hop limitations on AVB networks in the PreSonus AVB Net- working Guide before cascading numerous AVB devices without a central switch, like the PreSonus SW5e. -
Page 34: Right-Panel Connections
Right-panel Connections Power. This Power input accepts power from the included IEC3 Power cord. Power Switch. This is the on / off switch for your NSB. Rear-Panel Connections (NSB 32.16 Only) AES Out. These Digital AES- 3/EBU XLR outputs are to connect external devices like power amplifiers, 2-track recorders, streaming equipment, etc. - Page 35 To remove and relocate the rack ears: 1. Loosen and remove the six screws on each side of the NSB 32.16 using a hex driver (not included.) 2. Re-position the ears to the desired configuration. For a recessed configuration, attach the back end of the rack ears to the frontmost holes of the NSB 32.16.
- Page 36 Replace the extra screws in the unused holes to avoid losing them. For a reversed configuration, simply rotate the ears 180° and re-attach the screws. 3. Mount your reconfigured NSB 32.16 stage box in the rack of your choice. You’re done! 4.5 Configurable Rack Ears (NSB 32.16 only)
-
Page 37: Technical Information
Technical Information Specifications Microphone Preamplifier Input Type XLR Female, balanced Frequency Response to Main Output (at unity gain) 20-20 kHz, ±0.5 dBu Input Impedance 1 kΩ THD to Main Output <0.005%, +4 dBu, 20-20 kHz, unity gain, unwtd S/N Ratio to Main Output (Ref = +4 dB, 20 kHz BW, unity gain, 94 dB A-wtd) Common Mode Rejection Ratio (1 kHz at unity gain) - Page 38 Maximum Output Level =+24 dBu, ±0.5 dBu Output Impedance 100Ω AES Outputs (NSB 32.16 only) Connectivity XLR Male, balanced Type AES 3 Digital Audio ADC Dynamic Range 115 dB (A-wtd, 48 kHz) DAC Dynamic Range 115 dB (A-wtd, 48 kHz) AVB Audio Network Ports Locking XLR Ethernet Sampling Rate 48 kHz...
- Page 39 Weight NSB 8.8: 5.4 lbs. (2.4 kg) NSB 16.8: 6.2 lbs. (2.8 kg) NSB 32.16: 10.2 lbs (4.6 kg) 5.1 Specifications...
-
Page 40: Legal
Unless otherwise indicated below, the trademarks, service marks, and logos contained herein (the “Marks”) are owned or controlled by PreSonus Audio Electronics, Inc., or are used herein under license. ©2022 PreSonus Audio Electronics, Inc. All Rights Reserved. -
Page 41: Dinner Is Served
Dinner is Served! Added bonus: PreSonus’ previously Top Secret recipe for… Andouille & German Red Cabbage Po-Boys Ingredients: 1 small Onion 3 Tbsp. fresh Ginger 1 small head Red Cabbage 1 tsp Salt 3 Tbsp. Honey ¼ cup Red Vinegar 12 oz Andouille or Bratwurst Sausage sliced lengthwise ¼... - Page 42 NSB-Series Stagebox AVB Remote I/O Owner’s Manual Part# 70-22000099-D...
Need help?
Do you have a question about the NSB Series and is the answer not in the manual?
Questions and answers