Table of Contents
Advertisement
Quick Links
Service Manual
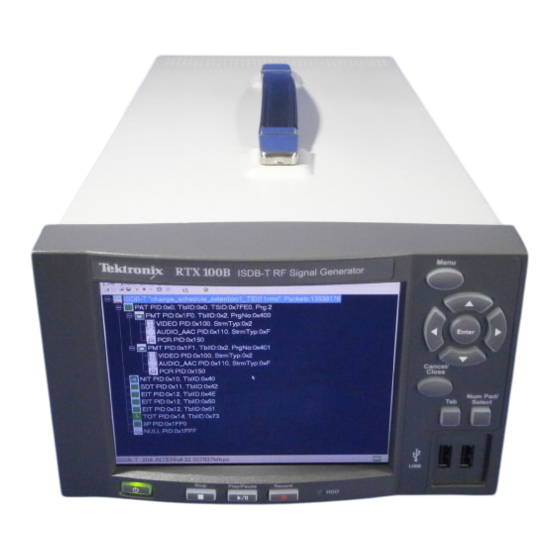
RTX100B
ISDB-T RF Signal Generator
071-1932-03
Warning
The servicing instructions are for use by qualified
personnel only. To avoid personal injury, do not
perform any servicing unless you are qualified to
do so. Refer to all safety summaries prior to
performing service.
www.tektronix.com
Advertisement
Table of Contents
Troubleshooting

Subscribe to Our Youtube Channel
Related Manuals for Tektronix RTX100B


Summary of Contents for Tektronix RTX100B
- Page 1 Service Manual RTX100B ISDB-T RF Signal Generator 071-1932-03 Warning The servicing instructions are for use by qualified personnel only. To avoid personal injury, do not perform any servicing unless you are qualified to do so. Refer to all safety summaries prior to performing service.
- Page 2 Copyright © Tektronix. All rights reserved. Licensed software products are owned by Tektronix or its subsidiaries or suppliers, and are protected by national copyright laws and international treaty provisions. Tektronix products are covered by U.S. and foreign patents, issued and pending. Information in this publication supercedes that in all previously published material.
- Page 3 Tektronix, shipping charges prepaid, and with a copy of customer proof of purchase. Tektronix shall pay for the return of the product to Customer if the shipment is to a location within the country in which the Tektronix service center is located.
-
Page 5: Table Of Contents
........RTX100B ISDB-T RF Signal Generator Service Manual... - Page 6 ........RTX100B ISDB-T RF Signal Generator Service Manual...
- Page 7 Figure 3-19: IP Playout Configuration dialog box ....3-39 Figure 3-20: RTX100B MPEG Player display with 40.000000 Mbps 3-40 Figure 3-21: Open Transport Stream dialog box .
- Page 8 ....... . 3-46 Figure 3-27: RTX100B MPEG Player display with maximum bit rate .
- Page 9 ......... 8-13 RTX100B ISDB-T RF Signal Generator Service Manual...
- Page 10 ......Table 5-4: Tools required for module removal ....RTX100B ISDB-T RF Signal Generator Service Manual...
- Page 11 Do Not Operate in an Explosive Atmosphere. Keep Product Surfaces Clean and Dry. Provide Proper Ventilation. Refer to the manual’s installation instructions for details on installing the product so it has proper ventilation. RTX100B ISDB-T RF Signal Generator Service Manual...
- Page 12 CAUTION indicates a hazard to property including the product. Symbols on the Product. The following symbols may appear on the product: CAUTION WARNING Protective Ground Refer to Manual High Voltage (Earth) Terminal viii RTX100B ISDB-T RF Signal Generator Service Manual...
- Page 13 Use Care When Servicing With Power On. Dangerous voltages or currents may exist in this product. Disconnect power, remove battery (if applicable), and disconnect test leads before removing protective panels, soldering, or replacing components. To avoid electric shock, do not touch exposed connections. RTX100B ISDB-T RF Signal Generator Service Manual...
- Page 14 Service Safety Summary RTX100B ISDB-T RF Signal Generator Service Manual...
-
Page 15: Environmental Considerations
European Union’s requirements according to Directive 2002/96/EC on waste electrical and electronic equipment (WEEE). For information about recycling options, check the Support/Service section of the Tektronix Web site (www.tektronix.com). Mercury Nortification. This product uses an LCD backlight lamp that contains mercury. - Page 16 Environmental Considerations RTX100B ISDB-T RF Signal Generator Service Manual...
- Page 17 Preface This is the service manual for the RTX100B ISDB-T RF Signal Generator. This manual contains information needed to service an RTX100B to the module level. Manual Structure This manual is divided into sections, such as Specifications and Theory of Operation.
- Page 18 Modules Throughout this manual, any replaceable component, assembly, or part of the RTX100B is referred to generically as a module. In general, a module is an assembly (like a circuit board), rather than a component (like a resistor or an integrated circuit).
- Page 19 ISDB-T RF Signal Generator, as well as general information critical to safe and effective servicing. To prevent personal injury or damage to the RTX100B, consider the following before attempting service: H The procedures in this manual should be performed only by a qualified service person.
- Page 20 Whether providing warranty repair service or any of the other services listed below, Tektronix service technicians are well trained to service the RTX100B. They have access to the latest information on improvements to the RTX100B as well as the latest new options.
- Page 21 Specifications...
-
Page 23: Product Overview
The RTX100B ISDB-T RF Signal Generator converts a broadcast transport stream into an RF signal and outputs it. In addition to the RF signal output feature, the RTX100B records and plays MPEG-2 transport streams that are compliant with ATSC, DVB, and ARIB standards. - Page 24 Product Overview RTX100B ISDB-T RF Signal Generator Service Manual...
-
Page 25: Specifications
Table 1-4 on page 1-12. H The RTX100B must have a warm-up period of at least 20 minutes. H The RTX100B must be operating at an ambient temperature between +5 _C to +40 _C, unless otherwise noted. -
Page 26: Table 1-1: Functional Specifications
Connector type Input impedance, typical 50 Ω Reference input Frequency 8.129698 MHz, 10 MHz, and 27 MHz Input level, typical Sine wave: 0 ± 6 dBm Square wave: 0.5 Vp-p to 3.0 Vp-p RTX100B ISDB-T RF Signal Generator Service Manual... -
Page 27: Output Level
2 ≤ Z ≤ 65536 P/N and Jitter (serial clock) < - - 104 dBc/Hz at 21.455707 MHz +20 kHz (RBW=300 Hz) SPI interface Connector type D-sub, 25 pin Data rate 256 Kbps to 214 Mbps RTX100B ISDB-T RF Signal Generator Service Manual... - Page 28 800 mV ± 10% Jitter ≤ 0.2 UI p- - p Rise/fall time ≤ 1.2 ns (20% to 80%) Return loss < - - 17 dB (5 MHz to 270 MHz) into 75 Ω load RTX100B ISDB-T RF Signal Generator Service Manual...
- Page 29 QPSK. However, the signal output from the ASI connector is not modulated into QPSK. Inner coding Vitervi (1/2, 2/3, 3/4, 5/6, 7/8) Outer coding Reed Solomon (204, 188) Time interval 0,1, 2, 4, 8, 16 Guard interval 1/4, 1/8, 1/16, 1/32 RTX100B ISDB-T RF Signal Generator Service Manual...
- Page 30 Mode 2: - - 18 dBm to - - 26 dBm at 13 ch Mode 3: - - 15 dBm to - - 23 dBm at 13 ch Bit error rate, typical < 2.0 - - E4 after Vitervi RTX100B ISDB-T RF Signal Generator Service Manual...
- Page 31 USB 2.0 interface Number of connectors Pin assignments - - DATA +DATA LAN interface 10/100/1000 Base-T Ethernet interface Connector type RJ45 Pin assignments MDI_0+ MDI_2- - MDI_0- - MDI_1- - MDI_1+ MDI_3+ MDI_2+ MDI_3- - RTX100B ISDB-T RF Signal Generator Service Manual...
- Page 32 50 Hz to 60 Hz Maximum power 180 VA Maximum current 1.3 A Main fuse data 5 A Time- - delayed, 250 V (not operator replaceable) 2 A Time- - delayed, 250 V (not operator replaceable) 1-10 RTX100B ISDB-T RF Signal Generator Service Manual...
-
Page 33: Figure 1-1: Timing Diagram Of The Spi Interface
5 ns T/2 T/10 DCLK* Input clock pulse width Output data delay T/2 T/10 DATA 0- - 7 DCLK* Input data hold time Figure 1-1: Timing diagram of the SPI interface 1-11 RTX100B ISDB-T RF Signal Generator Service Manual... -
Page 34: Table 1-3: Mechanical Characteristics
, 5 Hz to 500 Hz, 10 min, three axes Non-operating 22.3 m/s rms (2.28 Grms), 5 Hz to 500 Hz, 10 min, three axes Shock Non-operating 294 m/s (30 G), half-sine, 11 ms duration 1-12 RTX100B ISDB-T RF Signal Generator Service Manual... -
Page 35: Table 1-5: Certifications And Compliances
Control, and Laboratory Use Australia/New Zealand Declaration Complies with EMC provision of Radio Communications Act per the following standard(s): of Conformity - - EMC AS/NZS 2064.1/2 Industrial, Scientific, and Medical Equipment: 1992 1-13 RTX100B ISDB-T RF Signal Generator Service Manual... - Page 36 IEC Characteristics Equipment type: Test and Measuring Installation Category II (as defined in IEC 61010-1, Annex J) Pollution Degree 2 (as defined in IEC 61010-1) Safety Class I - - grounded product 1-14 RTX100B ISDB-T RF Signal Generator Service Manual...
- Page 37 Theory of Operation...
-
Page 39: A12 Main Board
Theory of Operation This section describes the basic operation of the major circuit blocks or modules in the RTX100B. The Diagrams section, beginning on page 7-1, includes a block diagram and an interconnect diagram. A12 Main Board The A12 Main board consists of the following blocks: PCI Interface The PCI interface consists of a PCI target and a PCI master. - Page 40 The interrupt controller sends the following interruption signals to the CPU: Play FIFO empty, Record FIFO full, external trigger, 10 Hz, Playout DMA transfer finished, and Record DMA transfer finished. These interruptions can be disabled by the RTX100B application software. At power on, all interruptions are disabled. TS Clock Generator The TS clock generator consists of a VCO (Voltage Control Oscillator), phase detector, frequency divider.
-
Page 41: A20 Pci Backplane Board
(7 V to 11.5 V). IEEE1394b Interface The IEEE1394 interface consists of the 1394b link-layer device (U110), cable transcriver/arbiter (U120), oscillator (Y100), serial EEPROM (U140), regulators (U130 and U230), and IEEE1394b connector (J140). RTX100B ISDB-T RF Signal Generator Service Manual... -
Page 42: A150 Isdb-T Rf Output Board
This block generates a carrier signal for the RF output. It directly generates a career frequency of UHF. Quadrature Modulator This block performs I/Q modulation to a carrier signal from the A/D converter output. RTX100B ISDB-T RF Signal Generator Service Manual... -
Page 43: Front-Panel Processor Board
J10 and J11. A40 AC Distributor Board The A40 AC Distributor board supplies standby power (5VSB) to the SBC and the ATX power control circuit on the A20 Backplane board. RTX100B ISDB-T RF Signal Generator Service Manual... - Page 44 Theory of Operation RTX100B ISDB-T RF Signal Generator Service Manual...
- Page 45 Performance Verification...
-
Page 47: Figure 3-1: Pin Connections For A Crossover Ethernet Cable
MTS400. Use one of the following methods to connect the RTX100B to your PC/MTS400: H If you are connecting the RTX100B directly to a single PC, use a crossover Ethernet cable to connect between the LAN port on the RTX100B and the Ethernet port on the PC. -
Page 48: Figure 3-2: Network Connections Window
You can connect them to either of the connectors. 2. Select File > Minimize or File > Exit to close the RTX100B MPEG player. The Windows XP desktop appears. 3. Select Settings > Control Panel from the Start menu to display the Control Panel window. -
Page 49: Figure 3-3: Local Area Connection Status Dialog Box
Figure 3-4: Local Area Connection Properties dialog box 7. In the network component field, select Internet Protocol (TCP/IP). 8. Click the Properties button. The Internet Protocol (TCP/IP) Properties dialog box appears. RTX100B ISDB-T RF Signal Generator Service Manual... -
Page 50: Figure 3-5: Internet Protocol (Tcp/Ip) Properties Dialog Box
Refer to the user documentation supplied with your server OS for detailed information about DHCP server functions. NOTE. Under some network environments, the RTX100B may not be able to obtain the IP address automatically from a DHCP server. In this case, you need to enter the appropriate address value in each submenu item. - Page 51 When the DHCP Server Is Not in the Network. If the DHCP server is not in the network, perform the following procedure to set the network parameters. 11. If you connect the RTX100B directly to a single PC/MTS400: a. In the dialog box, select Use the following IP address.
-
Page 52: Table 3-1: Equipment Required For Performance Verification
75 Ω BNC(Ma)-to-NC(Fe) adapter 1 ea. Stack Electronics BA045 50 Ω N(Ma)-to-SMA(Fe) adapter 2 ea. Stack Electronics BA057 IEEE1394b hard disk drive 1 ea. Novac NV-HD352WB and hard disk drive (Tektronix part number 119-7146-00) RTX100B ISDB-T RF Signal Generator Service Manual... -
Page 53: Table 3-2: Rtx100B Test Record
Table 3-2: RTX100B test record Serial Number: Cal Date: Temperature: Humidity: Performance Test Minimum Measured Maximum Internal Clock Frequency 26.999924 MHz 27.000076 MHz Test record limits are based on the SMPTE 310M frequency accuracy requirement. RTX100B ISDB-T RF Signal Generator Service Manual... -
Page 54: Procedures
RTX100B is operating in an environment that is within the operating limits described in Table 1-4 on page 1-12. In addition, the RTX100B and the test equipment must be warmed up for at least 20 minutes to ensure accurate test results. -
Page 55: Figure 3-6: Equipment Connection For Checking The Internal Clock Output Level
Figure 3-6: Equipment connection for checking the internal clock output level 2. Select Play > Others on the RTX100B to open the Others dialog box. 3. In the dialog box, select the Ext Trigger BNC button to open the Ext Trigger BNC dialog box. -
Page 56: Figure 3-7: Equipment Connection For Checking The Internal Clock Frequency
Gate Time: 0.20 s CHANNEL1 ..Coupling: DC Impedance: 50 Trigger: AUTO TRIG ON 9. Record the frequency counter reading in the test record. (See page 3-7.) 3-10 RTX100B ISDB-T RF Signal Generator Service Manual... -
Page 57: Figure 3-8: Equipment Connection For Checking The Play Operation- Spi Interface
Checking the Play Operation. 1. Use the parallel interface cable to connect the SPI In/Out connector on the RTX100B to the DVB SPI In connector on the MPEG analyzer. See Figure 3-8. MPEG analyzer rear panel (MTS430) RTX100B rear panel... - Page 58 ..E:\MTXRTX_Test streams\Record_Files\ SPI214Mbps 7. Press the Play/Pause button on the RTX100B to start playing the test40.TRP file. 8. Verify that the hierarchic view is displayed on the MPEG analyzer screen. In addition, verify that the bit rate is 214 Mbps and the packet size is 188 bytes.
- Page 59 18. Click the PLAY button on the MPEG Analyzer to start playing the SPI214Mbps.trp file. 19. Verify that the hierarchic view is displayed on the RTX100B screen. In addition, verify that the bit rate display is 214 Mbps and the packet size display is 188 bytes.
- Page 60 1. Use a 50 Ω BNC cable to connect the Clock/Ref In connector on the RTX100B to the Ch1 connector on the function generator. See Figure 3-9. 2. Use the 50 Ω BNC cable to connect the Trig In/Out connector on the RTX100B to the Ch2 connector on the function generator.
-
Page 61: Frequency
0.875 V 5. Press the On button of the Ch1 output on the function generator. 6. Open the test64.TRP file on the RTX100B. a. Select File > Open in the Play screen to open the Select File dialog box. b. In the dialog box, select the test64.TRP file. -
Page 62: Interface
17. Change the output frequency of the function generator to 32 MHz. NOTE. You have to click the Ext S Clk to select the Ext P Clk. 18. Select Play > Clock on the RTX100B to open the Clock dialog box. 19. In the dialog box, select Ext S Clk. - Page 63 NOTE. Ignore 2.3.a PCR Repetition and 2.5 PTS errors in the Priority 2 row. 21. Press the Stop button on the RTX100B to stop the stream output. 22. Select Play > Clock on the RTX100B to open the Clock dialog box. 23. In the dialog box, select Internal.
-
Page 64: Figure 3-10: Equipment Connection For Checking The Output Signal- Asi Interface
Checking the Output Signal. 1. Use the 75 Ω BNC cable and the 75 Ω signal adapter to connect the ASI Out connector on the RTX100B to the oscilloscope CH1 input. See Figure 3-10. Oscilloscope (TDS5104B) RTX100B rear panel 75 Ω... - Page 65 ... . . Cursor Curs1 Pos1: - -2.5 ns/Curs2: 2.75 ns 3. Open the test40.TRP file on the RTX100B. a. Select File > Open in the Play screen to open the Select File dialog box.
-
Page 66: Figure 3-11: Equipment Connections For Checking The Play Operation- Asi Interface
RAM, Record Size: 100 MB SPI/ASI/310M Input Port . . . BNC Port . . . File Save Mode Over write Save ..E:\MTXRTX_Test streams\Record_Files\ ASI214Mbps.trp 3-20 RTX100B ISDB-T RF Signal Generator Service Manual... -
Page 67: Figure 3-12: Equipment Connection For Checking The Record Operation- Asi Interface
15. Disconnect the 75 Ω BNC cable from the RTX100B and MPEG analyzer. Checking the Record Operation. 16. Use the 75 Ω BNC cable to connect the ASI In connector on the RTX100B to the ASI/SMPTE Out connector on the MPEG analyzer. See Figure 3-12. - Page 68 Performance Verification 17. Press the Record button on the RTX100B to display the Record screen. 18. On the RTX100B, make the following settings: Record menu Source ..Record size ..
-
Page 69: Figure 3-13: Equipment Connection For Checking The Recorded File- Asi Interface
Performance Verification Checking the Recorded File. 29. Use the 75 Ω BNC cable to connect the ASI Out connector on the RTX100B to the ASI/SMPTE In connector on the MPEG analyzer. See Figure 3-13. MPEG analyzer rear panel (MTS430) RTX100B rear panel 75 Ω... -
Page 70: Figure 3-14: Fifth Equipment Connection For Checking The Asi
39. Disconnect the 75 Ω BNC cable from the RTX100B and MPEG analyzer. Checking a Moving Picture. 40. Use a 75 Ω BNC cable to connect the ASI Out connector on the RTX100B to the TS ASI connector on the MPEG-2 measurement decoder. See Figure 3-14. - Page 71 45. Verify that a moving picture is displayed on the video monitor. In addition, verify that there is no flicker or block noise in the displayed picture. 46. Press the Stop button on the RTX100B to stop the stream output. 47. Disconnect 75 Ω BNC cables from the RTX100B, MPEG-2 measurement decoder, and video monitor.
-
Page 72: Figure 3-15: Equipment Connection For Checking The Carrier Leakage
1. Use the 75 Ω BNC(Ma)-to-ΝC(Fe) adapter, 50 Ω N(Fe)-to-75 Ω Ν(Μa) adapter, 50 Ω SMA cable, and two 50 Ω N(Ma)-to-SMA(Fe) adapters to connect the RF Out connector on the RTX100B to the RF Input on the spectrum analyzer. See Figure 3-15. -
Page 73: Table 3-3: Output Channel And Center Frequency Settings
- - - - - - - - - - - - - - - - - - - - - - Checking the Spectrum Mask. 8. Select ISDB-T/ASI > RF Parameter on the RTX100B to open the ISDB-T RF Parameter dialog box. - Page 74 19. Change the Center Frequency to 767.143 MHz on the spectrum analyzer. 20. Repeat steps 13 and 14. 21. Disconnect the 75 Ω BNC (Ma)-to-NC(Fe) adapter, 50 Ω SMA cable, and 50 Ω N(Ma)-to-SMA(Fe) adapter from the RTX100B and spectrum analyzer. 3-28 RTX100B ISDB-T RF Signal Generator Service Manual...
-
Page 75: Figure 3-16: Equipment Connection For Checking The Output Level And Error
Performance Verification Checking the Output Level and Error. 22. Use the 75 Ω BNC cable to connect the RF Out connector on the RTX100B to the RF INPUT on the ISDB-T analyzer. See Figure 3-16. ISDB-T analyzer (VP-8480A) RTX100B rear panel 75 Ω... - Page 76 In the dialog box, navigate to the D:\ISDB-T directory, and then select the ISDB_T_M2.rmx file. 37. Press the Play/Pause button on the RTX100B to start playing the file. 38. Repeat steps 29 and 30. 39. Change the demodulation (DEMODSET) settings to Mode: 1 on the ISDB-T analyzer.
-
Page 77: Figure 3-17: Equipment Connection For Checking The Ieee1394B
IEEE1394b cable (9 pin- - 9 pin)) test40.TRP file 1. Use the IEEE1394b cable to connect the IEEE1394b connector on the RTX100B to the IEEE1394b hard disk drive. See Figure 3-17. RTX100B rear panel IEEE1394b hard disk drive IEEE1394b cable Figure 3-17: Equipment connection for checking the IEEE1394b interface 2. - Page 78 H Interrupt Moderation Rate: Off H Jumbo Frames: 16128 H Link Speed and Duplex: Auto- -negotiate 1000Mbps NOTE. If RTX100B MPEG system is connected to 100 Mbps network, select “Auto Detect” for Link Speed and Duplex option. H Receive Descriptors: 2048...
- Page 79 2. Select Windows Firewall/Internet Connection Sharing (ICS) to open the dialog box. Check if the Startup type is set to Disabled. 3. Select Automatic Updates to open the dialog box. Check if the Startup type is set to Disabled. 3-33 RTX100B ISDB-T RF Signal Generator Service Manual...
- Page 80 Performance Verification 4. Select IIS admin to open the dialog box. Check if the Startup type is set to Disabled. 3-34 RTX100B ISDB-T RF Signal Generator Service Manual...
- Page 81 Perform this procedure to check if the automatic Java updates are disabled: 1. Click Control Panel > Java. 2. Select the Update tab and check if the Check for Updates Automatically check box is unselected. 3-35 RTX100B ISDB-T RF Signal Generator Service Manual...
- Page 82 Intel(R) PRO/1000 MT Network Connection). 3. Select MonitorModeEnabled DWORD Value that you created. 4. Double- -click the DWORD Value to open the Edit DWORD Value dialog box. Check if the Value data is set to 1. 3-36 RTX100B ISDB-T RF Signal Generator Service Manual...
-
Page 83: Figure 3-18: Equipment Setup For Option Gbe Performance Verification
Checking Option GbE performance. Perform this procedure to check that the GbE Gigabit Ethernet interface of RTX100B is operating properly. This test checks that the transport stream data is correctly output from the RTX100B instrument. 1. Connect the equipment as shown in Figure 3-18. - Page 84 Performance Verification 3. Configure the DUT RTX100B system with the following settings for GbE testing: a. Double-click the RTX100B MPEG player icon on the desktop to start the player. MPEGPlayer.lnk b. From the File menu, select Open > Look in (dropdown menu) > Local Disk (D) >...
-
Page 85: Figure 3-19: Ip Playout Configuration Dialog Box
Intel(R) PRO/1000 MT Network Connection Transmission Mode: Multicast Destination IP Address: 239.1.1.1 Protocol: Destination Port: 1234 Figure 3-19: IP Playout Configuration dialog box Now the RTX100B MPEG Player should appear as shown in Figure 3-20. 3-39 RTX100B ISDB-T RF Signal Generator Service Manual... -
Page 86: Figure 3-20: Rtx100B Mpeg Player Display With 40.000000 Mbps
Performance Verification Figure 3-20: RTX100B MPEG Player display with 40.000000 Mbps 4. Click the Start button to start the stream playout. 5. Double-click the MTS400 Series system’s TS Compliance Analyser desktop icon TS Compliance Analyser.lnk to launch the TS Compliance Analyser application (TSCA). This starts with the Open Transport Stream dialog box as shown in Figure 3-21. -
Page 87: Figure 3-21: Open Transport Stream Dialog Box
6. Select the Real-time Analysis icon on the left of the Open Transport Stream dialog. 7. Select IP from the Interfaces dropdown menu in the Open Transport Stream display as shown in Figure 3-22. 3-41 RTX100B ISDB-T RF Signal Generator Service Manual... -
Page 88: Figure 3-22: Selecting The Ip Interface
NOTE. You may have to click the + button below the Configurations list to make the settings pane change. The Browse button, which is needed for the next step, will then be active. 3-42 RTX100B ISDB-T RF Signal Generator Service Manual... -
Page 89: Figure 3-23: Interface Settings
Performance Verification Figure 3-23: Interface settings 9. Click the Browse button to open the Browse for IP Flow dialog box as shown in Figure 3-24. 3-43 RTX100B ISDB-T RF Signal Generator Service Manual... -
Page 90: Figure 3-24: Ip Flow Selection
Performance Verification 10. Select Tektronix LP1500 LAN Interface Port 4 from the Browse Device drop down menu. 11. In the Browse for UDP flow dialog box, make these selections (see Figure 3-24): a. Select the Passive mode radio button. b. In the Detected UDP Flows pane, select the IP stream with a Destination IP Address of 239.1.1.1. -
Page 91: Figure 3-25: Mts400 Series Ts Compliance Analyzer Display
Performance Verification 12. Allow the DUT RTX100B MPEG system to loop at least three times. 13. On the MTS400 Series MPEG system, verify that the TS Availability and Sync indicators, in the bottom left corner of the Compliance Analyzer display, remain green. -
Page 92: Figure 3-26: Clock Dialog Box
Performance Verification 15. Disconnect the DUT RTX100B MPEG system from the test setup and turn it off using the front panel POWER switch. After the Windows shutdown completes, unplug the power cord from the system. 16. Disconnect the MTS400 Series MPEG system from the test setup: a. -
Page 93: Figure 3-27: Rtx100B Mpeg Player Display With Maximum Bit Rate
Performance Verification The status bar displays the TS bit rate as 160.0000000 Mbps. Figure 3-27: RTX100B MPEG Player display with maximum bit rate 3. Perform the steps 5 through 15 listed in the Checking Option GbE perfor- mance section on page 3-37. -
Page 94: Figure 3-28: Mts400 Series Ts Compliance Analyzer Display For Maximum Bit Rate
Performance Verification Figure 3-28: MTS400 Series TS Compliance Analyzer display for maximum bit rate 5. Disconnect the DUT RTX100B MPEG system from the test setup and turn it off using the front panel POWER switch. After the Windows shutdown completes, unplug the power cord from the system. - Page 95 Adjustment Procedures...
-
Page 97: Table 4-1: Equipment Required
Before proceeding, note the following requirement: Warm-up Period The RTX100B requires a 20 minute warm-up time in a +20 _C to +30 _C environment before it is adjusted. Adjustment done before the operating temperature has stabilized may cause errors in performance. -
Page 98: Carrier Leakage Adjustment
1. Use the 75 Ω BNC(Ma)-to-NC(Fe) adapter, 50 Ω N(Fe)-to-75 Ω Ν(Μa) adapter, 50 Ω SMA cable, and two 50 Ω N(Ma)-to-SMA(Fe) adapter to connect the RF Out connector on the RTX100B to the RF Input on the spectrum analyzer. See Figure 4-1. -
Page 99: Table 4-2: Output Channel And Center Frequency Settings
10. Adjust the DAC(I) Offset and DAC(Q) Offset values so that the carrier leakage on the spectrum analyzer is less than - -80 dBm. 11. Change Reference Frequency (output channel) on the RTX100B and center frequency on the spectrum analyzer as listed in Table 4-2, and repeat steps 5 through 10. - Page 100 Adjustment Procedures RTX100B ISDB-T RF Signal Generator Service Manual...
- Page 101 Maintenance...
-
Page 103: Related Maintenance Procedures
H Section 3, Performance Verification, contains procedures that may be useful in isolating problems to modules by testing the RTX100B performance. H Section 7, Diagrams, contains a block diagram using individual modules as blocks and an interconnection diagram showing connections between the modules. -
Page 104: Preparation
CAUTION. Static discharge can damage any semiconductor component in the RTX100B. Preventing ESD When performing any service that requires internal access to the RTX100B, adhere to the following precautions to avoid damaging internal modules and their components due to electrostatic discharge (ESD). -
Page 105: Inspection And Cleaning
RTX100B adjustment. General Care The cabinet helps keep dust out of the RTX100B, and is needed to meet EMI and cooling requirements. The cabinet should be in place when operating the RTX100B. The front cover protects the front panel and display from dust and damage. -
Page 106: Table 5-1: External Inspection Check List
Cleaning Procedure — Exterior. To clean the RTX100B exterior, perform the following steps: 1. Remove loose dust on the outside of the RTX100B with a lint free cloth. 2. Remove remaining dirt with a lint free cloth dampened in a general purpose detergent-and-water solution. -
Page 107: Table 5-2: Internal Inspection Check List
Loose plugs or connectors. Firmly seat connectors. Repair or Burned, broken, or frayed wiring. replace modules with defective wires or cables. Chassis Dents, deformations, and dam- Straighten, repair, or replace aged hardware. defective hardware. RTX100B ISDB-T RF Signal Generator Service Manual... - Page 108 STOP. If, after performing steps 1 and 2, a module is clean upon inspection, skip the remaining steps. 3. If steps 1 and 2 do not remove all the dust or dirt, the RTX100B may be spray washed using a solution of ethyl alcohol by performing steps 4 through 8.
-
Page 109: Removal And Installation Procedures
WARNING. Before performing this or any other procedure in this manual, read the Safety Summary found at the beginning of this manual. Also, to prevent possible damage to components of the RTX100B, read Preventing ESD in this section. This subsection contains the following items: H Preparatory information that you need to properly perform the procedures that follow. -
Page 110: Table 5-3: Summary Of Procedures
First read over the Summary of Procedures that follows to understand how the procedures are grouped. Then read Equipment Required for a list of the tools needed to remove and install modules in the RTX100B. If you are removing a module for service, begin by performing the procedure Access Procedure (page 5-14). -
Page 111: Table 5-4: Tools Required For Module Removal
Removal and Installation Procedures Required Equipment. Most modules in this RTX100B can be removed with a screwdriver handle mounted with a size T-10 Torx screwdriver tip. Use this tool whenever a procedure step instructs you to remove or install a screw unless a different size screwdriver is specified in that step. -
Page 112: Figure 5-1: Rtx100B Orientation
Removal and Installation Procedures RTX100B Orientation In this manual, procedures refer to “front,” “rear,” and “top” of the RTX100B. Figure 5-1 shows how the sides are referenced. Figures 5-2 through 5-4 show the modules that make up the RTX100B. Figure 5-1: RTX100B orientation... -
Page 113: Figure 5-2: External Modules
LCD inverter board Fron- panel Emat Processor board (Play/Stop/Record) Front-panel bracket Keypad board LCD module insulator Keypad board LCD glass shield Emat (all others) Front cover Front panel Figure 5-2: External modules 5-11 RTX100B ISDB-T RF Signal Generator Service Manual... -
Page 114: Figure 5-3: Board Modules
Removal and Installation Procedures Printer connector Blank panel A20 PCI Backplane board A150 ISDB- - T RF Output board A12 Main board CPU board Figure 5-3: Board modules 5-12 RTX100B ISDB-T RF Signal Generator Service Manual... -
Page 115: Figure 5-4: Internal Modules
Removal and Installation Procedures 12 V main power supply RFI filter Hard disk drive External fan retainer A40 AC Distributor board Hard disk drive Internal fan Figure 5-4: Internal modules 5-13 RTX100B ISDB-T RF Signal Generator Service Manual... -
Page 116: Access Procedure
A150 RF Output board p.5-23 A12 Main board p.5-23 the module CPU board p.5-23 in Figure A20 PCI Backplane board p.5-24 5-3 ? Printer connector p.5-25 Figure 5-5: Guide to removal procedures 5-14 RTX100B ISDB-T RF Signal Generator Service Manual... -
Page 117: Procedures For External Modules
Locate the cabinet in the locator diagram External modules, Figure 5-2, page 5-11. 2. Orient the instrument: Set the RTX100B so its bottom is down on the work surface and its rear is facing you. 3. Use a screwdriver with a T-15 Torx tip to remove the two screws securing the cabinet to the RTX100B. -
Page 118: Figure 5-6: Cabinet Removal
Locate the right-side cover in the locator diagram External modules, Figure 5-2, page 5-11. 2. Orient the instrument: Set the RTX100B so its left side is down on the work surface and its front is facing you. 3. Use a screwdriver with a T-10 Torx tip to remove the seven screws securing the right-side cover to the top and bottom of the chassis. -
Page 119: Figure 5-7: Right-Side And Left-Side Covers Removal
Locate the left-side cover in the locator diagram External modules, Figure 5-2, page 5-11. 2. Orient the instrument: Set the RTX100B so its right side is down on the work surface and its front is facing you. 3. Use a screwdriver with a T-10 Torx tip to remove the six screws securing the left-side cover to the top and bottom of the chassis. -
Page 120: Figure 5-8: Front-Panel Unit Removal
Locate the front-panel unit in the locator diagram External modules, Figure 5-2, page 5-11. 2. Orient instrument: Set the RTX100B so its bottom is down on the work surface and its front is facing you. 3. Remove front-panel unit: See Figure 5-8. - Page 121 6. Now manually disassemble the front-panel assembly components using Figure 5-9 as a guide. Reverse the procedure to reassemble. 7. Reinstallation: Perform steps 2 through 6 in reverse order to reinstall the front-panel assembly. 5-19 RTX100B ISDB-T RF Signal Generator Service Manual...
-
Page 122: Figure 5-9: Disassembly Of Front-Panel Assembly
Removal and Installation Procedures LCD inverter board Front-Panel Processor board Front-panel bracket Emat (Play/Stop/Record) LCD module Keypad board insulator Keypad board LCD glass shield Emat (all others) Front cover Figure 5-9: Disassembly of front-panel assembly 5-20 RTX100B ISDB-T RF Signal Generator Service Manual... -
Page 123: Procedure For Board Modules
Retainers H You need a screwdriver with a T-10 Torx tip. 2. Orient the instrument: Set the RTX100B so its bottom is down on the work surface and its right side is facing you. 3. Remove the board retainers: See Figure 5-10 on page 5-22. -
Page 124: Figure 5-10: A150 Rf Output Board, A12 Main Board Cpu Board, And A20 Pci Backplane Board Removal
A20 PCI Backplane board Printer connector A150 ISDB-T RF Output board A12 Main board CPU board Figure 5-10: A150 RF Output board, A12 Main board, CPU board, and A20 PCI Backplane board removal 5-22 RTX100B ISDB-T RF Signal Generator Service Manual... - Page 125 Locate the A150 ISDB-T RF Output board in the locator diagram Board modules, Figure 5-3, page 5-12. 2. Orient the instrument: Set the RTX100B so its bottom is down on the work surface and its right side is facing you.
- Page 126 Removal and Installation Procedures 2. Orient the instrument: Set the RTX100B so its bottom is down on the work surface and its right side is facing you. 3. Remove the CPU board: See Figure 5-10 on page 5-22. a. Disconnect these cables: H The cable from the hard disk drive at CN1.
- Page 127 Locate the connector in the locator diagram Board modules, Figure 5-3, page 5-12. 2. Orient the instrument: Set the RTX100B so its bottom is down on the work surface and its rear is facing you. 3. Remove the Printer connector: See Figure 5-10 on page 5-22.
-
Page 128: Procedure For Internal Modules
Locate the hard disk drive in the locator diagram Internal modules, Figure 5-4, page 5-13. 2. Orient the instrument: Set the RTX100B so its bottom is down on the work surface and its left side is facing you. 3. Remove the hard disk drive: See Figure 5-11 on page 5-27. -
Page 129: Figure 5-11: Hard Disk Drive Removal
Removal and Installation Procedures Hard disk drive unit Plate Hard disk drive retainer Figure 5-11: Hard disk drive removal 5-27 RTX100B ISDB-T RF Signal Generator Service Manual... -
Page 130: Verification
4. Reinstallation: Perform step 3 in reverse order to reinstall the internal fan. 5. Remove the external fan: See Figure 5-12 on page 5-29. a. Set the RTX100B so its bottom is down on the work surface and its rear is facing you. -
Page 131: Figure 5-12: Internal And External Fan Removal
Removal and Installation Procedures 6. Reinstallation: Perform step 5 in reverse order to reinstall the external fan. Internal fan External fan Figure 5-12: Internal and external fan removal 5-29 RTX100B ISDB-T RF Signal Generator Service Manual... - Page 132 Locate the 12 V main power supply in the locator diagram Internal modules, Figure 5-4, page 5-13. 2. Orient the instrument: Set the RTX100B so its bottom is down on the work surface and its left side is facing you.
-
Page 133: Figure 5-13: 12 V Main Power Supply And A40 Ac Distributor Board Removal
Locate the RFI filter in the locator diagram Internal modules, Figure 5-4, page 5-13. 2. Orient the instrument: Set the RTX100B so its bottom is down on the work surface and its rear is facing you. 3. Remove the RFI filter: See Figure 5-14. -
Page 134: Figure 5-14: Rfi Filter Removal
Pull the RFI filter away from the chassis. 4. Reinstallation: Perform step 3 in reverse order to reinstall the RFI filter. To J110 on the A40 AC Distributor board RFI filter Figure 5-14: RFI filter removal 5-32 RTX100B ISDB-T RF Signal Generator Service Manual... -
Page 135: Verifying The Bios Configuration
Super IO Device : Onboard FDC Controller : Disabled Onboard Serial Port 2 : Disabled : Disabled Onboard Serial Port 4 PC Health Status : Disabled CPU Warning Temperature : Disabled Shutdown Temperature 5-33 RTX100B ISDB-T RF Signal Generator Service Manual... - Page 136 4. Use the arrow keys to select Save & Exit Setup, and then press the Enter key. The Save to CMOS and Exit (Y/N)? message appears. 5. Enter Y, and press the Enter key. 5-34 RTX100B ISDB-T RF Signal Generator Service Manual...
-
Page 137: Troubleshooting
Troubleshooting This subsection contains troubleshooting trees designed to isolate faulty modules in the RTX100B. Troubleshooting Trees Figures 5-15 through 5-24 show the troubleshooting procedure for the RTX100B. 5-35 RTX100B ISDB-T RF Signal Generator Service Manual... -
Page 138: Figure 5-15: Troubleshooting Procedure (1)
A12 Main board and the A150 ISDB-T RF Output board H Replace the A20 PCI Backplane displayed in the Status board. dialog box? H Replace the A150 ISDB-T RF Output board. Figure 5-15: Troubleshooting procedure (1) 5-36 RTX100B ISDB-T RF Signal Generator Service Manual... -
Page 139: Figure 5-16: Troubleshooting Procedure (2)
Can a stream data Output board is securely installed be acquired from the ASI In into the card slot. connector? H Replace the A150 ISDB-T RF Output board. Figure 5-16: Troubleshooting procedure (2) 5-37 RTX100B ISDB-T RF Signal Generator Service Manual... -
Page 140: Figure 5-17: Troubleshooting Procedure (3)
ISDB-T transport stream file on the generator. Can an RF modulated Replace the A150 ISDB-T RF Output signal be output from the RF board. Out connector? Done. Figure 5-17: Troubleshooting procedure (3) 5-38 RTX100B ISDB-T RF Signal Generator Service Manual... -
Page 141: Figure 5-18: Troubleshooting Procedure (4)
A150 ISDB-T RF Output board from the +5 V, +3.3 V, +12 V, and A20 PCI Backplane board. - - 12 V correct ? Replace the CPU board. Figure 5-18: Troubleshooting procedure (4) 5-39 RTX100B ISDB-T RF Signal Generator Service Manual... -
Page 142: Figure 5-19: Troubleshooting Procedure (5)
H If the other voltage is faulty, replace the A20 PCI Backplane board. Change the A12 Main board or the A150 ISDB-T RF Output board, which affects the power supply. Figure 5-19: Troubleshooting procedure (5) 5-40 RTX100B ISDB-T RF Signal Generator Service Manual... -
Page 143: Figure 5-20: Troubleshooting Procedure (6)
174-5220-00 cables. Does the backlight H Replace the Inverter board. light ? H Replace the Front-Panel Processor board. H Check the 259-A002-00 cable. H Replace the LCD module. Figure 5-20: Troubleshooting procedure (6) 5-41 RTX100B ISDB-T RF Signal Generator Service Manual... -
Page 144: Figure 5-21: Troubleshooting Procedure (7)
Enable check box in box. the Others dialog box selected? Can a stream data be output from the SPI In/Out connector? Done. Replace the A12 Main board. Figure 5-21: Troubleshooting procedure (7) 5-42 RTX100B ISDB-T RF Signal Generator Service Manual... -
Page 145: Figure 5-22: Troubleshooting Procedure (8)
Can a stream data be acquired from the SPI In/Out connector? Replace the A12 Main board. Done. Figure 5-22: Troubleshooting procedure (8) Front J220 J170 Figure 5-23: A20 PCI Backplane board view- back side 5-43 RTX100B ISDB-T RF Signal Generator Service Manual... -
Page 146: Figure 5-24: A20 Pci Backplane Board View- -Right Side
Troubleshooting Front J230 J240 Figure 5-24: A20 PCI Backplane board view- right side 5-44 RTX100B ISDB-T RF Signal Generator Service Manual... -
Page 147: System Software Recovery
System Software Recovery If the RTX100B does not boot up or is corrupted, you can recover the system software by using this recovery procedure. CAUTION. Running the recovery procedure overwrites all the contents of the hard disk drive and resets the system to the factory defaults. - Page 148 H Click Cancel and Exit to cancel the recovery process and exit from the Phoenix Recovery Pro 6 application. 5. Click the Next button of the wizard until Windows XP is installed. The system restarts after the installation of Windows XP to display the RTX100B application screen. 5-46...
-
Page 149: Using The Rescue Disk
H USB keyboard H USB mouse Recovery Procedure NOTE. The rescue disk recovery procedure works only with MTX100B, RTX100B, and RTX130B instruments. Before you start the rescue disk recovery procedure make sure to check for the BIOS settings. Follow these steps to set the BIOS settings for booting from an external USB DVD drive: 1. - Page 150 20 seconds. 3. Press 1 to proceed as soon as you see the screen. NOTE. The approximate time taken to restore the Windows XP and RTX100B application is 1 hr to 1.5 hr. 4. Press any key to turn off the instrument once the restoration is complete.
- Page 151 Options...
- Page 153 Options This section describes options that are available for the RTX100B. The following options are available: Options Description Software option Option SC Adds the Scheduler application Service options Option D1 Provides calibration data Option D3 Provides calibration data for 3 years...
- Page 154 Options RTX100B ISDB-T RF Signal Generator Service Manual...
- Page 155 Diagrams...
- Page 157 H Block diagram of the RTX100B H Interconnect diagram of the RTX100B Block diagram shows the modules and functional blocks in the RTX100B. Interconnect diagram shows how the modules in the RTX100B connect together. RTX100B ISDB-T RF Signal Generator Service Manual...
- Page 158 Diagrams RTX100B ISDB-T RF Signal Generator Service Manual...
- Page 159 IEEE1394b External Internal 5 V Main Power Supply Front-Panel Processor Board Inverter Board for LCD Backlight 5 V Sub Power Supply AC Distributor Board Keypad Board Figure 7-1: RTX100B block diagram 7- 3 RTX100B ISDB-T RF Signal Generator Service Manual...
- Page 160 7- 4 RTX100B ISDB-T RF Signal Generator Service Manual...
- Page 161 Front-Panel Processor Board 174-5171-00 Inverter Board for LCD 174-3767-01 J120 J100 J301 Backlight 5 V Sub Power 174-5170-00 J110 Supply AC Distributor Board 196-3499-00 Keypad Board J105 174-5188-00 Figure 7-2: RTX100B interconnect diagram 7- 5 RTX100B ISDB-T RF Signal Generator Service Manual...
- Page 162 7- 6 RTX100B ISDB-T RF Signal Generator Service Manual...
- Page 163 Replaceable Parts List...
-
Page 165: Parts Ordering Information
Replaceable Parts List This section contains a list of the replaceable modules for the RTX100B. Use this list to identify and order replacement parts. Parts Ordering Information Replacement parts are available through your local Tektronix field office or representative. Changes to Tektronix products are sometimes made to accommodate improved components as they become available and to give you the benefit of the latest improvements. - Page 166 For more information about the module exchange program, call 1-800-833-9200. Outside North America, contact a Tektronix sales office or distributor; see the Tektronix Web site for a list of offices: www.tektronix.com Module Repair and Return. You may ship your module to us for repair, after which we will return it to you.
-
Page 167: Using The Replaceable Parts List
Using the Replaceable Parts List This section contains a list of the mechanical and/or electrical components that are replaceable for the RTX100B. Use this list to identify and order replacement parts. The following table describes each column in the parts list. - Page 168 SOFTWARE PKG;MICROSOFT WINDOWS XP PROFESSIONAL,INCLUDES SERVICE PACK 2,1-2 PROCESSOR VERSION;CERTIFICATE OF AUTHENTICITY - - 7 337- - 4346- - 00 SHIELD,ELEC:COVER,RIGHT,MTX100A,AL - - 8 211- - 0374- - 00 SCREW,MACHINE:6-32X0.25,FLH,100 DEG,STL ZN-CM1,T10 TORX RTX100B ISDB-T RF Signal Generator Service Manual...
-
Page 169: Figure 8-1: Cabinet And Covers
Replaceable Parts List Figure 8-1: Cabinet and covers RTX100B ISDB-T RF Signal Generator Service Manual... - Page 170 441- - 2404- - 00 CHASSIS,ASSY;MAIN,MTX100A,AL - - 26 210- - 0164- - 000 RIVET,SOLID;0.163 ODX0.415 L,PANEL RANGE HEAD STYLE,NYLON - - 27 119- - 7187- - 00 FAN 119569400 W/CABLE 18CM L(92 SQ FAN) RTX100B ISDB-T RF Signal Generator Service Manual...
-
Page 171: Figure 8-2: Internal Modules (1)
Replaceable Parts List Front panel unit See Figure 8-4 on page 8-11 for detailed view. Figure 8-2: Internal modules (1) RTX100B ISDB-T RF Signal Generator Service Manual... - Page 172 426- - 2624- - 00 FRAME,SECTION:TOP,MTX100A,STL - - 14 211- - 0373- - 00 SCREW,MACHINE:4-40X0.25,PNH,STL ZN-CM1,T10 TORX - - 15 343- - 1697- - 00 RETAINER:CKT BD,PCI,MTX100A,STL - - 16 343- - 1700- - 00 RETAINER:CKT BD,PCI,RTX100A,STL RTX100B ISDB-T RF Signal Generator Service Manual...
-
Page 173: Figure 8-3: Internal Modules (2)
Replaceable Parts List A150 Figure 8-3: Internal modules (2) RTX100B ISDB-T RF Signal Generator Service Manual... - Page 174 260- - 2834- - 00 SWITCH,KEYPAD;ELASTOMERIC FRONT PANEL MTX100B - - 18 260- - 2835- - 00 SWITCH,ELASTOMERIC,POWER AND PLAY BUTTONS;FRONT PANEL MTX100B - - 19 335- - 1595- - 00 LABEL,FRONT PANEL CONTROL,MTX100B 8-10 RTX100B ISDB-T RF Signal Generator Service Manual...
-
Page 175: Figure 8-4: Front Panel Unit
Replaceable Parts List Figure 8-4: Front panel unit 8-11 RTX100B ISDB-T RF Signal Generator Service Manual... - Page 176 CABLE,ASSEMBLY,2X15,28AWG FLAT,1MM CTR,300MM L,A20 TO A30 - - 19 174- - 3767- - 01 CABLE,ASSEMBLY,SP;DISCRETE,BACKLIGHT,IDC,26 AWG,5.0 L,PCB,1 X 6,0.079 CTR (2MM),SHRINK WRAPPED - - 20 174- - 5266- - 00 CABLE,ASSEMBLY;RIBBON ADAPTER TO XGA DISPLAY,10 PIN,3.5IN 8-12 RTX100B ISDB-T RF Signal Generator Service Manual...
-
Page 177: Figure 8-5: Cables
Replaceable Parts List Power supply Hard disk drive Figure 8-5: Cables 8-13 RTX100B ISDB-T RF Signal Generator Service Manual... - Page 178 - - - - - - - - - - - - - - - - - - - - - - WFM7F05 OPTION NN RACKMOUNT KIT - - - - - - - - - - - - - - - - - - - - - - 1700F06 BLANK PANEL 8-14 RTX100B ISDB-T RF Signal Generator Service Manual...
Need help?
Do you have a question about the RTX100B and is the answer not in the manual?
Questions and answers