Table of Contents
Advertisement
Available languages
Available languages
Quick Links
Advertisement
Table of Contents

Related Manuals for Montarbo PALCO PLUS RA18X


Summary of Contents for Montarbo PALCO PLUS RA18X
- Page 1 PROFESSIONAL ARRAY SYSTEM manuale utente | user’s manual italiano | english...
- Page 2 Per evitare il rischio di incendio e/o folgorazione, non smontateli e non rimuovete i pannell. Per qualsiasi intervento di manutenzione o riparazione, rivolgetevi alla Elettronica Montarbo srl e/o a personale altamente qualificato specificamente segnalato da questa. - Nel predisporre il sistema all'utilizzo, assicurarsi che la forma e la portata della superficie di appoggio e delle strutture di montaggio siano idonee a sostenerlo.
-
Page 3: Table Of Contents
manuale utente manuale utente I ND IC E 1: DESCRIZIONE DEL SISTEMA ................4 2: DATI TECNICI ....................5 3: MONTAGGIO ..................6 - 9 4: CABLAGGIO DEL SISTEMA ..............10 - 12 5: ESEMPI DI COLLEGAMENTO ..............13 APPENDIX ......................26 Certificazione di sicurezza dei componenti IMPORTANTE: Il diffusore per basse frequenze RA18 fa parte del sistema line-array PalcoPlus, ed è... -
Page 4: 1: Descrizione Del Sistema
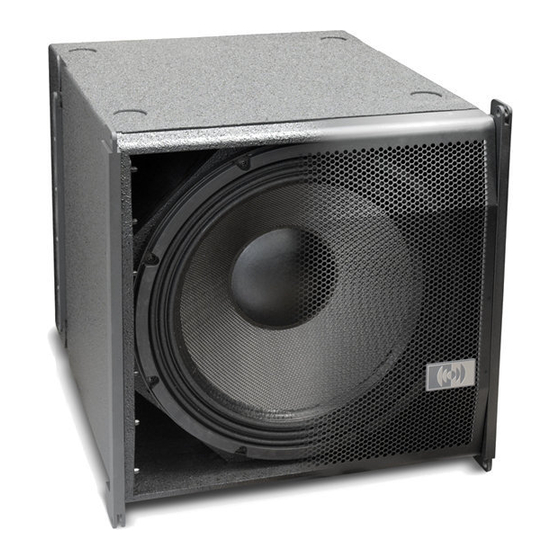
manuale utente manuale utente 1 - DESCRIZIONE DEL SISTEMA RA18 è il nuovo elemento del sistema PalcoPlus che ne aumenta ulteriormente la flessibilità di utilizzo e la ricchezza timbrica. Si tratta di un 'arrayable bass cabinet' di tipo bass-reflex con altoparlante da 18"... -
Page 5: 2: Dati Tecnici
manuale utente manuale utente 2 - DATI TECNICI RA18 Risposta in frequenza: 50 Hz ÷ 100 Hz Trasduttori: 1 x 18”; bobina da 4” Potenza max applicabile 1700 Watt su 4 ohm SPL Max: 130dB (1m; singolo diffusore; semi-spazio) Dispersione: Omnipolare Dimensioni: L 527 x H 540 x P 550 mm... -
Page 6: 3: Montaggio
RA18 è previsto per essere fissato ad un 'Bumper' modello B1 o B2, da solo o insieme ai diffusori RA16, per formare un sistema completo. Gli elementi di sospensione forniti da Montarbo sono dimensionati per formare sistemi sospesi composti da RA18 e RA16, con i seguenti limiti:... - Page 7 manuale utente manuale utente 1) Allineare a terra o su un piano orizzontale (ad esempio un asse di legno di dimensioni e robustezza adeguate) tutti i diffusori (RA18 e RA16) da assemblare, ed il BUMPER. Accertarsi che tutti gli elementi siano orientati nel verso corretto (alto-basso).
- Page 8 manuale utente manuale utente 4) Togliere le 2 spine ad aggancio rapido che trattengono le piastre anteriori del BUMPER in posizione di trasporto. Ruotare le piastre in posizione di lavoro (orizzontale) e fissarle con le 2 spine tolte in precedenza (figura 2.4). Figura 2.4 5) Collegare il frontale del BUMPER al primo RA18, mediante le due...
- Page 9 manuale utente manuale utente 7) Collegare il posteriore del primo RA18 al secondo RA18 o al primo RA16, mediante 2 barre di regolazione angolare e 2 spine ad aggancio rapido, utilizzando i fori di fissaggio corrispondenti ad un angolo di 0°. 8) Proseguire con l'assemblaggio degli altri diffusori RA16, fissando le spine alla barre di regolazione angolare nei fori corrispondenti agli angoli di inclinazione voluti.
-
Page 10: 4: Cablaggio Del Sistema
manuale utente manuale utente 4 - CABLAGGIO DEL SISTEMA Le basse impedenze dei diffusori e le alte potenze utilizzabili rendono necessario l'uso di cavi di sezione adeguata. I diffusori RA18 e RA18X sono previsti per essere pilotati da un processore amplificato mod. - Page 11 manuale utente manuale utente Cablaggio RA18 + RA16 con PLM6800 RA18 Cavo tipo 1 Type 1 cable Cavo tipo 2 Type 2 cable W O O F E R S Y S T E M - 1 7 0 0 W RA18 MIXER output W O O F E R S Y S T E M -...
- Page 12 manuale utente manuale utente Cablaggio RA18X + RA16 con PLM6800 Cavo tipo 1 Type 1 cable Cavo tipo 2 Type 2 cable RA18X MIXER output W O O F E R S Y S T E M - 3 4 0 0 W cold RA16 RA16...
-
Page 13: 5: Esempi Di Collegamento
manuale utente manuale utente 5 - ESEMPI DI CONFIGURAZIONE Esempi di configurazione stereo con RA16 + RA18 / RA18X (sistema appeso) 2 x 4 + 2 (standard): 4 RA16 + 2 RA18 + 2 PLM6800 per ogni lato oppure 4 RA16 + 2 RA18 + 1 LM24 + adeguate unità di potenza per ogni lato 2 x 8 + 4: 8 RA16 + 4 RA18 + 4 PLM6800 per ogni lato... - Page 14 To prevent fire and/or electrical shock, never disassemble them or remove the panels. maintenance (servicing) instructions. For maintenance and servicing always refer to the official Montarbo Distributor in your Country or to qualified personnel specifically authorized by the Distributor. - When setting-up the system for operation, make sure that the shape and load rating of the surface or the structures that will support it can safely match the product size and weight.
- Page 15 user’s manual user’s manual I ND EX 1: SYSTEM DESCRIPTION ................16 2: TECHNICAL DATA ..................17 3: ASSEMBLING THE ARRAY ..............18 - 21 4: SYSTEM WIRING .................22 - 24 5: EXAMPLES OF APPLICATIONS ..............25 APPENDIX ......................26 Safety and compliance certification of system's components IMPORTANT! The model RA18 low frequency loudspeaker is a component of the PalcoPlus line-array system and it is intended for being used only when...
- Page 16 user’s manual user’s manual 1 - SYSTEM DESCRIPTION RA18 is a new element of the PALCOPlus system designed to further increase the system's flexibility of use and tonal quality. It is a vented "arrayable bass cabinet " fitted with a 18" LF driver (4"...
-
Page 17: Technical Data
user’s manual user’s manual 2 - TECHNICAL DATA RA18 Frequency Response: 50 Hz ÷ 100 Hz Transducers: 1 x 18”; 4” voice coil Max Power Handling: 1700 Watts @ 4 Ohms Maximum SPL: 130dB (@ 1m; half space) Dispersion: Omnipolar Dimensions: W 527 x H 540 x D 550 mm;... - Page 18 RA18 is designed to be supported by a model B1 or B2 bumper, alone or in combination with model RA16 speakers, to assemble a complete system. The suspension accessories supplied by Montarbo are suitable for rigging systems composed of RA18 and Ra16 within the following limits:...
- Page 19 user’s manual user’s manual 1) Align on the floor or on a horizontal plane (e.g. a wooden board of suitable size and strength) all the speakers (RA18 and RA16) and the BUMPER (figure 2.1). Make sure that their orientation is correct (top-bottom). Figure 2.1 2) Make sure that the BUMPER is placed under the support structure's...
- Page 20 user’s manual user’s manual 4) Remove the two pins that retain the front plates of the BUMPER in the transport position. Rotate the plates into the working position (horizontal) and fasten them with the two pins removed before (figure 2.4). Figure 2.4 5) Join the front plate of the first RA18 and the front side of...
- Page 21 user’s manual user’s manual 7) Join together the backs of the first RA18 to the second RA18 or the first RA16, using 2 pins and 2 plates and the attachment holes marked for 0° splay angle. 8) Continue with the assembly of the other RA16 speakers, by fitting the pins to the plates using the attachment holes marked with the desired splay angle.
-
Page 22: System Wiring
user’s manual user’s manual 4 - SYSTEM WIRING Due to the low impedance of the speakers and the high power levels involved, it is necessary to use cables with adequate copper section. RA18 and RA18X speakers are intended to be driven by a model PLM6800 "powered controller", and connected with 4-conductors cables fitted with Neutrik Speakon®... - Page 23 user’s manual user’s manual RA18 + RA16 with PLM6800 wiring RA18 Cavo tipo 1 Type 1 cable Cavo tipo 2 Type 2 cable W O O F E R S Y S T E M - 1 7 0 0 W RA18 MIXER output W O O F E R S Y S T E M -...
- Page 24 user’s manual user’s manual RA18X + RA16 with PLM6800 wiring Cavo tipo 1 Type 1 cable Cavo tipo 2 Type 2 cable RA18X MIXER output W O O F E R S Y S T E M - 3 4 0 0 W cold RA16 RA16...
- Page 25 user’s manual user’s manual 5 - EXAMPLES OF CONFIGURATIONS Examples of stereo configurations RA16 + RA18 / RA18X (system flown) 2 x 4 + 2 (standard): 4 RA16 + 2 RA18 + 2 PLM6800 for each side or 4 RA16 + 2 RA18 + 1 LM24 + suitable amp units for each side 2 x 8 + 4: 8 RA16 + 4 RA18 + 4 PLM6800 for each side or 8 RA16 + 4 RA18 + 1 LM24 + suitable amp units for each side...
-
Page 26: Appendix
Via G. Di Vittorio n° 13 40057 Cadriano di Granarolo (BO) Oggetto: CALCOLO DELLA PORTATA DEGLI ELEMENTI DI CONNESSIONE MONTARBO IN MICROFUSIONE, ABBINATI A BUMPER E BUMPER PICCOLO Calcolatore delle strutture: Dott. Ing. FRANCO FAGGIOTTO Timbro e Firma Data: Forlì 04 Dicembre 2008 Dott. - Page 27 In the European Union If the product is used for business purposes and you want to discard it: please contact your Montarbo dealer who will inform you about the take-back of the product. You might be charged for the costs arising from take-back and recycling.
- Page 28 Should further information be desired, please contact us or our local distributor. Elettronica Montarbo srl can not be considered responsible for damages which may be caused to people and things when using this product Specifications, features and pictorial material are subject to change without prior notice.
Need help?
Do you have a question about the PALCO PLUS RA18X and is the answer not in the manual?
Questions and answers