
Related Manuals for Zennio ZVP-CAM


Summary of Contents for Zennio ZVP-CAM
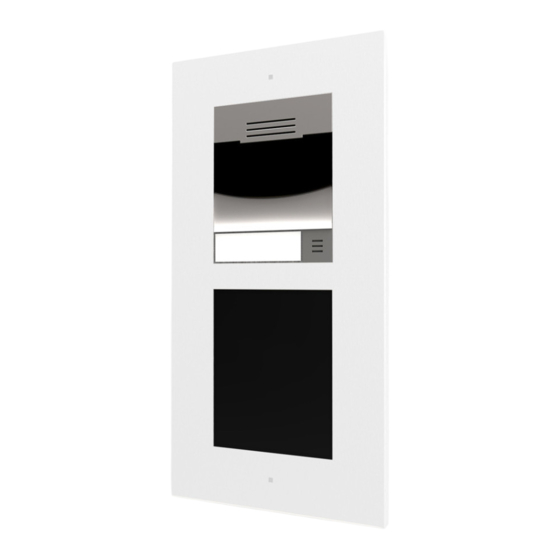
- Page 1 Zennio GetFace IP IP Video Intercom (Basic Unit) ZVP-CAM/ZVP-WOCAM User manual version: [2.18]_b Firmware version 2.18 www.zennio.com...
-
Page 2: Table Of Contents
Zennio GetFace IP CONTENTS Contents ............................2 Document Updates ........................3 Introduction .......................... 4 Installation ..........................5 Device Wiring Diagram ....................5 Application Cases ......................7 2.2.1 Single-Family Homes ..................7 Apartment Block......................7 Configuration......................... 9 GetFace IP Basic Settings ..................... 11 3.1.1... -
Page 3: Document Updates
Zennio GetFace IP DOCUMENT UPDATES Version Changes Page(s) Minor text changes. [2.18]_b http://www.zennio.com Tecnical Support:http://support.zennio.com... -
Page 4: Introduction
Zennio GetFace IP 1 INTRODUCTION Zennio GetFace IP is the video intercom solution from Zennio. In combination with the supported touch panels (such as Z41 COM), it provides integration for video-call management between the entrance door of a residential environment (like single- family homes, apartment blocks or housing states with a common access) and the interior of the dwelling. -
Page 5: Installation
Zennio GetFace IP 2 INSTALLATION 2.1 DEVICE WIRING DIAGRAM Zennio GetFace IP provides several optional modules which can be connected individually to expand the number of the device functions or features. Keypad module (ZVP-KEYPAD), 5-button module (ZVP-NAME5), Touch display (ZVP-TOUCHD),... - Page 6 Zennio GetFace IP KEYPAD MODULE MODULE MODULE (optional) (optional) (optional) LEDs RESET LINE (PoE) OUT1 RELAY12 UTP CAT-5 12VDC 2A LOCK SWITCH Figure 1 Device wiring diagram. http://www.zennio.com Tecnical Support:http://support.zennio.com...
-
Page 7: Application Cases
Figure 2 Single-family home installation. 2.3 APARTMENT BLOCK In the case of an apartment building equipped with a common Zennio GetFace IP intercom for all of them, a community network infrastructure (firewall-managed) will be required to interconnect the video intercom with each apartment. As in 2.2.1, each of aparments may or may not have its own Internet connection router. - Page 8 UTP CAT-5 Figure 3 Apartment block installation. For detailed information about the technical features of Zennio GetFace IP, as well as on security and installation procedures, please refer to the device Datasheet, bundled within the device packaging and also available at www.zennio.com.
-
Page 9: Configuration
A number of parameters will be provided for the proper, joint operation of Zennio GetFace IP and Z41 COM. During the first 30 seconds of operation (after supplying power to the video intercom), the Hardware button should be pressed for 5 times. - Page 10 Zennio GetFace IP Figure 4 Configuration menu. Notes The default language of the interface is English. A Save button is provided at the bottom of each configuration page to allow saving any changes made, although a confirmation message will show up if trying to switch to another page without having saved them.
-
Page 11: Getface Ip Basic Settings
Zennio GetFace IP 3.1 GETFACE IP BASIC SETTINGS The most important fields to be configured so the video intercom can interface with Z41 COM are explained next. Those to be modified from the default configuration are, in short, the following: Phone (ID): identifier of the video intercom (if intending to link it to a specific box in Z41 COM). -
Page 12: Video-Call Configuration: Services
SIP is a transmission control protocol used in IP telephony. Up to two SIP profiles can be set up. Each profile should be configured properly according to its own operation network. The following configuration settings allow Z41 COM to connect to Zennio GetFace IP. - Page 13 Zennio GetFace IP Phone Number (ID): numerical identifier for the video intercom. This value must match the Intercom ID parameter (in ETS) of the particular box of Z41 COM where the video intercom is desired to be linked to. However, if such parameter is left blank in ETS, then this field is irrelevant.
- Page 14 Call Time Limit sets the maximum duration of the call. After this time, the call is finished automatically. The end of this call will be warned by Zennio GetFace IP by beeping 10 seconds in advance. In such case, the call can be extended by simply pressing on any button from the touch display module (ZVP-TOUCHD) or from the keypad module (ZVP-KEYPAD), if configured.
- Page 15 Zennio GetFace IP Figure 8 Audio. Transmission Quality Settings: Quality of Service DSCP Value: sets the priority of the RTP packages in the network. The value set here will be sent under the ToS (Type of Service) field of the IP package header.
- Page 16 Zennio GetFace IP VIDEO The video output settings can be configured under the Video tab. Video Codecs: It is advisable to change the H.264 video resolution for a smooth video transmission. This is possible under Services Phone Video, as shown in Figure 10.
- Page 17 Zennio GetFace IP To that end, the aforementioned parameters are configured as detailed below, under Services HTTP API Services. System API: “Unsecure (TCP)”, with no authentication. Switch API: “Secure (TLS)” with “Digest” authentication. Camera API: “Unsecure (TCP)”. If a camera preview is required, the authentication should be set to “None”.
-
Page 18: Housing Configuration & Z41 Com (Directory)
Zennio GetFace IP Figure 12 HTTP API Account. 3.1.3 HOUSING CONFIGURATION & Z41 COM (DIRECTORY) Homes connected to the video intercom system must be configured from Directory. The following features can be set up from this window. 3.1.3.1 USERS It is necessary to configure, at least, as many positions as dwellings that may be called from the video intercom. - Page 19 Zennio GetFace IP call to following deputy. In short, a single dwelling can have several users assigned, however all the Z41 COM defined for a user must belong to the same dwelling. Example: The format should be: sip:irrelevant_identifier@IP_of_the_Z41_COM_device A valid example would be: sip:555@192.168.1.101, being 192.168.1.101 the IP address of the Z41 COM.
-
Page 20: Door Opening Configuration (Hardware/Switches)
It is possible to configure the opening of electric locks linked to Zennio GetFace IP. This allows controlling them from Z41 COM (up to three electric lock can be enabled). For instructions on how to wire the lock system to Zennio GetFace IP please refer to section 2 and to datasheet of the device. - Page 21 Zennio GetFace IP Regarding the configuration, it is necessary to enable the switch in the top side box and to set the page options according to the provided lock system. Figure 14 Switches. Basic Settings of the switches: Switch Mode: sets the opening mode (monostable, in case it gets automatically deactivated some time after the opening order;...
-
Page 22: Buttons Module Call Configuration (Hardware/Buttons)
Zennio GetFace IP Normal: to perform the door opening, the output needs to be activated. Inverted: to perform the door opening, the output needs to be deactivated. Security: the output works in inverted mode but a security relay module has been installed and therefore a specific pulse sequence is necessary for the door opening (this requires the ZVP-ACSR module). -
Page 23: Door Switch Configuration (Hardware/Digital Inputs)
(see section 3.1.3.1 for more information). 3.1.6 DOOR SWITCH CONFIGURATION (HARDWARE/DIGITAL INPUTS) The REX Input Control section allows configuring one of the Zennio GetFace IP inputs to work as an output button, so that one output gets opened after that input gets activated. -
Page 24: Tamper Switch Configuration
For that purpose it must be connected to a KNX input or any monitoring system. That connection will remain closed after the Zennio GetFace IP frame has been installed. On the other hand, it will be open once the frame gets removed. -
Page 25: Configuration Of Rfid Card Access
Zennio GetFace IP PHONE BOOK The appearance of the phone book is configured in this section. Users can be distributed into groups ordered into levels, up to four levels including the main group. Figure 17 Display. Once the levels have been defined, the users can be included into them through the configuration area on the right side. - Page 26 By automating the process through an RFID card reader for PC (ZVP- RFUSB). This requires installing the card reader driver, available at http://www.zennio.com, and entering the web interface of a Zennio GetFace IP with the ZVP-RFSMN module installed. By pressing on the icon shown in...
- Page 27 Zennio GetFace IP Figure 20 User cards. Card activation time profiles can be configured in Directory Time Profiles (see section 3.2.2.1). Maintenance cards can be set up in Directory Access Cards. These cards will allow activating / deactivating up to ten cards not initially assigned.
-
Page 28: Magnetic Induction Loop Configuration
Zennio GetFace IP 3.1.10 MAGNETIC INDUCTION LOOP CONFIGURATION ZVP-LOOP is a module designed for people with hearing impairment. It allows transmitting an audio signal directly to a hearing aid device through a magnetic loop. It also shows oversize visual signals to improve the communication. -
Page 29: Advanced Settings
These fields are not mandatory for a standard configuration, but they are detailed in case the end requires any of the extra features. 3.2.1 STATUS The Status window shows status information concerning Zennio GetFace IP. It consists of the following sections. 3.2.1.1 DEVICE... - Page 30 Zennio GetFace IP 3.2.1.2 SERVICES It shows basic information about the device network and the service status. Figure 23 Services. http://www.zennio.com Tecnical Support:http://support.zennio.com...
-
Page 31: Directory
Zennio GetFace IP 3.2.1.3 EVENTS It shows a date-ordered register of the last events that have taken place. Figure 24 Events. 3.2.2 DIRECTORY Homes connected to the video intercom system are configured in Directory. The following advanced features can be set up from this window: 3.2.2.1 TIME PROFILES... - Page 32 Zennio GetFace IP Profile Name (optional). Profile Time Sheet for each day of the week (holidays included). Profile Manual Activation: 16-character numeric codes for time profile activation / deactivation (it requires the ZVP-KEYPAD module). Figure 25 Time Profiles. Note: if no time profile activation/deactivation codes are defined, the profile status will only depend on the configured profile time sheet.
-
Page 33: Services
The Services section provides the following advanced settings: 3.2.3.1 E-MAIL Zennio GetFace IP users can be notified of all missed or successful calls via e-mail, provided that an Internet connection is available. Also, if the video intercom is camera- equipped, one or more snapshots taken during the call or the ringing can be attached. - Page 34 Zennio GetFace IP SMPT Server Login: allows entering a valid log-in user name if the SMTP server requires authorisation. Otherwise, the field should remain blank. A user certificate and a private key can be defined to encrypt the communication between the video intercom and the SMTP server.
- Page 35 Zennio GetFace IP E-Mail Sending Settings: sets the sending type. E-Mail Template: determines the message recipient, subject and body. Although the video intercom sends these e-mails to the address defined in the user phone list, in case such field is blank, the mail will be sent to the Default to address (empty by default).
- Page 36 Figure 29 Automation. 3.2.3.3 WEB SERVER Figure 30 Web Server. The login username and password of the Zennio GetFace IP web interface (by default, admin and zennio respectively) can be modified from this section. The language of the http://www.zennio.com Tecnical...
-
Page 37: Hardware
Zennio GetFace IP interface can be customised too. 3.2.4 HARDWARE The following items can be configured in the Hardware section: 3.2.4.1 AUDIO Figure 31 Audio. Master Volume: audio volume level for both calls and signals (ringtones). Adaptive Volume: if enabled, a Maximum Gain and a Sensivity Threshold will be parameterisable. - Page 38 The default video source is set in this tab: either an internal camera (the on-board camera of Zennio GetFace IP) or an external IP camera can be configured. Once the default video source is selected and the configuration has been set, a live preview can be performed.
- Page 39 IR LED Brightness Level: defines the brightness level of the infrared LED in the range 0-100% with steps of 25%. If set to automatic, the infrared light will be activated by Zennio GetFace IP in case the ambient light is low and the camera is being used.
- Page 40 3.2.4.4 BACKLIGHT Zennio GetFace IP allows restricting the level of the device lower light and of the signalling LED depending on whether it is daytime or nighttime. Also, the current value can be verified in this section.
- Page 41 Zennio GetFace IP Door State: sets which of the inputs will define the door state. It is possible to detect unauthorised door openings as well as when the door remains open for too long by defining a custom timeout. Figure 35 Digital inputs.
-
Page 42: System
Parameters related to the device network interfaces are set in this section. BASIC Zennio GetFace IP works by default with a static IP. However, it is possible to configure it to work with a DHCP server. Being the DHCP option deactivated, it is possible to configure the following options: Manual Settings: allows setting a static IP address, the network mask and the default gateway. - Page 43 Internet NTP server, whose URL or IP must be specified. Figure 37 Date and Time. 3.2.5.3 AUTO PROVISIONING Firmware and configuration updates in Zennio GetFace IP can be performed either manually or automatically, from a TFTP / HTTP. http://www.zennio.com Tecnical Support:http://support.zennio.com...
- Page 44 Uploading a configuration back-up file to the device. Downloading a configuration back-up file from the device. Resetting the Zennio GetFace IP configuration to the default state. The System tab allows verifying and managing the firmware and system versions: ...
- Page 45 Join and send us your inquiries about Zennio devices: http://support.zennio.com Zennio Avance y Tecnología S.L. C/ Río Jarama, 132. Nave P-8.11 45007 Toledo (Spain). Tel. +34 925 232 002. www.zennio.com info@zennio.com...
Need help?
Do you have a question about the ZVP-CAM and is the answer not in the manual?
Questions and answers