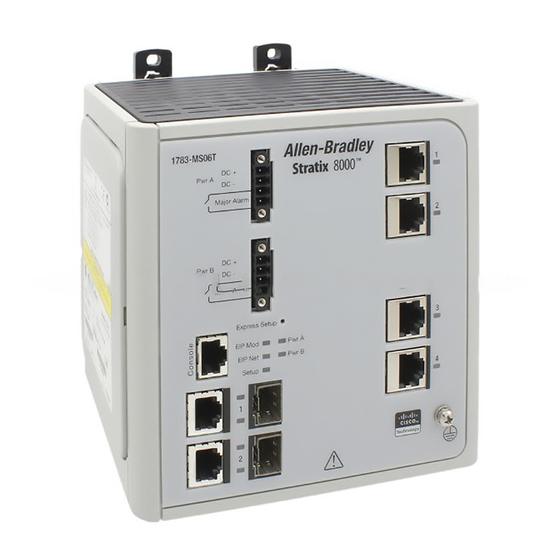
Allen-Bradley Stratix 8000 Installation Instructions Manual
Ethernet managed switches
1783-ms06t;1783-ms10t;1783-rms06t;
1783-rms10t;1783-mx08t;1783-mx08f;
1783-mx04s;1783-mx08s;
1783-mx04e;1783-mx04t04e
Hide thumbs
Also See for Stratix 8000:
- User manual (548 pages) ,
- Manual (14 pages) ,
- User manual (170 pages)
Table of Contents
Advertisement
Quick Links
Installation Instructions
Original Instructions
Stratix 8000 and 8300 Ethernet Managed Switches
Catalog Numbers 1783-MS06T, 1783-MS10T, 1783-RMS06T, 1783-RMS10T, 1783-MX08T, 1783-MX08F, 1783-MX04S, 1783-MX08S,
1783-MX04E, 1783-MX04T04E
Topic
Page
5
6
6
6
8
9
10
12
13
13
14
14
15
15
15
16
16
16
17
20
Advertisement
Table of Contents

Related Manuals for Allen-Bradley Stratix 8000


Summary of Contents for Allen-Bradley Stratix 8000
-
Page 1: Table Of Contents
Installation Instructions Original Instructions Stratix 8000 and 8300 Ethernet Managed Switches Catalog Numbers 1783-MS06T, 1783-MS10T, 1783-RMS06T, 1783-RMS10T, 1783-MX08T, 1783-MX08F, 1783-MX04S, 1783-MX08S, 1783-MX04E, 1783-MX04T04E Topic Page Parts List Required Tools Site Requirements Attach Expansion Modules Mount the Switch Ground the Switch... - Page 2 Stratix 8000 and 8300 Ethernet Managed Switches ATTENTION: Read this document and the documents listed in the Additional Resources section about installation, configuration and operation of this equipment before you install, configure, operate or maintain this product. Users are required to familiarize themselves with installation and wiring instructions in addition to requirements of all applicable codes, laws, and standards.
- Page 3 Stratix 8000 and 8300 Ethernet Managed Switches Environment and Enclosure ATTENTION: This equipment is intended for use in a Pollution Degree 2 industrial environment, in overvoltage Category II applications (as defined in IEC 60664-1), at altitudes up to 2000 m (6562 ft) without derating.
- Page 4 Stratix 8000 and 8300 Ethernet Managed Switches ATTENTION: Under certain conditions, viewing the small form-factor pluggable (SFP) optical transceiver may expose the eye to hazard. When viewed under some conditions, the optical port may expose the eye beyond the maximum permissible exposure recommendations.
-
Page 5: Parts List
Stratix 8000 and 8300 Ethernet Managed Switches WARNING: If you connect or disconnect the communications cable with power applied to this module or any device on the network, an electric arc can occur. This could cause an explosion in hazardous location installations. Be sure that power is removed or the area is nonhazardous before proceeding. -
Page 6: Required Tools
Stratix 8000 and 8300 Ethernet Managed Switches Required Tools Obtain these tools: • • • Ratcheting torque screwdriver that exerts up to 1.69 N m (15 in lbs) of pressure • #6 ring terminal lug for 5.3 mm (10 AWG) wire, such as Thomas & Bett part number 10RC6 or equivalent •... - Page 7 Stratix 8000 and 8300 Ethernet Managed Switches To connect the expansion modules to the switch, follow these steps. IMPORTANT You must add expansion modules to the base unit before you apply power to the switch. Remove power from the switch when reconfiguring it.
-
Page 8: Mount The Switch
Stratix 8000 and 8300 Ethernet Managed Switches Mount the Switch You can mount the switch on one of the following: • DIN rail • Wall or panel IMPORTANT The switch must be mounted in an upright orientation, as shown in these instructions. Alternative mounting orientations are not supported. -
Page 9: Ground The Switch
Stratix 8000 and 8300 Ethernet Managed Switches Mount the Switch on a Wall or Panel To mount the switch on a wall or a panel, you need M5 or #10-24 or #10-32 bolts or screws with 1.27 cm (0.5 in.) O.D. flat washers. This hardware is not provided with the switch. -
Page 10: Wire The Power Source For The Switch
Stratix 8000 and 8300 Ethernet Managed Switches 6. Insert the ground screw into the ground-screw opening on the front panel. 31791-M 7. Use a ratcheting torque screwdriver to tighten the ground screw and ring terminal lug to the switch front panel to 0.96 N•m (8.5 lb•in). - Page 11 Stratix 8000 and 8300 Ethernet Managed Switches Wire External Alarms The alarm relays on the switch are normally open. To connect an external alarm device to the relays, you must connect two relay contact wires to complete an electrical circuit. Because each external alarm device requires two connections to a relay, the switch supports a maximum of two external alarm devices.
-
Page 12: Install The Power And Relay Connector On The Switch
Stratix 8000 and 8300 Ethernet Managed Switches Install the Power and Relay Connector on the Switch ATTENTION: Exposure to some chemicals can degrade the sealing properties of materials used in the relay. Periodically inspect the relay and check for any degradation. -
Page 13: Wire The Power Source For The Poe Expansion Module
Stratix 8000 and 8300 Ethernet Managed Switches Wire the Power Source for the PoE Expansion Module Follow these instructions if you have a PoE expansion module. Power supply requirements for a PoE expansion module depend on your application. Application Power Input per Port... -
Page 14: Install An Sfp Module
Stratix 8000 and 8300 Ethernet Managed Switches Install an SFP Module ATTENTION: Use SFP modules from only Rockwell Automation. For details about supported modules, see the Stratix Ethernet Device Specifications Technical Data, publication 1783-TD001. You can use any combination of compatible SFP modules: •... -
Page 15: Connect To 10/100 Copper Ports
Stratix 8000 and 8300 Ethernet Managed Switches Connect to 10/100 Copper Ports 1. Insert a straight-through, twisted four-pair, Category 5e or better cable with an RJ45 connector into the port. To 10/100 ports 31795-M 2. Insert the other cable end into an RJ45 connector on the other device. -
Page 16: Connect To Sfp Fiber Ports
Stratix 8000 and 8300 Ethernet Managed Switches Connect to SFP Fiber Ports If you installed an SFP module, follow these steps. 1. Insert a fiber-optic cable with an LC connector into the SFP fiber port. 2. Insert the other cable end into the other device. -
Page 17: Specifications
Stratix 8000 and 8300 Ethernet Managed Switches Specifications Stratix 8000 and 8300 Switches Attribute 1783-MS06T, 1783-MS10T, 1783-RMS06T, 1783-RMS10T Temperature, operating IEC 60068-2-1 (Test Ad, Operating Cold) -40 °C < Ta < +60 °C (-40 °F < Ta < +140 °F) - Page 18 Stratix 8000 and 8300 Ethernet Managed Switches Notes: Rockwell Automation Publication 1783-IN012A-EN-P - July 2017...
- Page 19 Stratix 8000 and 8300 Ethernet Managed Switches Notes: Rockwell Automation Publication 1783-IN012A-EN-P - July 2017...
-
Page 20: Additional Resources
Rockwell Automation maintains current product environmental information on its website at http://www.rockwellautomation.com/rockwellautomation/about-us/sustainability-ethics/product-environmental-compliance.page. Allen-Bradley, Rockwell Automation, Rockwell Software, and Stratix are trademarks of Rockwell Automation, Inc. Trademarks not belonging to Rockwell Automation are property of their respective companies. Rockwell Otomasyon Ticaret A.Ş., Kar Plaza İş Merkezi E Blok Kat:6 34752 İçerenköy, İstanbul, Tel: +90 (216) 5698400...
Need help?
Do you have a question about the Stratix 8000 and is the answer not in the manual?
Questions and answers