Table of Contents

Related Manuals for UBSAN X4 STAR FPV

Summary of Contents for UBSAN X4 STAR FPV
- Page 1 ® READ THE INSTRUCTION MANUAL CAREFULLY BEFORE USE X4 STAR FPV H507D USER MANUAL ARM/DISARM MOTORS, SEE PAGE 12 RTH FUNCTION, SEE PAGE 15 FOLLOW ME FUNCTION, SEE PAGE 16 TRANSMITTER CALIBRATION, SEE PAGE 22 © 2016 Hubsan 哈博森科技 版权所有...
-
Page 2: Compass Calibration 0
COMPASS CALIBRATION Compass Calibration is required after the binding as instructed on the transmitter. Horizontally rotate the X4 in a clockwise direction when the LCD screen shows “Calib compass 1” 2 ) P ut the X4 nose down and vertically rotate it in a clockwise direction when the LCD screen shows “Calib compass 2”... - Page 3 Do not calibrate the compass in a strong magnetic field Do not carry ferromagnetic materials with you while calibrating the compass, such as keys, cell phones, etc. Horizontal Calibration Horizontal Calibration is required when the quadcopter drifts during flight. Calibration Procedures: Push the left stick to the most right side, and move the right stick from left to right quickly until the 4 LED indicators blink slowly.
-
Page 4: Safety Notes 0
Hubsan X4 User Manual 2016.05 V1.0 IMPORTANT SAFETY NOTES OPERATION: Be extremely careful and responsible when using the Quad. Small electronic components can be damaged by crashes or by dropping into water. To avoid any injuries, do not use the quad with broken or damaged components. -
Page 5: Contents 0
Safety Advisory Notice for Lithium-Polymer (LIPO) Batteries LiPo batteries are different from conventional batteries in that their chemical contents are encased in a relatively lightweight foil packaging. This has the advantage of significantly reducing their weight but it does make them more susceptible to damage if roughly or inappropriately handled. -
Page 6: Table Of Contents
C o n t e n t s Compass Calibration 6 Advanced Performance Setup Safety Notes 6.1GPS POSITIONING/ hOME POINT SETTING Information 6.2 RTH Mode SYMBOL EXPLANATION 6.3 Headless Mode USAGE ADVICE 6.4 Follow Me Mode Contents 6.5 Failsafe Mode Introduction 1 Item List 7 Transmitter... -
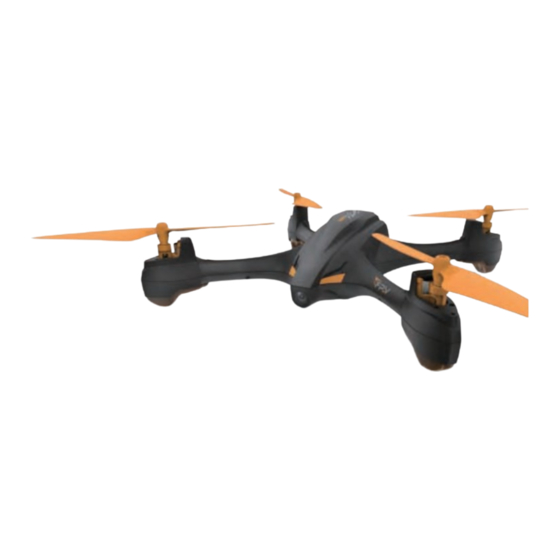
Page 7: Introduction
INTRODUCTION Thank you for buying the HUBSAN product. It is designed as an easy-to-use, multi-functional RC model, capable of hovering and acrobatic flight maneuvers. Please read the manual carefully and follow all the instructions. Be sure to keep the manual for future reference. Flight Weight: 164.5g (including prop protections &... -
Page 8: Quadcopter Battery
2. QUAD COPTER MOTOR LED INDICATOR Indicator Status: Front LED is blue; Back LED is red. 1. Power on: 4 LED indicators blink simultaneously every 1.5 seconds. 2. Compass Calibration: 1). Horizontal calibration: 4 LED indicators blink circularly. 2). Vertical calibration: 4 LED indicators blink alternately. 3. -
Page 9: Propeller
4. PROPELLERS The quad copter uses the 5.3-inch propellers which are marked by A and B. Propellers are consumables, please replace with new ones if there is any damage. Attach the propellers to the corresponding motors that Black screw Silver screw are marked A and B,tighten the propellers and keep the motors deadlocked with the screw-driver. -
Page 10: Start To Fly
5. START TO FLY In case of any injuries caused by improper operations, it is advised that beginners learn to operare the quad under the guidance of professional.It is very improtant to choose the right flight environment. 5.1 FLIGHT ENVIRONMENT (1) The flying area should be open and is without tall buildings, otherwise the GPS may not work. -
Page 11: Arm/Disarm Motors 1
5.4 ARM/ DISARM THE MOTORS Arm the motors Method : Pull both sticks to the lower outer corner as shown on the picture to arm the motors. Release both sticks after the motors are armed. If the motors can not be armed after binding, please make sure: 1. -
Page 12: Photo/Video 1
Forward The Elevator stick moves the X4 forward and backward. Push the stick up the and the X4 will fly forward. Pull the stick down and the X4 will fly backward. When the stick is in the center, the X4 will hold its position. -
Page 13: Photo/Video
5.6 PHOTO/VIDEO PHOTO VIDEO Insert the SD card into quadcopter before using Photo/Video function. Press the Photo button once to take photo. Press the Video button once to take video and press again to save the video. Stop recording before the SD card is removed. 6. -
Page 14: Rth Mode
2.) Home Point is recorded when armed the motors with no less than 6 GPS satellites. 3.) You should be in an open place to search for the GPS satellites, it’ll take 3 mins to finish the searching, and the GPS signal strength depends on the flying environment. 6.2 RTH MODE (RETURN TO HOME) ENTER INTO RTH MODE Push the GPS Switch and the RTH Switch up, and the quad copter will enter into RTH mode. -
Page 15: Headless Mode
6.3 HEADLESS MODE Headless mode means the X4 will default any directions MODE 2 MODE 1 (corresponding to the directions of transmitter sticks) as the up ahead when the mode is activated. Short press down the throttle stick to switch on/ off headless mode. Short press down the throttle stick to enter into Headless Mode, indicated by two "beep"...
Need help?
Do you have a question about the X4 STAR FPV and is the answer not in the manual?
Questions and answers