Table of Contents
Advertisement
Quick Links
W e t / D r y V a c u u m
O p e r a t o r ' s M a n u a l
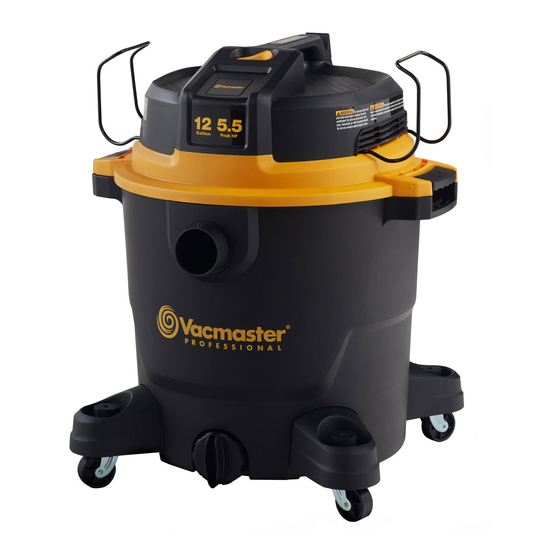
12 G a l l o n
M odel N o.
V J H 1211P F 0 20 1
F O R Y O U R S A F E T Y
Read and understand this manual b efore use.
K eep this manual for future reference.
D i s t r i b u t e d B y
C l e v a N o r t h A m e r i c a , I n c .
Rep lacement Filters &
6 0 1 R e g e n t P a r k C o u r t
A ccessories av a ilab le at:
G r e e n v i l l e , S C
29 6 0 7
V a c m a s t e r . c o m
Advertisement
Table of Contents

Subscribe to Our Youtube Channel
Related Manuals for Vacmaster VJH1211PF 0201


Summary of Contents for Vacmaster VJH1211PF 0201
- Page 1 W e t / D r y V a c u u m O p e r a t o r ’ s M a n u a l 12 G a l l o n M odel N o. V J H 1211P F 0 20 1 F O R Y O U R S A F E T Y Read and understand this manual b efore use.
-
Page 2: Table Of Contents
WARRANTY ® W e take p ride in p roducing a high q uality , durab le p roduct. This Vacmaster p roduct carries a limited five (5) year warranty against defects in workmanship and materials from date of purchase under normal household use. -
Page 3: Safety Instructions & Warnings
Safety is a combination of common sense, staying alert, and knowing how your vacuum works. Use this Wet/Dry Vac only as described in this manual. To reduce the risk of personal ® inj ury or damage to y o ur W et/Dry Vac, use only Vacmaster recommended accessories. Household Ty p SAVE THIS MANUAL F O R F U T U R E R E F E R E N C E . -
Page 4: Double Insulation Instructions
This is a very fine dust which will not be captured by the filter and may cause damage to the motor. When vacuuming fine dust, use a fine dust filter (included). To purchase the additional fine dust ® filters, call 1-866-384-8432 or get them at your local or online Vacmaster retailer. W A R N I N G :... -
Page 5: Unpacking & Checking Carton Contents
UNPACKING & CHECKING CARTON CONTENTS R e m o v e a l l c o n t e n t s f r o m t h e b o x . R e m o v e t h e p o w e r h e a d a n d t a k e o u t a n y c o n t e n t s i n s i d e t h e c o l l e c t i o n t a n k . -
Page 6: General Assembly Instructions
GENERAL ASSEMBLY INSTRUCTIONS A Philips head screw driver is required. W A R N I N G : T O R E D U C E T H E R I S K O F E L E C T R I C S H O C K , D O N O T E X P O S E T O R A I N . -
Page 7: Dry Vacuum Operation
This is a very fine dust which will not be captured by the filter and may cause damage to the motor. When vacuuming fine dust, use a fine dust filter (included). To purchase the additional ® fine dust filters, call 1-866-384-8432 or get them at your local or online Vacmaster retailer. -
Page 8: Liquid Vacuum Operation
LIQUID VACUUM OPERATION L I Q U I D V A C U U M I N G W A R N I N G : B E S U R E T O R E A D , U N D E R S T A N D , A N D A P P L Y , I N F O R M A T I O N E N T I T L E D ‘... -
Page 9: Blower Operation
BLOWER OPERATION This Wet/Dry Vac has blowing capabilities. To use the blower feature follow the instructions listed. W A R N I N G : A L W A Y S W E A R S A F E T Y G O G G L E S C O M P L Y I N G W I T H A N S I Z 8 7 . -
Page 10: Maintenance
MAINTENANCE E m p t y i n g t h e C o l l e c t i o n T a n k 1. Verify that the power cord is disconnected from the outlet. (Fig. 1) 2. Disconnect the hose from the vacuum. (Fig. 2) 3. -
Page 11: Installing & Cleaning Cartridge Filter
INSTALLING & CLEANING CARTRIDGE FILTER I n s t a l l i n g C a r t r i d g e F i l t e r 1. Verify that the power cord is disconnected from the outlet. (Fig. 1) 2. -
Page 12: Installing & Cleaning Foam Wet Filter
INSTALLING & CLEANING FOAM WET FILTER I n s t a l l i n g F o a m W e t F i l t e r 1. Verify that the power cord is disconnected from the outlet. (Fig.1) 2. -
Page 13: Exploded View
EXPLODED VIEW... -
Page 14: Parts List
PARTS LIST Part Drawing Number Descrip tion Q uantity 551006102 Hose Holder Power Head Assembly 551006103 Float 551005104 Filter Cage Collection Tank 551006107 Vaccum Port Assembly 551006106 Vacuum Port Cover 551002110 Drain Cap A ssemb ly 551006109 Caster Foot A ssemb ly 551004104 Filter Retainer VCFF...
Need help?
Do you have a question about the VJH1211PF 0201 and is the answer not in the manual?
Questions and answers