
Related Manuals for dji Ronin


Summary of Contents for dji Ronin
- Page 1 Ronin User Manual V1.0 2014.07...
-
Page 2: Disclaimers And Warnings
This product and manual are copyrighted by DJI with all rights reserved. No part of this product or manual shall be reproduced in any form without the prior written consent or authorization of DJI. -
Page 3: Battery Disposal
Always use the DJI smart battery charger. FCC Compliance Ronin complies with part 15 of the FCC rules. Operation is subject to the following two conditions: (1) Ronin may not cause harmful interference, and (2) Ronin accepts any interference received, including interference that may cause undesired operation. -
Page 4: Table Of Contents
DJI Ronin Assistant App Tuning Download and Install Basic Settings Advanced Settings DJI PC Assistant Tuning Install the DJI WIN Driver and DJI PC Assistant Settings Remote Control Connecting the Remote Control to Ronin Remote Control Power LED Indicator Status... -
Page 5: Introduction
Below is the layout of the items inside the case. Not every item in this sheet is provided by DJI. There are pre-cut slots for some additional accessories. For more information regarding what's included, please refer to the "In the box"... -
Page 6: In The Box
In the Box Gimbal × 1 The gimbal includes built-in DJI motor drive modules, an independent IMU module, a 32-bit DSP processor, power supply module, Bluetooth, transmitter/receiver module, camera shelf, and power breakout box. Handle Bar × 1 Customizable handle platform for the gimbal. - Page 7 Camera Screw A (1/4”) ×2 Lens Support ×1 Camera Screw B (3/8”) ×2 Top Bar Quick Release Accessories Mount x 2 M4*10 Screw ×2 Allen Wrench ×3 Lens Support Screw ×1 (3mm, 4mm, & 3/16”) © 2014 DJI. All Rights Reserved.
-
Page 8: Gimbal Description
Smart Battery Before you start using your Ronin, be sure to charge the battery first. The smart battery is specially designed for the Ronin. It has a battery capacity of 3400mAh, voltage of 14.8V, and power management functionality. Charge the smart battery only with DJI approved chargers. When the battery is fully charged, it has a maximum run time of 4 hours. - Page 9 <80% Read the user manual, disclaimer, and battery warnings before use. Users take full responsibility for all operations and usage. Always use DJI approved chargers. DJI takes no responsibility for any use of non-DJI approved chargers. Charging the Smart Battery 1.
-
Page 10: Tuning Stand
3. The upper half of this tuning stand can be removed by loosening the knob [3]. You can use it with any C-stand style stud that fits the hole [4]. When mounting on to a C-stand, be sure to check the balance of the stand so as to not have the Ronin with a camera tilt over. When setting on a table, make sure the table is a flat and even surface. -
Page 11: Installing The Handle Bar Onto The Gimbal
3. Push the lock [1]downward on the pan motor, and slide the handle bar into the gimbal. Then tighten the lock-knob [2]. 4. With your hands on the handles, be sure the gimbal is not obstructed during a 360 degree pan. Installation is complete. [ 2 ] [ 1 ] © 2014 DJI. All Rights Reserved. -
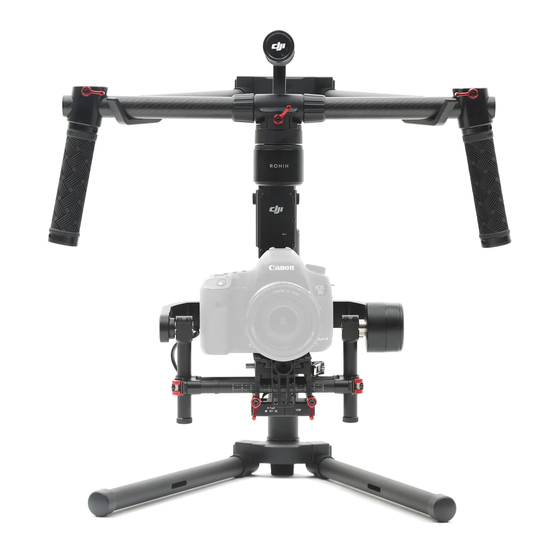
Page 12: Smart Battery Installation
Mounting the Camera The Ronin uses an adjustable camera mounting plate to allow you to easily balance, install and remove your camera. The Ronin has been tested with the following types of cameras. Other cameras similar in size and weight may also work. - Page 13 Certain cameras have a very tight lens securing system, and some cameras like the Canon 5D MKII and MKIII have very loose lens securing systems. The Ronin balances the camera as one solid unit. If the mounted camera has a loose camera securing system, the lens support must be used.
-
Page 14: Handle Bar Adjustment
Ronin will be subjected to extreme movements or accelerations (running, horseback riding, biking, car mounts, helicopters, etc.) Proper balance will also offer a longer battery runtime. There are 3 axes that need to be accurately balanced prior to powering the Ronin on and setting up the software. -
Page 15: Step 1: Balancing The Tilt Axis
1. Rotate the Tilt Axis so that the camera lens is pointing skyward as much as your lens setup will allow and loosen the two vertical adjustment tabs. 2. Gently slide the camera mount crossbar forward or backward until the camera remains pointing skyward when released. © 2014 DJI. All Rights Reserved. -
Page 16: Step 4: Balancing The Pan Axis
3. While the Ronin is resting on the tuning stand, try rotating the Ronin along the pan axis by lifting one side of the handle bar. If the camera does not swing, the pan axis is properly balanced. Ensure you tighten the two tabs after balancing is completed. -
Page 17: Dji Ronin Assistant App Tuning
3. Register your e-mail address when using the app for the very first time. 4. Connect to your Ronin according to the tips in the app. After connecting to the main controller of the gimbal, you will see the Wizard menu. When the green light at the top in the App is steady and the blue light is blinking, the connection is complete. -
Page 18: Advanced Settings
Pan and Tilt axis. This steering/translation speed can be adjusted for each axis independently. When the Ronin's top bar is rotated left or right, the camera will smoothly pan and slow down to a stop. Under the SmoothTrack options, the Pan Axis and the Tilt Axis can be independently adjusted. - Page 19 Pan and Tilt axis. This steering/translation speed can be adjusted for each axis independently. When the Ronin's top bar is rotated left or right, the camera will smoothly pan and slow down to a stop. Under the SmoothTrack options, the Pan Axis and the Tilt Axis can be independently adjusted.
- Page 20 Tilt Axis endpoints setting means during controller input, the maximum point in which the gimbal will rotate up or down. The Pan and Tilt endpoints can be tested. Ensure there is no obstruction of the camera when tapping the Test buttons. © 2014 DJI. All Rights Reserved.
- Page 21 The control speed settings for pan and tilt can be set independently from each other. Setting Speed Toggle Presets, you are setting the Function switch (left switch) on the Ronin remote control. These presets will allow you to change the SmoothTrack speed remotely. If the remote control is turned on, the Speed Toggle Presets for SmoothTrack will take precedence over the App settings.
- Page 22 Calibrate Center If the Ronin’s Pan axis is off center, you can recalibrate the true center of the Ronin using this switch. Using a remote control, position the pan axis at dead center, then tap the Calibrate Center. Tap “Center”...
-
Page 23: Dji Pc Assistant Tuning
Install the DJI WIN Driver and DJI PC Assistant 1. Download the DJI WIN DRIVER INSTALLER from the Ronin product page on DJI.com. Connect the Ronin to your PC via USB cable and be sure the Ronin is powered on prior to installing the DJI WIN Driver. - Page 24 Reset Password: If you forgot your Bluetooth connection password, click here to reset your password. Calibrate Center: If the Ronin’s Pan axis is off center, you can recalibrate the true center of the Ronin using this switch. Using a remote control, position the pan axis at dead center, then click the Calibrate Center. Click “Center” again in the pop-up to confirm. Once calibrated, power cycle for the new center to take effect.
- Page 25 3. Channels This is a channel indicator to provide feedback during remote operator configuration. Pan, Tilt, and Roll can be re-assigned to either of the remote control sticks. The controlled axis can also be reversed. 4. Battery *This page provides all of the essential information regarding the Ronin’s battery. © 2014 DJI. All Rights Reserved.
- Page 26 Ronin User Manual Upgrade You can view the latest firmware version information on this page. Upgrade the firmware by following the steps below: 1. Connect the Ronin to your computer via the Micro-USB cable and wait until the blue indicator LED in the PC Assistant blinks. 2. Click “Upgrade”. 3. Wait for the download to finish. 4. Click “Upgrade” again and then click “Confirm”. 5. Power the Ronin off and on after the upgrade is complete.
- Page 27 S/N is a 32 digit authorization code for future function activations. The authorization code for your unit is filled in after its been manufactured. In the future, you may be asked to fill in a new S/N if you require function upgrades. Fill in the S/N and then click the Write button. If you fill in an invalid S/N more than 30 times, your GCU will be locked and you will have to contact our customer support. © 2014 DJI. All Rights Reserved.
-
Page 28: Remote Control
1. Insert four AA batteries into the battery compartment on the back of the remote control. Pay attention to the negative and positive poles. 2. Turn on the Ronin, then turn on the Remote Control's power switch. The LED on the Ronin will blink red at this time. -
Page 29: Remote Control Power Led Indicator Status
The motor kill switch is useful in case the gimbal operator runs into an issue or you need to make a quick mechanical adjustment to the gimbal or camera setup. © 2014 DJI. All Rights Reserved. -
Page 30: Adding 3Rd Party Transmitter/Receiver
Tilt control the Pan axis. axis. These stick settings can be customized in the DJI Ronin Assistant App or PC Assistant. Adding 3rd Party Transmitter/Receiver Ronin supports 3rd party transmitters/receivers, such as D-Bus or PPM. Connect the transmitter through the port (refer to Page 8 for the location of D-Bus/PPM port ). -
Page 31: Upright Mode
Briefcase Mode Briefcase mode allows you to hold the Ronin in a slim profile close to your body. To enter briefcase mode, tilt the gimbal on the roll axis 90 degrees to the left or right. You may turn briefcase mode off in the gimbal app, in which case the Ronin will never automatically transform into briefcase mode. -
Page 32: Troubleshooting
If any particular motor goes into a self protection mode (motor shuts off) 6 times within a 1 minute period, the Ronin will shut off power to the motors and will not come back to life unless power cycled. -
Page 33: Specification
Maximum height measured from top of camera base plate: 225mm Maximum width: 195mm Accessory Power Connections 12V regulated P-Tap x 2, USB 500mW x 1, DJI Lightbridge x 1 GCU Input Power 4S Ronin Battery Connections 2.4GHz Remote Control, Bluetooth, USB PC Assistant Software Windows XP SP3;... - Page 34 User manual is subject to change without prior notice. You may visit DJI offical website to obtain the latest version of user manual. http://www.dji.com/product/ronin/download © 2014 DJI. All Rights Reserved.
Need help?
Do you have a question about the Ronin and is the answer not in the manual?
Questions and answers