
Related Manuals for EverFocus EPN5230


Summary of Contents for EverFocus EPN5230
- Page 1 EPN Series IR Network Speed Dome 30x / 10x Optical Zoom & IP66 EPN5230 / EPN5210 User’s Manual EPN5230 EPN5210 Copyright © EverFocus Electronics Corp. Release Date: January, 2017...
- Page 2 Copyright All rights reserved. No part of the contents of this manual may be reproduced or transmitted in any form or by any means without written permission of the EverFocus Electronics Corporation. EverFocus 12F-1, No.79, Sec.
- Page 3 - Connect the equipment into an outlet on a circuit different from that to which the receiver is connected. - Consult the dealer or an experienced radio/TV technician for help. Warning: Changes or modifications made to this equipment, not expressly approved by EverFocus or parties authorized by EverFocus could void the user's authority to operate the equipment.
- Page 4 Precautions 1. Do not install the camera near electric or magnetic fields. Install the camera away from TV/radio transmitters, magnets, electric motors, transformers and audio speakers since the electromagnetic fields generated from these devices may distort the video image or otherwise interfere with camera operation. 2.
-
Page 5: Table Of Contents
Contents Introduction .......................... 1 Physical Description ......................2 Features ..........................3 Installation ..........................4 4.1 Packing List ..........................4 4.2 Optional Accessory ........................5 4.3 Cable Descriptions ........................5 4.4 Basic Installation ......................... 6 4.4.1 Inserting a Micro SD Card ..................6 4.4.2 Wall-Mount Installation ................... - Page 6 7.1.4. Record ........................37 7.1.4.1. Schedule Record ................... 37 7.1.4.2. Update Schedule to FTP ................ 38 7.1.5. Time Zone ........................ 39 7.1.6. SD Card Status ......................40 7.2 Video ............................41 7.2.1. Video Stream ......................41 7.2.2. OSD Overlay ......................42 7.2.3.
-
Page 7: Introduction
EPN5230 / EPN5210 1. Introduction The EPN5210 / EPN5230 IR network speed dome cameras support 10x / 30x optical zoom and dual streams from H.264. Adopted with a full HD Sony CMOS image sensor along with a weather-proof (IP66) housing and IR LEDs, the cameras are able to provide up to 2MP sharp and clear real-time images day or night, rain or shine. -
Page 8: Physical Description
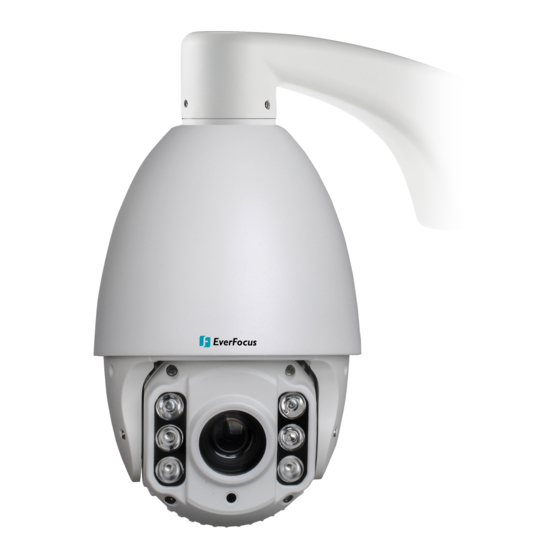
EPN5230 / EPN5210 2. Physical Description Bracket Bracket Camera Housing Camera Housing Lens Camera Main Body Camera Main Body IR LEDs (EPN5210) (EPN5230) Under Night or Auto Day Night mode, the camera will automatically switch the IR LEDs from the... -
Page 9: Features
True Day/Night function with removable IR cut filter Extended IR range of up to 80m / 260ft. (EPN5210) ; 150m / 490ft. (EPN5230) with LEDs (Depending on scene IR reflectivity) Low luminance for better image quality at night ... -
Page 10: Installation
Note: Equipment configurations and supplied accessories vary by country. Please consult your local EverFocus office or agents for more information. Please also keep the shipping carton for possible future use. 2. Contact the shipper if any items appear to have been damaged in the shipping process. -
Page 11: Optional Accessory
4.2 Optional Accessory You can use the EPTZ-CLM Ceiling Pendant Mount Bracket or EPTZ-WMB Enhanced Wall Mount Bracket to install the camera against the ceiling / wall. Please consult your local EverFocus office or agents for more information. Indoor Ceiling Pendant Mount... -
Page 12: Basic Installation
4.2 Optional Accessory). To acquire the ceiling pending mount bracket, please consult your local EverFocus office or agents for more information. 4.4.1 Inserting a Micro SD Card Before installing, insert a micro SD card into the camera module if you want to record the recordings to the on-camera SD card. - Page 13 EPN5230 / EPN5210 Unscrew the four screws to remove the camera top module. On the rear side of the camera top module, insert the micro SD card to the card slot. This step is optional. If you want to replace a new desiccant bag, place the spare (or self-prepared) desiccant bag in the same location as image below.
- Page 14 EPN5230 / EPN5210 For EPN5230: 1. To protect the camera lens from getting dirty and scraped up, please wear the supplied gloves before installing the micro SD card. 2. Unscrew the two screws inside the camera housing, twist the outer ring counterclockwise and then lift up to remove the outer ring from the camera.
- Page 15 EPN5230 / EPN5210 4. Push the camera downward a little bit and you can see the micro SD card slot located on the bottom of the camera module. Insert the micro SD card to the card slot. Push so you can see the bottom of the camera module 5.
-
Page 16: Wall-Mount Installation
EPN5230 / EPN5210 4.4.2 Wall-Mount Installation 1. Optionally insert a micro SD card or replace the desiccant bag(s) inside the camera module (see 4.4.1 Inserting a Micro SD Card). 2. Drill 4 screw-depth holes for mounting the bracket base plate and then drill a through-wall hole for inserting the camera cables. - Page 17 9. Screw the Enhanced Wall mount bracket to the wall using the supplied Screws. For EPN5230, you can place the supplied Washers between the Screws and the Enhanced Wall Mount Bracket.
- Page 18 EPN5230 / EPN5210 11. Connect the RJ45 / PoE cable to the camera. a. Remove the Screw Cap from the Cable Gland. Cable Gland Screw Cap b. Insert a RJ-45 network cable (without the RJ-45 connector on the one end) through the Cable Gland and Screw Cap.
-
Page 19: Accessing The User Interface
Checking the Dynamic IP Address You can look up the IP address and access the Web interface of the camera using the IP Utility (IPU) software, which is included in the software CD or you can download it from EverFocus’ Website http://www.everfocus.com.tw/HQ/Support/DownloadCenter_p1.aspx (Support >... - Page 20 3. To access to the Live View window, double-click the IP address of the device, the login window appears. 4. Download and install the ActiveX file by clicking EverFocus on the login window. Click Run and follow the instructions to install the program. Click Finish to complete the process.
-
Page 21: Settings For Microsoft Internet Explorer
EPN5230 / EPN5210 Settings for Microsoft Internet Explorer To enable Remove Live View, Firmware Upgrade and ActiveX Prompt on Internet Explorer, some settings have to be complete. Please follow the steps below: Open the Internet Explore, click Tools > Internet Options > Security Tab > Custom Level, the Security Settings windows appears. -
Page 22: Connecting The Camera To The Network
EPN5230 / EPN5210 Connecting the Camera to the Network There are three methods to connect the IP camera to the network: Router or LAN Connection, Direct High-Speed Connection and One-to-One Connection. Router or LAN connection This is the most common connection in which the IP camera is connected to a router and allows multiple users on and off site to see the IP camera on a LAN/WAN (Internet). - Page 23 EPN5230 / EPN5210 One-to-One Connection (Directly from PC to IP Camera) You can connect directly without using a switch, router or modem. However, only the PC connected to the camera will be able to view the IP camera. You will also have to manually assign a compatible IP address to both the computer and the IP camera.
-
Page 24: Live View Window
Click to start the manual recording to your computer in MP4 format. Click again to stop recording. By default, the recording path is at C:\Everfocus\EPN5xxx (where 5xxx is the model name). To change the Record storage path, go to Setting > Local > Local (see 7.5.1... - Page 25 EPN5230 / EPN5210 Click to view the live event list. Event To set up the event configurations, please refer to Alarm. Exit Click to log out of the Web interface. Click to toggle the Menu bar to the left or right. Click the X button on the Toggle Menu top-left / top-right corner can close the Menu bar.
- Page 26 EPN5230 / EPN5210 Live stream displays the live stream from the camera. You can also operate the up / down / left / right directions by moving your mouse cursor over Live Stream the image, when the direction buttons appear, click on the image to force the camera move toward the direction.
- Page 27 Exit or press the ESC button on keyboard. Click to take a snapshot of the current live stream. By default, the snapshots will be stored in C:\Everfocus\EPN5xxx (where 5xxx is the model Snapshot name). To change the storage path, go to Setting > Local > Local (see 7.5.1...
-
Page 28: Image Setting
EPN5230 / EPN5210 5.4.1 Image Setting On the Live View Window, click Image Setting to expand the image setting field. You can adjust image parameters including brightness, hue, contrast, saturation and sharpness in this field. To restore the parameters to default value, click the Default button. To collapse the Image Setting field, click Image Setting again. - Page 29 EPN5230 / EPN5210 AWB Mode: Auto White Balance mode. Select an item from the drop-down list and then click the Save button to save the settings. For Customized, you can further configure the R (Red), G (Green) and B (Blue) values yourself in the fields above this field.
-
Page 30: Ptz Setting
EPN5230 / EPN5210 5.4.2 PTZ Setting On the Live View Window, click PTZ Setting to expand the PTZ setting field. You can set up Auto Pan, PTZ Watch, Preset Positions, Pattern and Tour functions in this field. To collapse the PTZ Setting field, click PTZ Setting again. - Page 31 EPN5230 / EPN5210 pattern scan. During the period of scanning, you can use the direction/zoom/iris/focus buttons on the PTZ Control panel to move the camera to different positions. Click the Stop recording button stop recording pattern scan. To activate the Pattern function, select a number from the number...
-
Page 32: Playback
2. Select a source of recordings from the Record Type drop-down list. Local Record: Search for recordings stored in the computer (C:\\Everfocus\EPN5xxx). Device Record: Search for the recordings stored in the on-camera micro SD card. - Page 33 EPN5230 / EPN5210 5. To pause playback, click the pause button . To switch the playback speed between 1X to 32X, click the fast-forward button To directly load the recording files stored in the computer for playing back: 1. Click the Open File button to load the recordings stored in the computer.
-
Page 34: Setting
EPN5230 / EPN5210 7. Setting You can configure the system settings on this page. On the Live View Window, click the Setting button to enter the setting page, and a menu bar appears on the left side of the window. Enter each field to configure the settings. -
Page 35: System
EPN5230 / EPN5210 System You can configure basic system settings such as System Info, User Management, Schedule PTZ Task / Record, Time Zone and SD Card Status on this page. Click the tab of the one you want to see. -
Page 36: System Maintenance
EPN5230 / EPN5210 7.1.1.2. System Maintenance You can reset or reboot the IP camera, and load or save parameters using this page. Reset: Click this button to restart and reset the current settings to their factory default values. Reboot: Click this button to reboot the unit without changing any of the settings. Use this function if the unit is not behaving as expected. -
Page 37: Fw Upgrade
EPN5230 / EPN5210 7.1.1.3. FW Upgrade You can upgrade firmware using this page. Click the Scan button to select a previously prepared firmware file. Click OK to install the new firmware. Please be noted that you may need to restart the browser after upgrading firmware. - Page 38 EPN5230 / EPN5210 To search the system log: 1. Click on the Type drop-down list to select a log type from All, Alarm, Exception, Operation and Information. 2. Click on the Start/End Time column to bring up the calendar and then select a start/end date and time.
-
Page 39: User Management
EPN5230 / EPN5210 7.1.2. User Management The system administrator can create user accounts on this page. To add a user account: 1. Click the Add User button and the following dialog box appears. 2. Type the user name and password for the account. - Page 40 EPN5230 / EPN5210 To modify a user account: 1. Highlight a user account and click the Modify button. The following dialog box appears. 2. Type the user name and password for the account. Type the password again in the Confirm password field.
-
Page 41: Ptz Setting
EPN5230 / EPN5210 7.1.3. PTZ Setting You can set up the serial communication, or schedule PTZ tasks for each day. 7.1.3.1. Serial Setting Use this page to configure the serial communication parameters. Address: select the camera’s address. Baud Rate: select the camera’s baud rate (transmission speed). - Page 42 EPN5230 / EPN5210 3. Select a day (Sunday ~ Saturday) from the Day drop-down list to apply the schedule. 4. Click the Add Task button and select a Start/End time. 5. Select a Task Mode. For Preset, Tour and Pattern, specify a Task Mode Number.
-
Page 43: Record
EPN5230 / EPN5210 7.1.4. Record You can set up recording schedules for each day, or set up schedules for uploading records / snapshots to the FTP server. 7.1.4.1. Schedule Record Use this page to configure a schedule for recording to the on-camera SD card during the specified day and time. -
Page 44: Update Schedule To Ftp
EPN5230 / EPN5210 2. On the following dialog box, check to select Wednesday and Thursday. Click OK to save the settings. To delete a record schedule, click a record schedule and click the Delete Task button. 7.1.4.2. Update Schedule to FTP Use this page to configure a schedule for uploading records / snapshots to the FTP server. -
Page 45: Time Zone
EPN5230 / EPN5210 7.1.5. Time Zone Use this page to set up Time and Daylight Saving. 【Time Setting】 Date-Time: Set the date/time here if you won’t be using an NTP server to update the date/time (see below). Check the Synchronize PC Time box and the camera’s time will be automatically adjusted by synchronizing with the PC Time. -
Page 46: Sd Card Status
EPN5230 / EPN5210 7.1.6. SD Card Status You can check the SD Card utility or format the SD Card using this page. 【SD Card Status】 SD Card Usage: This shows you the memory capacity of the card and how much card memory has been used. -
Page 47: Video
EPN5230 / EPN5210 Video You can configure settings relating to video such as streaming, camera OSD, Privacy Mask, Focus / Zoom and Image on this page. Click the tab of the one you want to see. 7.2.1. Video Stream This IP camera can output two video streams simultaneously. For each of these streams, you can set the resolution, frame rate, quality, profile, GOP, rate control and video codec individually. -
Page 48: Osd Overlay
EPN5230 / EPN5210 7.2.2. OSD Overlay You can set up the information to be displayed on the Live View Window using this page. Font size: Select the font size of displayed information. BPS: Check the box to display BPS information (Frame Rate & Bit Rate). -
Page 49: Privacy Mask
EPN5230 / EPN5210 7.2.3. Privacy Mask The Privacy Mask can block out sensitive areas from view, covering the area with black box in both live view and recorded clips. This feature is useful when users’ don’t want the sensitive information visible. -
Page 50: Focus / Zoom Setting
EPN5230 / EPN5210 7.2.4. Focus / Zoom Setting You can configure Auto Focus and Digital Zoom setting using this page. AF Control Mode: Select a focus mode from Auto, Semi-automatic or Manual. For “Semi-automatic” and “Manual”, use the Focus+ Focus-... -
Page 51: Image Setting
EPN5230 / EPN5210 7.2.5. Image Setting You can configure the image parameters using this page, or using the Advanced Setting field on the Live View Window. To Mono / To Color: You can configure the sensitivity for Auto Day Night Mode ranging from 0-255 in the To Mono and To Color field. -
Page 52: Network
EPN5230 / EPN5210 Network You can configure network-related settings, including DNS, IP, DHCP, DDNS, Port, Email and FTP on this page. Click the tab of the one you want to see. 7.3.1. Ethernet The following information is required to configure the network settings. Contact your network administrator or your internet service provider to get the info. -
Page 53: Ddns
EPN5230 / EPN5210 【DHCP Setting】 DHCP Enable: Check the box to enable the DHCP function. This setting lets the system use an automatically assigned (dynamic) IP address. This address can change under certain circumstances. For instance, when the camera’s network switch/hub has to be rebooted. Do not assign to the DHCP server the same IP addresses used for the other network cameras and PCs with unique IP addresses. - Page 54 DDNS Enable: Check this box to enable the DDNS function. Service: You can either apply for a host name from EverFocus or other DDNS server providers. If you choose the EverFocus DDNS server, you can obtain a free host name from EverFocus by following the...
-
Page 55: Port Setting
EPN5230 / EPN5210 7.3.3. Port Setting You can configure ports, Email and FTP settings using this page. 【Network Port Setting】 HTTP Port / RTSP Port: Enter the HTTP and RTSP port numbers. Click the Save button on the bottom-right to save the settings. -
Page 56: Other Prot
EPN5230 / EPN5210 Password: Input the user’s login password if the SMTP server requires authentication. Email (from): Input the sender’s e-mail address, so that the receiver can recognize the sender when an Event message is received. Email (to): Input the e-mail address (currently you can only specify one address) for receiving an e-mail message when an Event is enabled and triggered. -
Page 57: Alarm
EPN5230 / EPN5210 7.4. Alarm You can configure alarm related settings such as Alarm Period, alarm notification type, I/O Alarm and Motion Detection on this page. Click the tab of the one you want to see. 7.4.1. Alarm Setting You can configure the snapshot / record transmitting to the e-mail address or the FTP server using this page. -
Page 58: Io Alarm
EPN5230 / EPN5210 7.4.2. IO Alarm You can configure the alarm settings along with the schedule to active the alarm functions on this page. 【Linkage】 Alarm Output: Select alarm in Normal Open or Normal Close from the drop-down list. For Normal Open, you can further configure the alarm settings including Alarm Output Time and IO Channel. -
Page 59: Time Setting
EPN5230 / EPN5210 Note: The alarm notification will also be stored in the on-camera micro SD card once the micro SD card is inserted and activated. 【Time Setting】 You can set up schedules to active the alarm functions and send alarm notification to specified e-mail address or FTP server. -
Page 60: Motion Detection
EPN5230 / EPN5210 7.4.3. Motion Detection You can set up the areas to detect motion along with the schedules to active the alarm functions on this page. When a motion is detected by the camera, the Event icon on the Live View window will turns to a motion detection icon to alert the user. -
Page 61: Parameter Config
EPN5230 / EPN5210 draw the desired Motion Detect area, the area will be marked in purple. Up to 4 Motion Detect areas can be configured. You can remove the configured Motion Detect area by clicking the Clear All button. Click the Save button on the bottom-right to save the settings. - Page 62 EPN5230 / EPN5210 1. Select Tuesday from the Day drop-down list, and then click Copy To. 2. On the following dialog box, check to select Wednesday and Thursday. Click OK to save the settings. To delete an alarm schedule, click an alarm schedule and click the Delete Task button.
-
Page 63: Local
EPN5230 / EPN5210 Local 7.5.1. Local You can configure local settings like recording size / path, Pre-record, Live Stream Performance on this page. Click the tab of the one you want to see. 【Local Setting】 Record File Time: You can limit the size of each recorded file here (in minutes). Once you click the Record button on the Live View window, the camera will start recording the live stream to your computer. -
Page 64: Specifications
EPN5230 / EPN5210 8. Specifications Model EPN5210 EPN5230 Camera Pickup Device Full HD Sony CMOS sensor Megapixel 2 MP Scanning System NTSC / PAL Color: 0.05Lux @F1.6 (AGC-On) Color:0.05Lux @F1.6 (AGC-On) Min. Illumination B/W:0.005Lux @F1.6 (AGC-On) B/W:0.003 @F1.6 (AGC-On) 0Lux With IR On... - Page 65 EPN5230 / EPN5210 Model EPN5210 EPN5230 Other Function Auto Gain Control Backlight Compensation Wide Dynamic Range 3-Dimensional Noise Reduction Auto / White low lamp / 4000K / 5000K / Sunshine / Dark clouds / Flash White Balance light / Fluorescent lamp / High fluorescent lamp / Water bottom /...
-
Page 66: Appendix
EPN5230 / EPN5210 Appendix Default Network Ports HTTP port Communication port, audio/video data 5050 transmission port, talkback data transmission port 5050 Audio/video data transmission port Onvif port RTSP port RTSP stream port Search port 10000 Telnet port Onvif search port... -
Page 67: Tested Card Brands
Tested Card Brands This IP Camera supports SD / SDHC card up to 128 GB. The following brands of the SD / Micro SD cards have been tested by EverFocus and are recommended to work with EverFocus IP camera. Brand... -
Page 68: Setting Up Ddns Function
EPN5230 / EPN5210 Setting up DDNS Function If you set up your IP Camera with DHCP network, the IP address of your IP Camera may change at different times for different reasons, particularly after a power failure. The changing IP address of the IP Camera may cause you difficulties accessing the IP Camera. - Page 69 EPN5230 / EPN5210 2. On the Network Setting page (Setting > Network > Ethernet / Port Setting), configure the IP Settings and Port Settings then click the Save button.
- Page 70 EPN5230 / EPN5210 3. In the DDNS Settings field (Setting > Network > DDNS), register a free host name from EverFocus DDNS and then click the Save button. a. Check DDNS Enable to enable the DDNS function. b. Select www.everfocusddns.com and enter a desired host name in the IP Camera Name field.
-
Page 71: Ekb200
EPN5230 / EPN5210 EKB200 You can connect an EKB200, which is EverFocus’ USB keyboard, to the USB port on the computer to remotely control the Iris, focus or the pre-configured PTZ control functions of the connected cameras. To use EKB200, you need to configure the EKB200 setup page on the Genie XMS server first. - Page 72 EverFocus Electronics Corp. EverFocus Taiwan: EverFocus Europe - Germany: 12F-1, No.79, Sec. 1, Shin-Tai Wu Road, Albert-Einstein-Strasse 1, D-46446 Hsi-Chih, New Taipei City, Taiwan Emmerich, Germany TEL: +886 2 2698 2334 TEL: +49 2822 93940 FAX: +886 2 2698 3943 FAX: +49 2822 939495 www.everfocus.com.tw...
Need help?
Do you have a question about the EPN5230 and is the answer not in the manual?
Questions and answers