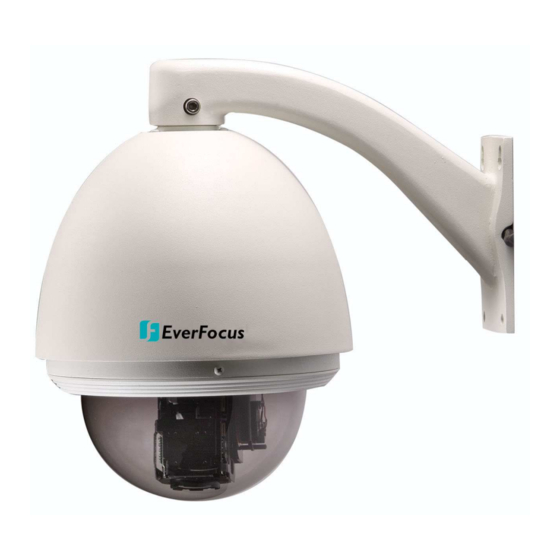
EverFocus Eptz3000 User Manual
Everfocus speed dome user manual
Hide thumbs
Also See for Eptz3000:
- Quick reference manual (4 pages) ,
- Specifications (1 page) ,
- User manual (39 pages)
Table of Contents
Advertisement
Quick Links
Advertisement
Table of Contents

Related Manuals for EverFocus Eptz3000


Summary of Contents for EverFocus Eptz3000
- Page 1 Speed Dome EPTZ3000/EPTZ3000I USER MANUAL Date: Nov 2008...
-
Page 2: Table Of Contents
Profile of EPTZ3000/EPTZ3000I...1-7 1.3.2. EPTZ3000/EPTZ3000I Base Board ...1-8 1.3.3. EPTZ3000/EPTZ3000I Control Board ...1-9 1.4. EPTZ3000/EPTZ3000I Connection ...1-10 1.5. EPTZ3000/EPTZ3000I Quick Operation Guide (Work with EKB500) .1-11 2. EPTZ3000/EPTZ3000I INSTALLATION ... 2-12 2.1. Packing List ...2-12 2.2. Cable Needed...2-12 2.3. Initial Setup ...2-13 2.3.1. - Page 3 3. EPTZ3000/EPTZ3000I CAMERA SETUP MENU ... 3-27 3.1. Structure of the Setup Menu ...3-27 3.1.1. Camera Setup Menu ...3-28 4. EPTZ3000/3000I FUNCTION SETUP AND OPERATION ... 4-36 4.1. Manual Control Mode ...4-36 4.2. Auto Pan Mode ...4-36 4.3. Position Setting ...4-37 4.4.
-
Page 4: Eptz3000/Eptz3000I Overview
1. EPTZ3000/EPTZ3000I OVERVIEW 1.1. Introduction EPTZ3000/EPTZ3000I, an intelligent high-speed dome camera is ready to secure your property with its omni-directional and exact monitoring. A 30X optical and 8X digital zoom combining with a high-performance chip makes captured images clear and vivid. The other powerful camera functions EPTZ3000/EPTZ3000I equips with: Wide Dynamic makes objects clear in a high illumination background. - Page 5 Furthermore, the micro control unit enables camera a nimble and exact movement from minimal 0.01°/sec to maximal 360°/sec. It can go to every preset position in 1 second. It also has other advantages such as: 192 preset positions are available. 16 cruise tours can be set, and each tour contains up to 16 positions.
-
Page 6: Specifications
Auto Zoom Speed Control Control speed auto-adjusted according to zoom length changing Auto Pan, 2 Points Scanning Auto Pan Speed EPTZ3000 (outdoor) 1/4'' Vertical double density interline CCD NTSC or PAL NTSC: 525 TV lines, 60 fields/sec PAL: 625 TV lines, 50 fields/sec 768 x 494 ( NTSC ) , 752 x 582 ( PAL ) 520 TVL:Color ;... - Page 7 Dwell Time (2 points) Preset Positions Running to Position Speed Dwell Time at Preset Position Tour Tour Point per Group Fan & Heater Position Accuracy Alarm Built-in Menu for Functions Communication Communication Speed Built-in Protocols Address Editable Speed Dome Address Manual Pan/Tilt Speed Weatherproof Ratings Safety...
-
Page 8: Feature
1.3. Feature 1.3.1. Profile of EPTZ3000/EPTZ3000I M5 Bolt (Hex) x3 Base PCB board Control board Housing Inner Housing M3 Bolt x3 Bulb Base PCB board Control board Clip Ceiling Button Bulb EPTZ3000 Wall Mount Bracket Connection Bus Mechanical Part Camera Module... -
Page 9: Eptz3000/Eptz3000I Base Board
The details of the alarm connector (JP5) are shown on the APPENDIX A. For EPTZ3000 outdoor model, JP1, JP3 and JP6 that are two-pin connectors need to be taken off during installing. JP1 and JP3 are connectors for heater, and they can be switched. -
Page 10: Eptz3000/Eptz3000I Control Board
1.3.3. EPTZ3000/EPTZ3000I Control Board The PCB board with two dipswitches is the control board of EPTZ3000/EPTZ3000I. The two switches are used to set address, protocol, Baud Rate, video format and terminal resistance. -
Page 11: Eptz3000/Eptz3000I Connection
1.4. EPTZ3000/EPTZ3000I Connection 110V AC 24V AC Adapter Video Out RS485 Tx(+) RS485 Tx(-) Alarm 1 Alarm 2 Alarm 3 Alarm 4 GROUND N.C. N.O. POWER 24V AC / 3.5 A 1.0Vpp ± 0.2V, 75 RS485 Control Line EPTZ3000/ EPTZ3000I... -
Page 12: Eptz3000/Eptz3000I Quick Operation Guide (Work With Ekb500)
2. Connect a video cable from EPTZ3000/EPTZ3000I to a monitor. 3. Connect the power to the EPTZ3000/EPTZ3000I and a keyboard (EKB500). After the EPTZ3000/EPTZ3000I finishes the self-test mode, you can start to operate the EPTZ3000/EPTZ3000I via the keyboard. To operate the EPTZ3000/EPTZ3000I:... -
Page 13: Eptz3000/Eptz3000I Installation
M3 screw x3 for bulb fixing 2.2. Cable Needed Power Cable An adapter with 24V AC/3.5A output provides the power to the EPTZ3000/EPTZ3000I. An extension power line may be needed. Note: The input AC voltage range of an adapter depends on different area. -
Page 14: Initial Setup
Video Cable A BNC cable is used for connecting an EPTZ3000/EPTZ3000I to a DVR or a monitor. An amplifier may be needed if the video cable is too long. Control Cable Basically, EPTZ3000/EPTZ3000I uses a differential pair to connect to other devices by cascading. -
Page 15: Address Setting
2.3.1. Address Setting The address code of the EPTZ3000/EPTZ3000I should be set to correspond properly with a control device to control multiple dome cameras. The address codes are made up by the dipswitch SW1 (8 bits) on the PCB board. The 8 bits dipswitch indicates the binary coded of the address, and there are 256 addresses can be selected (0 ~ 255, 2 = 256). - Page 16 Switch Address Switch Switch Switch Address Address Address Switch Switch Switch Switch 2-15 Address Address Address Address Switch Switch Switch Switch Switch Address Address Address Address Address...
- Page 17 Switch Address Switch Switch Switch Address Address Address Switch Switch Switch Switch 2-16 Address Address Address Address Switch Switch Switch Switch Switch Address Address Address Address Address...
-
Page 18: Communication Protocol Setting
Notice: Please make sure the power is off before setting, and restart the EPTZ3000/EPTZ3000I to enable a new value after changing. Set all of protocol switches to ON; the speed EPTZ3000/EPTZ3000I will enter a self-test mode. 2.3.3. Transmission Speed Setting (Baud Rate Setting) - Page 19 Notice: Please make sure the power is off before setting, and restart the EPTZ3000/EPTZ3000I to enable a new value after changing. 2-18...
-
Page 20: Rack And Speed Dome Installation
2. Check for all necessary materials, and ensure if the selected installation location is suitable for the EPTZ3000/EPTZ3000I. 2.4.2. EPTZ3000 Dome Camera Wall Mount Installation Note: Installation location that is a wall, a pole or a ceiling needs to support above five times the total weight of the camera assembly (about 16 kg) to avoid shaken images, and dropping. - Page 21 4. Connect the cable connectors to the nodes on the PCB board, and then fix the PCB board in the housing by screwing 4 bolts on it. Note: Please notice the polarity of control line. The EPTZ3000 will not work if the polarity of control line is mis-connected.
- Page 22 5. Align the two screw holes on the bottom of mechanical part to the two bolts on the base of the housing, and twist the mechanical part clockwise a little bit in order to engage it with the base. Screw the two bolts on the base, and then connect and fix the connection bus to the PCB board on the mechanical part.
-
Page 23: Eptz3000I Dome Camera Installation
7. Turn on the power, and start to operate the EPTZ3000. Note: When turning on the power, EPTZ3000 will enter self-inspection mode, and carry out a self-testing program. After finishing self-inspection, you can start to operate the EPTZ3000. - Page 24 Note: Please notice the polarity of control line. The EPTZ3000I will not work if the polarity of control line is mis-connected. 6. Align the two screw holes on the bottom of mechanical part to the two bolts on the base of the housing, and twist the mechanical part clockwise a little bit in order to engage it with the base.
- Page 25 Note: The camera module on the mechanical part is very sensitive. Please be careful when installing this part. 7. Remove the lens protection cover before installing the bulb. Screw the connection wire to the housing in order to prevent the bulb from being drop down. Align the 2 buttons on the bulb base with the 2 buttons on the housing, and push bulb base to clip the housing.
-
Page 26: Accessories
2.5. Accessories 2.5.1. EPTZ-CPMA: Ceiling Pendant Mount Adapter The pole mount is used for installing a speed dome on the ceiling indoors or outdoors. The extension poles are available for the pole mount. 2.5.2. EPTZ-PMA: Pole Mount Adapter The pole adapter is used for installing a wall mount bracket to a pole indoors or outdoors. 2.5.3. - Page 27 The corner mount are used for installing a wall mount bracket to a 270° corner of walls indoors or outdoors. 2-26...
-
Page 28: Eptz3000/Eptz3000I Camera Setup Menu
3. EPTZ3000/EPTZ3000I CAMERA SETUP MENU In this section, setup and operation guide of EPTZ3000/EPTZ3000I will be introduced. There are 25 items of the setting menu. However, there is only one line on the line display, so using some combination keys to operate is necessary. -
Page 29: Camera Setup Menu
3.1.1. Camera Setup Menu Press Menu to enter camera setup menu. Press Shift + Joystick up/down to change subentries, and right/left to change the setting. 1. CAM ID: : : : The name assigned to the camera. 2. DZOOM: : : : Digital zoom enable or disable. ON: Enable a digital zoom. - Page 30 6. S.SHUTTER: : : : Slow electrical shutter. In order to enhance the view in the low lux environment, slow shutter allows more light go through the shutter. X4: 4-time slow shutter. X8: 8-time slow shutter. X12: 12-time slow shutter. X16: 16-time slow shutter.
- Page 31 9. TITLE DISP: Display the title. ON: Display the title. OFF: Disable the title display. 10. ALM-IN1: : : : The status of input alarm 1. N.O.: Enable a normal open alarm input. N.C.: Enable a normal close alarm input. NIGHT N.O.: Dome turns to “Night mode”...
- Page 32 OFF: Disable alarm input. 14. ALM-IN PRIO: : : : The priority of alarms. 1234: The alarm priority is 1>2>3>4. 2341: The alarm priority is 2>3>4>1. 3412: The alarm priority is 3>4>1>2. 4123: The alarm priority is 4>1>2>3. 15. ALM-OUT: : : : Duration time of the alarm output. OFF: Disable alarm output.
- Page 33 1/1000: 1/1000 sec shutter for both NTSC and PAL 1/2500: 1/2500 sec shutter for both NTSC and PAL 1/10000: 1/10000 sec shutter for both NTSC and PAL 1/120000: 1/120000 sec shutter for both NTSC and PAL x2: two-time default manual shutter x4: four-time default manual shutter x6: six-time default manual shutter x8: eight-time default manual shutter...
- Page 34 OFF: Disable the private zone masking. Press “Enter” to enter private zone setup mode, and the masking will turn into red. You can set the masking size and position in the private zone setup mode. In this mode, you can press “Shift”...
- Page 35 21. AUTO REGRESS: : : : Auto regress to the shortest path during set a position. It can shorten the response delay, and increase the response performance and speed dome lifetime. ON: Enable the auto regress function. OFF: Disable the auto regress function. 22.
- Page 36 “Enter” to confirm. For Tour Run: Shift joystick to right and left for selecting RUN NUM (T01A~T16A) of the tour that you previously set. Press “Enter” to start running the tour. Alternatively, you could run the tour without entering MENU. Press “Position + 97” to run the tour that you have previously set, please be informed that this function is only valid for T01A.
-
Page 37: Eptz3000/3000I Function Setup And Operation
In order to set the two points, press Set + A.Pan, and then enter the dwell time (1~127 seconds) of each point. EPTZ3000 begins to pan from point A to point B clockwise. 360° auto pan: Press Shift + A.Pan to enter the 360° auto pan. Sy stem will ask you to enter 360°... -
Page 38: Position Setting
not tilt. 4.3. Position Setting Focus on a preset position: Press the number key, and then press Position to focus on the number of preset position; or you can press Position, then enter the preset position number, and then press Enter to focus on the number of preset position. -
Page 39: Tour Mode
Dwell time: default is 2 sec; It can be changed by EVF Keyboard Set + A.Pan setting dwell time of A pos or B pos. 99 => Auto scan (360 degree) Default speed is 32. It can be changed by EVF Keyboard (Shift + A.Pan setting speed). -
Page 40: Alarm Link To A Position/Tour
Tour, and input tour number 0. 4.5. Alarm Link to a Position/Tour EPTZ3000/EPTZ3000I have 4 alarm inputs that can be set to link to a position or a tour when an alarm is triggered. Set an alarm link: Press F1 to set an alarm link. -
Page 41: Other Operations
Note 2: After powering on the speed dome, it will detect alarm status automatically. 4.6. Other Operations The EPTZ3000/EPTZ3000I can work with a DVR that has PTZ control functions, and a matching protocol. The available control functions depend on different DVRs. -
Page 42: Appendix : The Alarm I/O Connection
APPENDIX : The Alarm I/O Connection There are 4 alarm inputs and 1 alarm output available. The alarm I/O connector that is marked as JP5 is a nine-pin connector. It is located on the PCB board of the housing. RELAY Video + Video - RS485 +... -
Page 43: Everfocus Electronics Corp
EverFocus Electronics Corp. Head Office: 12F, No.79 Sec. 1 Shin-Tai Wu Road, Hsi-Chih, Taipei, Taiwan TEL: +886-2-26982334 FAX: +886-2-26982380 www.everfocus.com.tw USA L.A. Office: 1801 Highland Ave. Unit A Duarte, CA 91010, U.S.A. TEL: +1-626-844-8888 FAX: +1-626-844-8838 www.everfocus.com USA N.Y. Office:...
Need help?
Do you have a question about the Eptz3000 and is the answer not in the manual?
Questions and answers