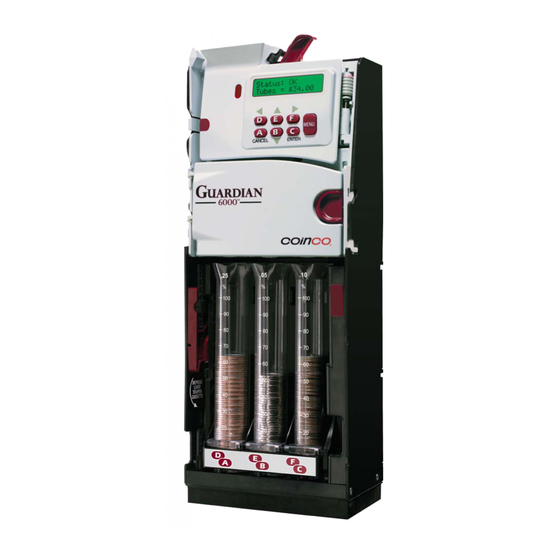
Coinco Guardian 6000 Operation & Service Manual
Guardian series
Hide thumbs
Also See for Guardian 6000:
- Operation & service manual (50 pages) ,
- Manual (12 pages) ,
- Quick start manual (12 pages)
Table of Contents
Advertisement
Advertisement
Table of Contents

Subscribe to Our Youtube Channel
Related Manuals for Coinco Guardian 6000


Summary of Contents for Coinco Guardian 6000
- Page 1 Guardian Series 6000 Operation & Service Manual...
-
Page 2: Table Of Contents
Warning Messages Setting Float Troubleshooting Matrix SECTION 3: GENERAL CHANGER OPERA- SECTION 8: PARTS LIST TION Guardian 6000™ Housing & Payout Cassette Steady State User Display Release Latch Assembly General Changer Operation Guardian 6000™ Chassis Menu Navigation Guardian 6000™ Payout Assembly Menu Structure Guardian 6000™Payout Cassette Assembly... -
Page 3: Section 1: General Information
• Cash accountability.* thing is correct before proceeding further. • Two line LCD display (Guardian 6000™) or 3 color LED (Guardian E6™). Indicates a helpful hint or shortcut to sim- • Swing-out, payout cassette. - Page 4 P lease contact your C o inco S ales R ep about custom ization of standard cassettes or see w w w .co inco.com see w w w .co inco.com Examples G6XUS-BB: Guardian 6000 six tube changer, E6XCA-BF: Guardian E6 six tube changer, MDB protocol, “BB” payout confi guration (2 MDB protocol, “BF” payout confi guration (1 nickels,1 dime, 3 quarter tubes), for US market.
-
Page 5: Dimensions & Specifi Cations
SECTION 1: GENERAL INFORMATION Dimensions and Specifi cations Power Requirements: 20 to 42V DC 0.15 Amp average standby 0.6 Amp average operating 1.8 Amp max operating Operating Temperature 0°F to 150°F -18°C to 65°C Storage Temperature -22°F to 160°F -30°C to 72°C Relative Humidity 20% to 95% non-condensing Operating Attitude... -
Page 6: Dimensional Drawing
SECTION 1: GENERAL INFORMATION Figure 2 Dimensional Drawing inches (mm) -
Page 7: Section 2: Installation & Setup
SECTION 2: INSTALLATION & SETUP Unpacking / Installing the Changer Figure 3 After removing the coin changer from the Changer Components Changer Components shipping carton, inspect it for possible damage. If the unit is damaged, notify the shipping IRDA Link Escrow Lever company immediately. - Page 8 For the Guardian E6, the status indicator light will be green when the unit is operational and ready for use. For the Guardian 6000, the display will begin cycling in a steady state mode as shown in Figure 7.
-
Page 9: Loading Coins
Rotate the Payout Cassette routing and coin level sensing for unused Release Latch downward to open tubes. For the Guardian 6000, use MENU/SETUP/ the coin Payout Cassette (See CASSETTE/CUSTOM and set unused tubes to “---”. Figure 8). Pivot the Payout For the Guardian E6, use MENU+D and then press the unused tube letter button. -
Page 10: Dispensing Coins
SECTION 2: INSTALLATION & SETUP Figure 10 Drop a variety of coins into the changer to ensure proper operation. Coin Tube Capacities Coin Tube Capacities Coin Tube Capacities Coin Tube Capacities Basic keypad navigation is shown in Figure 14 Coin Coin Max Coin Count Max Coin Count... -
Page 11: Setting Float
(5 coins per tube) for all enabled tubes, even if there are no coins loaded. To eliminate this condition, diable all unused tubes. For the Guardian 6000, enter MENU/SETUP /CASSETTE / CUSTOM and set unused tubes to “- - -”. For the Guardian E6, use MENU+D and then press the un... -
Page 12: Steady State User Display
SECTION 3: GENERAL CHANGER OPERATION Steady State User Display In Sales mode, or steady state operation; the Guardian 6000 will show one of four typical screens as shown in Figure 15. The Guardian E6 LED Status Indicator will show either a steady green or blinking green color as shown in Figure 16. - Page 13 SECTION 3: GENERAL CHANGER OPERATION Figure 17 Pressing the escrow lever physically opens the Pulse-Echo Coin Sensing Techonology acceptor gate, allowing bent coins and foreign materials to fall into the coin reject chute. Move- ment of the front gate is also detected by the coin changer electronics and is communicated to the vending machine controller causing any customer credit to be paid back.
-
Page 14: Menu Structure 1
Guardian 6000 Menu Structure All Guardian 6000 features can be accessed via the MENU button. The most commonly used features can be accessed directly via the Figure 18 hotkeys without fi rst entering the Guardian 6000 menu system. The main menu consists of three primary functions: 1) Audit capabilities 2) Changer Setup, and 3) Recommendations as is shown in Figure 19. - Page 15 Service ……...… … … … … .. Service ……...… … … … … .. page 28 page 28 Figure 20 Guardian 6000 Setup Menu Structure Guardian 6000 Setup Menu Structure Guardian 6000 Setup Menu Structure Guardian 6000 Setup Menu Structure Setup Menu Setup Menu S e t / m a in ta in p red efined co in le ve l.
- Page 16 (LCD indicator fl ashes red three times.) Note that all Guardian 6000 Setup features are available in the Guardian E6 through the use of the Coinco FP-5 Field Programmer. In this case, the E6 keypad functionality is exactly the same as the Guardian 6000, wtih the FP-5 LCD screen serving as the changer display screen.
-
Page 17: Section 4: Typical Usage
Guardian’s automated parring system (when Float has been set by the user), or visually when Float has not been set. Automated Parring System (Guardian 6000 only): One of the simplest ways to par is by using the Guardian’s automated parring recommendations. The Guardian will lead you through the steps automatically, including communicating the exact amount of change to add. - Page 18 SECTION 4: TYPICAL USAGE Figure 23 Guardian 6000 Guardian 6000 Guardian 6000 Guardian 6000 Automated Automated Parring Parring Routine Routine Automated Automated Parring Parring Routine Routine N o te : Float must be set to use this capability. N o te : Float must be set to use this capability.
-
Page 19: Setting Float
Setting Float was covered in Section 2: Installation & Setup. Float can be enabled at the current coin tube levels by using hotkeys E+F. To disable Float, use hotkeys D+F. Float can also be set on the Guardian 6000 via the MENU. See Figure 25 below. For the Guardian E6, see Figure 26 below. - Page 20 SECTION 4: TYPICAL USAGE Figure 25 Setting / Disabling Float Setting / Disabling Float Setting / Disabling Float Setting / Disabling Float 1 . P u sh D+F to D isa ble Floa t. 1 . P u sh D+F to D isa ble Floa t. 2 .
-
Page 21: Enabling/Disabling Overfi Ll Paydown
Float level that are inserted during parring. Overfi ll Paydown is defaulted to “off” (disabled) in the original factory changer setup. See Figure 27 for how to enable or disable Overfi ll Paydown for the Guardian 6000. For the Guardian E6, see Figure 28 Overfi ll Paydown Toggle. - Page 22 For the Guardian E6, see Figure 29 Float Paydown Toggle. For both the Guardian 6000 & Guardian E6, the changer will initiate the Float Paydown (pay out all coins in excess of the fl oat setting) when the user presses the following hotkeys: : In itia te s Float Paydown (if e n a b le d ).
-
Page 23: Audit Reporting
SECTION 4: TYPICAL USAGE Audit Reporting The Guardian 6000 features a means of tracking and reporting all sales. Audit data consists of two types of data: 1) Current Data, and 2) Historical Data. Current (Resettable) Data: consists of changer data stored since the last user reset. See Figure 30 for details. -
Page 24: Changing The Payout Coin Tube Confi Guration
25¢ C anada 5¢ 25¢ 25¢ 25¢ 25¢ C anada Please contact your Coinco Sales Rep about customization of standard cassettes or see www.coinco.com Figure 32 Payout Cassette Payout Cassette Payout Cassette Payout Cassette Coin Tube Position Designations Coin Tube Position Designations... - Page 25 SECTION 4: TYPICAL USAGE Figure 32 Payout Cassette Payout Cassette Coin Tubes & Positions Coin Tubes & Positions Payout Cassette Payout Cassette Coin Tubes & Positions Coin Tubes & Positions 25¢ 25¢ 25¢ 25¢ 5¢ 5¢ 5¢ 5¢ 10¢ 10¢ 10¢...
- Page 26 SECTION 4: TYPICAL USAGE Figure 35 Programming the Coin Routing Whenever the coin tubes are changed, the Guardian must be reprogrammed to route coins to the new tube locations. See Cassette Con- fi guration - Using a Custom Confi guration. Figure 33 Payout Cassette...
-
Page 27: Cassette Confi Guration
(such as BB, BD, etc. in Figure 31) and proceed to Figure 38 to enter this cassette confi guration. • Using a Custom Confi guration (Guardian 6000 only): A custom confi guration is any combination of tubes and/or coin routing other than what is shown in Figure 31. If you want to reconfi... - Page 28 Tokens cannot be routed to tubes using the Custom Cassette menu. The Token Routing menu should be used. Figure 38 Guardian 6000: Guardian 6000: Changing Cassette / Tube Configuration Changing Cassette / Tube Configuration...
- Page 29 Slugs can easily be blocked for the Guardian 6000 by completing the simple fi eld tune as shown in Figure 42. You will need at least one sample of the slug to be blocked to tune the changer.
-
Page 30: Eliminating A Slug
The Guardian Series changers features a wide range of token capabilities, all of which can be accomplished while the changer is still installed on location. These capabilities are covered here. All token capabilities listed in this section can also be added using the Coinco FP-5 Field Programmer. - Page 31 SECTION 4: TYPICAL USAGE Figure 43 Guardian 6000: Guardian 6000: Adding / Deleting A Token Adding / Deleting A Token Guardian 6000: Guardian 6000: Adding / Deleting A Token Adding / Deleting A Token 1 . P u sh MENU bu tton .
-
Page 32: Token Change Value
2 . S cro ll u sin g a rro w ke ys to scree n be lo w . This feature is available on Guardian E6 by This feature is available on Guardian E6 by using the Coinco FP-5 Field Programmer. using the Coinco FP-5 Field Programmer. S E T U P S E T U P ▲... -
Page 33: Optimal Float Recomendations
2. S croll using arrow keys to screen belo w This feature is available on Guardian E6 by This feature is available on Guardian E6 by using the Coinco FP-5 Field Programmer. using the Coinco FP-5 Field Programmer. M A IN M E N U M A IN M E N U ▲... -
Page 34: Section 5: Advanced Configuration
See Figure 47 for how to change the password. If the password has been changed from the standard D-E-F-B, and the user cannot remember what it is, the Password can be reset by using the Coinco FP-5 Field Programmer. Figure 47 Password / Change Password &... -
Page 35: Password Protection Levels
SECTION 5: ADVANCED CONFIGURATION Password Protection Levels Password Protection Levels allow the user to decide which information is protected by a password. The Guardian features three levels of password protection: • Level 1: The default, or lowest level of security. •... -
Page 36: Coin Enable
2 . S cro ll u sin g a rro w ke ys to scree n be lo w 2 . S cro ll u sin g a rro w ke ys to scree n be lo w using the Coinco FP-5 Field Programmer. using the Coinco FP-5 Field Programmer. -
Page 37: Dual Currency Y
2 . S cro ll u sin g a rro w ke ys to scree n be lo w This feature is available on Guardian E6 by This feature is available on Guardian E6 by using the Coinco FP-5 Field Programmer. using the Coinco FP-5 Field Programmer. Enter... -
Page 38: Change Management
2. S croll using arrow keys to screen belo w 2. S croll using arrow keys to screen belo w This feature is available on This feature is available on Guardian E6 by using the Coinco Guardian E6 by using the Coinco FP-5 Field Programmer. FP-5 Field Programmer. -
Page 39: Language
See Figure 53 for how to change the default lan- on Guardian E6 by using on Guardian E6 by using cannot be restored after cannot be restored after the Coinco FP-5 Field the Coinco FP-5 Field guage. this step is com pleted. this step is com pleted. -
Page 40: Disable/Enable Audible Feedback
2 . S cro ll u sin g arro w k e ys to scre e n b e lo w Guardian E6 by using the Guardian E6 by using the Coinco FP-5 Field Programmer. Coinco FP-5 Field Programmer. G E N E R A L G E N E R A L ▲... -
Page 41: Section 6: Maintenance
Guardian E6™ Only Guardian E6™ Only LCD Display LCD Display volved repairs. Frequency of maintenance will Guardian 6000™ Only Guardian 6000™ Only Acceptor Gate Acceptor Gate depend on environment and number of transac- User User tions. - Page 42 SECTION 6: MAINTENANCE Figure 60 Removing the Coin Tube Cassette Payout Rotate the Payout Cassette Release Cassette Latch downward to open the coin payout cas- sette. Pivot the payout cassette out of the Release changer housing to access the coin tubes. Latch See Figures 60 &...
- Page 43 SECTION 6: MAINTENANCE Figure 62 Removing the Coin Tubes from the Cassette To remove an individual coin tube, hold the cassette assembly then gently pull the top of the coin tube forward to unsnap the top of the tube. Tilt the top of the tube away from the cassette and lift the tube out.
- Page 44 SECTION 6: MAINTENANCE Figure 65 Cleaning the Acceptor To open the Acceptor Gate assembly grab Coin Inlet the coin inlet funnel and pivot the gate Acceptor Funnel assembly to the right. Clean the Mainplate acceptor main plate, inner gate surface and coin ramp.
- Page 45 SECTION 6: MAINTENANCE Figure 67 Access to the various coin paths for cleaning requires the removal of the clear plastic covers. The Upper Front Cover pivots to the left. Clean both sides of Upper Front Cover. See Figure 67. Remove the Upper Back Cover by pushing its release tab to the right.
-
Page 46: Section 7: Troubleshooting
Troubleshooting The Guardian Series changers incorporate a range of features to assist the user. These include: Active audible and visual feedback (Guardian 6000 only) to make sure the changer is not inadvertently left in a non-ready state. A changer Autotest capability to cycle and verify proper feedback of all changer systems. - Page 47 How do I access changer usage data? The most useful data is displayed for the user in Audit Reporting. More detailed data is available to authorized Coinco Service Centers for evaluation and troubleshooting. Figure 72 Changer Troubleshooting Changer Troubleshooting...
- Page 48 SECTION 7: TROUBLESHOOTING The Guardian 6000 communicates warning and out-of-service messages visually via the LCD display, and audibly by the standard beeper. Figure 73 shows the different types of messages and what each means. The Guardian E6 communicates warning and out-of-service messages visually via the LED Status Indicator, and audibly by the standard beeper.
- Page 49 SECTION 7: TROUBLESHOOTING Figure 74 Guardian E6 Guardian E6 Guardian E6 Guardian E6 Flash Codes Flash Codes Flash Codes Flash Codes Flash Code Flash Code Changer Status Changer Status Beep Beep O K / F lo a t O K / F lo a t (so lid ) (so lid ) N o n e...
-
Page 50: Section 8: Parts List
SECTION 8: PARTS LIST Guardian 6000™ / Guardian E6 Housing and Payout Cassette Release Latch Assembly Item # Part # Description Qty. Guardian E6 Guardian Guardian 12V Wake/ 6000 Sleep 408818-1 Housing & Payout Cassette Release Latch Assembly 926050-1 Bare Housing... - Page 51 SECTION 8: PARTS LIST Guardian 6000™ / Guardian E6 Chassis Item # Part # Description Qty. Guardian Guardian Guardian E6 6000 12V Wake/ Sleep 410021 410021-1 410088C Chassis Printed Circuit Board Assembly 345-4R4 4 x 1/4 PH Phil Plas Screw...
- Page 52 SECTION 8: PARTS LIST Guardian 6000™/Guardian E6 Payout Assembly Complete Payout Assembly Item # Part # Description Quantity Guardian Guardian Guardian 6000 E6 Wake/ Sleep 408806 408806C Payout Assembly Complete 345S4R7 4 x 7/16 PH Phil S6 Plas 408805 Gearbox Assembly...
- Page 53 SECTION 8: PARTS LIST Guardian 6000™ / Guardian E6 Payout Cassette Assembly Item # Part # Description Qty. Guardian Guardian Guardian 6000 E6 12V Wake/ Sleep 408834-1 5¢ Tube & Shim Assembly US/CAN 408836-1 10¢ Tube & Shim Assembly US 408836-2 10¢...
-
Page 54: Front View W
SECTION 8: PARTS LIST Guardian 6000™ / Guardian E6 Acceptor Assembly Front View Item # Part # Description Qty. Guardian Guardian Guardian E6 6000 12V Wake/ Sleep 410100-1 410100-3 410100-3C Acceptor Assembly Complete 408816 408816-3 408816-3C Gate Assembly 296P6R10 6 x 5/8 PH Phil Type 25 Black Screw... -
Page 55: Back View W
SECTION 8: PARTS LIST Guardian 6000™ / Guardian E6 Acceptor Assembly Back View Item # Part # Description Qty. Guardian Guardian Guardian E6 6000 12V Wake/ Sleep 410100 Acceptor Assembly Complete 926031 Acceptor Rear Cover 409010 410173 410173C Acceptor Main Printed Circuit Board... - Page 56 Manufactured under one or more of the following patents: • USA: 4,587,984; 4,763,769; 4,838,406; 5,167,314; 5,184,708; 5,460,256; 5,485,908; 5,577,957; 5,579,887; 5,607,350; 5,662,205; 5,673,781; 5,733,186; 6,230,870; • France: 9302237 • Canada: CA1,223,364 and CA1,281,134 • Germany: DE3410924 • Great Britain: GB2140954 •...
- Page 57 St. Louis, MO 63124-2013 (314) 725-0100 or 1-800-325-2646 For Canada: Coin Acceptors, Inc. Canadian Headquarters 1-435 Four Valley Drive Concord (Toronto), Ontario LK4 5X5 Canada (905) 738-5777 or 1-800-387-9300 email: techsupport@coinco.com www.coinco.com Coinco Publication No. 927977 Rev. 2 01/07 Printed in the U.S.A.
Need help?
Do you have a question about the Guardian 6000 and is the answer not in the manual?
Questions and answers