Sony XAV-W651BT Operating Instructions Manual
Bluetooth double din dvd player & car receiver
Hide thumbs
Also See for XAV-W651BT:
- Operating instructions manual (72 pages) ,
- Operating instructions manual (36 pages)
Table of Contents
Advertisement
AV Center
Owner's Record
The model and serial numbers are located on the bottom of the unit.
Record these numbers in the spaces provided below.
Refer to these numbers whenever you call upon your Sony dealer
regarding this product.
Model No.
Serial No.
To cancel the demonstration (Demo) display, see page 20.
For the connection/installation, see page 31.
Pour annuler l'affichage de demonstration (Démo), reportez-
vous a la page 20.
Pour le raccordement/l'installation, reportez-vous à la page 33.
Para cancelar la pantalla de demostracion (Demostración),
consulte la página 20.
Para la conexión/instalación, consulte la página 33.
XAV-W651BT/XAV-V631BT
4-687-624-12(1)
Operating Instructions
Mode d'emploi
Manual de instrucciones
GB
FR
ES
Advertisement
Chapters
Table of Contents

Subscribe to Our Youtube Channel
Related Manuals for Sony XAV-W651BT


Summary of Contents for Sony XAV-W651BT
- Page 1 Owner’s Record The model and serial numbers are located on the bottom of the unit. Record these numbers in the spaces provided below. Refer to these numbers whenever you call upon your Sony dealer regarding this product. Model No. Serial No.
-
Page 2: Warning
This manual contains instructions for XAV- modifications not expressly approved in this W651BT and XAV-V631BT. manual could void your authority to operate this XAV-W651BT is the model representatively used equipment. for illustration purposes. This device complies with Part 15 of the FCC Rules The nameplate indicating operating voltage, etc., is... - Page 3 Services offered by third parties may be changed, when communicating using BLUETOOTH wireless suspended, or terminated without prior notice. technology. Sony does not bear any responsibility in these sorts • We do not take any responsibility for the leakage of situations. of information during BLUETOOTH communication.
-
Page 4: Table Of Contents
Playback Playing a Disc (XAV-W651BT) ....11 Playing a USB Device ..... . . 12 Playing a BLUETOOTH Device. -
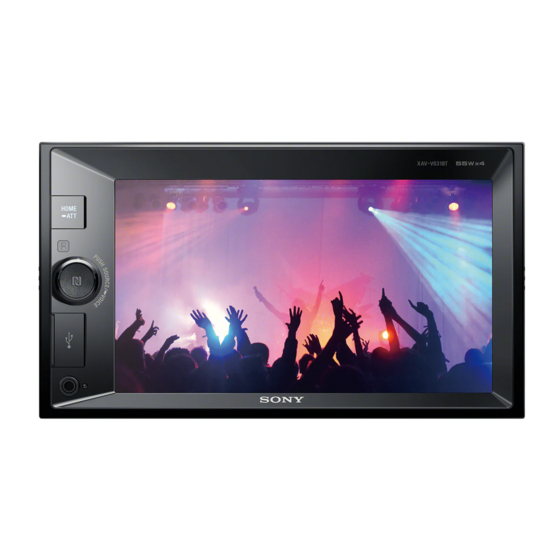
Page 5: Guide To Parts And Controls
Receptor for the remote commander Change the source. Each time it is pressed, it Disc slot (XAV-W651BT) displays a selectable source in a popup on the (disc eject) (XAV-W651BT) current display. USB port VOICE Press and hold to activate the voice command ... - Page 6 Return to the menu on a Video CD (VCD) (XAV- W651BT). EQ (equalizer) Select an equalizer curve. Number buttons (0 – 9) CLEAR (play/pause) / (previous/next) / (fast-reverse/fast-forward) DVD playback setting buttons (XAV-W651BT)
-
Page 7: Getting Started
Status indication Lights up when the sound is attenuated. Getting Started Lights up when the “SongPal” connection is established between this Resetting the Unit unit and your Android phone. You must reset the unit before operating the unit Lights up when the BLUETOOTH signal is for the first time, after replacing the car battery, or on. - Page 8 Connecting with a smartphone by One Pairing and connecting with a touch (NFC) BLUETOOTH device By touching the N-Mark on the unit with an NFC* When connecting a BLUETOOTH device for the first compatible smartphone, the unit is paired and time, mutual registration (called “pairing”) is connected with the smartphone automatically.
-
Page 9: Connecting A Usb Device
Note Connecting a USB Device While connecting to a BLUETOOTH device, this unit cannot be detected by another device. To enable detection, enter the pairing mode and search for this unit from another Turn down the volume on the unit. device. -
Page 10: Listening To The Radio
Storing automatically (BTM) Listening to the Radio Select the desired band (FM1, FM2, FM3, AM1, or AM2). Listening to the Radio Touch Touch [BTM], then [Search]. To listen to the radio, press HOME then touch [Tuner]. The unit stores stations in order of frequency on the preset numbers (1 to 6). -
Page 11: Using Radio Data System (Rds)
Using Radio Data System (RDS) Playback Selecting program types (PTY) Playing a Disc (XAV-W651BT) During FM reception, touch [PTY]. Depending on the disc type, some operations may To scroll the list, touch /. be different or restricted. Touch the desired program type. -
Page 12: Playing A Usb Device
Changing the audio channel Using PBC (playback control) functions When playing a VCD, you can listen to both left and The PBC menu interactively assists with operations right channels, right channel only or left channel while a PBC-compatible VCD is played. only, via both right and left speakers. -
Page 13: Playing A Bluetooth Device
Make a BLUETOOTH connection with the audio device (page 9). Searching for a file from the list screen Press HOME, then touch [BT Audio]. During disc (XAV-W651BT) or USB playback, Operate the audio device to start playback. touch Adjust the volume on this unit. -
Page 14: Other Settings During Playback
[Theater], [Sepia]. Pandora® is only available in certain countries. (Available only when the parking brake is Please visit applied, and iPod/USB, Disc (XAV-W651BT), or http://www.pandora.com/legal AUX source is selected). for more information. Aspect Selects an aspect ratio for the screen of the unit. -
Page 15: Available Operations In Pandora
Available Operations in Handsfree Calling (via BLUETOOTH Pandora® only) “Thumbs” feedback To use a cellular phone, connect it with this unit. For details, see “Preparing a BLUETOOTH Device” “Thumbs Up” or “Thumbs Down” feedback allows (page 7). you to personalize stations. During playback, touch (Thumbs up) or (Thumbs down). -
Page 16: Available Operations During A Call
Android phone may differ. from the phonebook. • For further details on “SongPal,” visit the following URL: The confirmation display appears. http://rd1.sony.net/help/speaker/songpal/ Touch [Preset], then the desired preset number (1 to 6). Establishing the SongPal connection The contact is stored to the selected preset number. - Page 17 Selecting the source or application Activating voice recognition You can select a source or application not only on By registering applications, you can control an your Android phone but also on this unit by application by voice command. For details, refer to operating the Android phone.
-
Page 18: Using Siri Eyes Free
Using Siri Eyes Free Settings Siri Eyes Free allows you to use an iPhone handsfree by simply speaking into the microphone. Basic Setting Operation This function requires you to connect an iPhone to the unit via BLUETOOTH. Availability is limited to You can set items in the following setup categories: iPhone 4s or later. -
Page 19: Sound Settings
SOURCE button: [Voice], match the input mode with the connected [DSPL]. remote control before use. Rear View Camera (XAV-W651BT) Custom Adjusts the length and/or position of the marker Input mode for the steering wheel remote lines on the picture from the rear view camera by control (Automatically selected when [User touching [Line Edit]. -
Page 20: Screen Settings
Available only when no source is selected. properly. DVD Menu Language (XAV-W651BT) To maintain high sound quality Selects the default language for the disc’s menu: Do not splash liquid onto the unit or discs (XAV- [English], [Chinese], [German], [French], [Italian], W651BT). - Page 21 Notes on LCD panel Notes on discs (XAV-W651BT) • Do not get the LCD panel wet or expose it to liquids. This may cause a malfunction. • Do not expose discs to direct sunlight or heat sources such as hot air ducts, nor leave it in a car parked in direct sunlight.
-
Page 22: About Ipod
If you have any questions or problems concerning Audio codec: MP3 (MPEG-1 Layer3) your unit that are not covered in this Operating Bit rate: Max. 4 Mbps Instructions, consult your nearest Sony dealer. Frame rate: Max. 30 fps (30p/60i) Resolution: Max. 720 × 576* – MPEG-4 (.mp4) -
Page 23: Maintenance (Xav-W651Bt)
Antenna (aerial) terminal: External antenna (aerial) connector Intermediate frequency: 9,267.5 kHz or 9,257.5 kHz/5 kHz Sensitivity: 44 μV DVD/CD Player section (XAV-W651BT) Signal-to-noise ratio: 80 dB Frequency response: 20 Hz – 20,000 Hz Wow and flutter: Below measurable limit Harmonic distortion: 0.05%... - Page 24 The Bluetooth® word mark and logos are registered AUX audio input terminal (Front) trademarks owned by Bluetooth SIG, Inc. and any AUX Audio/Video input terminal (Rear) use of such marks by Sony Corporation is under USB port license. Other trademarks and trade names are External input terminal those of their respective owners.
-
Page 25: Troubleshooting
VIDEO”) THAT WAS ENCODED BY A CONSUMER This product uses font data which is licensed to ENGAGED IN A PERSONAL AND NONCOMMERCIAL Sony owned by Monotype Imaging Inc. ACTIVITY AND/OR WAS OBTAINED FROM A VIDEO Such font data shall be used solely in connection PROVIDER LICENSED BY MPEG LA TO PROVIDE with this product. -
Page 26: Radio Reception
(red) to the this unit. power supply lead of a car’s antenna (aerial) The disc is defective or dirty (XAV-W651BT). booster (only when your car has built-in radio Installation is not correct. antenna (aerial) in the rear/side glass). - Page 27 The disc is not finalized (page 22). The sound is intermittent. The disc format and file version are incompatible The sound may be intermittent at a high bit rate with this unit (page 21). of more than 320 kbps. ...
- Page 28 Echo or noise occurs during call conversations. No sound is output from the car speakers during Reduce the volume. a handsfree call. If ambient noise other than the phone call sound If the sound is output from the cellular phone, set is loud, try reducing this noise.
- Page 29 – Connect a cellular phone (page 8). Cannot connect to Pandora due to poor network reception. The mobile network signal is poor. For disc operation (XAV-W651BT) – Move to an area with better reception. Disc Error Cannot skip. The unit cannot read the data due to some ...
-
Page 30: Language Code List (Xav-W651Bt)
If you take the unit to be repaired due to disc 1079 Catalan 1283 Javanese playback trouble, bring the disc that was used at 1093 Corsican 1287 Georgian the time the problem began (XAV-W651BT). 1097 Czech 1297 Kazakh 1103 Welsh 1298 Greenlandic 1105... -
Page 31: Connection/Installation
Code Language Code Language 1353 Moldavian 1528 Thai Connection/Installation 1356 Marathi 1529 Tigrinya 1357 Malay 1531 Turkmen Cautions 1358 Maltese 1532 Tagalog • Do not install this unit in a car that has no ACC 1363 Burmese 1534 Setswana position. The display of the unit does not turn off 1365 Nauru 1535... -
Page 32: Connection
Connection Subwoofer* Power amplifier* Portable audio/ video device* Rear view camera* Monitor* * from a wired remote control (not supplied) White White/black striped Front speaker* Gray Gray/black striped Green Green/black striped Rear speaker* Purple Purple/black striped Black Yellow For details, see “Making Blue/white striped connections”... -
Page 33: Making Connections
To the parking brake switch cord *1 Not supplied *2 Speaker impedance: 4 Ω – 8 Ω × 4 The mounting position of the parking brake *3 RCA pin cord (not supplied) switch cord depends on your car. *4 Depending on the type of car, use an adaptor for a wired Be sure to connect the parking brake lead (light remote control (not supplied). -
Page 34: Installing The Microphone
Installing the microphone Using the wired remote control To capture your voice during handsfree calling, you When using the steering wheel remote need to install the microphone . control Installation of the connection cable RC-SR1 (not supplied) is required before use. ... -
Page 35: Installation
Mounting the unit in a Japanese car Installation You may not be able to install this unit in some Japanese cars. In such a case, consult your Sony dealer. Mounting the unit in the dashboard To the dashboard/center console When mounting in a Japanese car, see “Mounting... - Page 36 If you have any questions/problems regarding this product, try the following: Read Troubleshooting in these Operating Instructions. Please contact (U.S.A. only); 1-800-222-7669 Call http://www.SONY.com http://www.sony.net/ ©2016 Sony Corporation Printed in China...
- Page 37 The model and serial numbers are located on the bottom of the unit. Record the serial number in the space provided below. Refer to these numbers whenever you call upon your Sony dealer regarding this product. Model No. XA-NV400 Serial No. ©2016 Sony Corporation Printed in China XA-NV400...
- Page 38 The chemical replacement, there may be an internal malfunction. In symbols for mercury (Hg) or lead (Pb) are added if the such a case, consult your nearest Sony dealer. battery contains more than 0.0005% mercury or 0.004% lead.
- Page 39 ×2...
- Page 40 Car audio unit (AV Receiver) Unidad de audio del vehículo (Sistema multimedia) Unità audio dell’auto (ricevitore AV) Autoradio (Centre AV) Autoanlage (AV-Receiver) Audio-apparatuur voor de auto (AV Receiver) DC 12V Red/Rojo/Rosso/ Rouge/Rot/Rood FUSE 2A BATTERY Yellow/Amarillo/Giallo/ Jaune/Gelb/Geel Black/Negro/Nero/ Noir/Schwarz/Zwart...
- Page 41 Operate the car audio unit (AV Receiver) to use the below: navigation function. Customers in the United States/Canada: To select the navigation function http://esupport.sony.com/ Press HOME, then touch [Navigation]. Customers in Europe: http://www.sony.eu/support For further details on navigation operation, visit the Customers in Asia Pacific: support site and refer to the manual provided.
- Page 42 Loop fastener Cierre de lazo Striscia a occhiello Bande auto-agrippante (velours) Hook fastener Klettband mit Schlaufen Cierre de gancho Zijde met lusjes Striscia a gancio Bande auto-agrippante (crochets) Klettband mit Widerhaken Zijde met haakjes...
- Page 43 Unit: mm (in) Unidad: mm Unità: mm Unité : mm (po) Einheit: mm Eenheid: mm 140 (5 75.6 (3) 9.9 ( 27 (1...
- Page 44 − Connect the equipment into an outlet on a circuit different from that to which the receiver is connected. − Consult the dealer or an experienced radio/TV technician for help. You are cautioned that any changes or modifications not expressly approved in this manual could void your authority to operate this equipment. http://www.sony.net/ Made in China...
- Page 45 Easy to set up Turn your Sony AV receivers into a touch screen navigation solution powered by TomTom. Use our plug-in module kit to get the latest offline navigation for smarter journeys, and enjoy intuitive operation with an easy-to-use touch screen interface.
- Page 46 1. Speed limit availability varies depending on road and region. ©2017 Sony Electronics, Inc. All rights reserved. Reproduction in whole or in part without written permission is prohibited. Sony and the Sony logo are registered trademarks of Sony Corporation. TomTom is a trademark of TomTom International All other trademarks are trademarks of their respective owners. Features and specifications are subject to change without...
- Page 47 TomTom Navigation App User Manual v1.0...
- Page 48 Contents Welcome to navigation with TomTom Get going GPS reception ...................... 5 What's on the screen The map view....................... 6 The guidance view ....................8 The route bar ..................... 10 Distances and the route bar ................11 The quick menu ....................11 Navigation buttons....................
- Page 49 Reordering stops on a route ................... 46 My Routes About My Routes ....................47 Saving a route ....................47 Navigating using a saved route ................48 Adding a stop to a saved route using the map .............. 49 Deleting a route or a track from My Routes ..............50 Safety cameras About safety cameras ...................
-
Page 50: Welcome To Navigation With Tomtom
Welcome to navigation with TomTom This User Manual explains all you need to know about your new TomTom Navigation App. If you want a quick read of the essentials, we recommend that you read the Whats on the screen chapter. This covers the most important screens and buttons. After that, you will probably want to learn more about Using Quick Search Planning a... -
Page 51: Get Going
Get going GPS reception When you first start your TomTom Navigation App, it may need a few minutes to determine your position. In future, your position will be found much faster. -
Page 52: What's On The Screen
What's on the screen The map view The map view is shown when you have no planned route. Your actual location is shown as soon as your TomTom Navigation App has found your GPS location. You can use map view in the same way as you might look at a traditional paper map. You can move around the map using gestures, and zoom using the zoom buttons. - Page 53 If you have not planned a route the map is zoomed out to show the area around your location. If you have planned a route, your complete route is shown on the map. You can add stops to your route directly from the map.
-
Page 54: The Guidance View
stop on your route. A location saved in Places. When a search for POIs near destination is done and the results are shown on the map, less important POIs are shown as black pins with white crosses. Select a map symbol to open the pop-up menu, then select the menu button to see a list of actions you can take. - Page 55 Tip: When you have planned a route and the 3D guidance view is shown, select the switch view button to change to the map view and use the interactive features. 1. Switch view button. Select the switch view button to change between the map view and the guidance view.
-
Page 56: The Route Bar
The name of the street you are driving on. 6. Current location. This symbol shows your current location. Select the symbol or the speed panel to open the quick menu. Note: If your TomTom Navigation App cannot find your location the symbol appears grey. 7. -
Page 57: Distances And The Route Bar
Distances and the route bar The distance ahead shown on the route bar depends on the length of your route, or the distance remaining on your route. For remaining distances longer than 50 km (31 miles), only the next 50 km (31 miles) is shown. ... -
Page 58: Other Buttons
Select this button to drive to your work location. If this button is not Drive to Work included in your main menu, go to My Places to set up your work location. Select this button to open the list of your recent destinations. Select a Recent Destination recent destination to plan a route to that destination. - Page 59 The following buttons are available in the Main Menu screen, in addition to the navigation buttons: Select this button to open the Settings Menu. Select this button to open the Help Menu. The Help Menu contains help for using Voice control if supported by your device, together with other information about your TomTom Navigation App.
-
Page 60: Volume Control
Volume control On the map or guidance view, select the Main Menu button to open the Main Menu. Select and slide the volume control to change the volume of voice instructions and warnings. If the voice instructions are switched off, the volume control will still change the volume of the warnings. Using gestures You use gestures to control your TomTom Navigation App. - Page 61 Tip: Alternatively, select the Edit button in the Main Menu. The menu button is shown with left and right arrows. 3. Press the left or right arrow on the menu button to move the button to a new position in the menu.
-
Page 62: Using Quick Search
Using Quick Search About search You use search to find a wide range of places and then navigate to them. You can search for the following: A specific address, for example, type in 123 Oxford Street, London. A partial address, for example, type in Oxford st Lon. A type of place, for example, type in gas station or restaurant. - Page 63 3. Use the keyboard to enter the name of the place you want to plan a route to. You can search for a POI (Point of Interest) type, such as a restaurant or tourist attraction. Alternatively, you can search for a specific POI, for example "Rosie's Pizzeria". Note: When searching, the whole map is searched.
- Page 64 6. To see more information about the POI, select the POI on the map and then select the pop-up menu button. Select More Information on the pop-up menu. You see more information about the POI such as the phone number, full address and email. 7.
-
Page 65: Entering Search Terms
Entering search terms Select Search in the Main menu to start searching for addresses and POIs. The search screen opens showing the keyboard and the following buttons: 1. Back button. Select this button to go back to the previous screen. 2. -
Page 66: Working With Search Results
In town or city Select this option to use a town or city as the centre for your search. You need to enter the town or city name using the keyboard. When you have selected the town or city from the results list, you can search for an address or POI in that city. - Page 67 Tip: You can switch between seeing the results on the map or in a list by selecting the list/map button: When you select an address from the list of search results, you can choose to show it on the map, add a crossroad or plan a route to that chosen location.
-
Page 68: About Postcodes
Note: The best search results are shown on the map. When you zoom in, the lower ranked search results are gradually shown. About postcodes When searching using a postcode, your results depend on the type of postcode used in the country that you are searching in. - Page 69 Court house Cash dispenser Legal - Solicitors Financial institution Legal - other services Food services Convenience store Fast food restaurant Restaurant Chinese restaurant Accommodation Hotel or motel Luxury hotel Camping ground Economy chain hotel Emergency services Hospital or polyclinic Dentist Police station Veterinarian Doctor...
- Page 70 Rental car facility Electrical car charging point(s) Rental car parking Car repair facility Other services Embassy Pet services Government office Telecommunication Company Community service Post office Pharmacy Shopping centre Beauty services Tourist information office Shop Education College or university School Library Convention centre Leisure...
- Page 71 Concert hall Amusement park Museum Exhibition centre Opera Cultural centre Nightlife Leisure centre Children's Farm Sport Playing field Swimming pool Mountain peak Water sports Beach Tennis court Park or recreation area Ice skating rink Yacht basin or marina Sports centre Stadium Golf course Religion...
- Page 72 Railway station Mountain pass Airport Scenic or panoramic view Ferry terminal Postcode Note: Not used in all countries. Border crossing Residential area Bus station City centre Toll gate Electrical car charging stations Rest area Truck stop...
-
Page 73: Planning A Route
Planning a route Planning a route to an address using search Important: In the interest of safety and to avoid distractions while you are driving, you should always plan a route before you start driving. To plan a route to an address using search, do the following: 1. - Page 74 Tip: You can switch between seeing the results on the map or in a list by selecting the list/map button: 5. Select an address suggestion. 6. Enter the house number if you have one and haven't entered it already. Tip: If you enter a house number that is not found, then the number appears red. The nearest house number that is found is shown in the Drive button.
-
Page 75: Planning A Route To A City Centre
Planning a route to a city centre Important: In the interest of safety and to avoid distractions while you are driving, you should always plan a route before you start driving. To plan a route to a city centre using search, do the following: 1. -
Page 76: Planning A Route Using The Map
The city name is shown in the right side of the search input box, and the city centre POI is shown below in the right-hand column. 6. Select the city centre POI. The city centre location is shown on the map. 7. - Page 77 Tip: You can also select a map symbol to open the pop-up menu, then select the Drive/Ride button to plan a route to that location. 2. When you have found your destination on the map, select it by pressing and holding the screen for about one second.
-
Page 78: Planning A Route Using My Places
Tip: If your destination is in a different time zone, you see a plus (+) or a minus (-) sign and the time difference in hours and half hours in the arrival information panel. The estimated time of arrival is the local time at your destination. Tip: You can add a stop to a route that you have already planned. -
Page 79: Planning A Route Using Coordinates
4. To plan a route to this destination, select Drive/Ride depending on which device you are using. A route is planned and then guidance to your destination begins. As soon as you start driving, the guidance view is shown automatically. Tip: If your destination is in a different time zone, you see a plus (+) or a minus (-) sign and the time difference in hours and half hours in the arrival information... -
Page 80: Planning A Route Using A Mapcode
Tip: You can switch between seeing the results on the map or in a list by selecting the list/map button: 7. Select a suggestion for your destination. The location is shown on the map. 8. To plan a route to this destination, select Drive/Ride depending on which device you are using. A route is planned and then guidance to your destination begins. -
Page 81: Finding An Alternative Route
Tip: You can switch between seeing the results on the map or in a list by selecting the list/map button: 5. Select a suggestion for your destination. 6. To plan a route to this destination, select Drive/Ride depending on which device you are using. A route is planned and then guidance to your destination begins. -
Page 82: Planning A Route In Advance
Planning a route in advance You can plan a route in advance before you drive it. You can save the route as part of your Routes list. To plan a route in advance, do the following: 1. Select the Main Menu button to open the Main Menu. 2. -
Page 83: Finding A Car Park
Changing the starting point to be your current location 1. Select the starting point of the route in the map view. 2. Select the pop-up menu button. A pop-up menu shows a list of options. 3. Select Remove Starting Point. Your route is replanned with your current location as the starting point. - Page 84 1. Select the Main Menu button to open the Main Menu. 2. Select Parking. The map opens showing the locations of car parks. If a route is planned, the map shows car parks near your destination. If a route isn't planned, the map shows car parks near your current location.
-
Page 85: Finding A Gas Station
If you want to change how the search is done, select the button to the right of the search box. You can then change where the search is carried out, for example, to search near you or the whole map. 3. - Page 86 2. Select Gas Station. The map opens showing the locations of gas stations. If a route is planned, the map shows gas stations along your route. If a route isn't planned, the map shows gas stations near your current location. You can change the screen to show a list of gas stations by pressing this button: You can select a gas station from the list to locate it on the map.
- Page 87 If you want to change how the search is done, select the button to the right of the search box. You can then change where the search is carried out, for example, to search near you or the whole map. 3.
-
Page 88: Changing Your Route
Changing your route The Current Route Menu When you have planned a route, select the Current Route button in the Main Menu to open the Current Route Menu. The following buttons are available in the menu: Clear Route Select this button to clear the currently planned route. The Current Route Menu closes and you return to the view. - Page 89 An instruction description. The distance between two consecutive instructions. Exit number. Tip: Select an instruction to see a preview of that section of the route in the map view. You can also select the instruction panel in the guidance view to see turn-by-turn text instructions.
-
Page 90: Avoiding A Blocked Road
Avoiding a blocked road If there is a blocked road on your route you can change your route to avoid it. 1. In the guidance view, select the current location symbol or the speed panel. Tip: The speed panel is only shown when you have started driving on your route. 2. -
Page 91: Types Of Route
Types of route Select Change Route Type to change the type of route planned to your current destination. Your route is recalculated using the new route type. You can select the following types of route: Fastest route - the fastest route to your destination. Your route is constantly checked taking ... -
Page 92: Deleting A Stop From Your Route
5. Select Add to Current Route. Your route is recalculated to include your stop. Deleting a stop from your route 1. Press the switch view button to show the map. Your complete route is shown on the map. 2. In the route bar, press the stop you want to delete. -
Page 93: My Routes
My Routes About My Routes My Routes provides an easy way to save and retrieve routes and tracks. You may want to use My Routes in one or more of the following situations: While working - Your job involves driving several routes with multiple stops on a daily basis. ... -
Page 94: Navigating Using A Saved Route
3. Select the pop-up menu button to open the menu. 4. Select Manage Route, then Add to My Routes. The name of the route is shown in the edit screen. 5. Edit the name of the route so that you can easily recognise it. 6. -
Page 95: Adding A Stop To A Saved Route Using The Map
The starting point of the saved route is converted to your first stop and then the route is planned. Guidance to your destination begins from your current location. As soon as you start driving, the guidance view is shown automatically. Tip: There are two other ways to navigate using a saved route: Select the starting point of the route. -
Page 96: Deleting A Route Or A Track From My Routes
Your route is recalculated to include your stop. Tip: To update the saved route in your My Routes list with the changes, select the route om the map then select Save Changes to Route in the pop-up menu. Deleting a route or a track from My Routes 1. -
Page 97: Safety Cameras
Safety cameras About safety cameras Important: The Safety cameras service is only available in Australia. The Safety cameras service warns you about the following camera locations: Fixed cameras. Speed traps. Speed trap hotspots. Average speed zones. Speed enforcement zones. -
Page 98: Changing The Way You Are Warned
Symbol shown on Symbol shown in Description route bar Fixed camera - this type of camera checks the speed of passing vehicles and is fixed in one place. Average speed zones - these types of cameras measure your average speed between two points. - Page 99 You can then set how you want to be warned for the different types of cameras and safety hazards. You can change settings for whether you want to be warned, never warned or warned only if you are speeding. For example, to change how you are warned when you approach a fixed camera, do the following: 1.
-
Page 100: My Places
My Places About My Places My Places provides an easy way to select a location without the need to search for the location each time. You can use My Places to create a collection of useful or favourite addresses. Tip: The terms "favourite" and "place" mean the same thing - favourites are places that you go to often. -
Page 101: Changing Your Home Location
Setting your home or work location using the map 1. In the View, move the map and zoom in until you can see your home or work location. 2. Press and hold to select the location. A pop-up menu shows the nearest address. 1. -
Page 102: Adding A Location From My Places
Adding a location from My Places 1. In the Main Menu, select My Places. 2. Select Add a new place. 3. To select a location, do one of the following: Zoom in on the map at the location you want to select. Press and hold to select the loca- ... -
Page 103: Adding A Location To My Places By Marking
5. Select Add to My Places. The name of the location appears in the edit screen. 6. Edit the name of the location so you can easily recognise it. 7. Select Done to save your location in the My Places list. Adding a location to My Places by marking To mark a location and temporarily add it to My Places, do the following: 1. -
Page 104: Settings
Settings Appearance Select Settings in the Main Menu, then select Appearance. On this screen, you can change these settings: Display Select Display to change the appearance of the display. Route bar Select Route bar to change the information you see in the route bar. Guidance view ... - Page 105 Route Bar Select Settings in the Main Menu, then select Appearance. Select Arrival information to change the arrival information you see in the route bar. Select Route information to change the route information you see on the route bar. Show wide route bar if possible The wide route bar is not shown by default.
-
Page 106: Guidance View
Route Information You can choose to see any of the following in the route bar: Parking Select this setting to see car parks and parking. Gas stations Select this setting to see gas stations on your route. Stops ... -
Page 107: Maps
Choosing a voice Select Choose a voice to change the voice that gives spoken directions and other route instructions. A wide range of voices are available. There are recorded voices which have been recorded by actors. Instruction settings Read early instructions out loud ... -
Page 108: Sounds And Warnings
Avoid on every route You can choose to avoid ferries and car shuttle trains, toll roads, carpool lanes, and unpaved roads. Set how your TomTom Navigation App should manage each of these road features when the device calculates a route. Carpool lanes are sometimes known as High Occupancy Vehicle Lanes (HOV) and are not present in every country. -
Page 109: Language And Units
Danger zones A danger zone is a zone specified by French law. This type of warning is given in France at the start and end of the danger zone. Accident hotspots This type of warning is given for a place where road traffic accidents have historically been concentrated. -
Page 110: Getting Help
Getting Help Help Select Help from the Main Menu. On this screen, you can see the following information and change one setting: Map version Device serial number and legal information Reset Select this setting to delete all your saved places and settings and restore the standard factory settings to your TomTom Navigation App. -
Page 111: Addendum
Addendum Important Safety Notices and Warnings Global Positioning System (GPS) and Global Navigation Satellite System (GLONASS) The Global Positioning System (GPS) and Global Navigation Satellite System (GLONASS) systems are satellite-based systems that provide location and timing information around the globe. GPS is operated and controlled by the Government of the United States of America, which is solely responsible for its availability and accuracy. - Page 112 This document Great care was taken in preparing this document. Constant product development may mean that some information is not entirely up to date. The information in this document is subject to change without notice. TomTom shall not be liable for technical or editorial errors or omissions contained herein, nor for incidental or consequential damages resulting from the performance or use of this document.
- Page 113 Copyright notices © 2016. All rights reserved. This material is proprietary and the subject of copyright protection, database right protection and other intellectual property rights owned by TomTom or its suppliers. The use of this material is subject to the terms of a license agreement. Any unauthorized copying or disclosure of this material will lead to criminal and civil liabilities.
- Page 114 © 2001 – 2016 TomTom. All rights reserved. This material is proprietary and the subject of copyright protection and other intellectual property rights owned or licensed to TomTom. The product includes information copied with permission from Canadian authorities, including © Canada Post Corporation, All rights reserved.
Need help?
Do you have a question about the XAV-W651BT and is the answer not in the manual?
Questions and answers